Exercise - Organize data in a spreadsheet
This exercise shows how you can use certain actions to organize data in an Excel spreadsheet.
Tasks
In this exercise, you will:
- Attach to an open Excel file and add a header to each column.
- Switch the positions of two columns.
- Copy and paste cells.
- Delete a blank column.
- Run the flow and verify successful completion.
Attach to an Excel file and add headers
To begin, download Customers.xlsx. Select Download. Extract the Excel file to your local computer. Then, follow these steps to attach to this running Excel file:
Create a new flow and then add the Attach to running Excel action.
Find/select the Customers.xlsx document in the Document name input field. You can select the Select file icon to assist your search.

The Excel document contains a list of customers. Each customer has a first name, a family name, an address, a state, and a city.
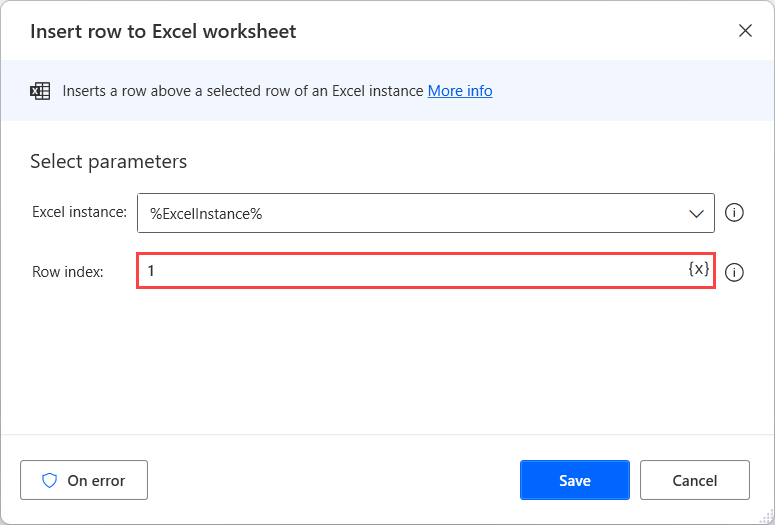
Insert a row with headers by using the Insert row to Excel worksheet action, specifying the Row index. To add a row at the top of the worksheet, set the Row index property to 1. Save the action.
Add five (5) Write to Excel worksheet actions, one for each column (or header). In the first of these actions, set Value to write to First Name, and then set the Column property to A. Save the action.
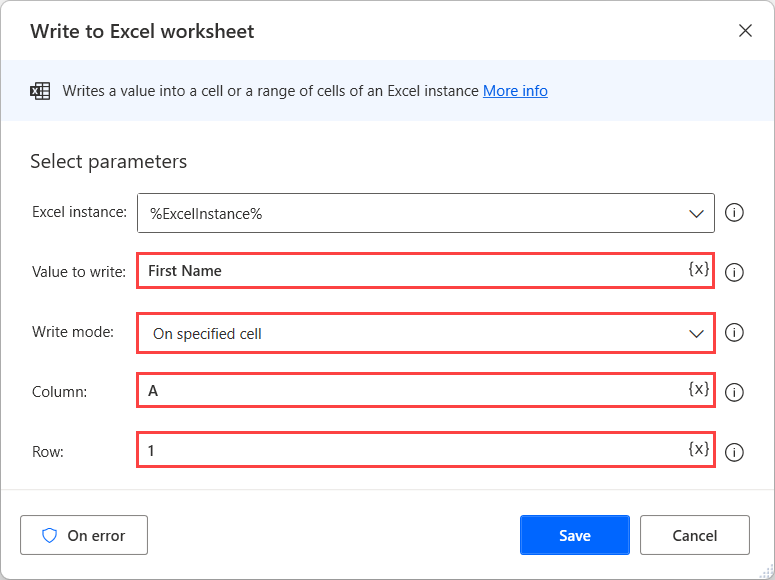
Configure the rest of the Write to Excel worksheet actions as follows (all on Row 1):
- Last Name - Column B
- Age - Column C
- State - Column D
- City - Column E
Switch positions of two columns
Next, to switch the positions of the last two columns of data so that State appears after City, follow these steps:
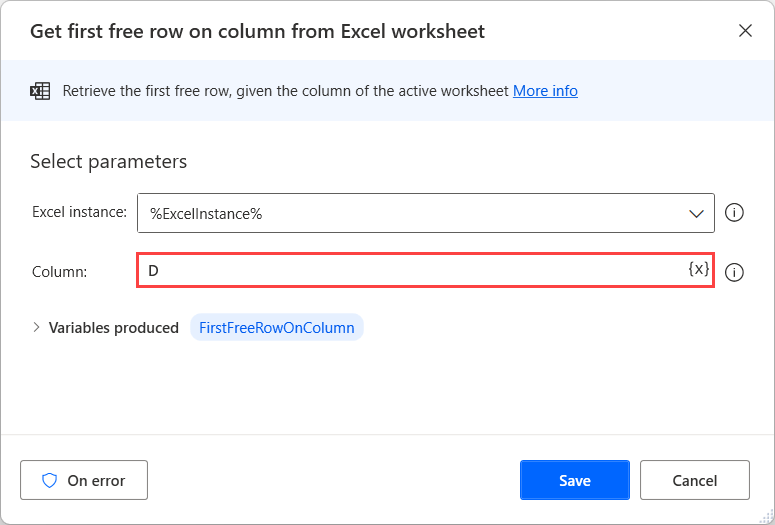
Select the Get first free row on column from Excel worksheet action, which retrieves the index of the first available row in the column of your choice.
Because you're moving the State column, select column D. Then Save.
Next we need to copy and paste cells with data.
Copy and paste cells
To copy the cells, follow these steps:
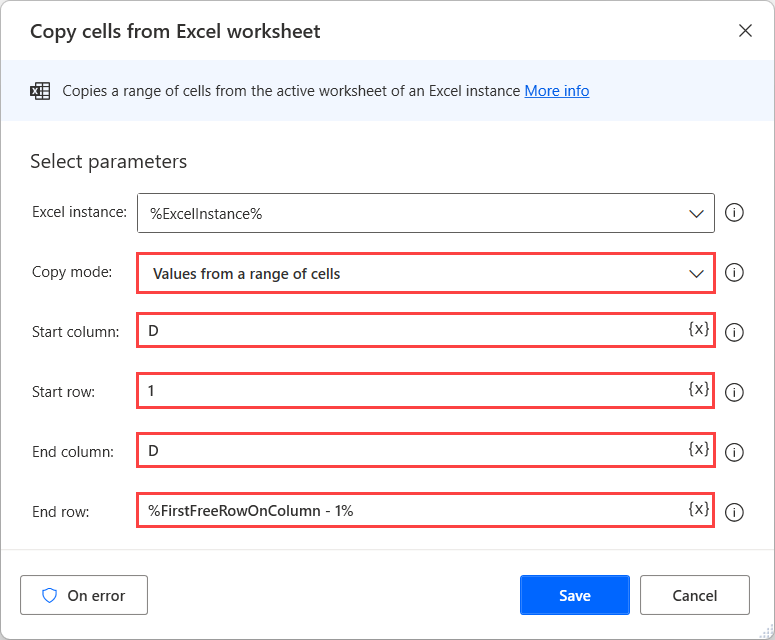
Select the Copy cells from Excel worksheet action.
In the Copy mode options, select Values from a range of cells.
Set the Start column to D and Start row to 1.
Set the End column to D and then set End row to the variable from the previous step by selecting the variable icon, then selecting the value: %FirstFreeRowOnColumn% so that the action selects the entire column without having to calculate its length. Save the action.
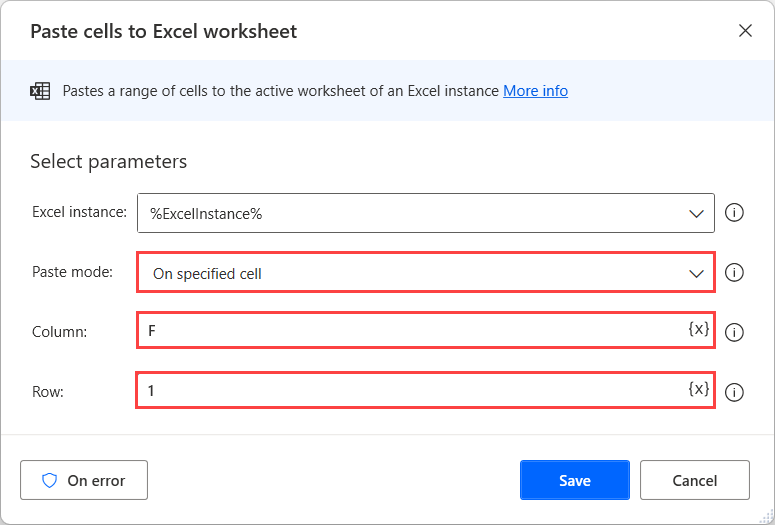
To paste cells, follow these steps:
Select the Paste cells to Excel worksheet action.
Set the Column property to F and the Row property to 1. This setting pastes the cells in the clipboard into the specified cell. Save the action.
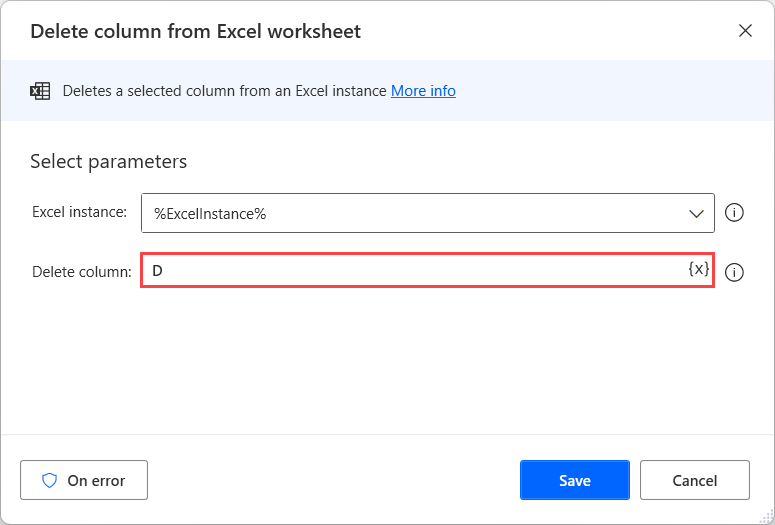
Delete column
To delete the column where we copied from, insert the Delete column from Excel worksheet action and then set the Delete column property to D. Save the step.
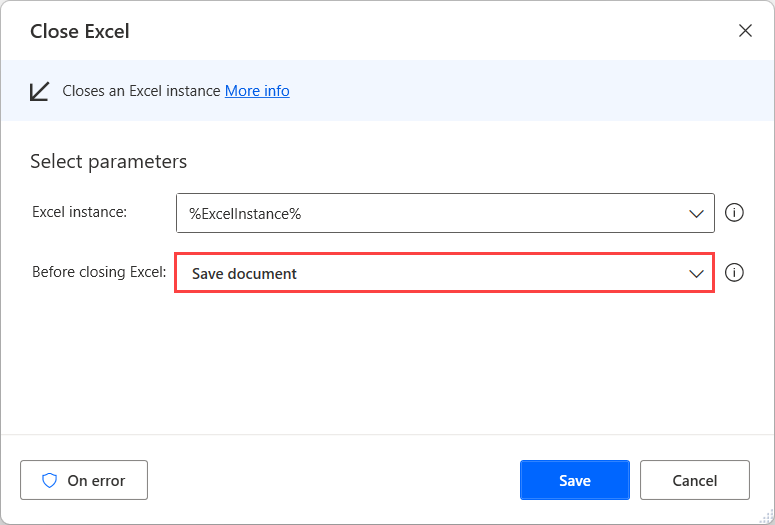
Save and quit the file by adding the Close Excel action. To save the document before closing, select Save document under Before closing Excel. Save the action.
The completed flow should look similar to the following screenshot.

Run the flow
Now open the Customers.xlsx spreadsheet and run the flow to see that a new row was inserted, the headers were written, and the last two columns switched positions. Once the spreadsheet closes, the flow is complete. You can reopen the spreadsheet to see the changes made including the column headers, values in Column D as "City" and Column E as "State."