Manage user access and permissions for agents
Managing user access and permissions for agents is one of the most critical responsibilities for administrators working with Microsoft Copilot and related agent technologies. Proper access management ensures that only the right users can create, configure, or interact with agents, while also safeguarding sensitive data. Without careful planning and oversight, unauthorized access could lead to both operational and security risks, from unapproved changes to agents to exposure of sensitive business information.
Access management is especially important because agents are typically used across multiple roles within an organization. For example, business users might need the ability to interact with agents for productivity purposes, while administrators require deeper control to configure or restrict access. Developers or power users might also need elevated permissions to design and test custom behaviors. Because of this mix of responsibilities, understanding how to properly assign and manage access is essential for maintaining order and preventing accidental disruptions.
Finally, access management isn't a one-time configuration. It must be treated as an ongoing process. Organizations evolve, roles shift, and new features become available in Microsoft 365 and Power Platform. As such, administrators must regularly revisit and audit permissions, ensuring the system remains both secure and functional. This unit provides the groundwork to help you build those good practices, using step-by-step instructions, real-world examples, and explanations of the tools available to you as an admin.
Licensing and agent types
One of the most common points of confusion for new administrators is the difference between Copilot Chat access and agent access. Not all Copilot capabilities are covered by the same license, and not all agents behave the same way.
Important
Having access to Copilot Chat (which is included in many Microsoft 365 subscriptions) doesn’t automatically grant rights to build, publish, or manage agents. Agent creation and management require distinct Copilot Studio licensing and the correct environment role in Power Platform.
Understanding this distinction should help you avoid frustration when a user says, “I can use Copilot, but I can’t see that agent,” or “I can build an agent but my coworker can’t.”
To make things clearer, think about Copilot access in terms of three categories of subscriptions: the free Copilot Chat experience included with Microsoft 365, the licensed Copilot Studio environment for creating and publishing tenant agents, and the consumption-based model for high-volume or premium agents.
Before exploring user licensing, it’s important that you first understand the two categories of agents:
Declarative / public web-grounded agents (often free to use). Organizations can custom build declarative agents that access tenant-specific data, while public web-grounded agents rely on publicly available information and are generally accessible to all eligible users. Both agent types can appear in the Microsoft 365 Agent store based on your store settings. Copilot Chat users can interact with these agents according to the store and tenant configurations. In short, many agents are available for use in Copilot Chat without any extra licenses or fees.
Tenant-specific / Copilot Studio / consumption-billed agents (paid or require extra setup). Agents you build in Copilot Studio, publish to your tenant, or that use pay-as-you-go or message pack consumption typically require extra licensing, Copilot Studio user licenses, or an Azure subscription/tenant capacity. Creating, managing, testing, and publishing agents in Copilot Studio is governed by separate Copilot Studio licensing and capacity rules.
While Copilot Chat (the chat experience) is included at no extra cost for eligible Microsoft 365 subscribers, agent functionality is layered and depends on the type of agent and how it’s published. Not all agents or agent capabilities are included for free. As mentioned previously, there are free (declarative, web-grounded) agents and there are paid/tenant agent scenarios (Copilot Studio creation, tenant-published agents that access tenant data, or pay-as-you-go agents) that require extra licensing or an Azure subscription. Let’s take a closer look:
Copilot Chat (free with Microsoft 365 subscription)
What it includes. Eligible Microsoft 365 subscribers (for example, users with an Exchange Online mailbox and a Microsoft Entra ID account) have access to the Copilot Chat experience at no extra cost. In other words, many users already have the “entry ticket” to use the chat itself.
Effect. These users can open Copilot in Teams or the web app and interact with chat-based assistance, as well as many public or declarative agents that rely on instructions and public web content.
Admin check. In the Microsoft 365 admin center, confirm the user’s subscription plan. If it’s an eligible plan, they already have the free Copilot Chat entitlement.
Example. A marketing employee with a standard Microsoft 365 Business subscription can open Copilot Chat and use a publicly available “FAQ Assistant” agent that queries information from a website. No extra license is required.
Copilot Studio agents (license required)
What it includes. To build, customize, or publish tenant-specific agents (like an internal Recruiting Assistant or Finance Helpdesk bot), users need Copilot Studio licensing. These licenses allow creation, testing, and publishing inside the tenant.
Effect. Without the proper Copilot Studio license, a user might be able to use Copilot Chat, but they can’t open Copilot Studio or publish tenant-scoped agents.
Admin check. In the Microsoft 365 admin center, verify whether the user has a Copilot Studio license assigned. In the Power Platform admin center, confirm the user has the correct environment role (for example, Environment Maker).
Example.HR staff might all use the Recruiting Assistant agent in Teams for free, but only two HR power users with Copilot Studio licenses (and Environment Maker roles) can go into Copilot Studio to update or republish the agent.
Pay-as-you-go or consumption-based agents
What it includes. In some cases, using agents can lead to extra costs, such as when agents go beyond what's included by default. For example, when using premium features or handling a large number of requests. In those situations, you might be charged based on usage, either through message packs or a pay-as-you-go Azure subscription.
Effect. The tenant must have capacity configured (through the Power Platform admin center) for users to publish and run these agents.
Admin check. In the Power Platform admin center, navigate to Billing > Capacity to confirm whether your tenant has prepaid message packs or a pay-as-you-go billing account set up.
Example. A call center agent that integrates with Dynamics 365 and runs thousands of conversations per month would likely require message packs or pay-as-you-go billing to handle the workload.
While these details can get complex, the main distinctions fall into three simple buckets that you can keep in mind when deciding how to provision users and agents:
Free. Copilot Chat + many public/declarative agents.
Licensed. Tenant-specific or customized agents created in Copilot Studio.
Consumption-billed. High-volume or premium agents that require message packs or pay-as-you-go.
Overview to configuring user access to agents
When admins begin working with Copilot agents, one of the first questions they typically encounter is: Who can use these agents? Configuring user access is the process of granting or restricting the ability for individuals or groups to interact with agents in your environment. This process isn’t just about convenience; rather, access defines what data an agent can touch, and who can request actions from it. Configuring access carefully ensures the right balance between productivity and security.
Access configuration often starts in Microsoft 365, where administrators manage licenses and user assignments. Without a proper license, a user might not be able to even see or interact with an agent. From there, you can also configure access within the Copilot Studio environment, deciding who is allowed to publish agents, who can share them, and who can consume them.
To avoid mistakes, administrators should plan out access rules before widely rolling out agents throughout their organization. For example, you might grant Marketing staff access to a customer support agent while preventing Finance staff from interacting with it, simply because the agent has no relevance to Finance workflows.
The following sections provide a high-level overview of the two steps that are required to configure user access to Copilot agents.
Step 1 - Assign a Copilot license in the Microsoft 365 admin center
To enable a user to create and manage Copilot agents, you must assign them a Copilot Studio user license through the Microsoft 365 admin center. This license is sometimes referred to as a "per-user license" or "Copilot Studio User License." Without this license, the user can’t access Copilot Studio to build or manage agents.
What it does. The license grants the user the right to use Copilot services across supported apps (Word, Outlook, Teams, and so on) and, depending on the license, agent experiences in Copilot Studio.
Effect. Copilot Chat is included at no extracost for eligible Microsoft 365 subscribers (so many users can access the chat experience and many public, web-grounded agents). However, building, publishing, or using tenant-specific agents (or pay-as-you-go agents) requires Copilot Studio licensing, tenant capacity, or an Azure subscription depending on how the agent is published and what data it accesses.
Scope. Tenant-wide. It affects the user’s entitlement to the product across the entire tenant.
Example. You assign the Microsoft Copilot for Microsoft 365 license to a user. They can now use Copilot in Word, Teams, and interact with Copilot Chat agents that are shared with them.
Step 2 – Assign an environment role in the Power Platform admin center
The Power Platform admin center is where you fine-tune permissions. It’s here where you define whether a licensed user can only use an agent, or whether they can build, manage, and publish agents. You can also use security groups in Microsoft Entra ID to simplify administration. To do so, you must assign a group to a role, and all members of the group inherit the permissions associated with the role.
Agents created in Copilot Studio are stored in Power Platform environments, which have their own security roles and access controls. A Power Platform environment is essentially a container for apps, data, and resources within Microsoft Power Platform. Think of it as a “workspace” where you can build, manage, and run apps, flows, and agents while keeping them organized and separated from other teams or business units. For example, you might have one environment for HR apps, another for Finance, and another for IT projects.
Environments let you control who can access, create, or manage resources. Permissions are typically assigned through environment roles, such as Environment Maker (can create and edit apps/agents) or Environment Admin (full control over the environment). You can use separate environments for development, testing, and production to ensure that changes don’t disrupt live business processes. Assigning permissions based on predefined roles is known as role-based access control (RBAC). Using roles to assign permissions not only saves time but also enforces consistency across your organization. At its core, RBAC for agents ensures that different personas in your organization have the right set of capabilities.
When you create or manage Copilot agents, the environment acts as the workspace where those agents live and operate. Assigning a user to the correct environment role determines what they can do with agents inside that workspace. Here’s a list of key points that might help clarify the relationship between Power Platform environments and agents:
Environment is where agents are stored and run. Every agent you build in Copilot Studio is associated with a specific Power Platform environment. For example, an HR Recruiting Assistant agent lives in the HR environment, separate from Finance agents in the Finance environment. The agent’s environment contains its configuration, data connections, and any linked resources.
Environment roles control agent permissions. Assigning the correct environment role ensures users have the right level of access without giving unnecessary permissions. For example:
Environment Maker. Users assigned this role can create and edit agents in that environment.
Environment Admin. Users assigned this role can manage all resources and users in the environment, including agents.
Basic User. Users assigned this role can only interact with agents shared with them. It doesn't enable them to create or modify agents.
Separation of environments improves security and organization. Users in one environment can’t access agents in another environment unless they’re explicitly given permissions. This separation prevents accidental changes, ensures sensitive data stays protected, and allows multiple teams to operate independently. For example, Finance staff can't edit or see the HR Recruiting Assistant agent unless you grant them access in the HR environment.
Licensing ties into environments. Users need a Copilot license to interact with agents (free or paid, depending on the agent type). Users also need the appropriate environment role to create, edit, or publish agents. For example, a user with only a Copilot license can use a tenant agent but can’t create or publish new agents without the Environment Maker role in that agent’s environment.
In short, a Power Platform environment is like a secure workspace for your Copilot agents. The environment determines where the agents live, who can manage them, and what data they can access, while environment roles control the level of permissions each user has.
What it does. When you assign a user to a specific Power Platform environment role, it determines what level of control the user has inside that environment, which is where Copilot Studio agents live.
Effect. Assigning a user to an environment role doesn’t impact their ability to consume or use agents in apps like Teams. Instead, it governs whether they can create, edit, manage, or publish agents. To create, edit, manage, or publish agents in a specific environment, the user must be assigned an appropriate environment role—typically Environment Maker, or Copilot Studio Author where supported.
Tip
Some environments might require broader permissions for full functionality. If users report issues with agent access, verify they’re assigned both the Environment Maker role and the Copilot Studio Author role. This combination ensures they have the necessary permissions to create, edit, and publish agents reliably across environments.
Scope. Environment-level. It affects user permissions only in that environment, not across the entire tenant. Environment roles can be assigned directly to a user account or through group membership, and they determine what the user can do within that environment (for example, build agents, access data, and publish bots).
Group-based role assignments
Managing access one user at a time quickly becomes inefficient, especially in larger organizations. Instead of assigning environment roles to individual accounts, administrators can use security groups in Microsoft Entra ID to streamline the process.
When you assign a role to a group, every member of that group automatically inherits the same permissions. This feature offers several advantages over individual role assignments per user:
Simplified management. If a new employee joins the Marketing department, adding them to the “Marketing Users” group immediately grants them the correct access to relevant agents. No need to manually update permissions in multiple places.
Consistency. Using groups helps ensure that users with similar responsibilities all receive the same permissions, reducing the risk of mistakes or uneven access.
Scalability. As your organization grows, group-based assignments save time by applying changes broadly instead of repeating steps for each user.
To implement group-based role assignments, create or use existing security groups in Microsoft Entra ID (for example, “Finance Makers” or “HR Viewers”). Then, assign the group to a role in the Power Platform admin center. All group members automatically inherit that role within the environment where the assignment is made.
Security best practices
When managing agent access, it’s important to balance productivity with protecting sensitive information. The following best practices help you maintain security and compliance:
Use the principle of least privilege. Always assign the lowest level of permissions a user needs to perform their role. For example, most employees only need “Basic User” access to interact with agents, not the ability to build or publish them.
Separate environments for development and production. Keep experimental agents and testing in a non-production environment. Doing so reduces the risk of unfinished or faulty agents disrupting real business processes.
Regularly review access. Roles and responsibilities change over time. Set a schedule (such as quarterly) to audit group memberships, licenses, and environment roles, and remove access that is no longer required.
Monitor usage. Use reports in the Power Platform admin center and Microsoft 365 audit logs to track who is interacting with agents and how they’re being used. Monitoring helps you identify unusual patterns or potential misuse.
Combine with conditional access policies. For high-value agents or environments that handle sensitive data, use Microsoft Entra ID conditional access (such as requiring MFA or blocking external devices) to strengthen security.
Tip
When admins combine group-based role assignments with these security best practices, they can simplify access management while keeping agents and organizational data safe.
Detailed instructions to configure user access to agents
Earlier sections provided a high-level overview of the two steps required to configure user access to agents. Now let’s take a look at the detailed instructions required to complete these two steps. When you complete these steps, you ensure the proper individuals have visibility into agents while preventing unlicensed or unauthorized users from interacting with them.
- To assign a license with Copilot access to a user account, sign into the Microsoft 365 admin center at https://admin.microsoft.com.
- In the navigation pane, select Users > Active users to see a list of all licensed users in your tenant.
- Select the user you want to configure to open their profile.
- In the user’s detail pane, select Licenses and apps.
- Select the checkbox for the Copilot product license that includes agent access.
- Save your changes. The user now has the baseline license required for agent access.
- To configure access to specific agents, sign into the Power Platform admin center at https://admin.powerplatform.microsoft.com.
- In the navigation pane, select Environments, then select the environment where the agent resides.
- Under Settings > Users + permissions > Users, locate the user and assign the appropriate environment role (such as Basic User or Environment Maker).
Keep in mind the following considerations when you plan user access to Copilot agents:
Users of published agents don’t need a Copilot Studio license or environment role. They can interact with agents as long as they have access to the published endpoint (for example, Teams, SharePoint, and so on).
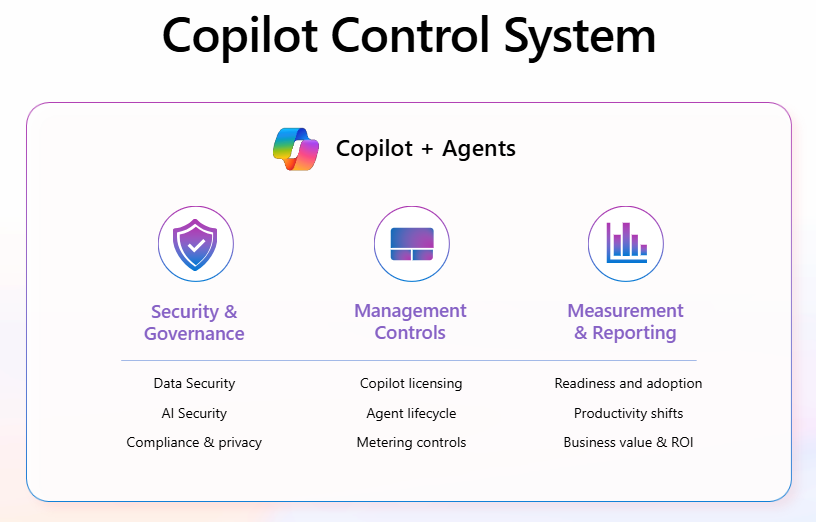
Admins can manage agent availability, assign agents to users or groups, and block or remove agents using the Copilot Control System in the Microsoft 365 admin center. It’s the centralized interface within the Microsoft 365 admin center where IT administrators manage Copilot agents, configure scenarios, assign licenses, and enforce policies.
Power Platform environment roles are critical for controlling access to data and functionality. Even if a user has a Copilot license, they can’t use the agent unless they’re assigned the correct environment role.