List the available post-installation configuration tools
Contoso is in the process of deploying Windows Server server computers throughout their organization. As a Windows Server administrator, it's your task to perform post-installation configuration on the newly deployed servers. You decide to investigate the available post-configuration options.
What must you configure?
When you install Windows Server using the defaults from the local installation media, a number of settings are configured automatically, as described in the following table.
| Setting | Description |
|---|---|
| Computer name | The computer name is automatically generated. You'll need to change the name to something meaningful, and unique, within your organization. |
| Workgroup | The server is added to a workgroup called WORKGROUP. Typically, you'll want your server computers to be part of your Active Directory Domain Services (AD DS) domain. |
| Network settings | By default, both IPv4 and IPv6 are enabled and bound to the installed network interface cards (NICs). In the case of IPv4, a Dynamic Host Configuration Protocol (DHCP) configuration is assigned. For IPv6, stateless autoconfiguration is enabled. Both these defaults are probably suitable. |
| Time zone | The time zone defaults to the (UTC-08:00) Pacific Time (US & Canada) unless your installation media was based on a different locale. You'll need to change the time zone, and the computer's time and date, to those which are appropriate for your location. |
| Locale and language settings | The initial values are specified during an interactive installation, or are implied by the installation media locale. You'll need to update these settings to those which are appropriate for the server's physical location. |
| Roles and features | Very few roles or features are enabled by default in a standard installation. Typically, the Storage Services role service, and a number of features are enabled. These features include: elements of .NET Framework, Windows Defender Antivirus, and some elements of Windows PowerShell, including Windows PowerShell 5.1 and Windows PowerShell ISE. |
| Firewall settings | The Windows Defender Firewall is enabled by default. Until you define them as otherwise, all NICs are assigned to the Public network location profile - which is generally more restrictive that Private network connections. |
| Activation | Typically, the server will not be activated. |
After you have installed the server, you'll need to reconfigure some of these settings.
Overview of available post-installation configuration tools
You can choose from a number of available tools. The tool you choose to use depends on circumstances. For example, if you deployed Windows Server Core, because there is no graphical user interface installed, you'll need to rely on remote tools, for the most part, to reconfigure the server.
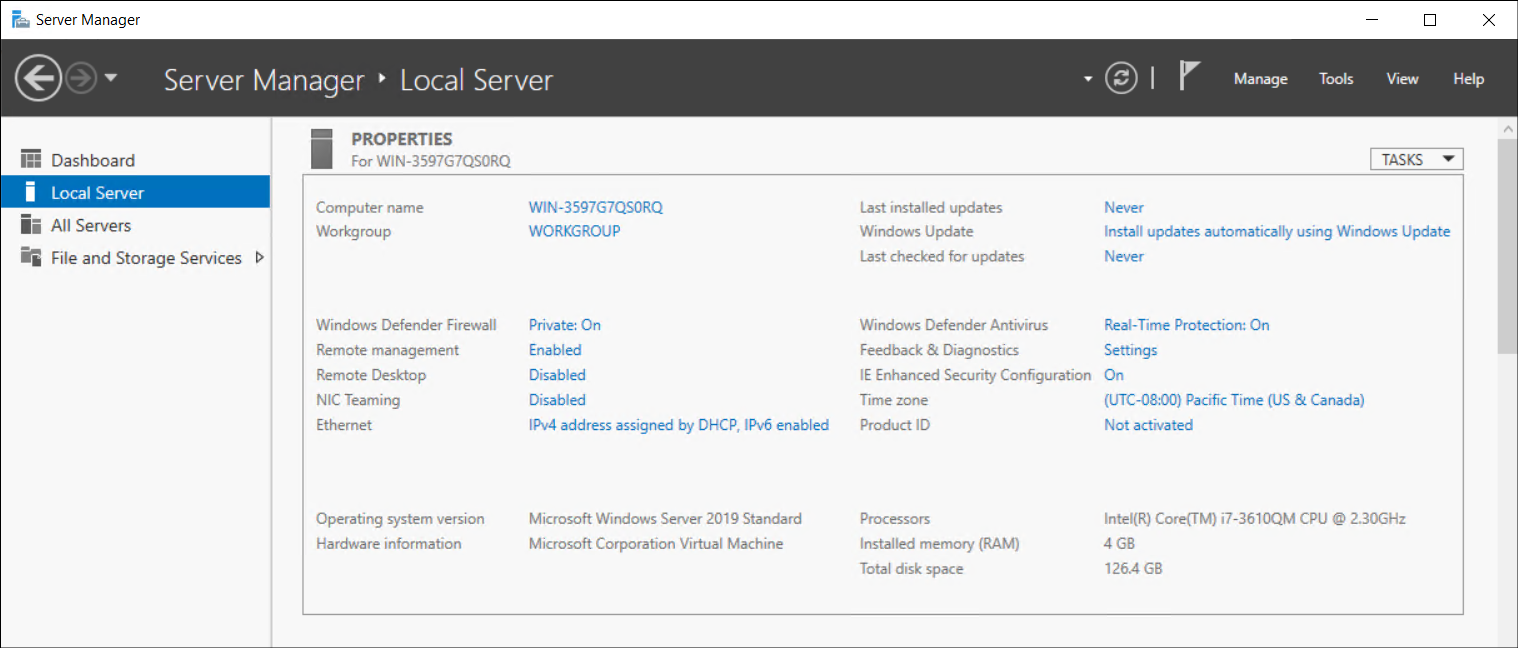
Server Manager
If the computer is installed with Windows Server with Desktop Experience, then you can use Server Manager to configure the required settings. Sign in as local administrator, and if necessary, open Server Manager. Select Local Server in the navigation pane, and then you can change the required settings.
Important
If you change the computer name or you add the computer to a domain, you'll need to restart the server for the setting to take effect.
Tip
To add a computer to a domain, the server will need to contact a domain controller. So, you'll have to configure the DNS name resolution settings before you attempt the domain-join.
Windows Admin Center
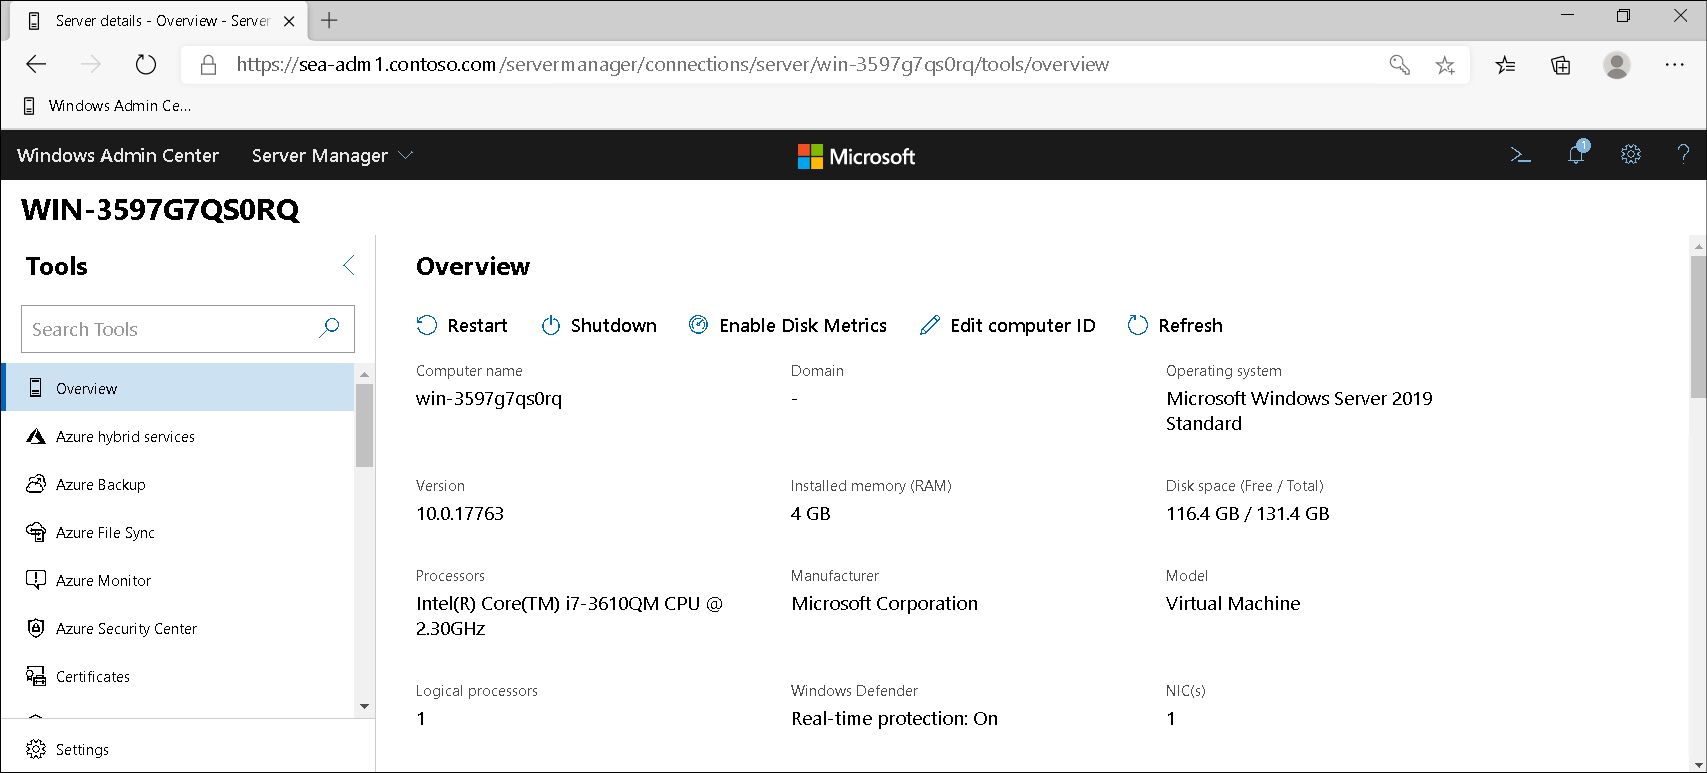
You can use Windows Admin Center to perform post-installation configuration for both Windows Server with Desktop Experience and Server Core installations.
Note
You'll only be able to connect to a server if you can resolve its name into an IP address, and if the IP address is accessible. Typically, a newly deployed computer uses DHCP to obtain an IP configuration, and so should be configured with an appropriate IP address and DNS client settings.
Download and install Windows Admin Center. Then, open Microsoft Edge, and navigate to the Windows Admin Center website.
Note
To connect to a server, you'll need to know it's name and the local administrator account credentials.
Add the server as a connection, and then select the server from the list of servers. Use the navigation pane to select the appropriate tool with which to make configuration changes. We'll discuss Windows Admin Center in more detail later in this module.
Note
Windows Admin Center is not included in Windows Server. You must download and install it.
Desired state configuration
You can use DSC to reconfigure your Windows Server. DSC is a management platform that leverages Windows PowerShell, enabling you to manage your IT infrastructure. As PowerShell Desired State Configuration is included with Windows Server, you don't need to install anything before you can use it. However, you'll need to be comfortable with Windows PowerShell, PowerShell scripts, and PowerShell remoting. We'll discuss DSC in more detail later in this module.
Answer files
You can use answer files to complete the installation process. Typically, these are used to help to automate the entire installation process, including post-installation settings.
You can create answer files by downloading the Windows Assessment and Deployment Kit (Windows ADK). Then, using the Windows System Image Manager (Windows SIM) you can create and configure the required answer file. The final step is to distribute the answer file to your servers, often on removable media.
Note
The answer file is an .xml text file.
We'll discuss how to implement server configuration with answer files in more detail later in this module.