Perform post-installation configuration with Windows Admin Center
In the past, managing and administrating the IT environment at Contoso involved using different tools across multiple consoles. Windows Admin Center combines those tools into a single console that you can easily deploy and access through a web interface.
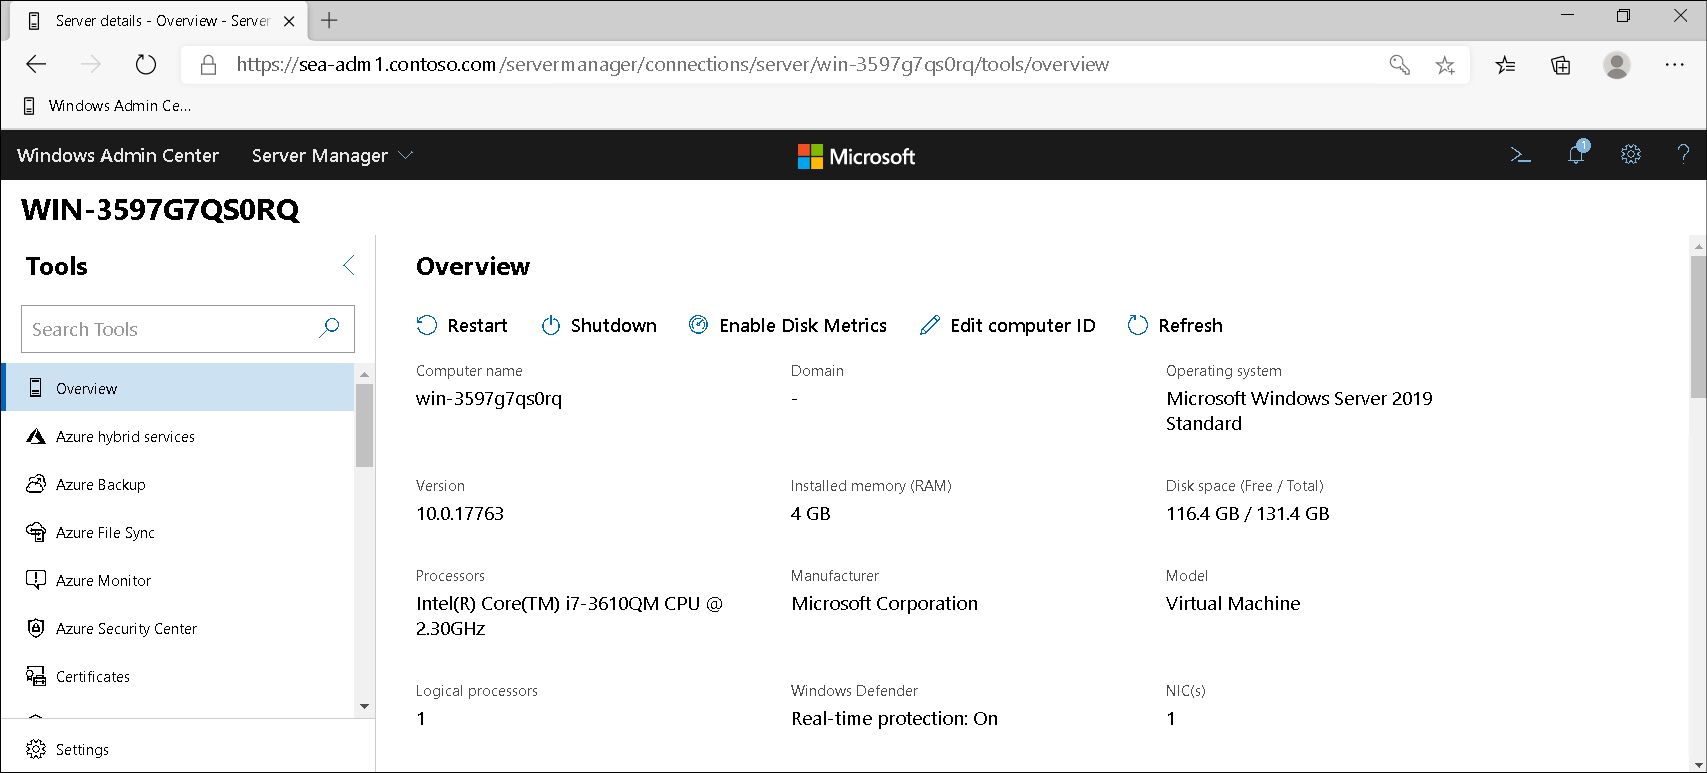
Overview
You can also use Windows Admin Center to perform post-installation configuration. The process begins when you add the newly deployed server to the Windows Admin Center console.
Authenticate to the target server
When you connect to a remote computer, you must authenticate to that computer. If the computer you want to manage with Windows Admin Center is part of the same AD DS forest, Kerberos authentication is used.
Where this isn't the case, you must configure the target computers as trusted hosts. For example, you use a workgroup computer installed with Windows Admin Center to administer your domain computers.
Important
When you install Windows Admin Center on a workgroup computer, you are prompted to allow Windows Admin Center to manage the local computer's TrustedHosts setting. If you bypass this automated setting, you must configure TrustedHosts manually.
You can configure trusted hosts settings by using the following Windows PowerShell command in an elevated Windows PowerShell window. You can specify the remote hosts by IP, FQDN, or NetBIOS name.
Set-Item WSMan:localhost\Client\TrustedHosts -Value 'SEA-DC1.Contoso.com'
Connect to the target server
To connect to a server in Windows Admin Center, you must first add it. To do this, use the following procedure:
Open Microsoft Edge and navigate to the Windows Admin Center site.
Authenticate to the Windows Admin Center site, if needed.
On the All connections page, select Add.
On the Add resources blade, in the Windows Server section, select Add.
In the Server name box, enter the name of the target server and select Add.
In the Credentials needed section, select Use another account for this connection, and then enter the credentials to connect to the server.
Tip
It's likely the user account name will be .\Administrator, using whatever password you assigned during installation.
Select Add with credentials. Your server is added to the All connections list.
Select the new server in the All connections list.
Perform post-installation configuration
After you've added and connected to your newly deployed server, you can use Windows Admin Center to make the required configuration changes. Start by updating the computer's name and domain membership.
- From the Overview tab, select the Edit computer ID button in the Overview pane.
- On the Edit computer ID blade, enter the new computer name and then select Domain.
- Enter the domain name, and then select Next.
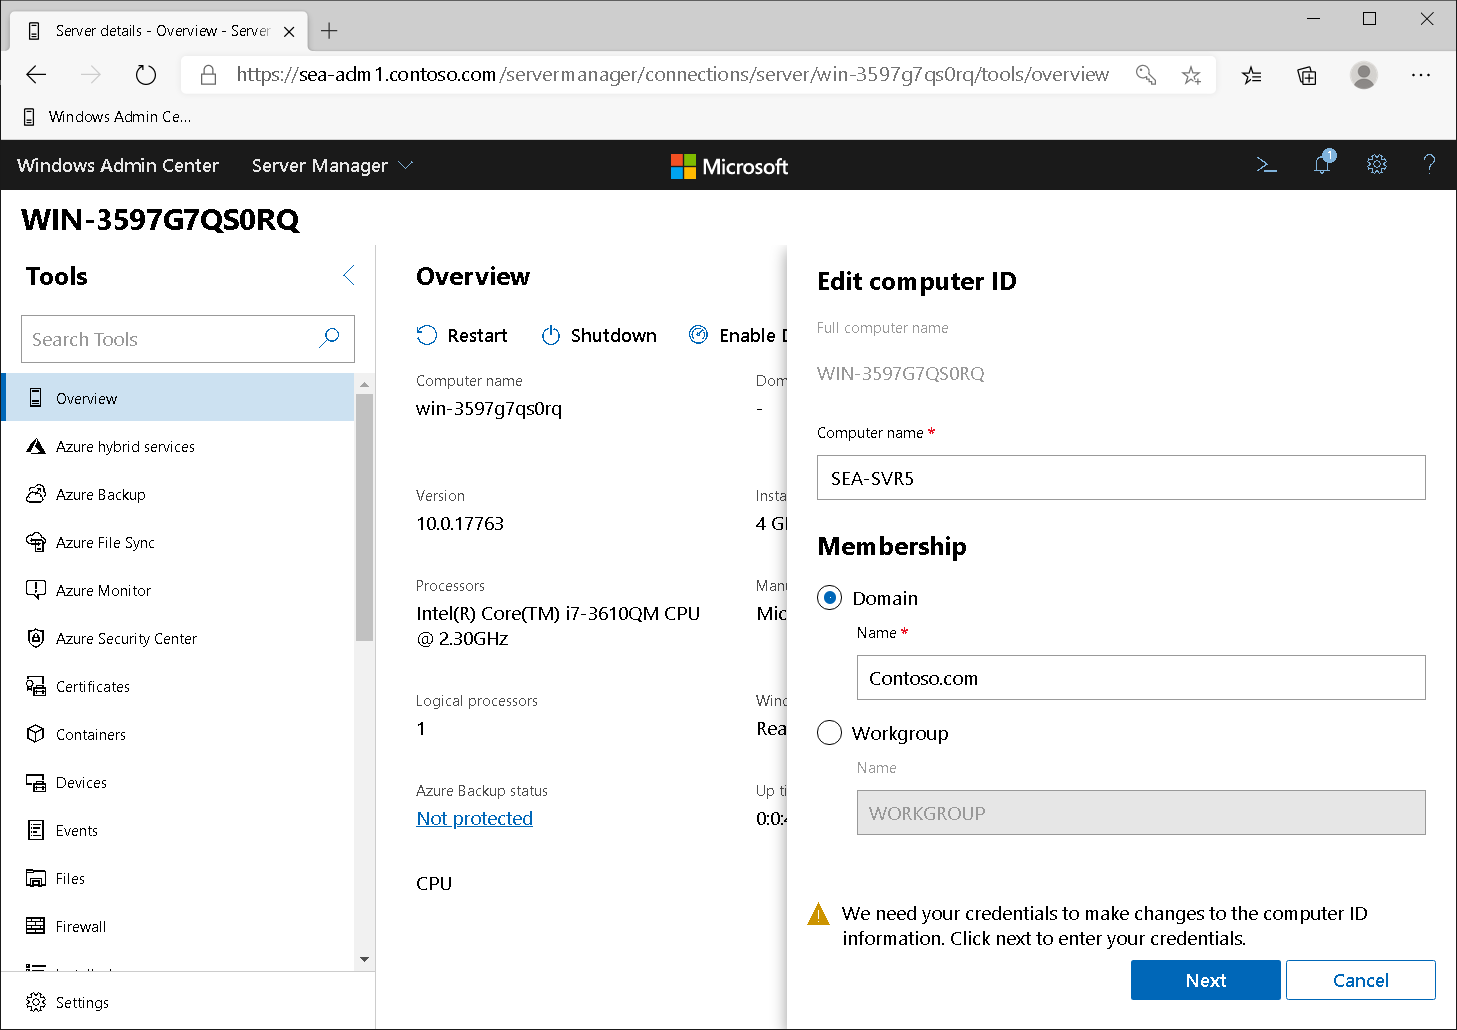
- On the Update computer name and domain blade, enter the credentials of an account in the domain that has rights to add computers to the domain.
- Select the Restart immediately check box, and select Save. The computer restarts.
Tip
You might need to add the computer to Windows Admin Center using its new name. You'll also need to specify new credentials appropriate to the computer's domain membership.
After you have added the computer to the domain, you can perform additional administrative tasks in your usual way using Server Manager, Windows PowerShell, or RSAT. You can, of course, continue with Windows Admin Center.
For example, to use Windows Admin Center to add roles or features:
- Select the Roles & features link in the navigation pane.
- In the Roles and features pane, select the required role. For example, select DHCP Server, and then select Install.
- On the Install Roles and Features blade, select Yes.
If you want to use Windows PowerShell remoting, in the navigation pane, select PowerShell. After a moment, a remote session is established to the selected server. You'll need to authenticate the connection. Then you can use the appropriate PowerShell commands to complete post-installation configuration.
Tip
Of course, you can use Windows PowerShell remoting without opening the Windows Admin Center, first.