Exercise - Build test scripts to test business functionality
After you have created a Business Process Modeler (BPM) library, you'll need to use Task recorder to create your test cases and then upload the cases to BPM.
Next, you will need to create a test plan and test suite in Azure DevOps. This will allow you to run an ordered suite of test cases and easily manage, investigate, and track the results.
Before you begin
To get the most benefit from this exercise, we recommend that you have the standard sample data available in finance and operations apps installed by using Lifecycle Services.
Create a BPM library
- In Lifecycle Services, navigate to your project. In the tiles on the right, select Business process modeler.
- On the Business process libraries page, select New library.
- Enter a name. for example Training First for the new library, and then select Create.
Add a new process
- In the BPM library, select Training First.
- Highlight the process Sample Core Business Process and then select Add process.
- You can select to add the process as a child or a sibling of the selected process node. In this way, you can create a semantic hierarchy of business processes. Select As child.
Edit the properties of the process
- In the BPM library, select the process node to edit New business process.
- On the right-pane, on the Overview tab, select Edit mode.
- Enter a name and description for the process node:
- Name: Create a sales order
- Description: This process documents the creation of a sales order.
- Optionally, select the industries and the countries or regions that the process applies to. You can also add keywords and links. Keywords let you define categories, work streams, or other metadata. Links (URLs) let you reference external sites or documentation.
- When you've finished editing the properties, select Save.
Copy a library
You may have the need to copy a library, for example, for a variation. This task illustrates how it’s done.
Open the Business process libraries page via the Business process modeler tile on the project page on Lifecycle Services.
On the tile for Training first, as the library that you want to copy, select the ellipsis button (...) and then select Copy.
Enter a name for the library Training Second and then select Create.
Add a new child process
- In the Training Second library, select the existing process Create a sales order. You do this by selecting the caret next to Sample Core Business Process and highlighting the Create a sales order line.
- Select Add process. You can select to add the process as a child or a sibling of the selected process node. In this way, you can create a semantic hierarchy of business processes. Select As child.
Edit the properties of the process
- On the right-pane, on the Overview tab, select Edit mode.
- Enter a name and description for the process node:
- Name: Create a sales line
- Description: This process creates a line for the parent sales order.
- When you've finished editing the properties, select Save.
Record test cases and save to BPM
Open the finance and operations apps client and sign in.
Select the company that you want to use while recording, in this case USMF.
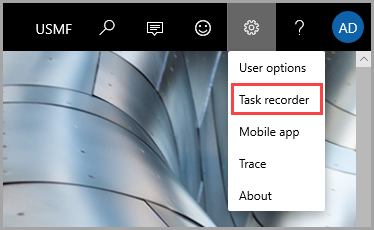
Go to Settings > Task recorder.
Select Create a new recording.
Enter a name for the recording: Sales order creation, and then select Start. Recording begins the moment that you select Start.
Navigate to Modules > Accounts receivable > Orders > All sales orders.
Click New.
Enter US-001 in the Customer field.
Select OK.
In the sales order line, enter A0001 in the Item field.
In the Site field, enter 1.
Allow the remaining values to default.
Select Save, and close with the X button.
When the task is complete, on the Task recorder pane, select Stop.
To save the task recording to an attached BPM, select Save to Lifecycle Services.
- If you haven’t connected to Lifecycle Services yet, now is the time to establish a connection. Select the Click here to connect to Lifecycle Services button.
- You should be sent to a browser tab saying that you were successful. You can close the tab.
- Return to your finance and operations screen and select OK.
Select the library that you want to save the recording to, which will have the name Training Second, and the process Create a sales order, then select OK.
Alternate method – save locally, then upload
Alternatively, you can select Save to this PC. Complete the save process of the .axtr.
Open or return to Lifecycle Services, in your project, on the Business process libraries page, select the library to upload the task recording to.
Locate and select the process (Create a sales order under Training Second) to upload the task recording to.
On the right-pane, select Upload.
Select Browse to find and select the .axtr file to upload, and then select Upload.