Exercise - Use a policy template to dynamically set the host URL
In this exercise, you'll create a policy template to set the host URL at connection creation. This process will allow a connection to work with either test or production.
This exercise requires you to install Python and access the command prompt on the machine that you're using for the exercise.
Important
Use a test environment with Microsoft Dataverse provisioned. If you don't have one, you can sign up for the community plan.
Note
Download the following file to your local computer to complete this exercise Contoso Invoicing Triggers. Select the download button on the middle-right of the screen.
Task 1: Import a solution
In this task, you'll import an unmanaged solution that contains a Contoso Invoicing custom connector. You'll use this connector to complete the tasks in this exercise.
Go to Power Apps maker portal and make sure that you are in the correct environment.
Select Solutions > Import solution.
Select Browse.
Select the ContosoInvoicingPolicyTemplates_1_0_0_2.zip solution and then select Open.
Select Next.
Select Import and then wait for the import to complete. You should get a success message after the import completes.
Select Publish all customizations and then wait for the publish to complete.
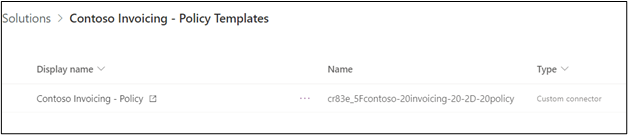
Open the Contoso Invoicing - Policy Templates solution that you imported.
You should see the Contoso Invoicing - Policy custom connector component.

Task 2: Install Microsoft Power Platform CLI
Microsoft Power Platform CLI includes the paconn command-line tool, which is designed to aid Microsoft Power Platform custom connectors development. The paconn tool uses the Python runtime, so you'll be installing that as well.
Go to Download Python and select Download Python. You can use any version greater than 3.5.
Select the downloaded .exe file to start installation.
Select the Add Python xx to Path check box, select install, and then wait for the installation to complete.
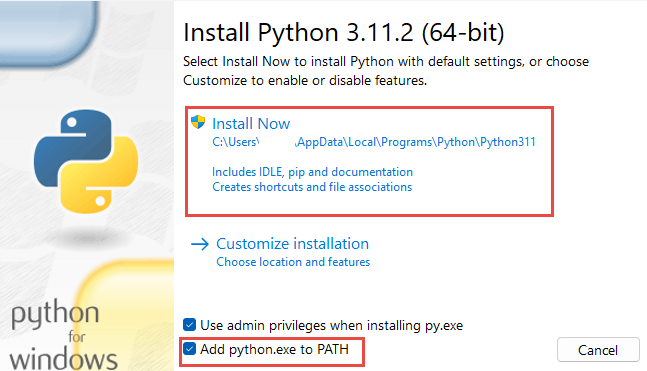
Close the installation wizard after the installation completes.
Start the command prompt and then run the following command to install paconn.
pip install paconn

Wait for the installation to complete.


Task 3: Download the connector locally
In this task, you'll download the connector definition files locally so that you can add the Host URL property.
Run the login command.
paconn login
Copy the provided Code.
In a browser, sign in with the same credentials as your environment. Go to Microsoft Device Login, paste the Code that you copied, and then select Next.
Provide your credentials.
Select Continue.
You should get a successful sign-in message.
Go back to the command prompt and run the download command.
paconn download
When prompted to select an environment, enter a number for the environment where you installed the solution, and then press the Enter key.
Only one connector should be listed: Contoso Invoicing Policy. Press the Enter key again to select that connector.
The download should complete successfully. Note the location where the connector was downloaded.

Task 4: Edit apiProperties.json to add the Host URL property
In this task, you'll edit the apiProperties.json file to configure the hostUrl property. When the property is configured, users who are creating a connection will be prompted for this value along with the API key.
Go to the folder that you downloaded in the previous task, and then open the apiProperties.json file.
Paste the JSON inside the ConnectionParameters, before the api_key property.
"hostUrl": {
        "type": "string",
        "uiDefinition": {
          "constraints": {
            "required": "true"
          },
          "description": "Specify your API Url e.g. https://test.contoso.com",
          "displayName": "API URL",
          "tooltip": "Specify your API Url e.g. https://test.contoso.com"
        }
      },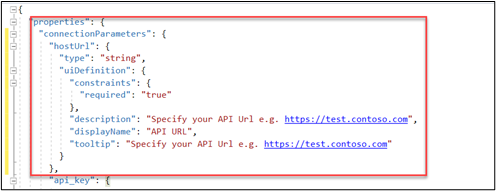
Save your changes.
Go to the command prompt and change the directory to the folder that you downloaded.
Run the update command.
paconn update --api-def apiDefinition.swagger.json --api-prop apiProperties.json --icon icon.png
Select the correct environment where you installed the solution.
Select the Contoso Invoicing - Policy connector.

The update should complete successfully.
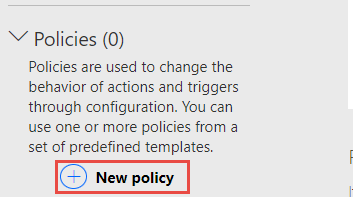
Task 5: Add the Set Host Name policy
In this task, you'll configure a Set Host Name policy template to use the connection property that you configured in the previous task.
Go to Power Apps maker portal and make sure that you have the correct environment selected.
Select Solutions and then open the Contoso Invoicing - Policy Templates solution that you imported.
Select the Contoso Invoicing - Policy custom connector and then select Edit.

Select the Definition tab.
Scroll down to the Policies section and then select + New policy.
Enter Host URL Policy for Name and then select Set host URL for Template.
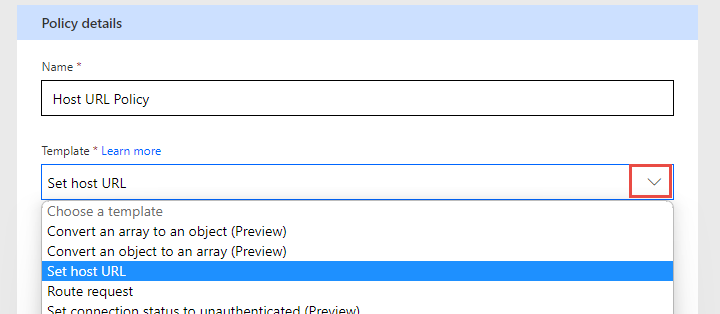
Enter @connectionParameters('hostUrl') for URL Template and then select Update connector.

The connector should update successfully.
Don't navigate away from this page.


Task 6: Test
In this task, you'll create a connection by using the new configuration and then you'll test it.
Start a new browser window and then go to Contoso Invoicing.
Select the API Key link.
Copy the API Key.
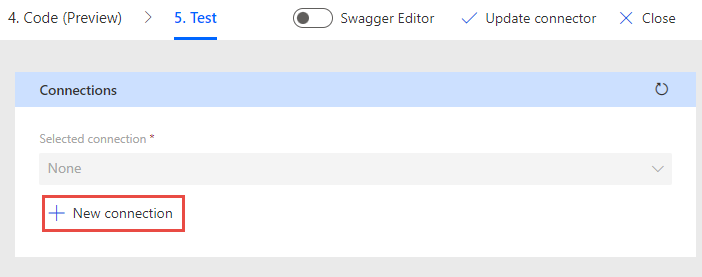
Return to the connector.
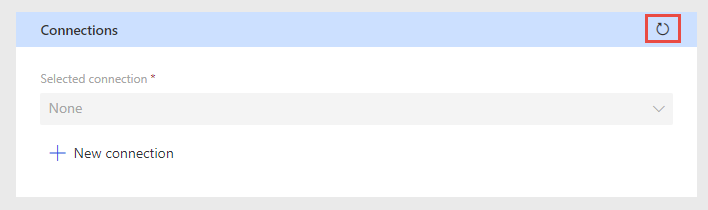
Select the Test tab.
Select + New connection.
Enter
https://contosoinvoicingtest.azurewebsites.net/for API URL, paste the API Key that you copied, and then select Create connection.Select Refresh connections.
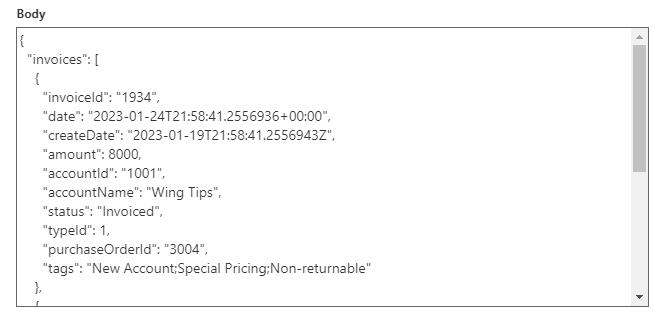
Select ListInvoice > Test operation.
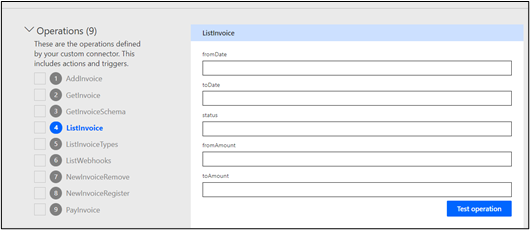
The test should return invoices.