Exercise - Run the site checker
Making a site live for production use is an important business step. The Go-live checklist includes interactive tasks that guide you in reviewing and completing the recommended actions before the site goes live. In this exercise, you'll complete some steps of the Go-live checklist.
At the end of these exercises, you'll be able to:
Access the Go-live checklist.
Run the Portal Checker.
Respond to the mitigation advice.
Rerun the Portal Checker to confirm that the issue has been addressed.
Switch the site from private to public access.
For this exercise, you'll need to have the following components set up in your environment:
A provisioned Power Pages site. If you don't have a Power Pages site available, follow the Create and manage Power Pages sites instructions to create one.
Access to the Power Pages design studio
Access to the Power Pages Management app.
Scenario
Your company has completed the Power Pages site development and wants to make the site available to the public. Prior to going live, they want to ensure that the site passes all site checker tests.
Steps
In this exercise, you'll make a few changes to your site configuration. Next, you'll run the Portal Checker tool from the Power Apps admin center and then evaluate the results. After you've addressed the issue, you'll rerun the Portal Checker to ensure that the issue has been resolved. The final step is to switch the site access from private to public and verify that the site is open to the public.
The high-level steps are as follows:
In the Portal Management app, locate the
Header/OutputCache/Enabledsite setting and then update the value to False.Synchronize site settings and run the Portal Checker. The warning message for the Header output cache.
Locate the
Header/OutputCache/Enabledsite setting and then update the value to True.Synchronize site settings and run the Portal Checker. The warning for the Header output cache has been cleared.
Verify that site visibility is set to private. Test access to the site by using InPrivate mode.
Set site visibility to public and then test site availability.
Disable header output cache
Your first task is to disable the header output cache:
Sign in to Power Pages.
Select a target environment by using the environment selector in the upper-right corner.
Select the overflow (...) menu for the target portal and then select Power Pages Management.
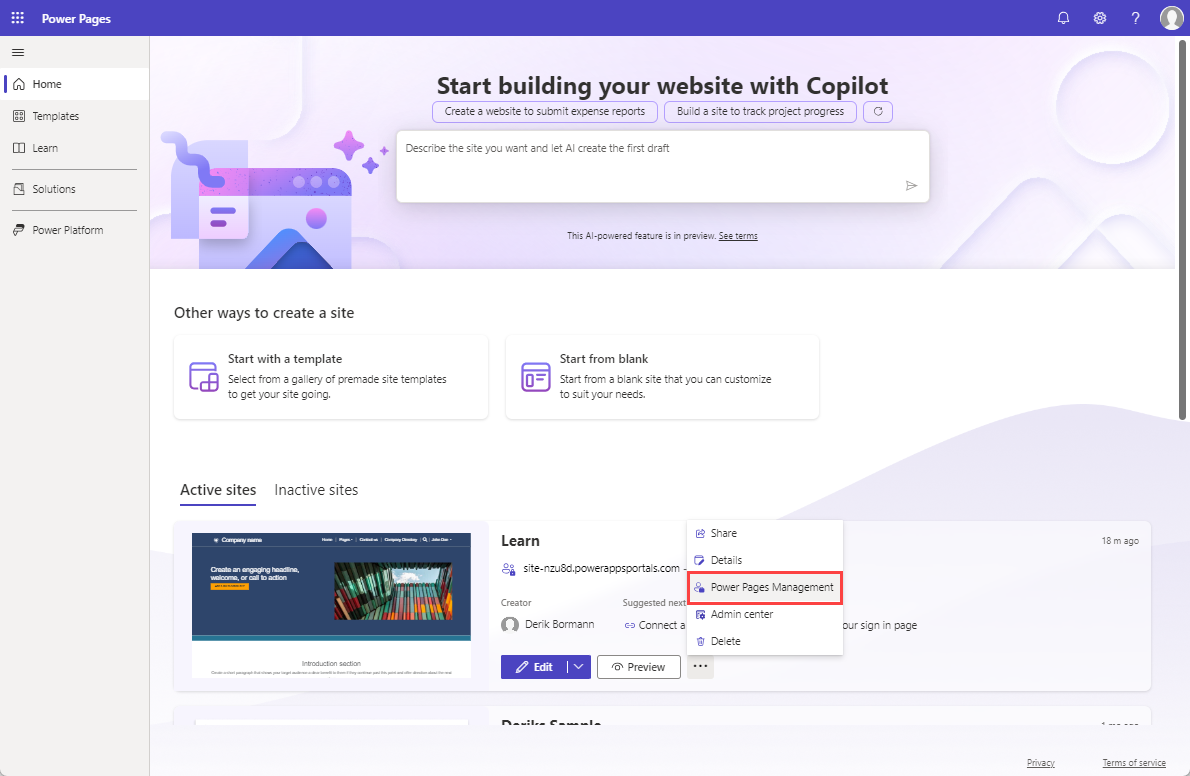
The Power Pages Management app will open in a new window.
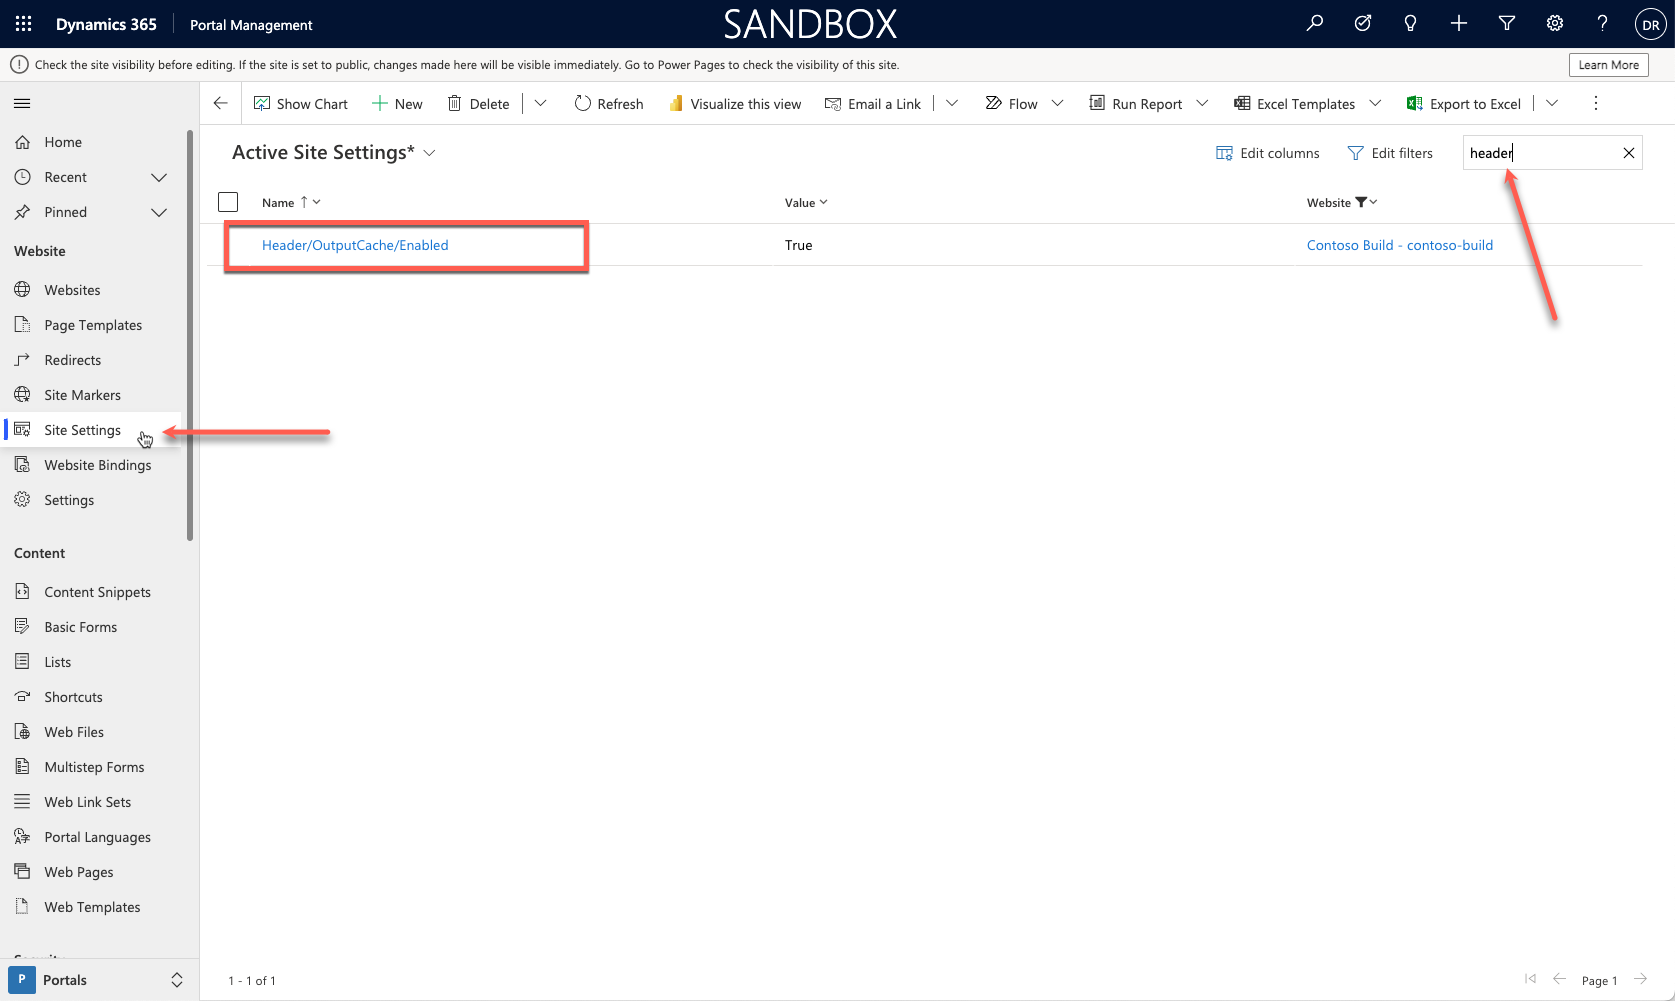
Select Site Settings.
Locate the
Header/OutputCache/Enabledsite setting.Tip
Use the search functionality and look for header to quickly locate the row.
Open the setting, update the value to False, and then select Save.
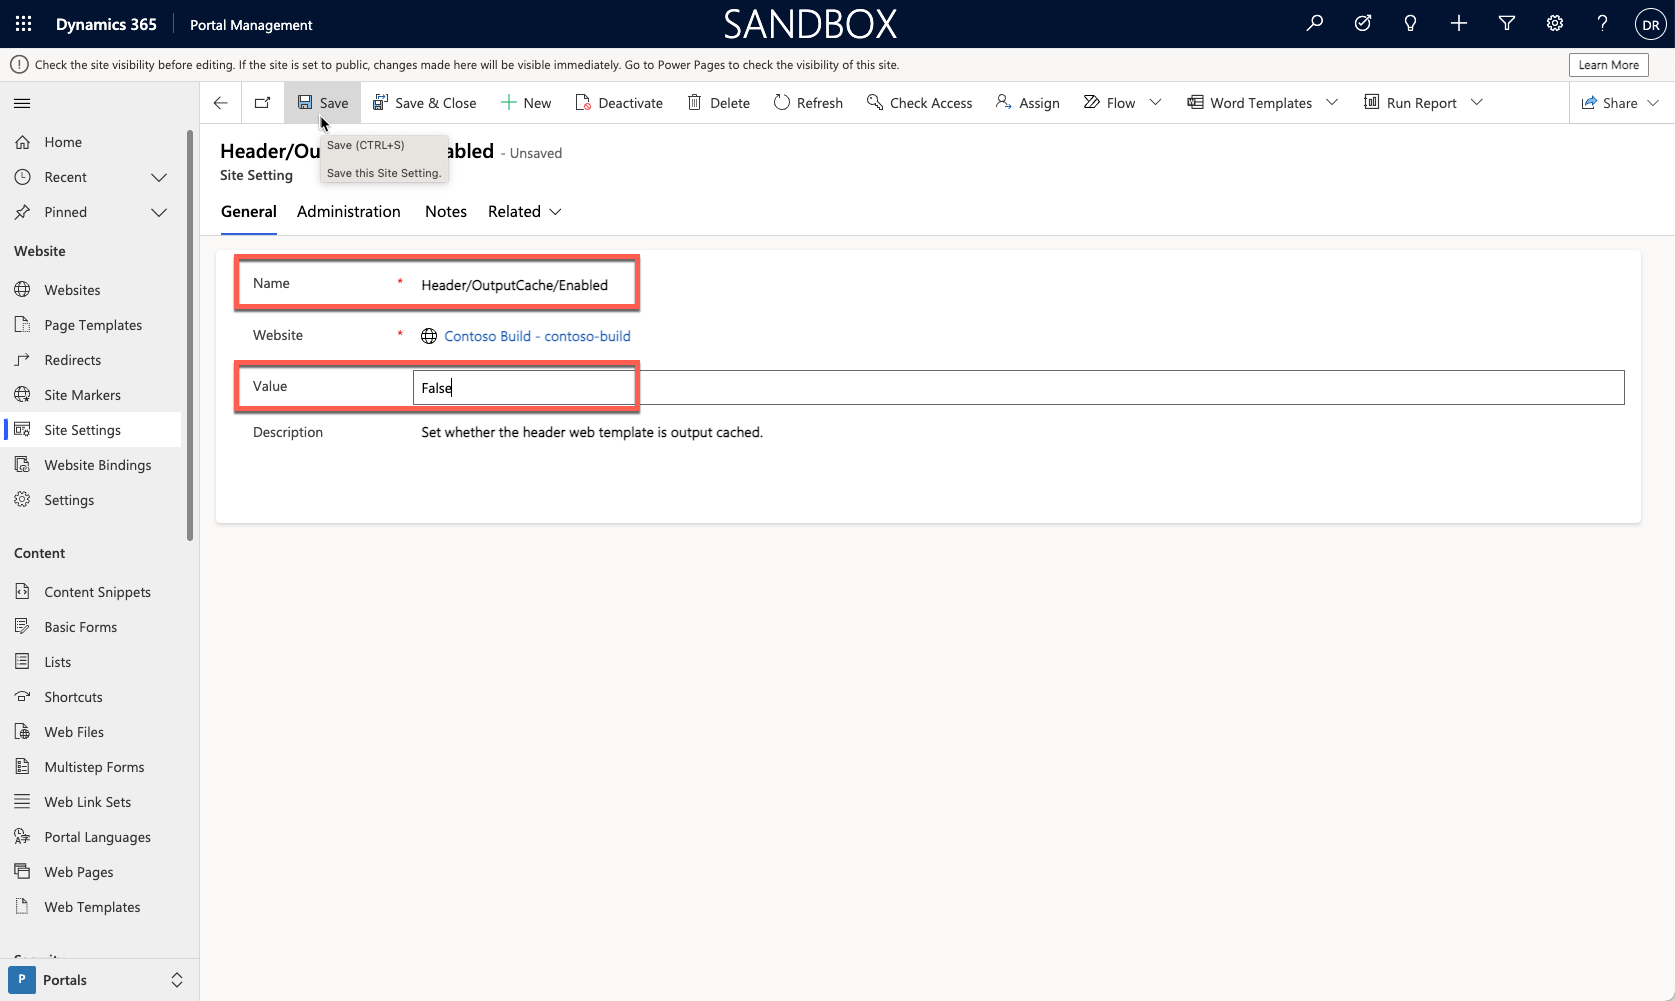
Leave the Power Pages Management app open.
Launch Power Pages Go-Live checklist
To launch the Power Pages Go-live checklist, follow these steps:
Switch to the Power Pages Home window.
Select your site and then select Edit to launch the design studio.
Select the Set up workspace.
Select Go-live checklist under General.
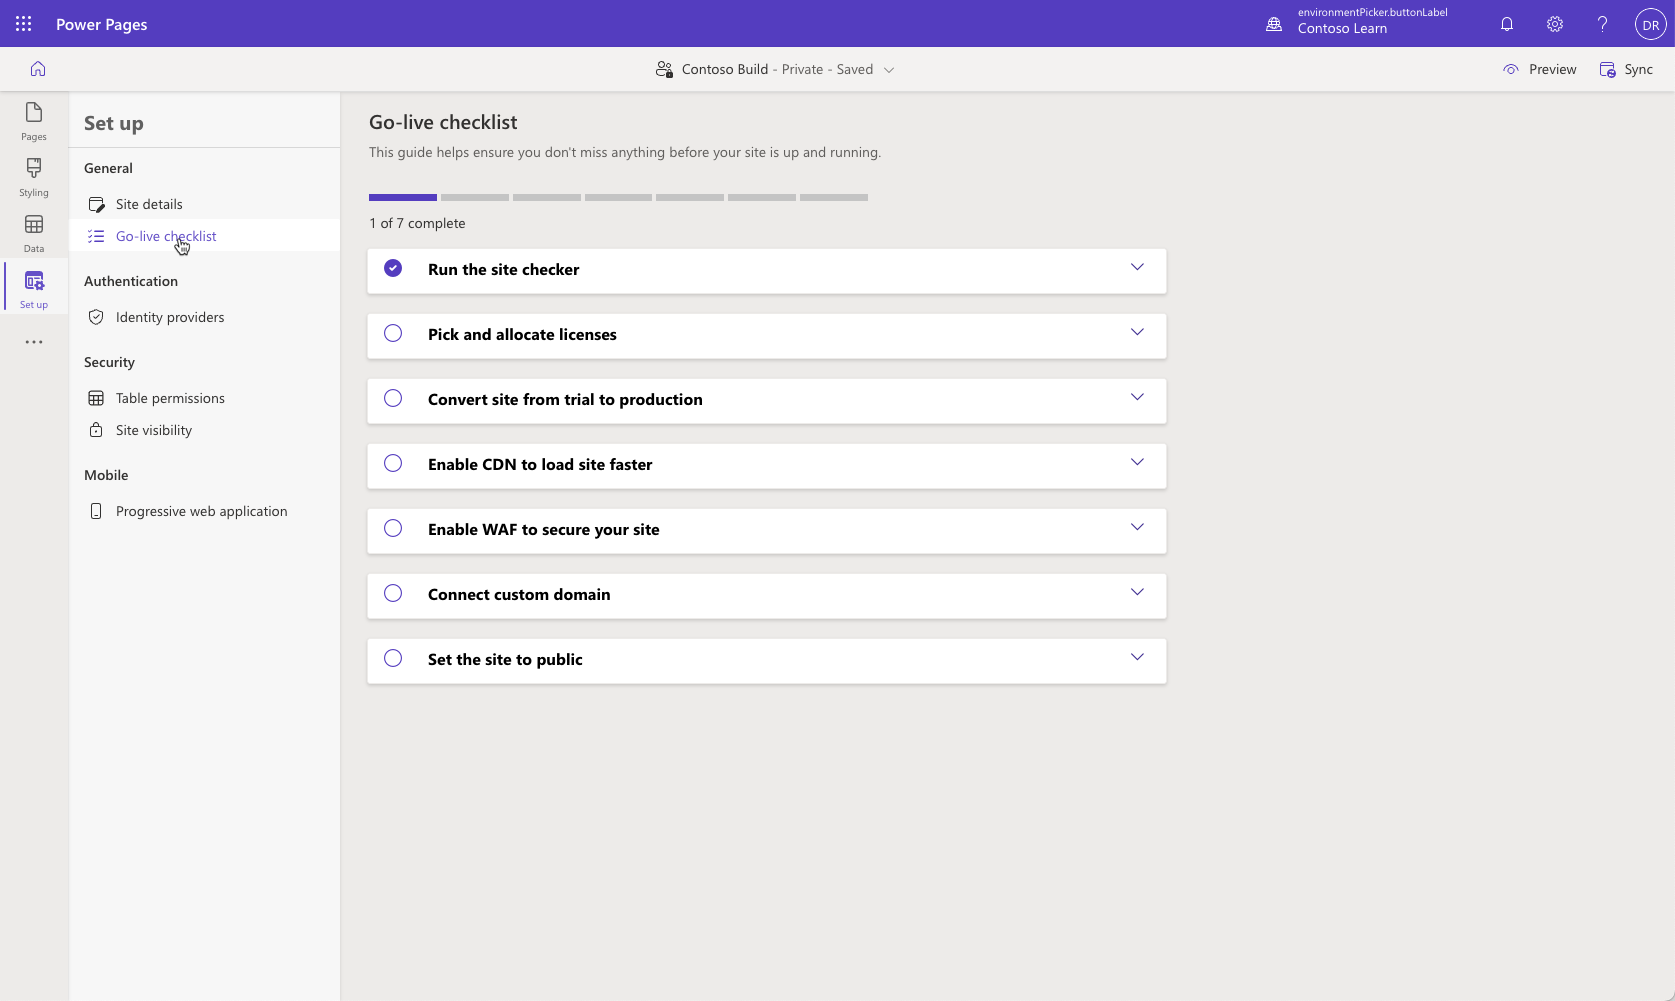
Run the site checker
Next, you'll run the site checker:
Select the Sync button in the upper-right corner to flush the cache and synchronize site configuration.
Expand the Run the site checker dropdown menu.
Select the Run site checker button.
In the Site checker results panel, the Header output cache entry should have a warning. Expand the message for more details.


Enable header output cache
To enable the header output cache, follow these steps:
Return to the Portal Management app.
Update the
Header/OutputCache/Enabledsite setting to True and then select Save.
Check the issue resolution
To check the issue resolution, follow these steps:
Repeat the preceding steps to flush the cache and synchronize configuration.
Run the Portal Checker tool.
Verify that the header output cache issue has been resolved.


Note
Warnings and errors are prioritized and are always displayed first in the list. The Header output cache entry is no longer a warning and might be in a different position in the list than previously.
Check site availability
Your next step is to check site availability:
In the Power Pages design studio, select Site details.
Locate the site URL and then right-click and select Open in InPrivate Window.
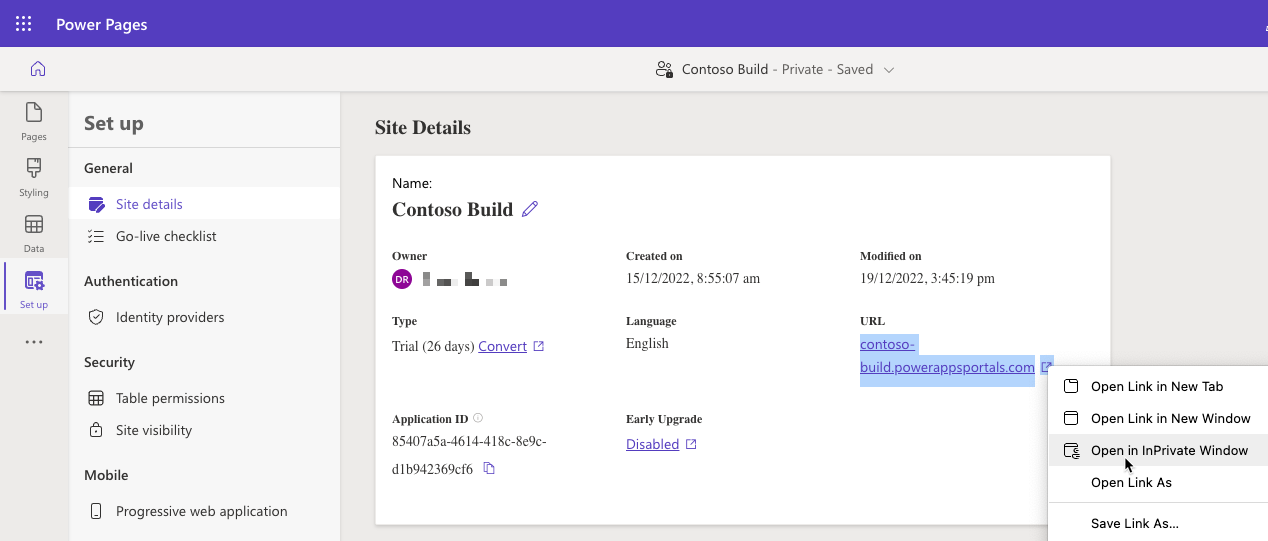
The new window should open and display the Microsoft Entra ID authentication prompt.
Tip
If the site visibility doesn't change, synchronize site settings, wait a few moments, and then try again.
Close the window.
Set public site visibility
To set public site visibility, follow these steps:
Return to the Power Pages design studio.
Select Site visibility under Security.
Select Public under This site is.
Select the Set to public button when prompted.
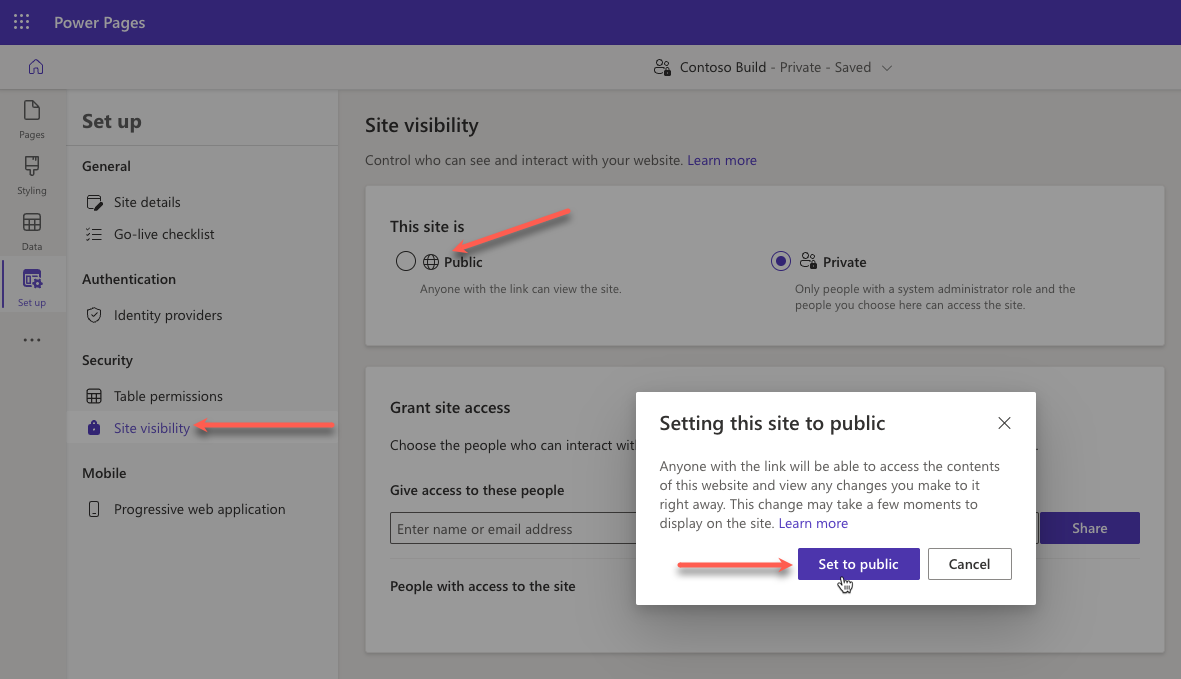
Wait for the operation to complete. The site header should change from Private to Public.


Verify public site access
Your last task is to verify public site access:
In the Power Pages design studio, select Site details.
Locate the site URL and then right-click and select Open in InPrivate Window. The new window should open with the site home page displayed.
Repeat the previous steps and then set the site visibility back to private.