Create agents and work with the Microsoft Copilot Studio interface
Before you start creating an agent, it's important to consider what it's used for. For example, you might use it to manage account inquiries, or you could use it for self-service support cases such as knowledge base access. Knowing how you plan to use the agent helps you define and plot out conversation paths and determine how many topics the agent handles. Other functions that you could consider include using it to look up basic account details, perform more advanced account operations, or implement some type of action. The more scenarios that you initially consider, the easier it's to determine the topics that your agent needs for you to facilitate it.
How to create an agent
Agents can be created in multiple ways. You can use the conversational experience to describe what your agent needs to do. You can install a managed agent. You can use one of the several built templates. You can create a blank agent. Any of these ways provide a quick and simple way to build a basic agent that you can tailor to your specific needs.

In the conversational creation experience, you have the ability to build your agent by describing, with natural language, what you want your agent to do - for example, "Help users learn how to create agents with Copilot Studio."
Agents are created for each environment. By default, all agents are created in the default Power Apps environment for your organization or tenant, unless otherwise specified. You can choose which environment that you want to use by selecting the Environments drop down to see a list of available environments.
Agent creation using natural language
When you create an agent, you can describe what you want your agent to do in your own words.
From Home page in Copilot Studio.
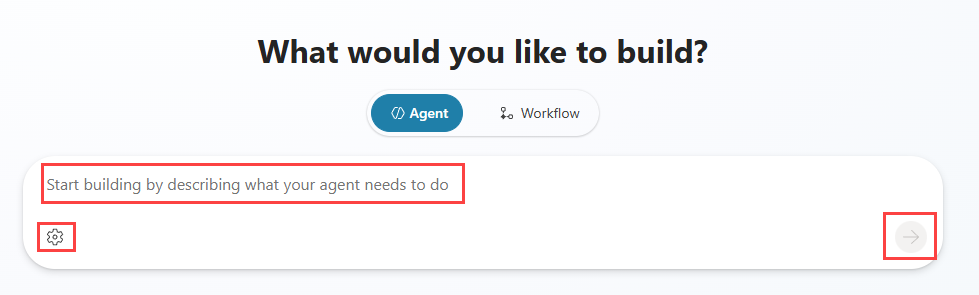
Enter a prompt that describes what your agent needs to do such as
Create an agent that helps users understand how to create agents with Copilot Studio.Select the Settings icon to change the primary language, solution, and schema name of your agent.
Select the Send icon to create the agent.
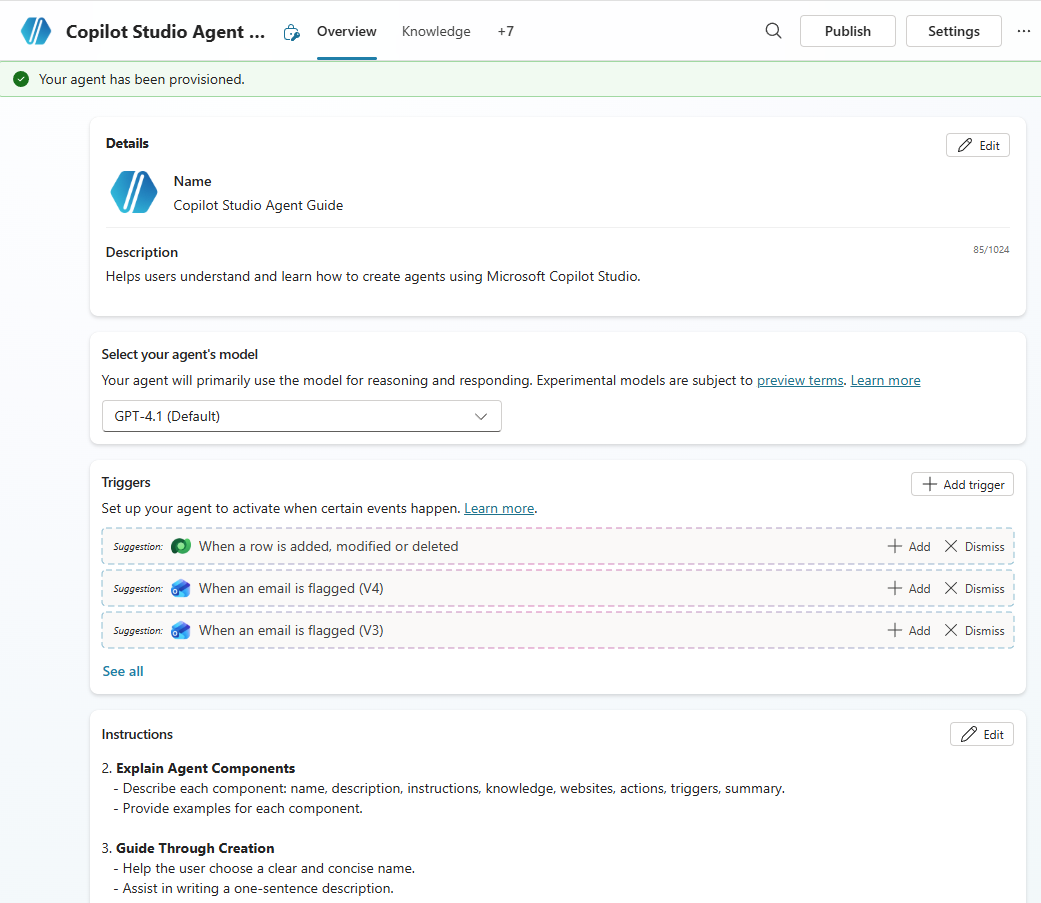
The agent is created, instructions populated, and suggestions for triggers, knowledge, and tools added.


Work with the Microsoft Copilot Studio user interface
The Microsoft Copilot Studio user interface provides you with all the tools necessary to create, test, publish, and monitor the performance of your agent. When the application is loaded after the copilot is created, you see multiple areas that can help you throughout the process of working with your agent.
The following image shows an example of what the user interface looks like.

The following list describes the Microsoft Copilot Studio user interface features, as indicated in the previous image:
The following list describes the Microsoft Copilot Studio user interface features:
Home page - Create an agent quickly and access recently used agents.
Agents page – Provides you with access to all your agents and options for creating new agents.
Flows page - Provides you with access to all your agent flows and to create new agent flows.
Tools page - Provides you with access to all your tools and to create tools.
Overview tab – Provides access to the home screen of the current agent that you're working with where you can specify instructions for your agent.
Knowledge tab – Allows you to provide knowledge sources to your agent.
Tools tab - Provides you with access to the tools added to your agent and to add tools to your agent.
Agents tab - Provides you with access to the tools added to your agent and to add tools to your agent.
Topics tab – Provides access to the different topics actions that are available for the agent.
Activity tab – Displays the agent's activity map, a visual mapping of your agent's sequence of inputs, decisions, and outputs within a session.
Evaluation tab - Manage test cases to measure the accuracy, relevancy, and quality of answers to the questions the agent is asked.
Analytics tab – Provides analytical details that are related to the performance and usage of the agent.
Channels tab – Provides tools for publishing your agent and deploying it to different channels.
Publish button - Provides tools for publishing your agent and deploying it to different channels.
Settings button – Toolset that helps with management items such as generative AI orchestration options, agent authentication, and skills management.
Test your agent panel – Lets you test your agent as an end user to ensure that it's performing as expected.
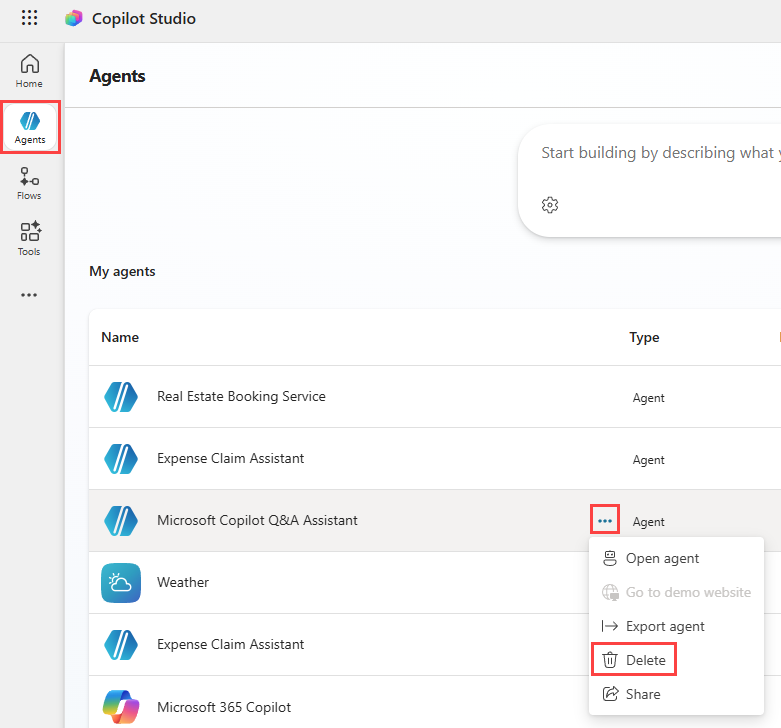
Delete an agent
Agents that are no longer needed can be removed from your environment. This situation might occur when the agent is being replaced with a different agent, or if the agent no longer fits the needs of your organization.
When editing an agent, you can select the Delete button on the command bar to delete the agent and enter the name of the agent to confirm deletion.
Using the Agents menu, select agent that you want to delete.