Run a disaster recovery drill
In this unit, you'll learn about Site Recovery disaster drills: what you need to consider and how to run a test to check that the configuration is correct.
You can use disaster recovery (DR) drills to test your organization's ability to recover from an outage without impacting any production service.
In the previous exercise, you completed setting up Azure Site Recovery and now need to test your infrastructure replication. Test your configuration by running a DR drill. Azure Site Recovery enables you to run these drills safely, so that won't impact your production environment. You'll also run some quality assurance tests on the configuration to ensure your DR solution is working.
What is a disaster recovery drill?
A DR drill is a way to check if you configured your solution correctly. The drill should give you and your company confidence that your data and services are available even if a disaster happens. Typically, organizations set a recovery time objective (RTO), which indicates how long it will take to recover infrastructure. Your company should also define a recovery point objective (RPO), which determines the amount of data loss acceptable as a function of time. For example, if your company's RPO is a day, you'll need to create a backup of all your data each day. You'll also need to ensure it takes less than a day to restore this backup.
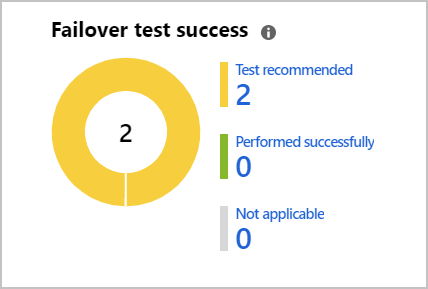
To ensure that we run our DR tests, Site Recovery actively prompts us to run them on the Site Recovery dashboard.
Why should you run a DR drill?
A DR drill is vital to ensure the solution implemented meets the business continuity and disaster recovery (BCDR) requirements and to ensure the replication works appropriately. Your DR drill, combined with RTO and RPO, must be tested thoroughly to ensure replication, failover, and recovery occur in the required timeframe.
For example, let's assume your RTO is an hour and the RPO is six hours. If your systems are backed up every hour, that's an hour of lost data plus the additional hour to recover your systems.
Imagine your actual recovery time is five hours. Your systems are now close to being more than six hours out of date, which means you'll be in breach of the BCDR RPO objective. Testing the actual time it takes to recover from failures can give you confidence that your systems follow your BCDR plans.
Test failover of individual machines
A failover test allows you to simulate a disaster and see its effects. You can start a failover test from the Site Recovery dashboard or directly from the disaster recovery menu on a specific VM. You'll start by choosing a recovery point. You can choose from either the last processed, the latest app-consistent point, or a custom recovery point.
Create a failover test
Create an isolated virtual network so that your production infrastructure isn't affected. To do so, follow these steps:
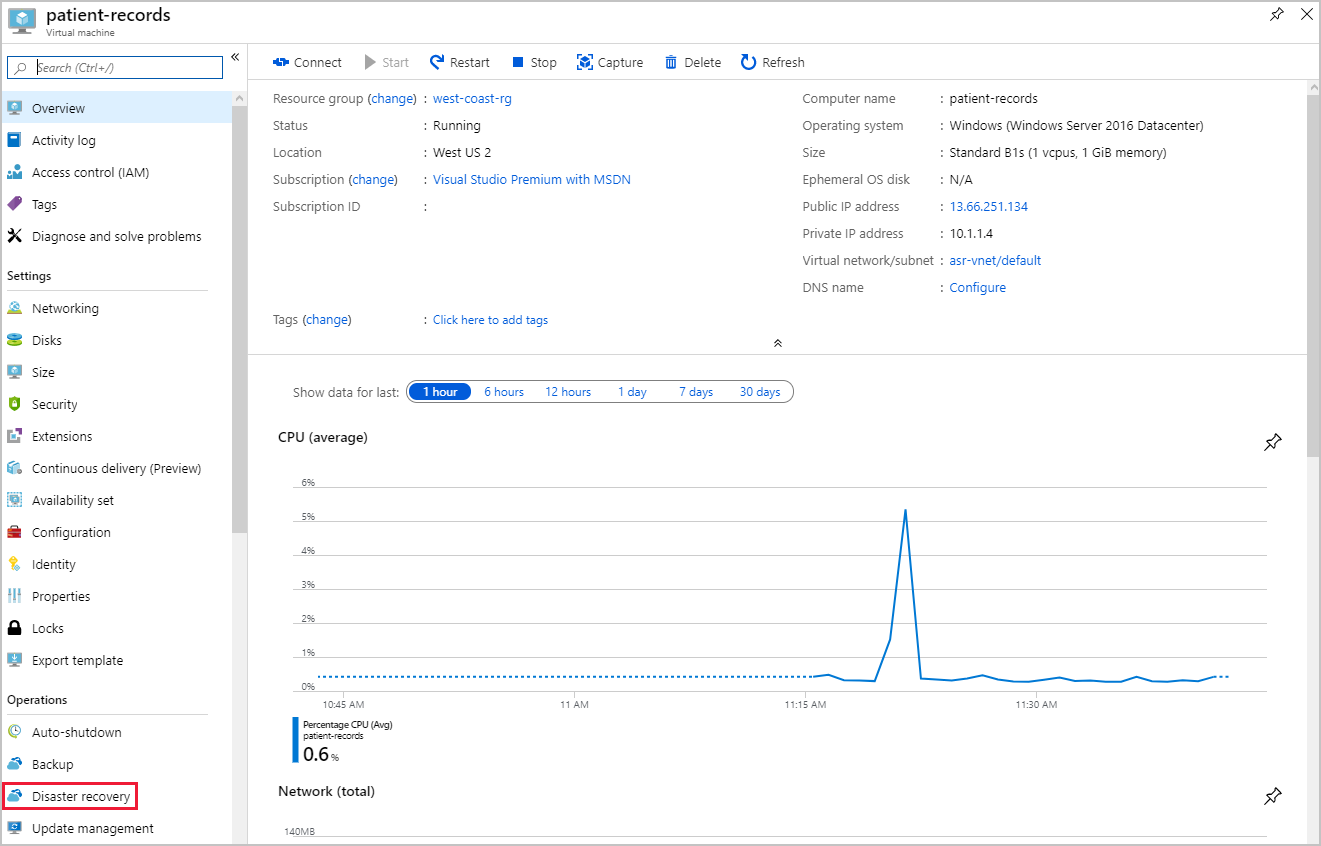
Open the target VM named patient-records. An easy way to find this is to filter all resources to show only Type == Virtual machine. Select patient-records from the results list.
In the resource menu, scroll to Operations, and then select Disaster recovery.
A new Replicated items pane appears. Select Refresh until you see Protected in the status field. Then, from the top menu bar, select Test Failover.
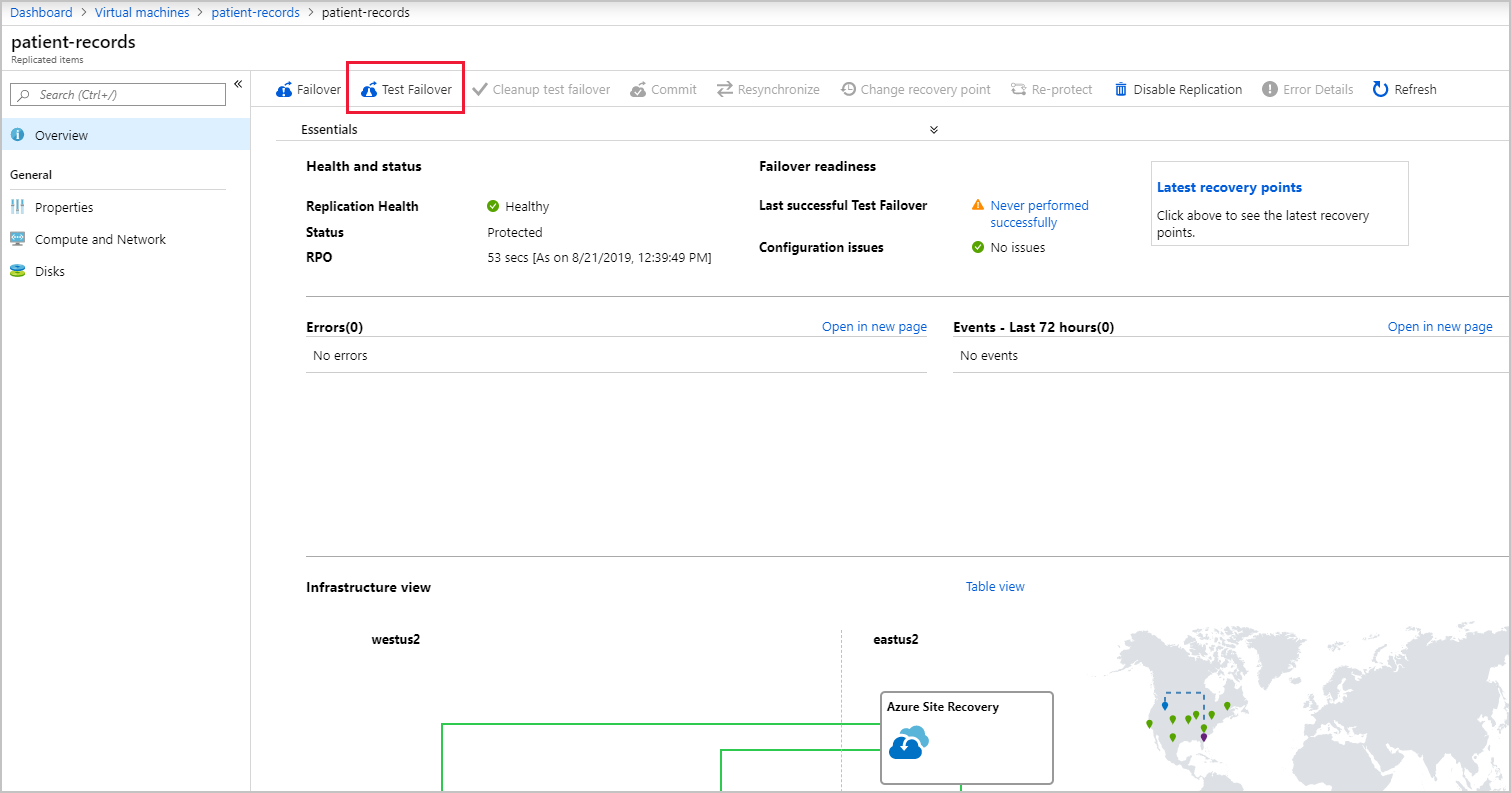
Once validation succeeds, select your virtual network in the Azure virtual network drop-down, then select the Test failover button. This option runs a test failover of the VM and lets you track its progress through the Site Recovery jobs page by selecting the Notifications icon and selecting the Starting the task to perform test failover of virtual machine link.
After completion, the failed-over VM appears in the portal under Virtual Machines in the recovery region. You can then check that the VM is running, is sized and connected correctly, and is mirroring the source VM but in a different Azure region.
After you've validated everything has worked as expected, you can delete the replicated VM by selecting Cleanup test failover from the Disaster recovery pane. At this point, we recommend adding notes about the test outcome. Check the box next to Testing is complete to delete the test failover virtual machine, then select OK.


Flexible failover of multiple machines
Site Recovery gives you the flexibility to run a full DR test scenario for all our VMs. You can create recovery plans that include one or more of your VMs. Failovers are runnable as many times as you like, and allow for a flexible policy to test different combinations of infrastructure.

Just like testing the single VMs, the same test cleanup is available for everything included in the recovery plan.

Difference between a drill and production failover
Running a production failover in Site Recovery is similar to that of a test drill. There are some exceptions, the first being that Failover is selected, instead of Test failover. You can choose to shut down the source VM before starting the failover so that no data is lost during the switch. Site Recovery doesn't clean up the source environment after the failover is complete.
When the failover is complete, validate that the VM is working as expected. Site Recovery allows you to change the recovery point at this stage. If you're satisfied that the failover works, you'll Commit the failover. Site Recovery deletes all the source VM recovery points and completes the failover. With your replicated infrastructure and data in the secondary region, you must remember that the new VM in the secondary region also needs protection.