Exercise - Publish for framework-dependent deployment
Framework-dependent deployments are the default for ASP.NET Core apps. When you publish a framework-dependent app, only your app's files and dependencies are included in the deployment package. The .NET runtime isn't included. The target machine must have the correct version of .NET runtime installed in order to run the app.
Your team lead asked you to prepare your team's app for deployment. Since the server your app will run on already has the .NET runtime installed, you can publish the app as a framework-dependent deployment. This reduces the size of the deployment package and make it easier to deploy the app.
In this exercise, you publish an ASP.NET Core app as a framework-dependent deployment.
Create an ASP.NET Core app
You need an ASP.NET Core app to play the role of your team's app. Let's create a new ASP.NET Core app using C# Dev Kit extension in Visual Studio Code.
Launch Visual Studio Code.
Press Ctrl+Shift+P to open the command palette.
Search for and select .NET New Project.
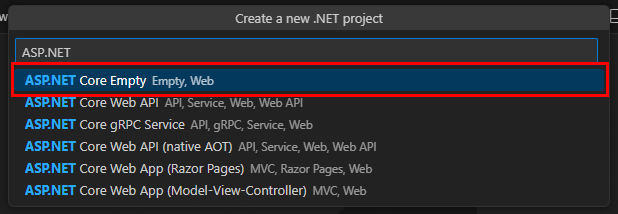
Search for and select ASP.NET Core Empty.
Select or create a folder for the new project.
Name the new app MyWebApp.
Select Create project to create the project.

Run the app
Test the app to make sure it runs.
In Visual Studio Code, press F5 to build and run the app.
- When prompted, select C# as the debugger.
- When prompted, select C#: MyWebApp [Default Configuration] as the launch configuration to use.
This command starts the app and hosts it on a local web server. A browser window opens and displays, "Hello, World!".
Close the browser window and stop the app by pressing Shift+F5 in Visual Studio Code.
Publish the app as a framework-dependent deployment
Now that you've verified that the app runs correctly, you can publish it as a framework-dependent deployment.
In Visual Studio Code, press Ctrl+` to open the terminal window.
Navigate to the MyWebApp directory.
cd MyWebAppRun the following command to publish the app:
dotnet publish -c Release -o publish-fdIn the preceding command:
-c Releasespecifies that the app should be built in release mode. This optimizes the app for performance.-ospecifies the name of the output directory. In this case, the output directory will be named publish-fd.
This command publishes the app as a framework-dependent deployment to the publish-fd directory.
In the Visual Studio Code Explorer window, expand the contents of the MyWebApp/publish-fd directory and view the list of files. The directory includes the app's files and dependencies, but not the .NET runtime or source code files. Some of the included files and directories are:
- MyWebApp.dll`**: The compiled app.
- Other MyWebApp. files: Additional files needed to run the app.
- appsettings.json: The configuration file for the app.
- web.config: The configuration file for IIS (Internet Information Services) on Windows.
- wwwroot: When present, this directory contains published static web assets, such as HTML, CSS, and JavaScript files. This directory isn't generated if the project doesn't contain any static web assets, so it isn't present in this case.
Navigate to the publish-fd directory and run the app.
cd publish-fd
dotnet MyWebApp.dll
This command starts the published app and hosts it in Kestrel. Web browsers that connect to the app see the same default ASP.NET Core welcome page.
Close the web browser and stop the app by pressing Ctrl+C in the terminal window.