Exercise - Publish to Azure App Service (optional)
Many integrated development environments and other tools can publish an ASP.NET Core app to various hosting environments. Behind the scenes, these tools are running the dotnet publish command with various options.
Your manager is evaluating Azure as an option for hosting your app, and they asked you to publish the app as a proof-of-concept. You need to publish the app on Azure. You've selected Azure App Service as the hosting environment because it's easy to use and supports ASP.NET Core apps.
In this exercise, you publish an ASP.NET Core app as a framework-dependent deployment for Azure.
Note
This exercise is optional. If you don't have an Azure subscription, you can get a free account or skip this exercise.
Create an Azure App Service web app
In Azure App Service, a web app can be thought of as a single-application web server. You need to create an Azure App Service web app in which to deploy your ASP.NET Core app. Make sure you have the Azure Tools extension for Visual Studio Code installed.
In Visual Studio Code, press Ctrl+Shift+A to open the Azure Tools extension.
Sign in to your Azure subscription and directory if necessary.
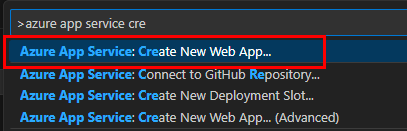
Press Ctrl+Shift+P to open the command palette.
Search for and select Azure App Service: Create New Web App.... Do NOT select the Advanced option.
Select the subscription you want to use.
Enter a name for the web app. The name must be unique within Azure.
Select the correct .NET runtime stack.
Tip
This usually corresponds to the version of the .NET SDK you're using. For example, if you're using .NET 8.0, you should select .NET 8.0. If you're not sure which runtime stack to use, check the
<TargetFramework>element in the MyWebApp.csproj file.Select the Free (F1) pricing tier.
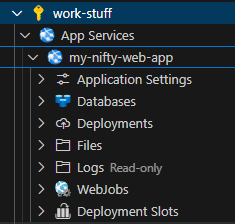
After the extension finishes creating the web app, return to the Azure Tools extension. Note that the App Services node under your subscription now contains the new web app.


Publish the app to Azure
Now that you've created the Azure App Service web app, you can publish the app to Azure.
Press Ctrl+Shift+P to open the command palette.
Search for and select Azure App Service: Deploy to Web App....
Select the folder that contains your project.
When prompted, select Add Config to add a configuration file for the app.
Select the Azure subscription you used earlier.
Select the web app you created earlier.
When prompted, select Deploy.
After a few moments, the app is published to Azure. In the Terminal window, you can see the output of the
publish-releasetask. Note that the extension runs thedotnet publishcommand to create a framework-dependent deployment.
When prompted, select Browse Website to open the web app in a browser. Alternatively, press Ctrl+Shift+P and search for Azure App Service: Browse Website and follow the prompts.
