Exercise - Share your app
Sharing your app
After you successfully publish your app, it's time to share it so that users can begin testing the app.
Go to https://make.powerapps.com. Then select Apps in the navigation menu. Power Apps lists your apps to show the one that you modified the latest on the top.
Find your app and select the radio button on the left of your app. With your app selected, select the Share button from the command bar.

A sharing flyout menu appears on the right side of your screen. Before you begin adding/editing users, make sure that you note several important details or options. Refer to the diagram with numbers that correspond to the steps that follow.

Add users from your Microsoft Entra ID service by typing their names or email addresses in the box. Selected users appear below the field so that you can add several at once.
Select the Co-owner checkbox if you want the selected users to be able to edit or share your app. They can't delete the creator, or owner, of the app. Likely, each app has only one or two developers and the remainder are added as users.
If your data source (such as Dataverse) requires a security role, you can assign the required roles as you share the app, so that app users can view/make changes to the underlying data (according to their security role). Regardless of your data source, users need to have the proper roles or permissions to view/take action on data.
Select the Send an email invitation to new users checkbox so that an email is sent to users with a link to access the application.
You can optionally add an email message and even attach an image file to the email that goes out with the invitation.
Select the Share button to share the app with your users. The Share button also enacts changes that you made to other users' permissions.
Take a few moments to share the app with some users in your organization.
When you're finished adding users, select Share and then close the flyout menu.


Remove users from your app
If you accidentally shared the app with someone, or if you need to remove a user's permission, follow these steps:
With your app selected in the app menu (or open in edit mode), select the Share button from the command bar.
Select the user or hover the cursor over their name and then select the X (Remove) icon.
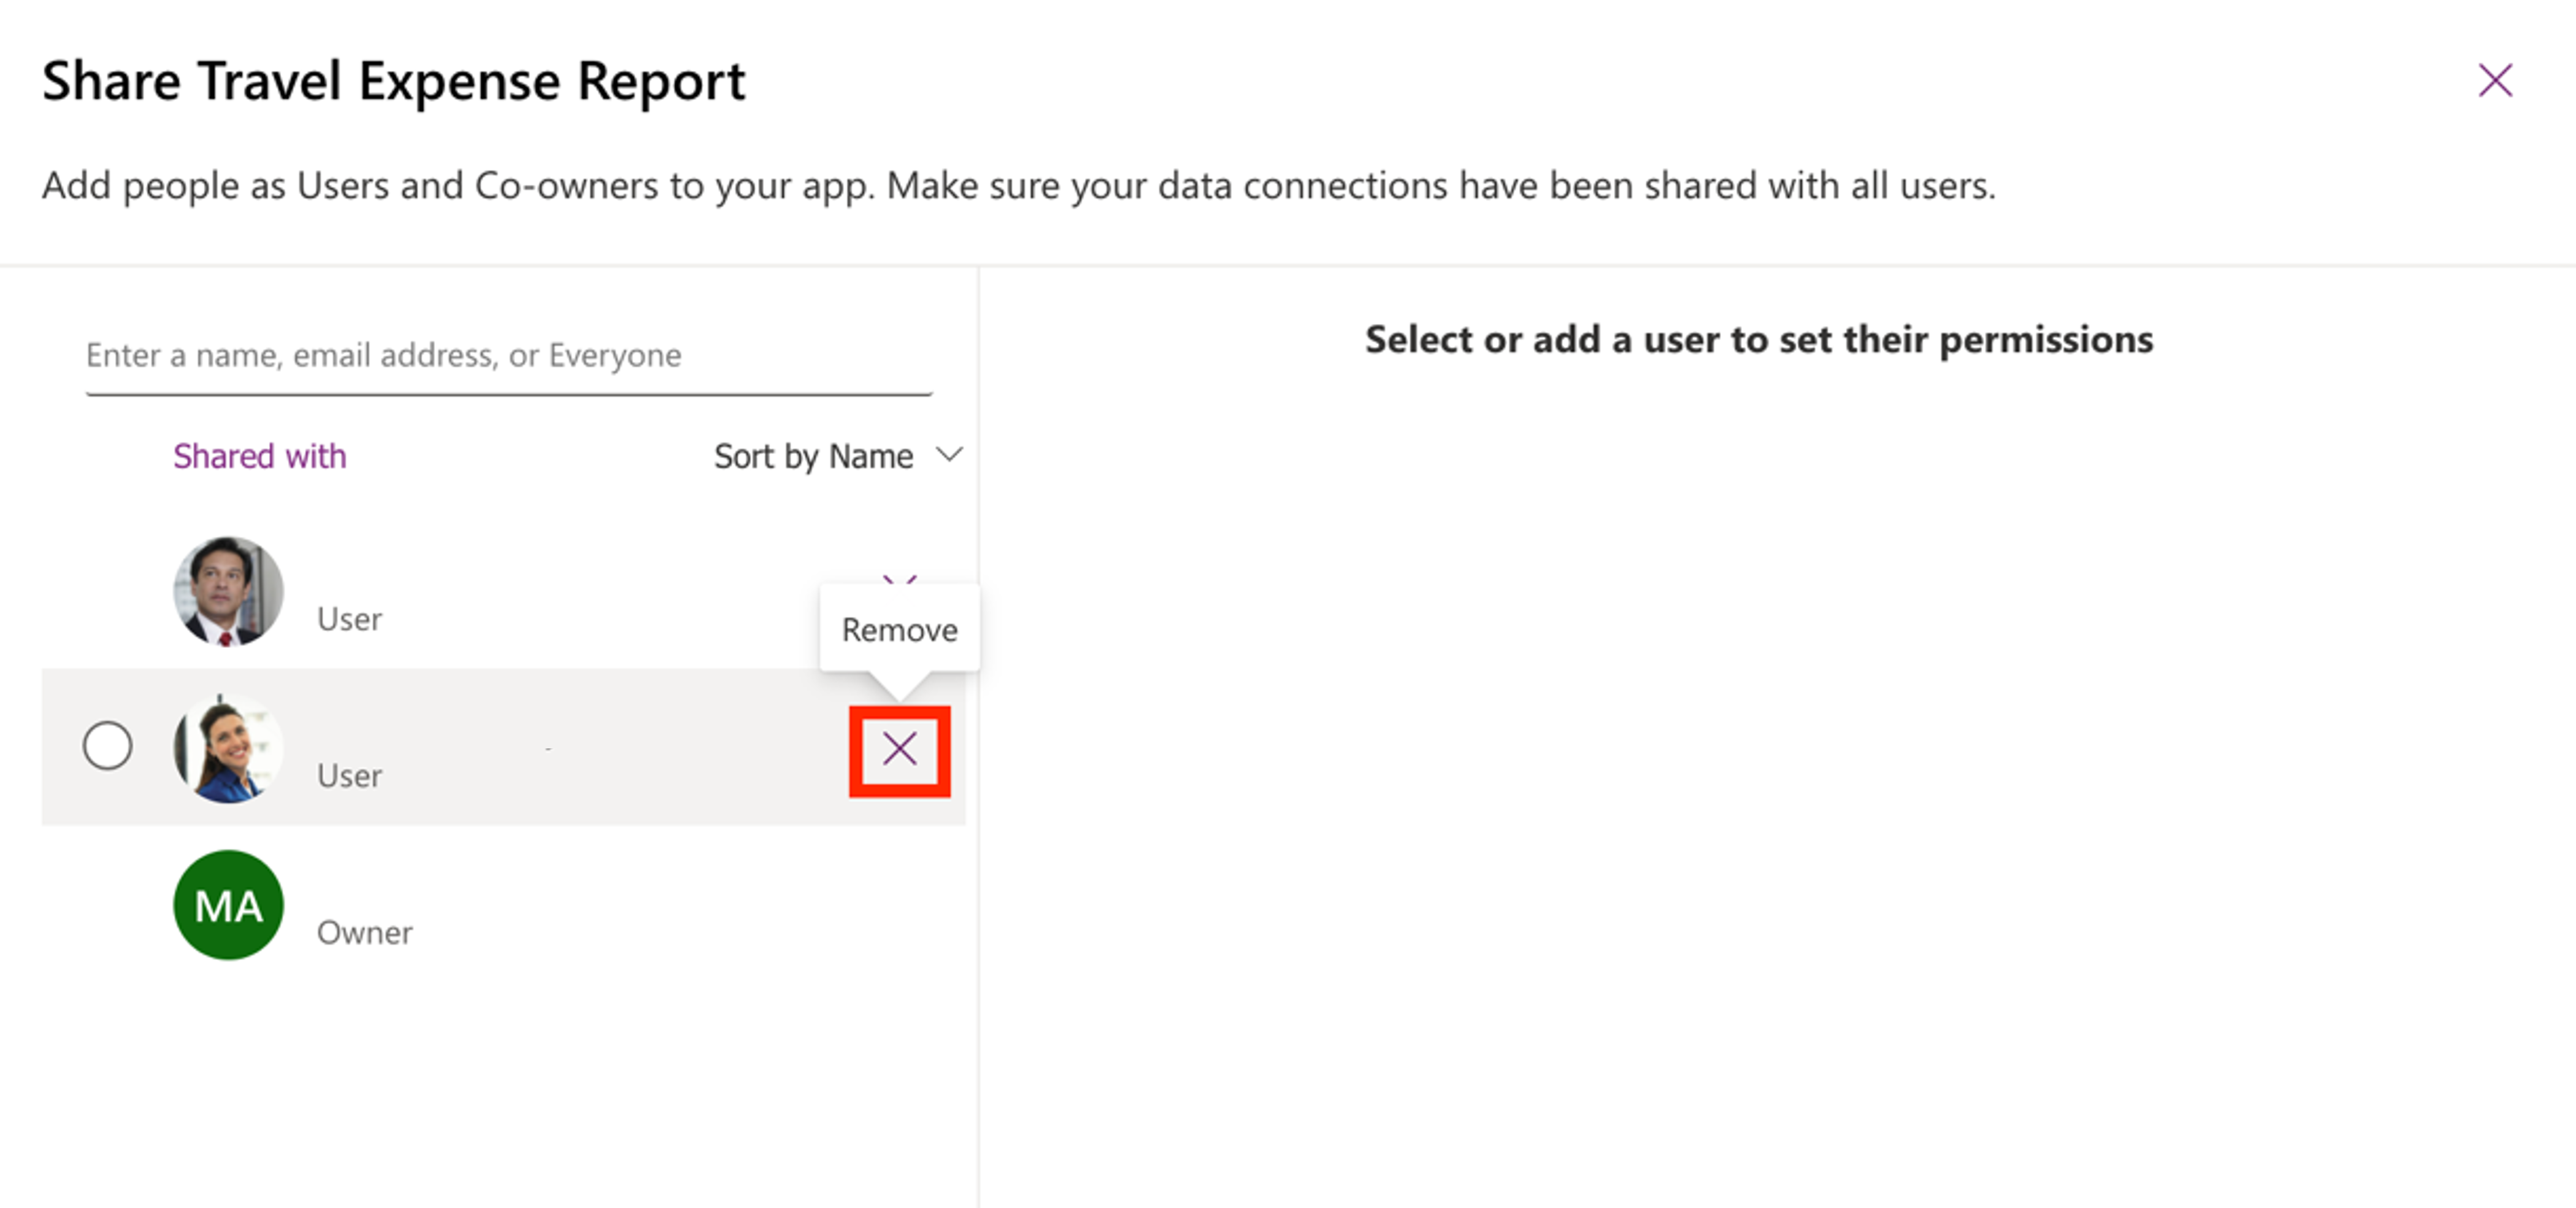
Select Share in the lower part of the screen to save your updated sharing permissions.

In addition to adding users one-by-one, you can type "everyone" to share with every user in your tenant. Just be mindful that if your app includes a "premium" data source, such as Dataverse or SQL, that user also needs the licensing that goes along with the app.
If you encounter a user who missed an email invite, or you didn't send an email invite, you can still send a link to the users of your app. You can find the link for your app on the app Details screen in the Web link section. There's even a "Copy" icon on the right of the link.

You still need to share the app with users whom you want to have access. If you sent someone the link to your app, and didn't give them access from the sharing flyout menu, then they receive a generic permission/access error message.

Now, you shared your app, and users who have access can begin testing. In the next section, you'll learn how to maintain your app.