Exercise - Publish the API with GitHub Actions
Your web app and API are both running locally. Now it's time to publish your web app and API to Azure Static Web Apps.
Push your changes to GitHub
You made changes to your API in the previous exercise. Commit those changes to the api branch and push them to GitHub by following these steps:
- In Visual Studio Code, open the command palette by pressing F1
- Type and select Git: Commit All. If Visual Studio Code prompts you to automatically stage all of your changes and commit them directly, select Yes.
- Enter a commit message such as api changes
- Open the command palette by pressing F1
- Type and select Git: Push
- If you're prompted with the message The branch 'api' has no upstream branch. Would you like to publish this branch? press the OK button
Create a Pull Request
You pushed your api branch to GitHub. Now you want the GitHub Action to publish your web app and API in a preview URL. So your next step is to create a pull request against the main branch.
Open a browser
Navigate to your repository
https://github.com/<YOUR_GITHUB_USERNAME>/my-static-web-app-and-apiSelect the Pull requests link
Select the New pull request button
Select the main branch from the base dropdown
Select the api branch from the compare dropdown
Select the Create pull request button
Again, select the second Create pull request button
Your GitHub Action is now triggered.
Watch the GitHub Action build and publish
You can stay in your browser on your repository and watch the GitHub Action's progress. View the progress by following these steps:
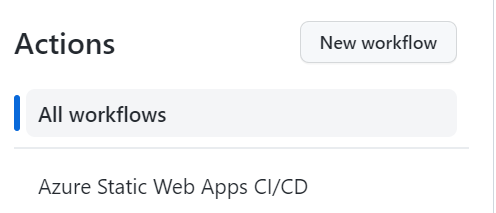
- Select the Actions menu
- Under the Workflows menu, select the Azure Static Web Apps CI/CD workflow item
- Select the top link in the list of action runs.
- Select the Build and Deploy Job link.
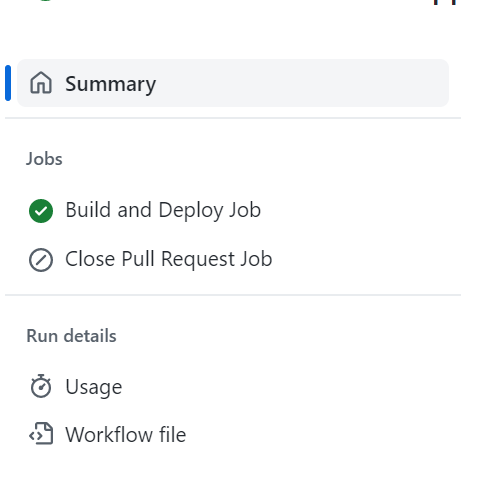
You can see the progress of your GitHub Action as it builds and publishes your web app and API.
Browse to the preview URL
Once the GitHub Action successfully completes, you can view your running app in the browser.
- Select the Pull requests menu
- Select your pull request
- Select the link following the message Azure Static Web Apps: Your stage site is ready! Visit it here
Notice that the preview URL contains a hyphen followed by a number. The number matches the pull request number for the pull request you created. For every pull request you create, you get a unique and repeatable preview URL. The region is also used to form the preview URL.
Next steps
Congratulations, you created your first Azure Static Web Apps instance with a web app and API!