Create a pipeline
In Azure Machine Learning, a pipeline is a workflow of machine learning tasks in which each task is defined as a component.
Components can be arranged sequentially or in parallel, enabling you to build sophisticated flow logic to orchestrate machine learning operations. Each component can be run on a specific compute target, making it possible to combine different types of processing as required to achieve an overall goal.
A pipeline can be executed as a process by running the pipeline as a pipeline job. Each component is executed as a child job as part of the overall pipeline job.
Build a pipeline
An Azure Machine Learning pipeline is defined in a YAML file. The YAML file includes the pipeline job name, inputs, outputs, and settings.
You can create the YAML file, or use the @pipeline() function to create the YAML file.
Tip
Review the reference documentation for the @pipeline() function.
For example, if you want to build a pipeline that first prepares the data, and then trains the model, you can use the following code:
from azure.ai.ml.dsl import pipeline

@pipeline()
def pipeline_function_name(pipeline_job_input):
    prep_data = loaded_component_prep(input_data=pipeline_job_input)
    train_model = loaded_component_train(training_data=prep_data.outputs.output_data)

    return {
        "pipeline_job_transformed_data": prep_data.outputs.output_data,
        "pipeline_job_trained_model": train_model.outputs.model_output,
    }
To pass a registered data asset as the pipeline job input, you can call the function you created with the data asset as input:
from azure.ai.ml import Input
from azure.ai.ml.constants import AssetTypes

pipeline_job = pipeline_function_name(
    Input(type=AssetTypes.URI_FILE,
    path="azureml:data:1"
))
The @pipeline() function builds a pipeline consisting of two sequential steps, represented by the two loaded components.
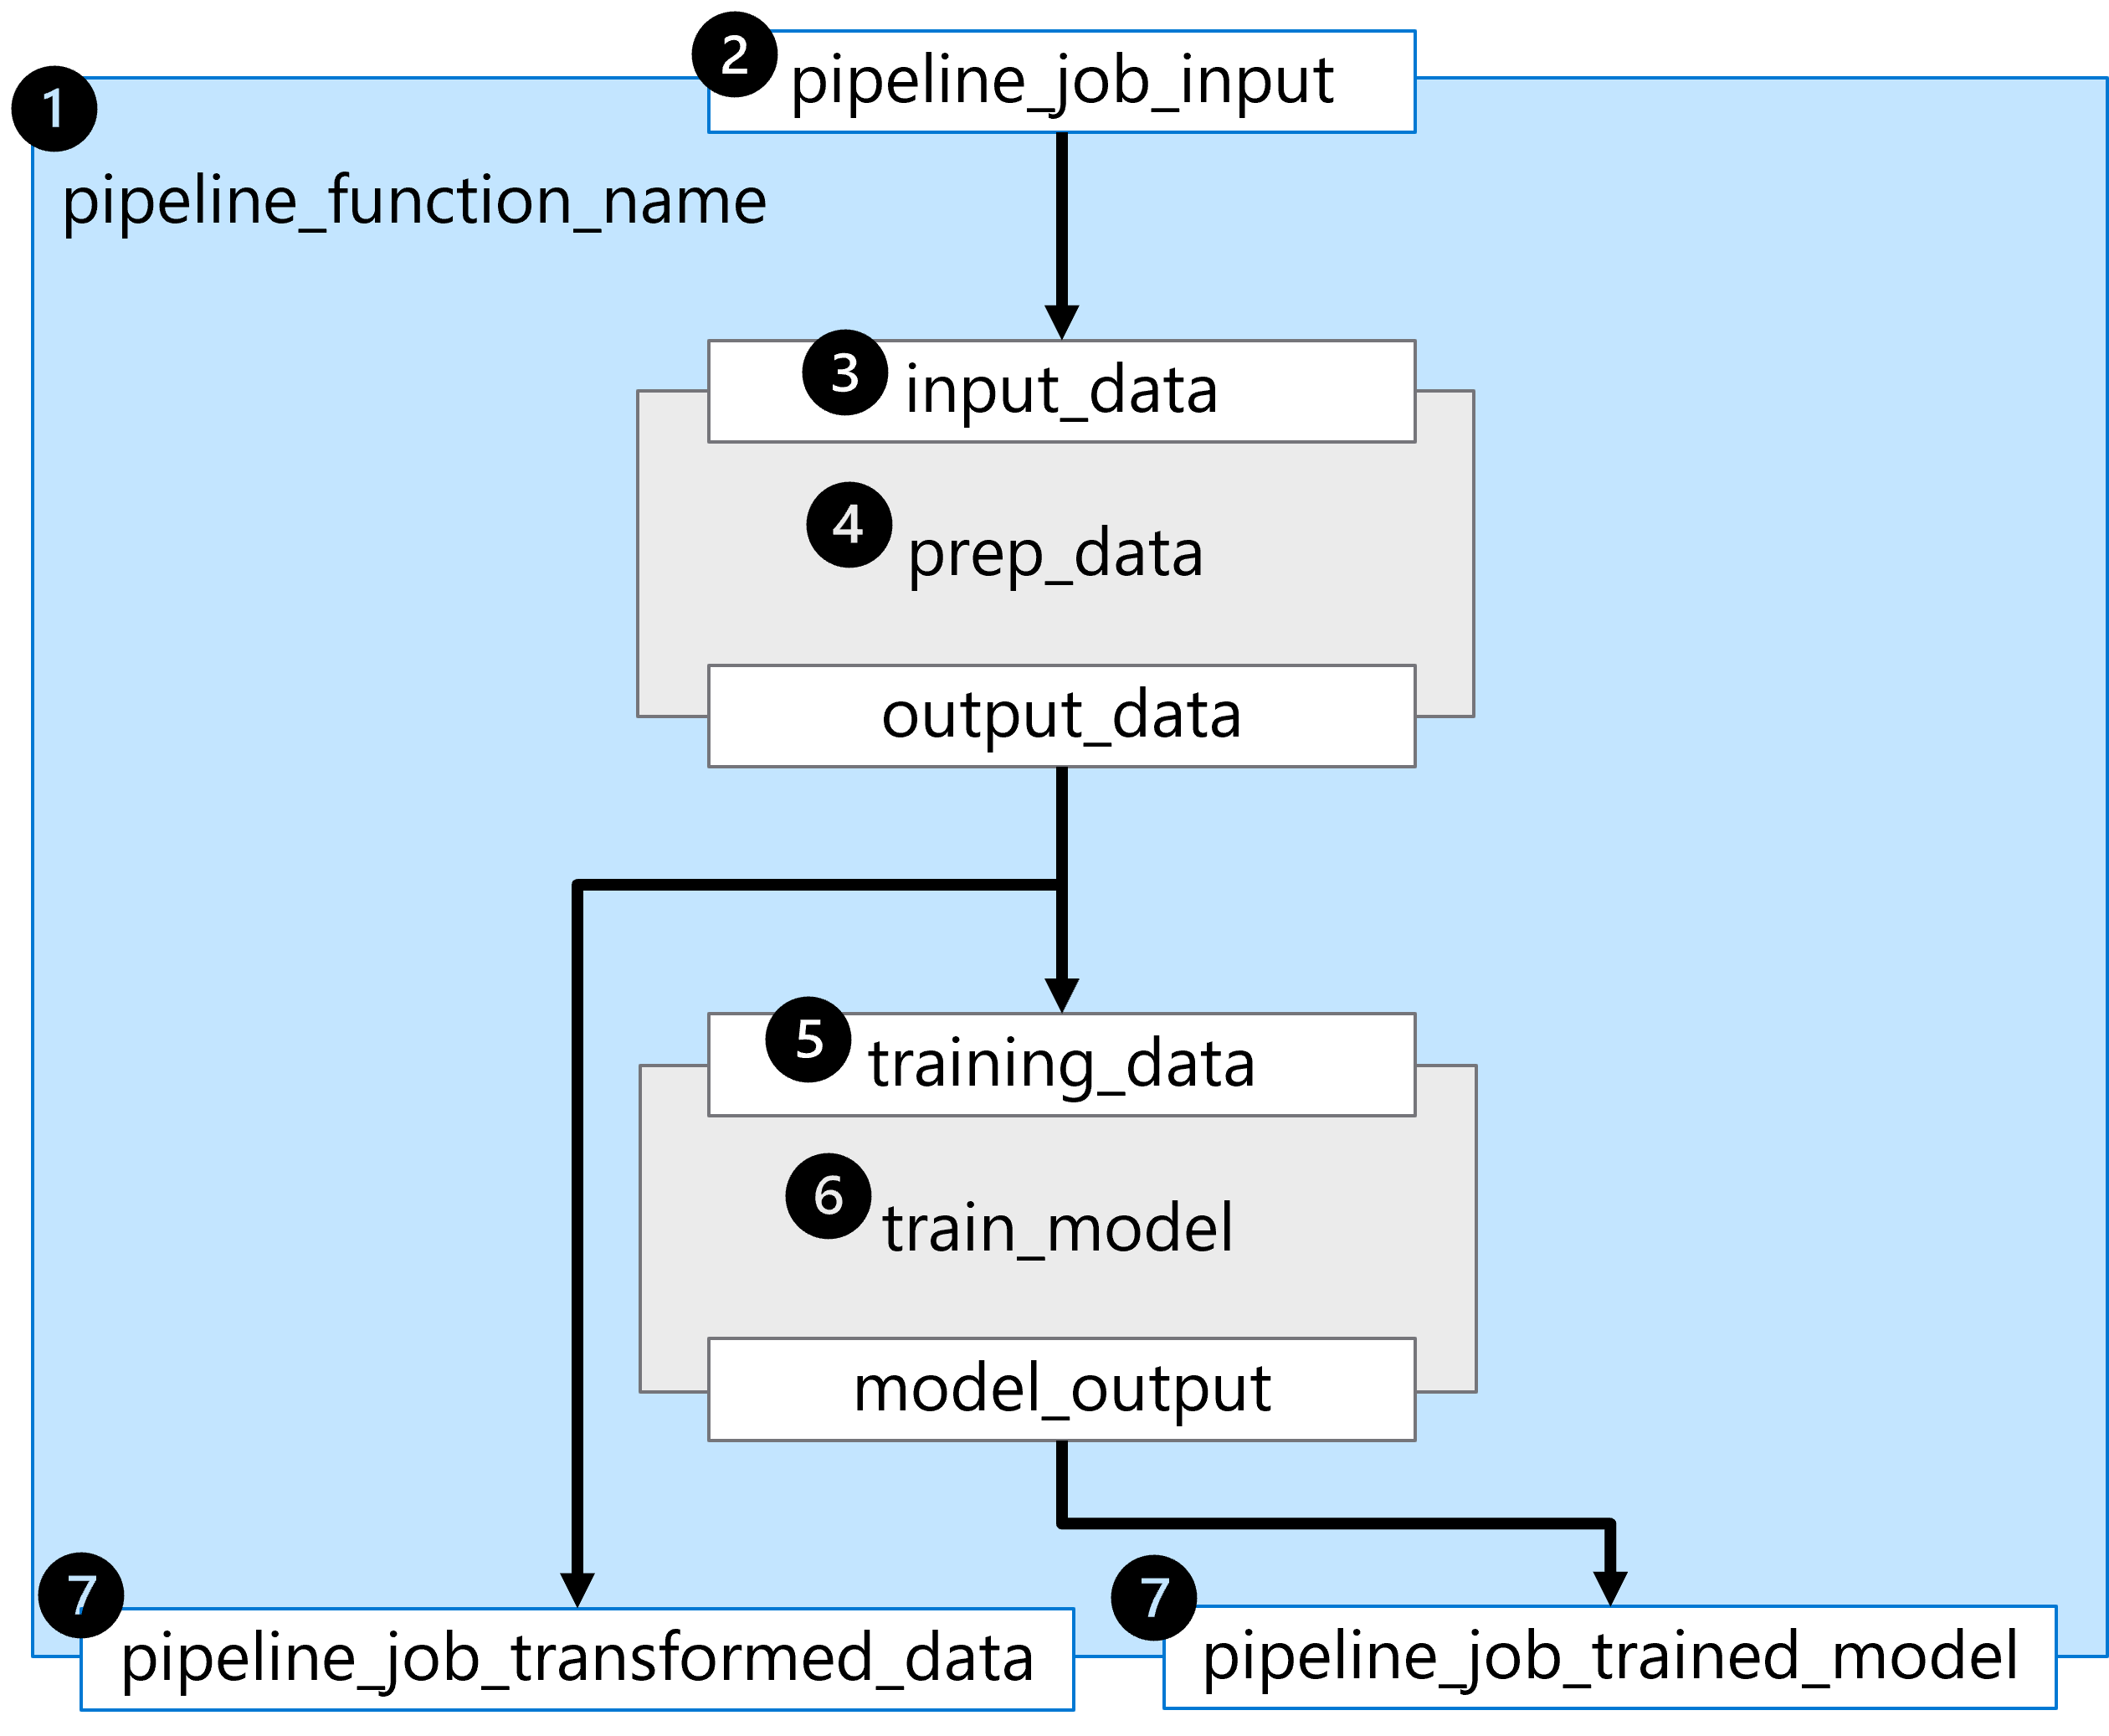
To understand the pipeline built in the example, let's explore it step by step:
- The pipeline is built by defining the function
pipeline_function_name. - The pipeline function expects
pipeline_job_inputas the overall pipeline input. - The first pipeline step requires a value for the input parameter
input_data. The value for the input will be the value ofpipeline_job_input. - The first pipeline step is defined by the loaded component for
prep_data. - The value of the
output_dataof the first pipeline step is used for the expected inputtraining_dataof the second pipeline step. - The second pipeline step is defined by the loaded component for
train_modeland results in a trained model referred to bymodel_output. - Pipeline outputs are defined by returning variables from the pipeline function.
There are two outputs:
pipeline_job_transformed_datawith the value ofprep_data.outputs.output_datapipeline_job_trained_modelwith the value oftrain_model.outputs.model_output
The result of running the @pipeline() function is a YAML file that you can review by printing the pipeline_job object you created when calling the function:
print(pipeline_job)
The output will be formatted as a YAML file, which includes the configuration of the pipeline and its components. Some parameters included in the YAML file are shown in the following example.
display_name: pipeline_function_name
type: pipeline
inputs:
  pipeline_job_input:
    type: uri_file
    path: azureml:data:1
outputs:
  pipeline_job_transformed_data: null
  pipeline_job_trained_model: null
jobs:
  prep_data:
    type: command
    inputs:
      input_data:
        path: ${{parent.inputs.pipeline_job_input}}
    outputs:
      output_data: ${{parent.outputs.pipeline_job_transformed_data}}
  train_model:
    type: command
    inputs:
      input_data:
        path: ${{parent.outputs.pipeline_job_transformed_data}}
    outputs:
      output_model: ${{parent.outputs.pipeline_job_trained_model}}
tags: {}
properties: {}
settings: {}