Run a pipeline job
When you've built a component-based pipeline in Azure Machine Learning, you can run the workflow as a pipeline job.
Configure a pipeline job
A pipeline is defined in a YAML file, which you can also create using the @pipeline() function. After you've used the function, you can edit the pipeline configurations by specifying which parameters you want to change and the new value.
For example, you may want to change the output mode for the pipeline job outputs:
# change the output mode
pipeline_job.outputs.pipeline_job_transformed_data.mode = "upload"
pipeline_job.outputs.pipeline_job_trained_model.mode = "upload"
Or, you may want to set the default pipeline compute. When a compute isn't specified for a component, it will use the default compute instead:
# set pipeline level compute
pipeline_job.settings.default_compute = "aml-cluster"
You may also want to change the default datastore to where all outputs will be stored:
# set pipeline level datastore
pipeline_job.settings.default_datastore = "workspaceblobstore"
To review your pipeline configuration, you can print the pipeline job object:
print(pipeline_job)
Run a pipeline job
When you've configured the pipeline, you're ready to run the workflow as a pipeline job.
To submit the pipeline job, run the following code:
# submit job to workspace
pipeline_job = ml_client.jobs.create_or_update(
    pipeline_job, experiment_name="pipeline_job"
)
After you submit a pipeline job, a new job will be created in the Azure Machine Learning workspace. A pipeline job also contains child jobs, which represent the execution of the individual components. The Azure Machine Learning studio creates a graphical representation of your pipeline. You can expand the Job overview to explore the pipeline parameters, outputs, and child jobs:

To troubleshoot a failed pipeline, you can check the outputs and logs of the pipeline job and its child jobs.
- If there's an issue with the configuration of the pipeline itself, you'll find more information in the outputs and logs of the pipeline job.
- If there's an issue with the configuration of a component, you'll find more information in the outputs and logs of the child job of the failed component.
Schedule a pipeline job
A pipeline is ideal if you want to get your model ready for production. Pipelines are especially useful for automating the retraining of a machine learning model. To automate the retraining of a model, you can schedule a pipeline.
To schedule a pipeline job, you'll use the JobSchedule class to associate a schedule to a pipeline job.
There are various ways to create a schedule. A simple approach is to create a time-based schedule using the RecurrenceTrigger class with the following parameters:
frequency: Unit of time to describe how often the schedule fires. Value can be eitherminute,hour,day,week, ormonth.interval: Number of frequency units to describe how often the schedule fires. Value needs to be an integer.
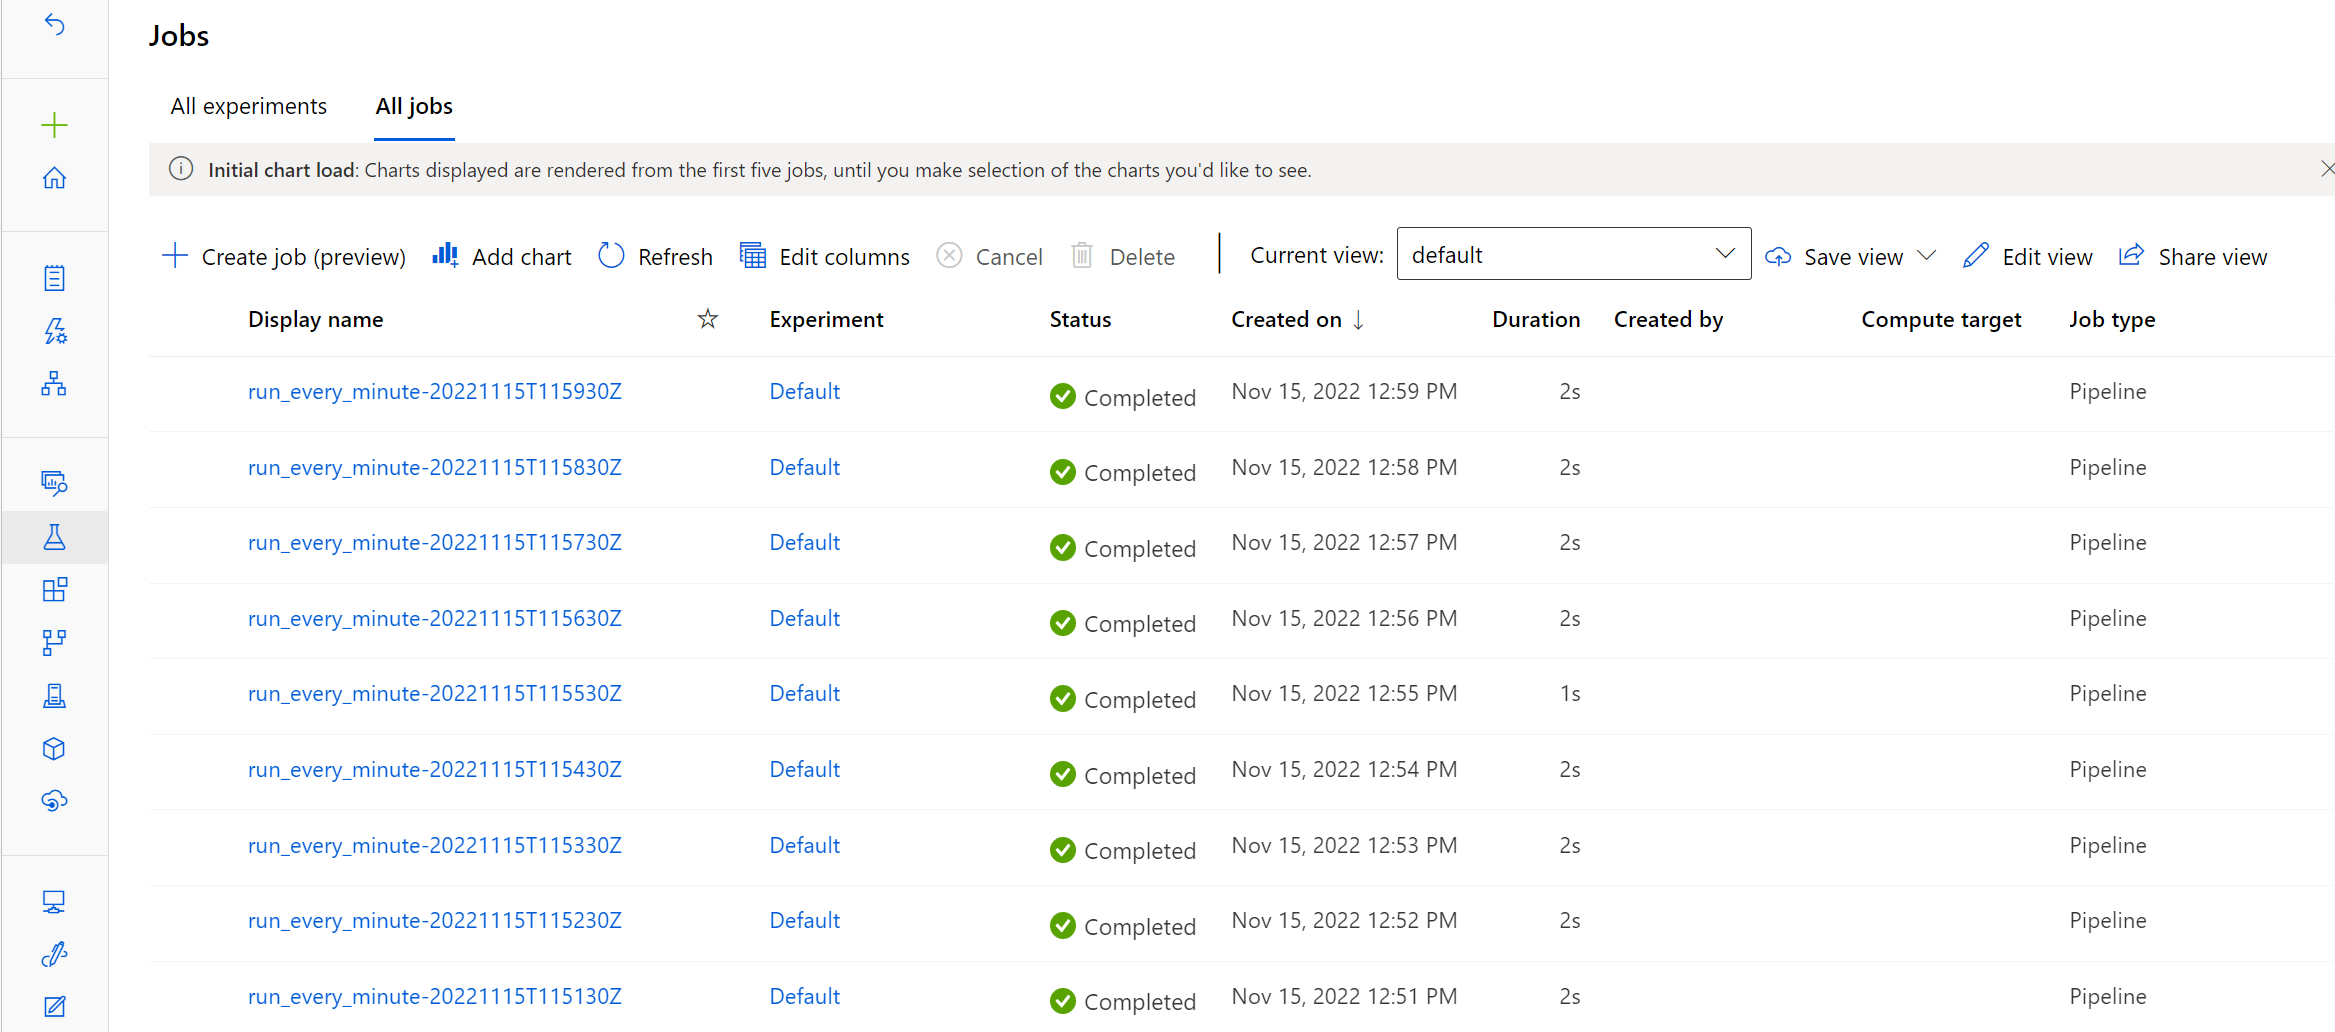
To create a schedule that fires every minute, run the following code:
from azure.ai.ml.entities import RecurrenceTrigger

schedule_name = "run_every_minute"

recurrence_trigger = RecurrenceTrigger(
    frequency="minute",
    interval=1,
)
To schedule a pipeline, you'll need pipeline_job to represent the pipeline you've built:
from azure.ai.ml.entities import JobSchedule

job_schedule = JobSchedule(
    name=schedule_name, trigger=recurrence_trigger, create_job=pipeline_job
)

job_schedule = ml_client.schedules.begin_create_or_update(
    schedule=job_schedule
).result()
The display names of the jobs triggered by the schedule will be prefixed with the name of your schedule. You can review the jobs in the Azure Machine Learning studio:

To delete a schedule, you first need to disable it:
ml_client.schedules.begin_disable(name=schedule_name).result()
ml_client.schedules.begin_delete(name=schedule_name).result()
Tip
Learn more about the schedules you can create to trigger pipeline jobs in Azure Machine Learning. Or, explore an example notebook to learn how to work with schedules.