Academic year transition with School Data Sync
The Academic Session Transition process involves two major tasks:
- Group cleanup: Clean up or archive class groups from the previous period.
- Prepare SDS for the new academic session: Update connected data and begin the transition.
Tip
Perform group cleanup before configuring SDS for the next academic session.
Group cleanup
Group cleanup helps you manage class groups that need to be expired or archived outside of the regular provisioning process; for example, transitioning from fall to spring semester.
The group cleanup process includes three steps.
Step 1: Generate a class group report
- In the left navigation, go to People.
- Select the Memberships tab.
- Select Group report.
- Select Generate new report.
The report lists all groups in your tenant—both SDSmanaged groups and manually created groups. It includes:
- Group names
- Metadata
- Group state
- Creation date
- SharePoint status
Report generation takes time. Close the panel and return later. When the report is ready, a timestamp appears along with an option to download the file.
Important
Do not rename the file. It must remain SectionUsage.csv.
Tip
Create a duplicate copy as a backup before modifying.
Step 2: Modify the report
- Open SectionUsage.csv in Excel.
- Delete rows for groups you want to keep.
- Make sure there are no empty rows in the list—empty rows cause errors during upload.
- Write down the number of remaining groups.
- Save the file and make sure:
- The name is still SectionUsage.csv.
- The format is CSV UTF8.
Step 3: Upload and apply cleanup options
- Go back to People > Memberships.
- Select Group cleanup.
- Upload your modified SectionUsage.csv file.
- Verify that the number of groups matches what you recorded in Part 4 of Step 2 (Modify the report).
- Choose one or more cleanup actions:
- Mark group as expired
- Updates the sysId on the Education extension attribute
- Renames the group by appending "ExtensionMMYYYY"
- Archive group
- Makes the group readonly
- Moves it to the Archived classes folder in Teams
Caution
Cleanup actions can be performed only once, so choose carefully.
- Mark group as expired
- Select Run cleanup. This may take some time.
- Come back later to check for the completion timestamp.
Prepare SDS for the next academic session
To prepare for the next academic session:
Step 1: Ensure your SIS rollover is complete
Before making new data available to SDS:
- Your SIS must complete its academic year rollover.
- Do not provide new-year data until the SIS rollover is complete.
For CSV users:
- Verify that all expected files are present.
- Confirm that column names and formats match previous expectations.
For OneRoster API users:
- Confirm that the connection is still valid.
- If you rotated your client ID or secret key, have the new values ready.
Step 2: Begin next session configuration
- Go to the SDS Home dashboard and look for the prompt asking if you're ready for the next academic session. Select it to begin.
- On the Source format page, if you're using the same format and SIS as last year, leave Change data format on OFF. (Most customers keep this setting off.)
- Select Next.
Step 3: Workflow
Follow the steps for your correct workflow.
CSV workflow
If you're connecting with CSV:
- Review the CSV sync details.
- Select Browse device, then upload the updated files.
- SDS validates file schema.
- SDS performs initial data validation using common rules.
- Review the user identity rule options.
- Set the date when SDS should stop syncing data (often at the end of the school year). Maximum is 18 months from the sync start date.
- Review all information.
- Select Connect data.
- Select Finished.
API workflow
If you're connecting with API:
- Review the API sync details.
- Update connection credentials:
- Web access URL
- Client ID
- Client secret
- Access token URL (OAuth 2 only)
- Select Next to test the connection.
If the connection is successful:
- Select Next and configure optional options (demographics, contacts, user flags, if supported).
- Turning off an option prevents updates to that data, but it does not delete previously imported data.
- Review identity rule options.
- Set the end date for data syncing.
- Review everything.
- Select Connect data.
- Select Finished.
Changing the data format or SIS source
If you're switching from:
- SDSv1 CSV to SDS 2.1 CSV
- CSV to API
- One SIS to a different SIS
- Set Change data format to ON.
- Select CSV for SDSv1 or SDS 2.1 CSV.
- Select API for OneRoster API.
- Follow the Connect Data steps detailed in Unit 2.
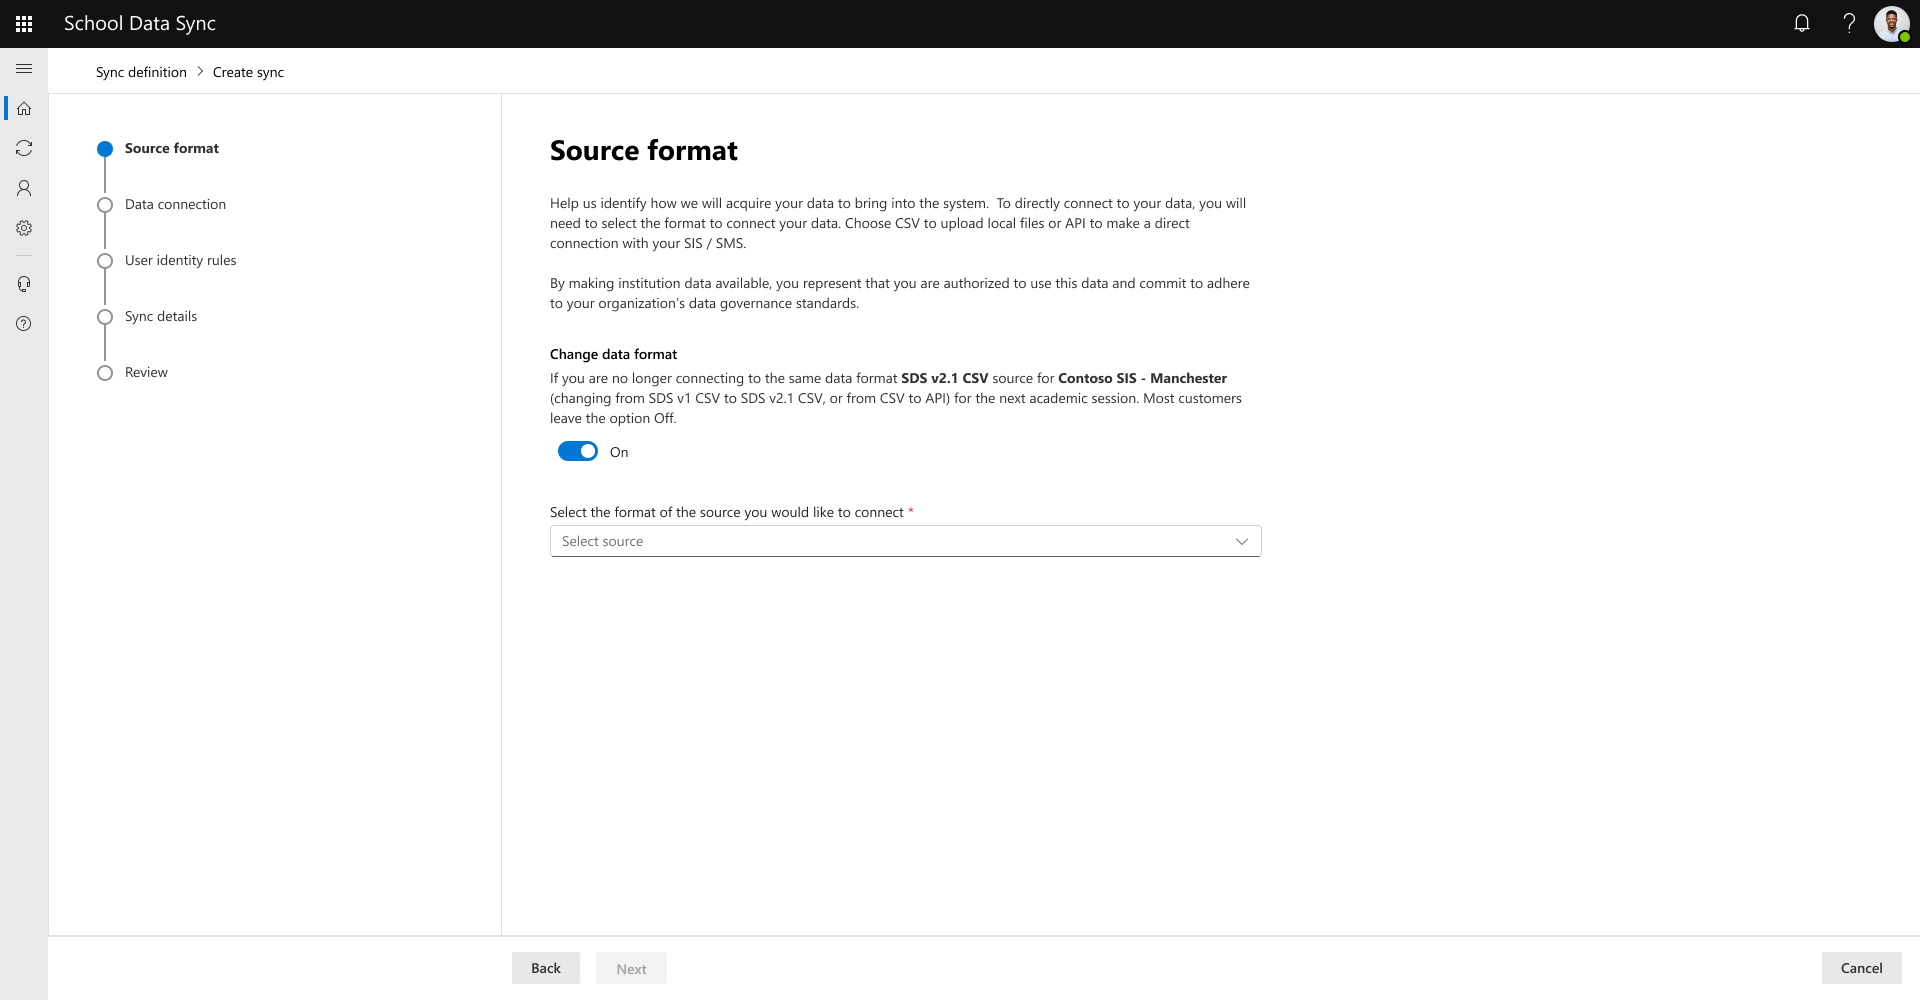
When to leave Change data format OFF
Leave Change data format OFF when you are not changing the format or the SIS used in the previous academic session.
Leave Change data format option OFF in the following scenarios:
- You used SDSv1 CSV with the same SIS last year and will continue using SDSv1 CSV with the same SIS.
- You used SDS 2.1 CSV with the same SIS last year and will continue using SDS 2.1 CSV with the same SIS.
- You used OneRoster API with the same SIS last year and will continue using OneRoster API with the same SIS.
Tip
Same SIS + Same data format: Change data format = OFF
When to turn Change data format ON
Set Change data format to ON when you're changing either the data format or the SIS source.
Set Change data format to** ON** in the following scenarios:
- Changing formats with the same SIS
- Moving from SDSv1 CSV to SDS 2.1 CSV
- Moving from SDS 2.1 CSV to OneRoster API
- Changing SIS providers
- Moving from SDSv1 CSV in one SIS to SDS 2.1 CSV in a new SIS
- Moving from SDS 2.1 CSV in one SIS to SDS 2.1 CSV in a new SIS
- Moving from OneRoster API in one SIS to OneRoster API in a new SIS
Tip
New SIS or new format: Turn Change data format = ON