Exercise - Upload files to document libraries
- 10 minutes
In this exercise, you'll create a new web part that someone can use to select a file to upload to the current site's Documents (also known as: Shared Documents) library.
Prerequisites
Important
In most cases, installing the latest version of the following tools is the best option. The versions listed here were used when this module was published and last tested.
- Node.js v22.*
- Gulp-cli v3.*
- Yeoman v5.*
- Yeoman Generator for SharePoint v1.21.1
- Visual Studio Code
Create a new SharePoint Framework web part project
Open a command prompt and change to the folder where you want to create the project.
Run the SharePoint Yeoman generator by executing the following command:
yo @microsoft/sharepoint
Use the following to complete the prompt that is displayed (if more options are presented, accept the default answer):
- What is your solution name?: FileUpload
- Which type of client-side component to create?: WebPart
- What is your Web Part name?: FileUpload
- Which template would you like to use? No framework
After creating the project folders, the generator will automatically install all the dependency packages by running npm install. When npm finishes downloading all dependencies, open the project in Visual Studio Code.
Update the web part's user interface
Locate and open the file ./src/webparts/fileUpload/FileUploadWebPart.module.scss.
Add the following to the bottom of the file:
.inputs {
  padding-top: 20px;
}
With the web part created, update the user interface to include a control to select a file from the user's computer and a button to trigger the upload process.
Locate and open the ./src/webparts/fileUpload/FileUploadWebPart.ts file.
Locate the existing render() method in the FileUploadWebPart class. Replace the contents of the render() method with the following HTML. This includes a file input control and a button:
public render(): void {
  this.domElement.innerHTML = `
  <section class="${styles.fileUpload} ${!!this.context.sdks.microsoftTeams ? styles.teams : ''}">
    <div class="${styles.welcome}">
      <img alt="" src="${this._isDarkTheme ? require('./assets/welcome-dark.png') : require('./assets/welcome-light.png')}" class="${styles.welcomeImage}" />
      <h2>Well done, ${escape(this.context.pageContext.user.displayName)}!</h2>
      <div>${this._environmentMessage}</div>
    </div>
    <div class="${styles.inputs}">
      <input class="${styles.fileUpload}-fileUpload" type="file" /><br />
      <input class="${styles.fileUpload}-uploadButton" type="button" value="Upload" />
    </div>
  </section>`;

  // TODO 1

  // TODO 2
}
Obtain element references and attach event handlers
Next, replace the // TODO 1 comment with the following code. These are used to get a reference to the two form elements you added to the web part:
// get reference to file control
const inputFileElement = document.getElementsByClassName(`${styles.fileUpload}-fileUpload`)[0] as HTMLInputElement;

// wire up button control
const uploadButton = document.getElementsByClassName(`${styles.fileUpload}-uploadButton`)[0] as HTMLButtonElement;
Now that you have a reference to the input control and button added to the web part, replace the // TODO 2 comment with the following:
uploadButton.addEventListener('click', async () => {
  // get filename
  const filePathParts = inputFileElement.value.split('\\');
  const fileName = filePathParts[filePathParts.length -1];

  // TODO 3
});
This code attaches to the click event on the button. The last two steps are to read the selected file in and then to write it to the document library.
Read the contents of the selected file
In the FileUploadWebPart.ts file, add the following method to the FileUploadWebPart class. This will take a file reference, read its contents into memory, and return it to the caller:
private _getFileBuffer(file: File): Promise<ArrayBuffer> {
  return new Promise((resolve, reject) => {
    const fileReader = new FileReader();

    // write up error handler
    fileReader.onerror = (event: ProgressEvent<FileReader>) => {
      reject(event.target?.error);
    };

    // wire up when finished reading file
    fileReader.onloadend = (event: ProgressEvent<FileReader>) => {
      resolve(event.target?.result as ArrayBuffer);
    };

    // read file
    fileReader.readAsArrayBuffer(file);

  });
}
Next, call this method by adding the following line to our click event handler, replacing the // TODO 3 comment:
// get file data
if (inputFileElement.files) {
  const fileData = await this._getFileBuffer(inputFileElement.files[0]);

  // TODO 4
}
This call will take the first file selected by the user and pass it as a reference to the method we just added. The contents of the file are stored in the fileData member.
Upload the file to the document library
The last step is to upload the file. To do this, we'll use the SharePoint Framework's API to use the SharePoint REST API.
Before we add the code to upload the file, we need to add a few references to object we'll use. Add the following code to the FileUploadWebPart.ts file, after the existing import statements at the top of the file:
import {
  ISPHttpClientOptions,
  SPHttpClient
} from '@microsoft/sp-http';
Now, add the following method to the FileUploadWebPart class. This class will first create the full URL of the endpoint where you'll upload the file. Notice it's using the GetByTitle() method to reference the Documents library. It's also set to upload the file and overwrite an existing file with the same name.
Next, after creating the request to send to the REST API endpoint, we're using the SpHttpClient object's post() method to upload the file to the SharePoint REST API. Once the file has been uploaded, an alert message notifies the user it worked. Otherwise it throws an exception.
private async _uploadFile(fileData: ArrayBuffer, fileName: string): Promise<void> {

  // create target endpoint for REST API HTTP POST
  const endpoint = `${this.context.pageContext.web.absoluteUrl}/_api/web/lists/GetByTitle('Documents')/RootFolder/Files/add(overwrite=true,url='${fileName}')`;

  const options: ISPHttpClientOptions = {
    headers: { 'CONTENT-LENGTH': fileData.byteLength.toString() },
    body: fileData
  };

  // upload file
  const response = await this.context.spHttpClient.post(endpoint, SPHttpClient.configurations.v1, options);

  if (response.status === 200) {
    alert('File uploaded successfully');
  } else {
    throw new Error(`Error uploading file: ${response.statusText}`);
  }
}
Finally, call this method from our click handler on the button. Replace the // TODO 4 commend with the following code. It calls the new _uploadFile() method and passes in the file's contents and the name of the file:
// upload file
await this._uploadFile(fileData, fileName);
Test the web part
Start the local web server using the provided gulp serve task, but include the --nobrowser argument to just start the local server.
gulp serve --nobrowser
The SharePoint Framework's gulp serve task will build the project, start a local web server.
Open a browser and navigate to any SharePoint site in your tenant. Append the following to the end of the site's URL: /_layouts/workbench.aspx to navigate to the SharePoint-hosted workbench.
Select the web part icon button to open the list of available web parts and select the FileUpload web part.
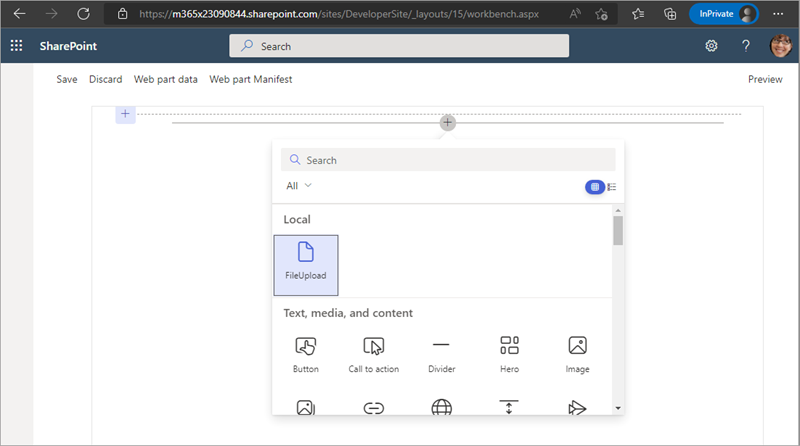
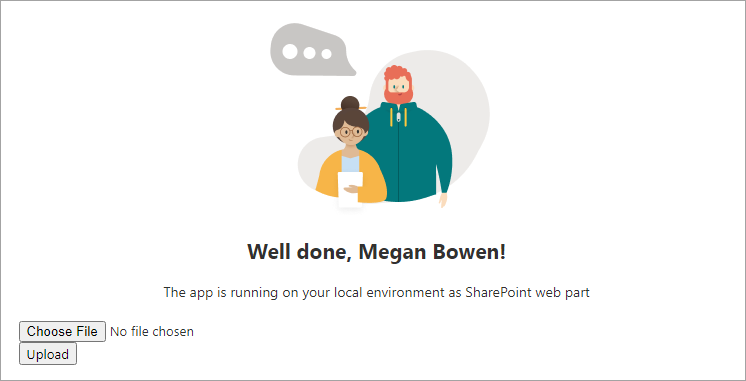
The web part will be rendered on the page, as shown in the following figure:
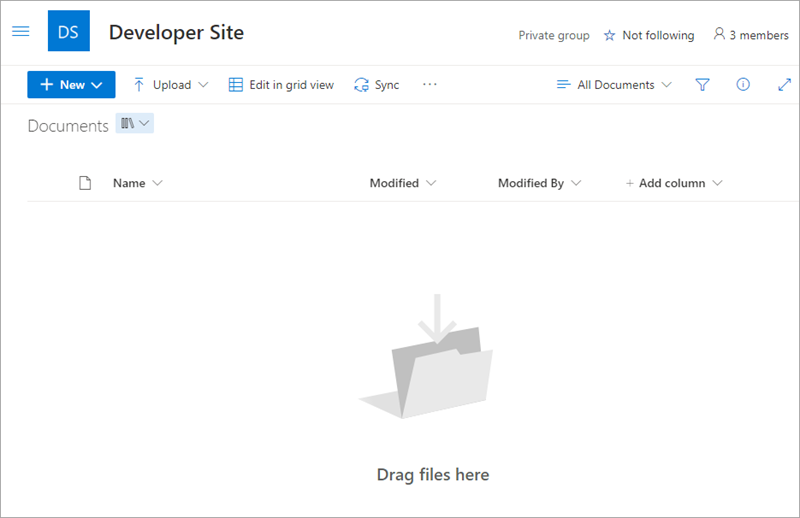
In another browser window/tab, navigate to the same site's Documents library. In this case, we can see nothing is in the library:
Go back to the browser window/tab that contains the web part.
Select the Choose File button and select a file from your computer, then select the Upload button. You should see an alert appear saying the file was uploaded.
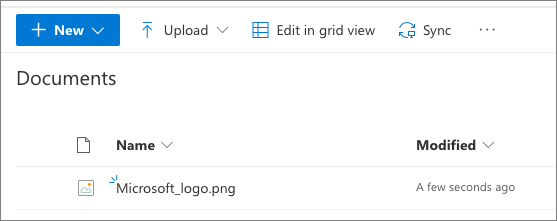
Finally, verify the file was uploaded by switching back to the browser window/tab with the Documents library. Refresh the page to see the file if it doesn't show automatically:
Close the browser and stop the local web server by pressing CTRL+C in the command prompt.
Summary
In this exercise, you created a new web part that someone can use to select a file to upload to the current site's Documents library.