Exercise - Deploy a web app by using deployment slots
When you're ready to swap two slots, make sure that you apply the correct configuration to the swapped slots.
Suppose you're finished testing version 2 of your social media web app. Now, you want to deploy that version to production. You want to further streamline deployment by automatically swapping future versions of the app.
Here, you learn how to swap manually and automatically.
Configure a slot setting
Before you deploy version 2 of the web app, configure a slot setting. The settings you configure here don't affect your demo app. The purpose of this exercise is just to see how the configurations work when you swap slots.
To configure slot settings:
From the All resources view in the Azure portal, go to the Overview page of the production slot of the web app.
Navigate to the Configuration pane for the deployment slot.
Select + New application setting. Add a new setting with the name ENVIRONMENT_NAME, and a value of production. Check the deployment slot setting box to make this setting a slot setting. Select OK.
Add another setting called APP_VERSION, and enter the value 1. Don't make this setting a slot setting. Select OK.
In the top menu bar, select Save, then select Continue.
Repeat the preceding steps on the staging slot, but use the following values:
Name Value Deployment slot setting ENVIRONMENT_NAME staging Yes APP_VERSION 2 No
Swap the slots
Now that you tested version 2 of the web app in the staging slot, you can deploy it by swapping the slots. Follow these steps:
To make sure you're configuring the production slot, select All resources, and then select the production slot of the web app.
In the left menu pane, under Deployment, select Deployment slots > Swap.
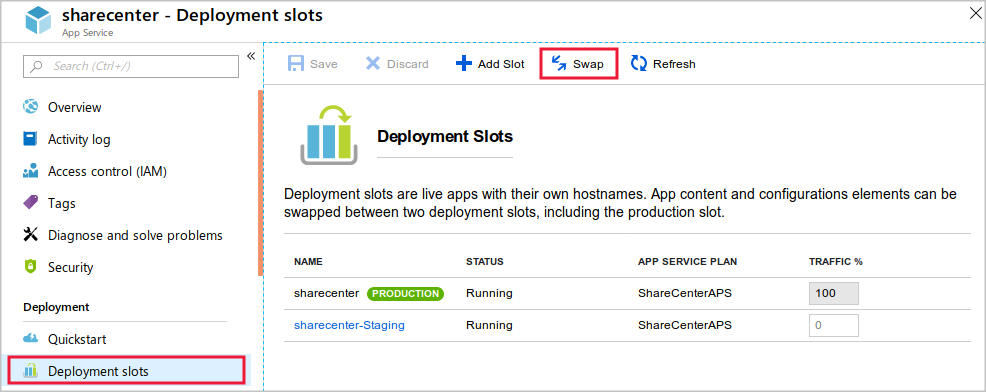
Make sure you're about to swap the staging and production slots. Notice how the swap is going to affect settings. The value of the APP_VERSION setting is going to be exchanged between the slots, but the value of the ENVIRONMENT slot setting isn't going to be swapped. Select Swap.

When the swap is complete, go to the Overview page of the production slot's web app, and select Browse. The web app appears on a new browser tab. Notice that version 2 of the web app is now in production.
Close the browser tab.
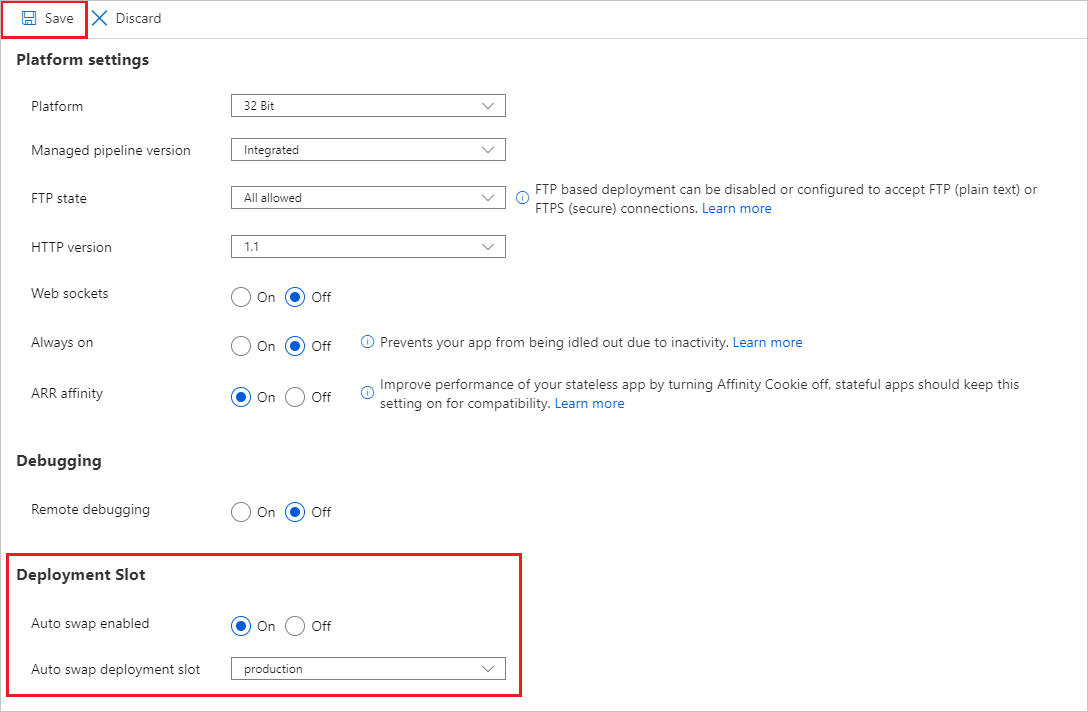
Configure auto swap for the staging slot
Now that you're using deployment slots, you can use the auto swap feature for your web app to enable continuous deployment. When auto swap is enabled, you can deploy new code to the staging slot and Azure automatically warms it up and deploys it to production by swapping the staging and production slots. To configure auto swap, follow these steps:
Go to the Configuration pane of the staging slot's web app and go to the General settings tab.
Set Auto swap enabled to On.
In the Auto swap deployment slot list, select production, then select Save and Continue.
Deploy new code and auto swap it into production
Now, you modify the code to create version 3 of the web app. When you deploy it to the staging slot, you can see an auto swap in action. Follow these steps:
On the right side of Cloud Shell, restart the editor if it's not already running.
cd ~/demoapp/app-service-web-dotnet-get-started/
code .
In the code editor, in the File list on the left, expand aspnet-get-started > Views > Home, and then select Index.cshtml.
Locate the following code.
<h1>Web App Version 2</h1>Replace that code with this code.
<h1>Web App Version 3</h1>To save your changes, press Ctrl+S.
In Cloud Shell, run the following commands. Enter your deployment password when you're prompted.
git add .
git commit -m "Third version of web app."
git push staging
Wait for the deployment to finish. Near the end of the text output, you see a message that indicates that the deployment requested an auto swap to the production slot.
In the Azure portal, go to the Overview page for the production slot's web app, and select Browse. The third version of the web app appears on a new browser tab. If the old version is shown, you might need to wait briefly and then refresh the page. The swap operation is atomic and occurs instantly, but it takes App Service a few moments to prepare the swap operation before running it.
Roll back the new version
Suppose that deploying version 3 of your app to production revealed an unexpected problem. To quickly resolve it, you can roll back to the previous version of the site by swapping the slots again.
Go to the Deployment slots pane of the production slot's web app.
Swap the staging and production slots.
When the swap finishes, on the Overview page, select Browse to view the app one last time. You can see that version 2 was redeployed to production.