Add prebuilt and custom connector tools to an agent
With the two integration paths established, the Woodgrove Bank IT operations maker is ready to configure both connector integrations for the IT service desk agent. This unit covers how to add both prebuilt and custom connector tools to your agent from the Copilot Studio interface.
Add a prebuilt connector tool
From your agent in Copilot Studio, open the Tools tab and select Add a tool. From the tool type options, select Connector. Copilot Studio opens the connector gallery, where you can browse or search available connectors.
For the Woodgrove Bank IT service desk agent, the maker searches for the Microsoft Dataverse connector and selects the relevant action for submitting a service request, such as Add a new row.
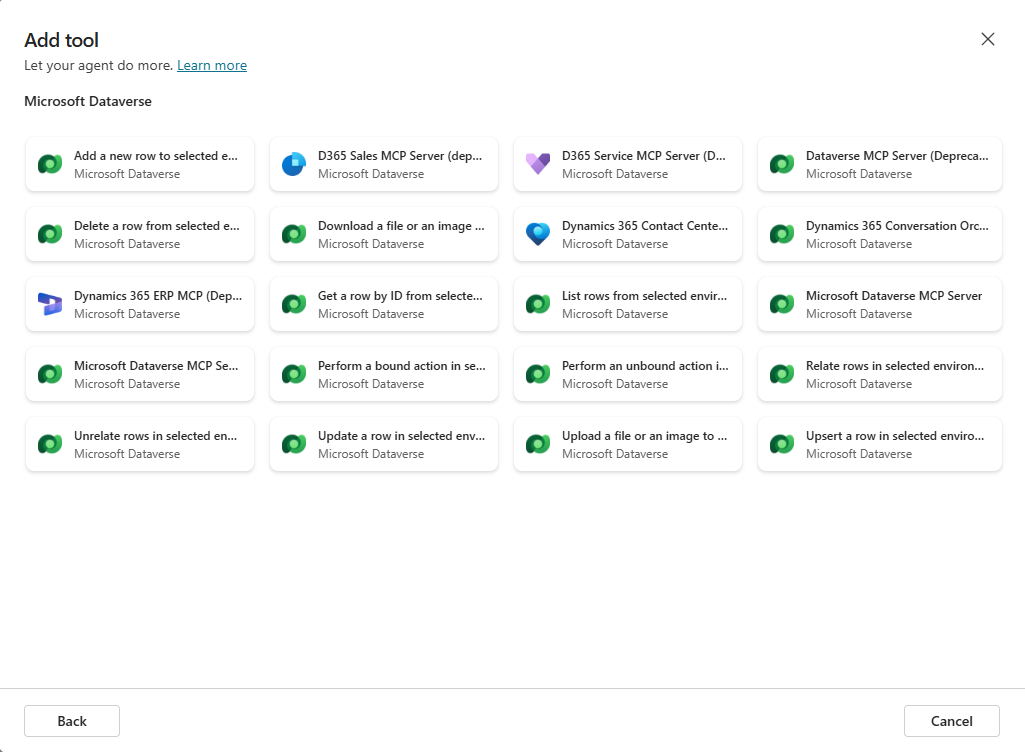
After you select an action, Copilot Studio prompts you to configure a connection if one doesn't already exist in the environment.
Set up a connection
Connections store the credentials the agent uses to communicate with the external service. When no connection exists yet for a selected connector, Copilot Studio walks you through creating one. Depending on the connector, this may involve signing in with your Microsoft account, providing an API key, or entering connection-specific credentials.
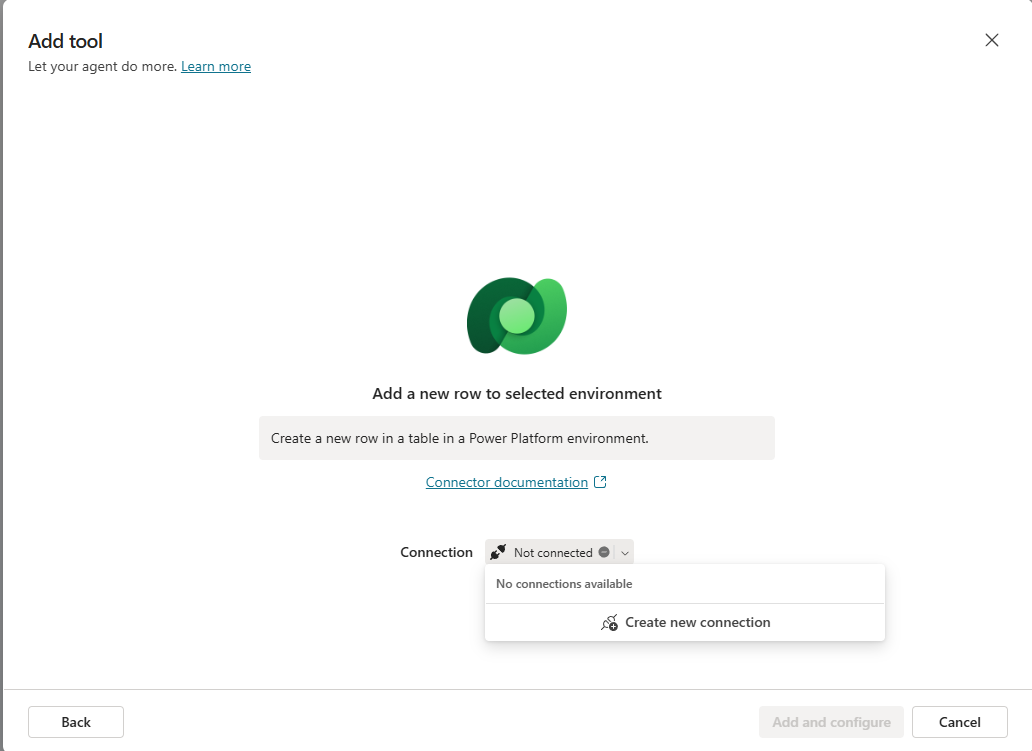
If a connection already exists in your environment for that connector, select it from the list rather than creating a new one. This is common in team environments where a shared connection has already been established.
Important
Standard connectors are available on all Copilot Studio plans. Premium connectors require a premium Copilot Studio license. If your plan doesn't include premium access, Copilot Studio displays a licensing prompt when you attempt to add a premium connector. Verify your plan before designing your agent around connectors that require a premium license.
Configure the tool
After you add the connector action, Copilot Studio opens the tool configuration page. Review and update the following fields:
- Name: A short, descriptive label for the tool. This name appears in logs and helps you identify the tool in the Tools registry.
- Description: A natural-language explanation of what the tool does and when the agent should use it. The generative orchestrator reads this field at runtime to determine whether to invoke the tool. Write it to match the kinds of requests users will make.
- Inputs: Copilot Studio sets inputs to Dynamically fill with AI by default, which means the orchestrator populates input values dynamically from conversation context. Override this by setting the input to a custom value, a variable, or a Power Fx formula when the input should remain constant or come from a known source.
A well-written description is the most important configuration decision for a connector tool. For example, a description like "Use this tool to submit IT service requests to Woodgrove Bank's IT service management system, including new incident reports and hardware replacement requests" gives the orchestrator enough context to invoke the tool when users ask to open a ticket or report an issue. A generic description like "Creates records in Dynamics 365" won't reliably trigger the right invocations.
Add a custom connector tool
Note
This content covers adding an existing custom connector as an agent tool. To create a custom connector, reference Create a custom connector from an OpenAPI definition.
Adding an existing custom connector follows the same workflow as prebuilt connectors. Custom connectors created in the Power Apps maker portal appear in the same connector gallery alongside prebuilt connectors.
Before selecting a custom connector, confirm that it has been shared with the appropriate users. For an agent to use a custom connector, other makers must have the connector shared with them using Can view (or Can edit) permission. This is a step that makers often configure separately from the Copilot Studio authoring workflow and can easily be missed.
To check or update sharing:
- Open the Power Apps maker portal at
make.powerapps.com. - Navigate to Data > Custom connectors.
- Select the ellipsis (...) button next to the connector you want to share, then choose Invite another user.
- On the Share tab, add the appropriate users or groups and assign Can view or Can edit permission, then select Save.
After permissions are confirmed, the workflow in Copilot Studio is identical to adding a prebuilt connector. Select the connector from the gallery, choose the action to expose as a tool, create or select a connection, and configure the tool name, description, and inputs.
For the Woodgrove Bank scenario, the bank's IT team previously built a custom connector for their internal configuration management database (CMDB), which tracks hardware inventory, network device records, and software installations. The maker adds this custom connector from the gallery, selects the Get configuration item action, and writes this tool description: "Use this tool to retrieve hardware and software configuration records from Woodgrove Bank's CMDB, including device specifications, network assignments, and installation history."
Agent-level tools vs. topic-level connector calls
The workflow above adds connector tools at the agent level, making them available to the generative orchestrator for automatic invocation across all conversations. This is the recommended approach for most connector integrations where the agent should decide when to use the tool based on the user's request.
You can also add connector calls within individual topic nodes for deterministic execution. Topic-level connector calls give you explicit control over when and how a connector is invoked, independent of orchestration decisions. This suits scenarios where the exact trigger condition and connector parameters are predefined and shouldn't vary based on user phrasing.
For the Woodgrove Bank IT service desk agent, both connector integrations fit the agent-level model. The orchestrator determines when to submit a service request or retrieve configuration records based on what the employee asks.