Add a REST API tool using an OpenAPI specification
When no prebuilt or custom connector exists for a target API, and the scope of use doesn't justify building a full custom connector, a REST API tool is likely the right starting point. The Woodgrove Bank employee portal API fits this scenario: it exposes a well-documented REST API with an OpenAPI specification, no connector has been built for it, and only the IT service desk agent requires access.
Note
REST API tools are currently in preview and aren't suited for production use. Configuration options and behavior may change before general availability.
Upload an OpenAPI specification
To create a new REST API tool for your agent in Copilot Studio, open the Tools tab and select Add a tool. Select New tool, then REST API. Copilot Studio prompts you to upload your OpenAPI specification file.
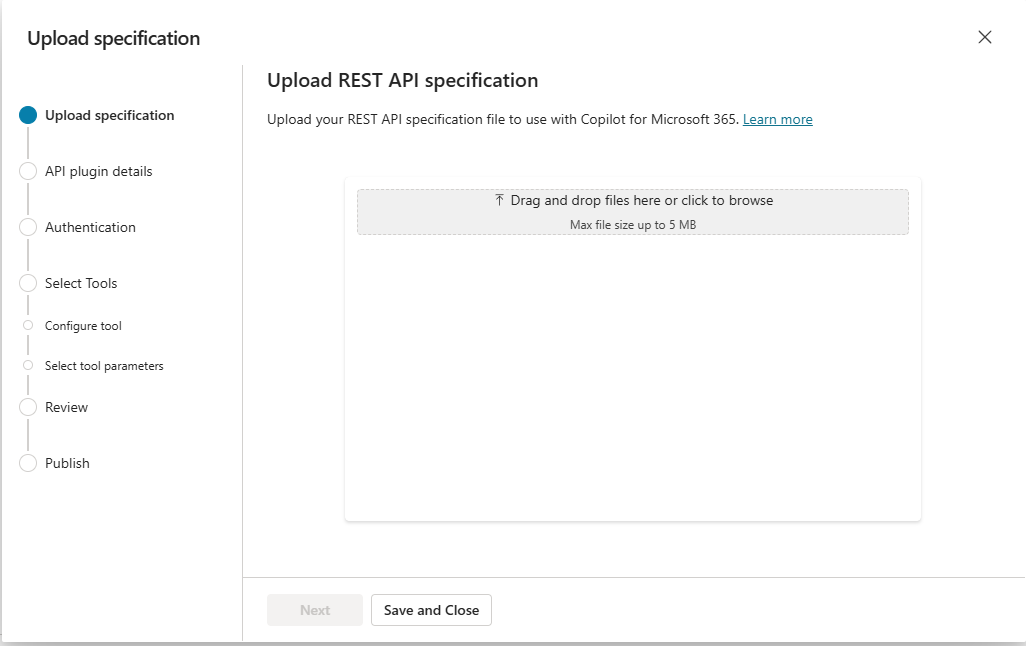
REST API tools require an OpenAPI v2 (Swagger) specification in JSON format. If your specification is in OpenAPI v3, Copilot Studio automatically converts it to v2 during upload. After the file is processed, Copilot Studio reads the spec and prepopulates the tool description from the info object defined in the specification.
Write an effective tool description
The auto-populated description is rarely specific enough for generative orchestration. Copilot Studio reads your tool's description at runtime to decide whether to invoke it for a given user request. A description that's too generic leads to missed invocations or the wrong tool being selected.
Compare these two descriptions for the Woodgrove Bank employee portal API:
Generic (insufficient): "A service for employee management."
Specific (effective): "Queries Woodgrove Bank's employee portal. Use this tool to look up employee IT profiles, including assigned devices, access permissions, and account details."
The effective description includes what the tool does, what domain or system it connects to, and enough synonyms that the orchestrator can match it to variations in how users phrase their requests. Write the description from the perspective of a user query, not from the perspective of the API's technical function.
Effective descriptions typically include:
- What the tool does and what system it connects to
- The specific data types or operations it handles
- Synonyms for the main concepts users might use when asking
Assign a solution and configure authentication
After refining the description, assign the tool to a solution. Solutions group related components in your Power Platform environment and make your tools easier to manage across environments.
Next, configure authentication. Copilot Studio supports three authentication options for REST API tools:
None: The API is openly accessible without credentials. Select this only for APIs that don't require authentication.
API key: The API authenticates using a key passed in the request. Configure three fields: the Parameter label (the display name shown to users when they're prompted to enter the key), the Parameter name (the actual header or query parameter name the API expects), and the Parameter location (Header or Query). Users are prompted to provide the API key the first time the tool is invoked in a conversation.
OAuth 2.0: The API authenticates through an identity provider.
For OAuth 2.0 authentication, you configure the following fields:
| Field | Description |
|---|---|
| Client ID | Application credential from your identity provider |
| Client secret | Secret credential from your identity provider |
| Authorization URL | The identity provider's authorization endpoint |
| Token URL | The endpoint used to exchange the authorization code for a token |
| Refresh URL | The endpoint for refreshing expired tokens (optional) |
| Scopes | The specific permission scopes required for the API (optional) |
| Which Microsoft 365 organization accesses the endpoints | Limits access to the maker's organization only, or any Microsoft 365 organization |
| Which app (client) can use the endpoints | GUID identifying which client application is permitted to access the API |
For the Woodgrove Bank employee portal API, the API uses an API key passed in a request header. The maker enters the parameter name the API expects (for example, x-api-key) and selects Header as the parameter location.
Select endpoints and HTTP methods
After you configure authentication, Copilot Studio prompts you to select which endpoints and HTTP methods from the uploaded spec to expose as tool actions.
Not all endpoints in the specification need to be added. The Woodgrove Bank employee portal spec may define 12 or more endpoints covering every aspect of employee data management. The IT service desk agent only needs two: retrieving an employee's IT profile and retrieving their assigned devices and software licenses. Selecting only those two endpoints keeps the tool surface area minimal and prevents the orchestrator from encountering too many overlapping options when deciding which action to call.
For each endpoint you select, review the auto-generated action name and description. These are the fields the orchestrator uses when deciding which specific action within the tool to call. Apply the same description quality principles: make the action-level description specific to the operation and the data it returns. A description like "Returns the IT profile for a specified employee, including assigned devices, software licenses, and access permissions" is far more useful than "Gets employee data."
Tip
Select only the endpoints your agent's use cases require. A smaller, focused tool surface area improves orchestration accuracy and limits unintended access to the API.
Try it yourself: If you have an OpenAPI specification for any API your team uses, upload it to a test agent in Copilot Studio. Review the auto-generated tool description that populates from the spec. Is it specific enough for a generative orchestrator to match it to realistic user requests? Rewrite it using the principles in this unit and compare the two versions side by side.