Exercise - Create Azure resources to host a Teams tab app
In this exercise, you'll first create and provision a Teams tab app by using Teams Toolkit for Visual Studio Code. In a later exercise, you'll set up the app to be hosted in Azure.
Note
The exercises in this training module use Teams Toolkit v5.0.0. The following steps begin with the Teams Toolkit extension installed.
Create a new tab app
In Visual Studio Code, on the Activity Bar, select the Microsoft Teams icon.
On the Teams Toolkit panel, select the Create a New App button.
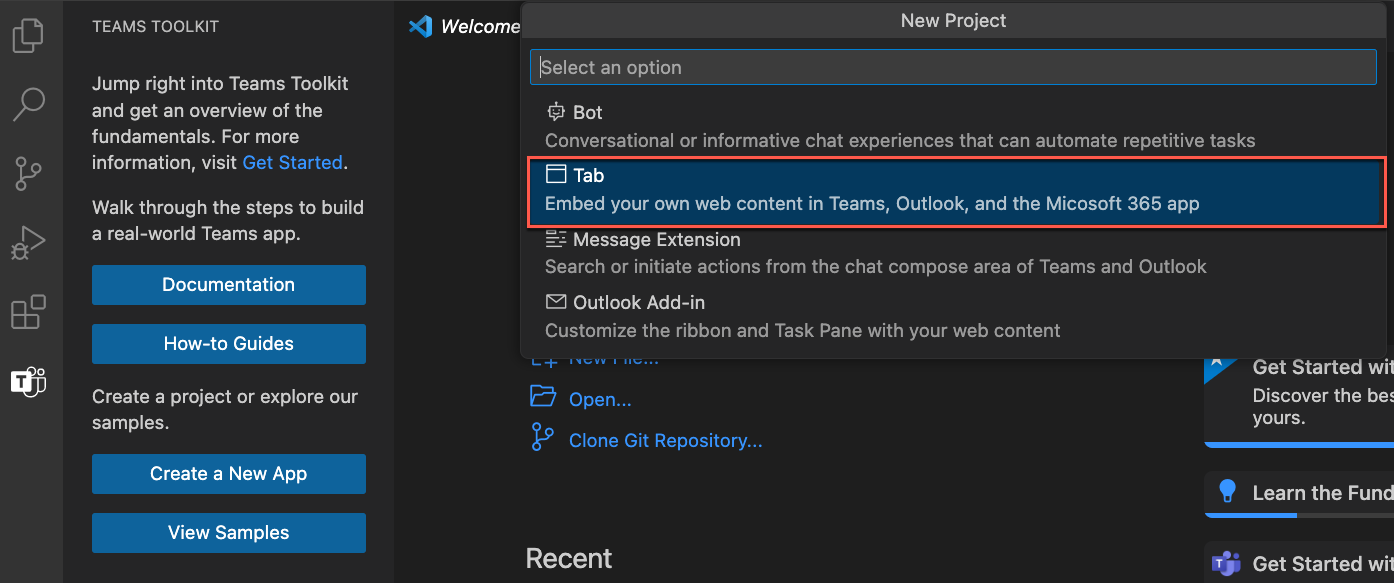
From the options, select Tab.
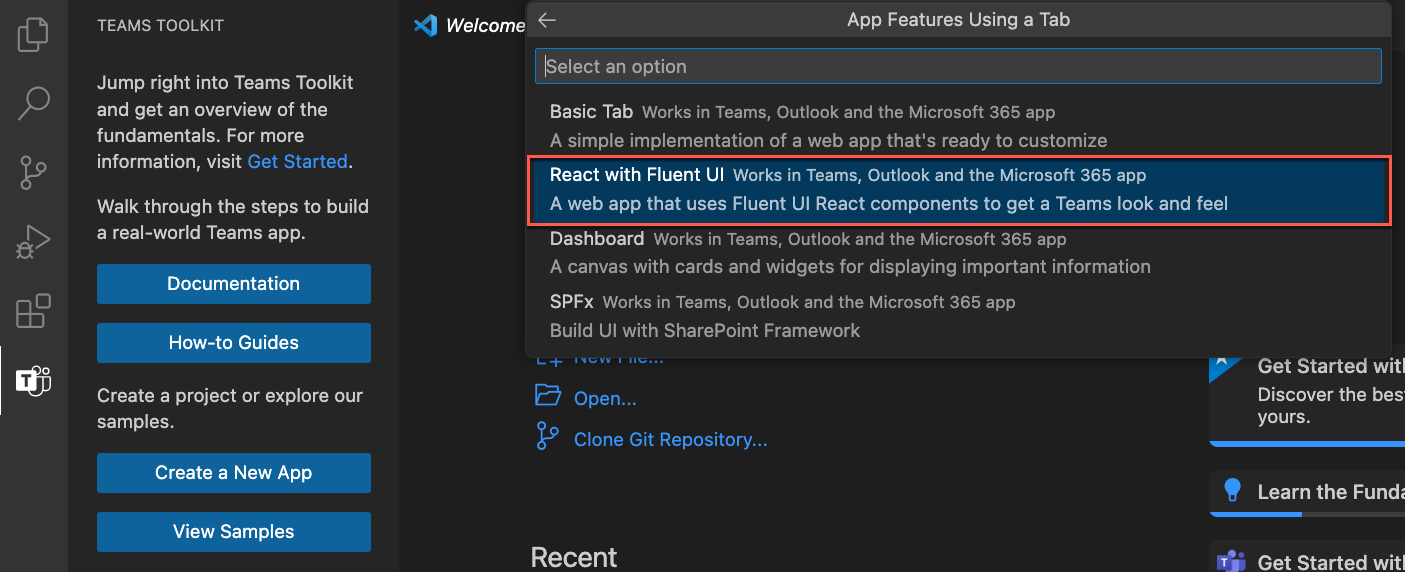
Next, select React with Fluent UI.
From the options for the programming language, select JavaScript.
Select a location for the tab app project folder and all its files.
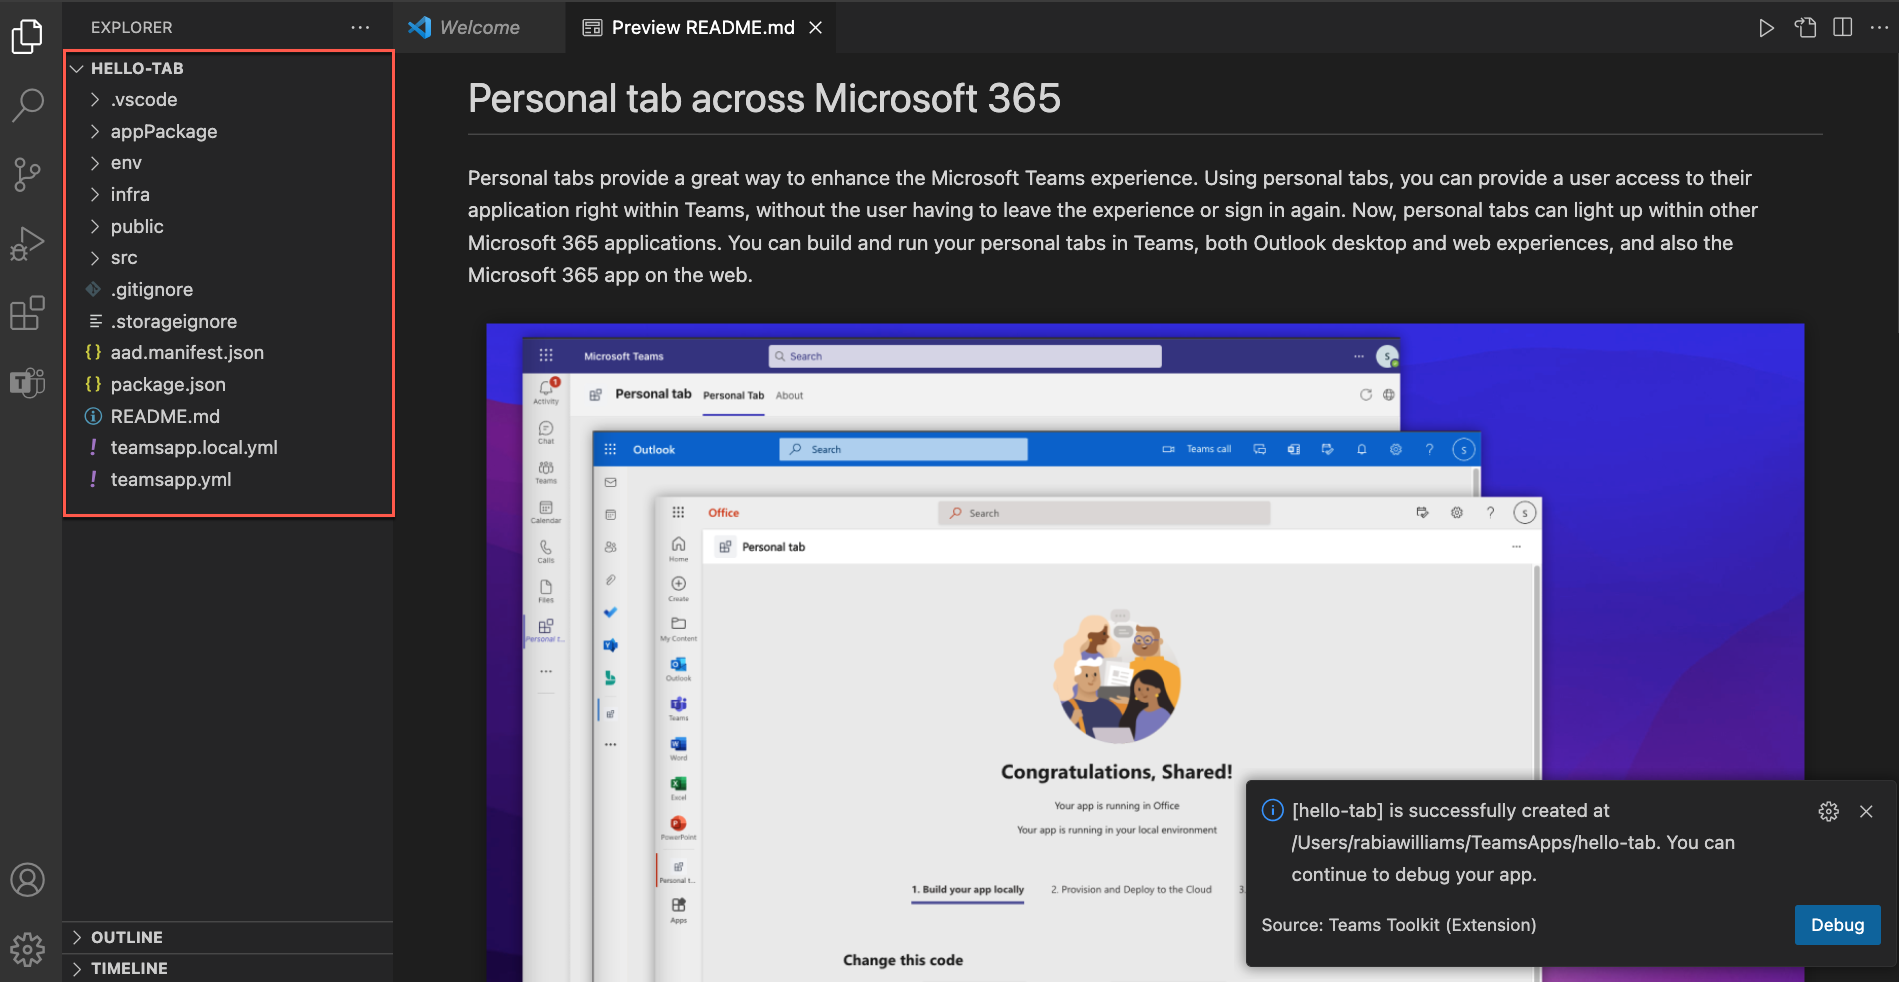
For the application name, enter hello-tab and select Enter.
Project scaffolding begins. When the project is scaffolded, a new Visual Studio Code window opens with the new project loaded.
In Visual Studio Code, select Run > Start debugging or select the F5 key to start the debug session.
Visual Studio Code builds and starts the application. Run the debug session before you begin to provision any Azure resources.
When the app is tested successfully, stop running the app locally.
To end the debug session and stop running the app, you can either close the browser, select Run > Stop Debugging, or select Shift+F5.
Sign in to Azure in Teams Toolkit
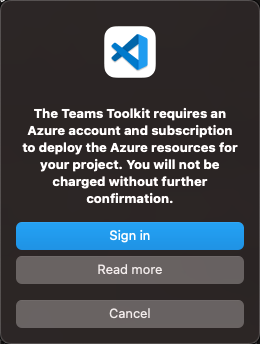
Next, on the Teams Toolkit panel, sign in to Azure.
On the Activity Bar, select the Microsoft Teams icon.
On the Teams Toolkit panel, under Accounts, select Sign in to Azure.
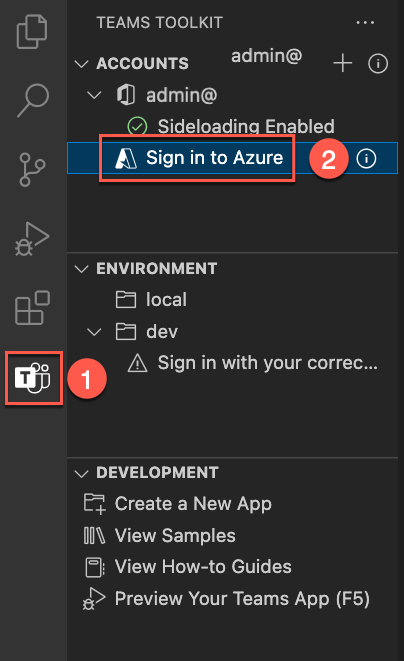
In the dialog that appears, select Sign in.
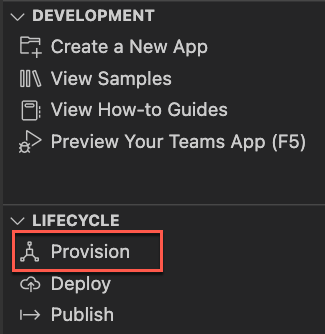
Provision the resources
Now you can provision the resources your Teams tab app needs.
On the Teams Toolkit panel, under Lifecycle, select Provision.
Next, you need to select a resource group where you can provision the resources. Create a new resource group by selecting the New resource group option on the Select a resource group menu.
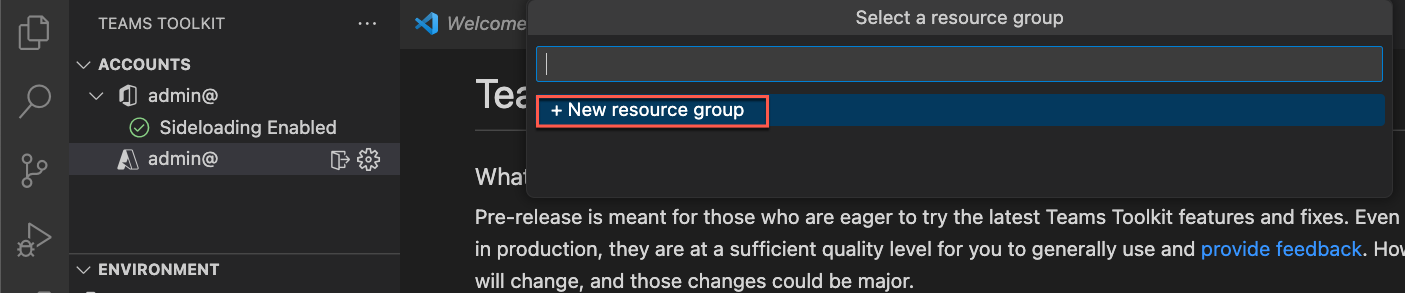
The tool automatically suggests the resource group name like rg-hello-tab0989fd-dev. Select Enter.
Next, select the location East US for the new resource group and select Enter.
In a dialog to confirm your selection, select Provision.
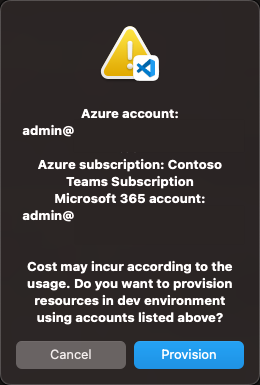
Provisioning begins for all the resources you need to host the Teams tab app in Azure. Provisioning might take a while.
You've now successfully provisioned all the resources you need to host the Teams tab application.
Next, you'll deploy the source code of your app to these resources.