Exercise - Event log transformation
To make your data more useful and easier to understand, you might need to perform other transformations. Steps that you might need to complete include:
Rename columns for clarity and consistency.
Filter out irrelevant activities from the dataset.
Change column types.
Replace values.
Objectives
Your learning objectives for this exercise are to:
Review and prepare data.
Change column types and rename columns.
Filter rows.
Replace values.
Rename steps.
Required fields
For process mining to analyze your event logs, the following fields are required: Case ID, Activity, and Event Start.
Prepare data and load
You receive a dataset in CSV format. You want to review the data, make sure that the dataset includes all required fields, and then create the process.
High-level steps: Prepare data and load
Try to perform the following high-level steps to complete this exercise. If you get stuck, go to the step-by-step section and follow those instructions instead.
Open and check the dataset.
If necessary, use the Text to Columns tool of Microsoft Excel to make the data easier to read.
Ensure that the dataset includes all required columns.
Identify the columns that you want to include in the process mining.
Save the dataset as CSV.
Create the process and then load the dataset.
Step by step: Prepare data and load
This section provides more in-depth guidance for the preceding high-level steps.
Task: Review the dataset
To review the dataset, follow these steps:
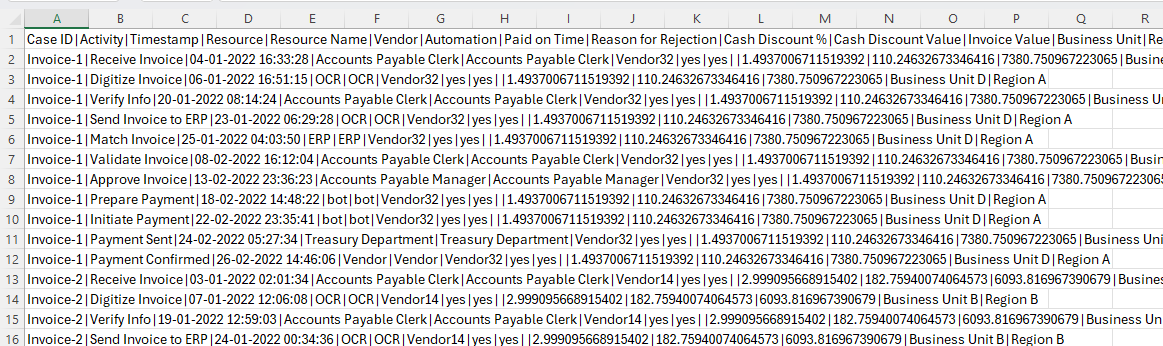
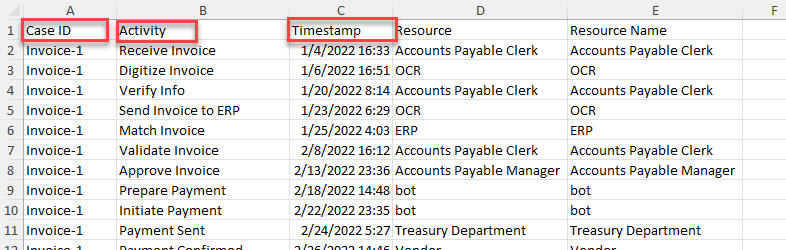
Locate and open the AP_EV_LAB_Transform.csv file.
The data in the file should resemble the following image.
Note
A vertical bar (|) separates the data, making it difficult to read. Use the Text to Columns feature of Excel to make the data easier to read.
Select the Data tab.
All data for each row is in one cell. Select all rows, including the header, and then select the Text to Columns tool.
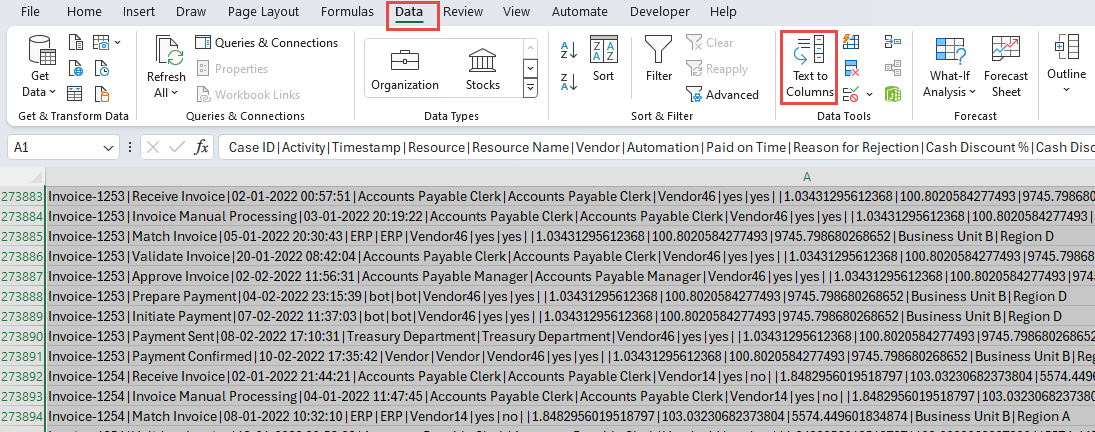
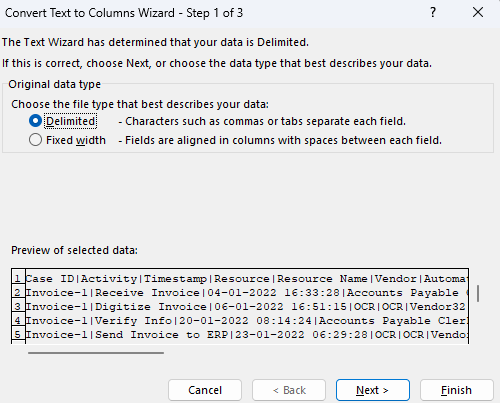
Select Delimited and then select Next.
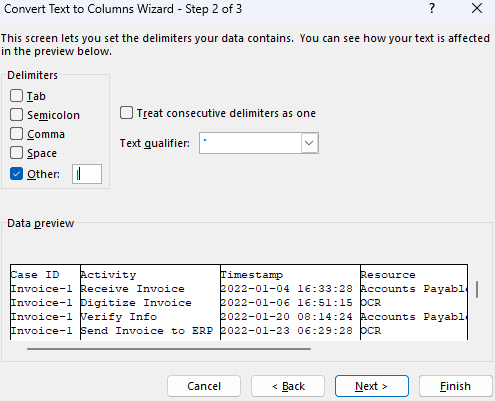
Select Other, enter the vertical bar (|) character, and then select Next.
Select Finish.
The data should now be easier to read.
Check if the required fields are present.
Identify other fields that you want to map for the process mining.
Optionally, you can take notes on what fields to use. After you finish inspecting the data, select File and then select Save As.
Save the file as CSV format and then give it an appropriate name.

Close the file.


Task: Create the process and load data
In this next task, you create the process and load data by following these steps:
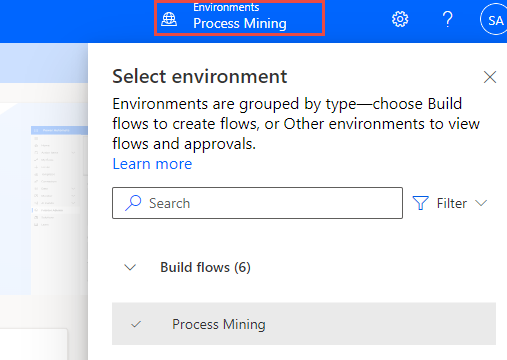
Go to Microsoft Power Automate and select the correct environment.
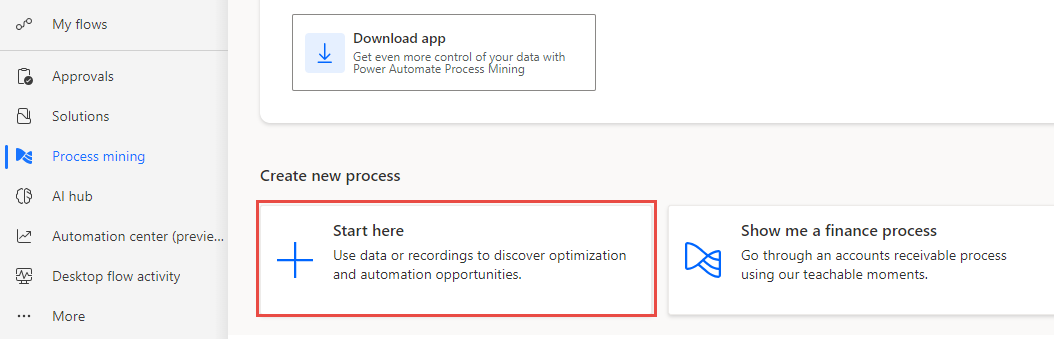
Select Process mining from the left pane and then select + Start here.
Enter Normalize PM for the Process name, select Import Data for the Data source, select Dataflow, and then select Continue.

Select Skip if the system prompts you to add Microsoft Power BI Workspace.
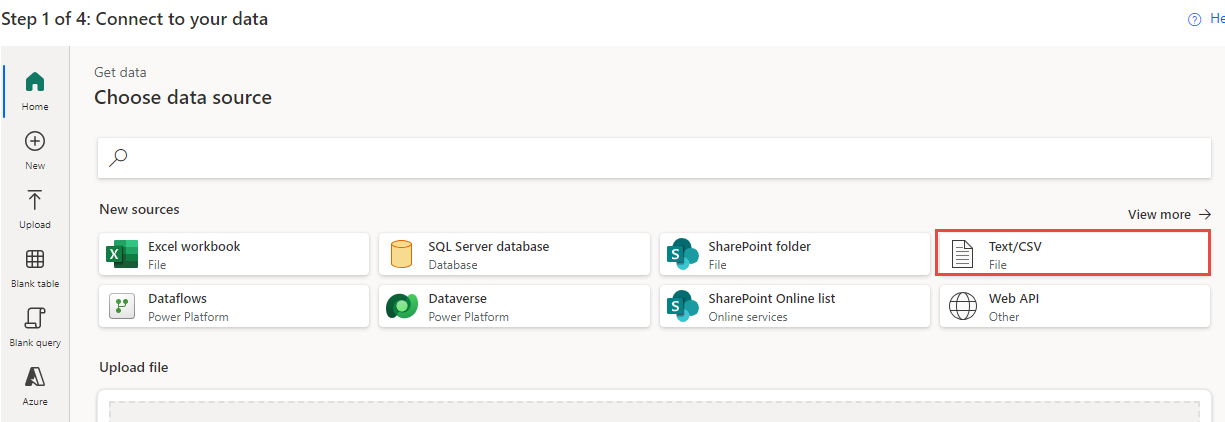
Select Text/CSV as the data source.
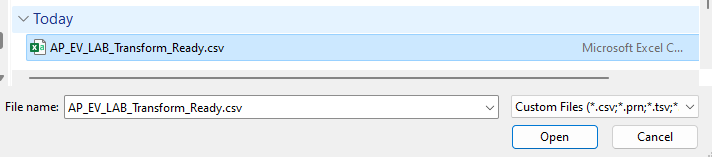
Select Upload file and then select the Browse button.
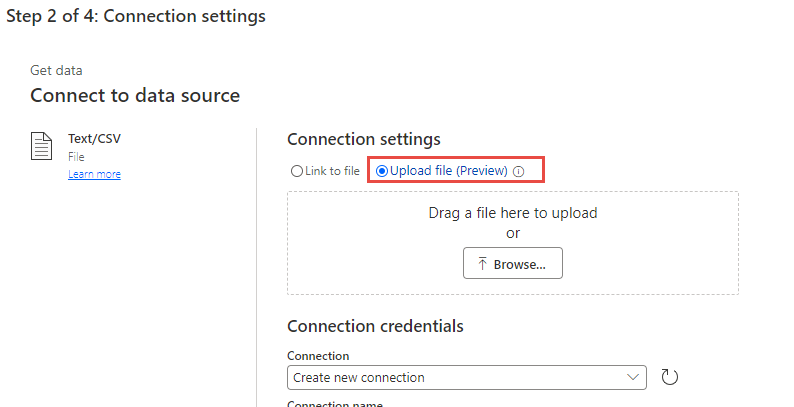
Select your created CSV file and then select Open.
If you're not signed in, select the Sign in button and provide your credentials.
Select Next.
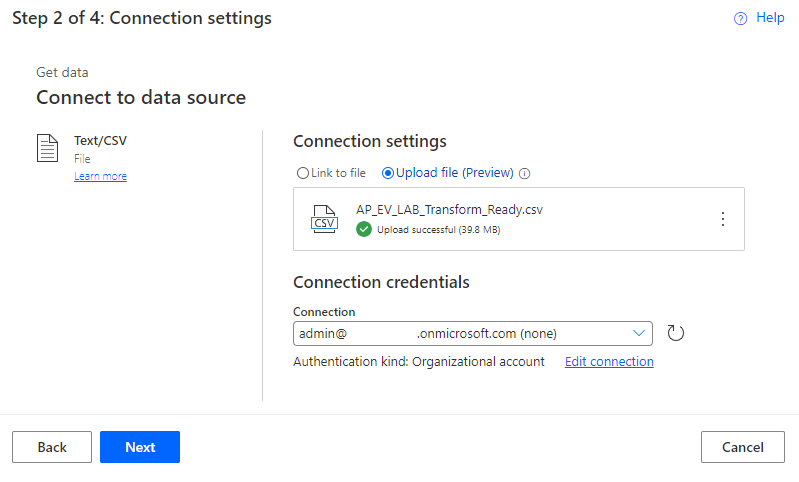
A preview of the data should display. Select Next.

The system should advance you to the Transform stage.
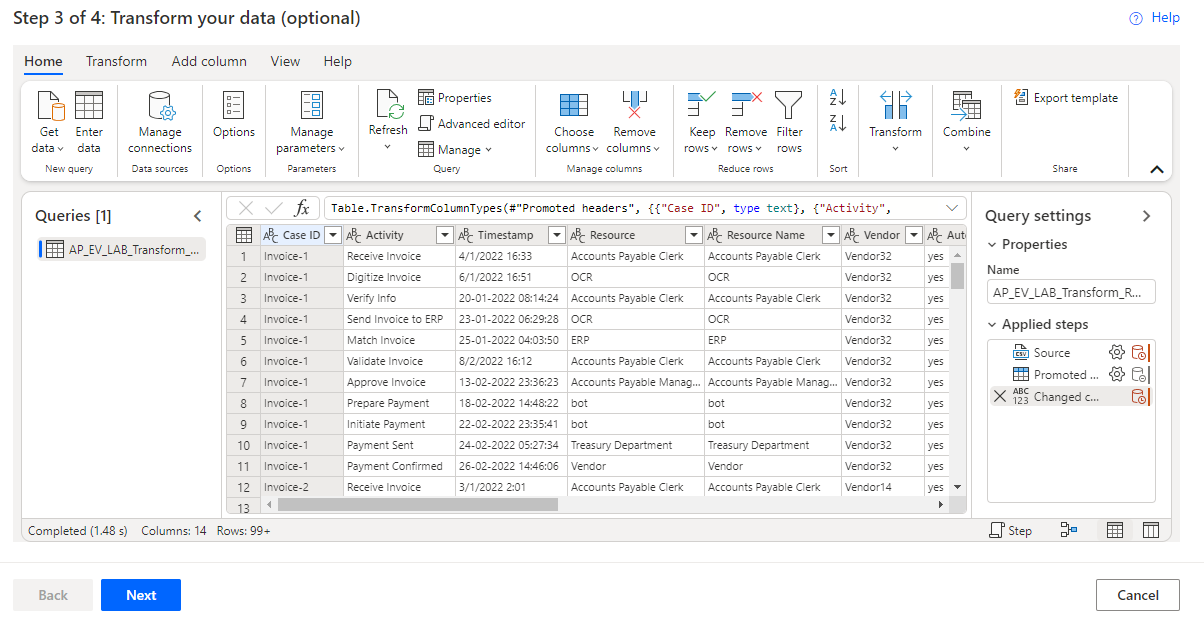
Don't navigate away from this page.


Change the column type and rename
After loading the data into your process, you discover that the data in the Timestamp column should read England (Europe) Date/Time. As a result, you decide to rename the column to Event Start.
High-level steps: Change the column type and rename
Try to perform the following high-level steps to complete this exercise. If you get stuck, go to the step-by-step section and follow those instructions instead.
To change the column type to Date/Time England (Europe), use the Change column type with locale tool from the Power Query Transform tab.
Rename the Timestamp column to Event Start.
Step by step: Change the column type and rename
This section provides more in-depth guidance for the preceding high-level steps.
Task: Change the column type and rename
To change the column type and rename it, follow these steps:
Select the Transform tab.
Select the Timestamp column header and then select the dropdown arrow next to Data type.
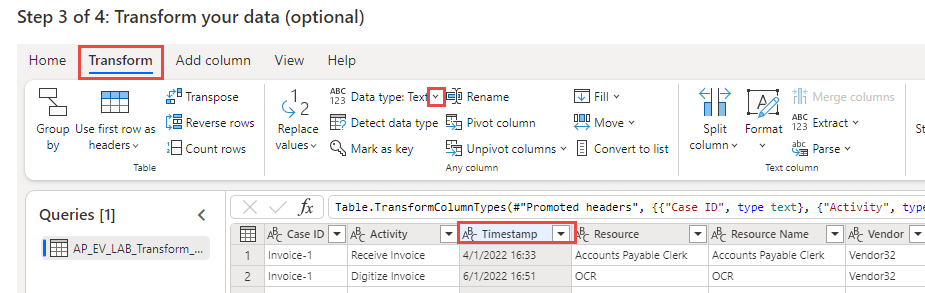
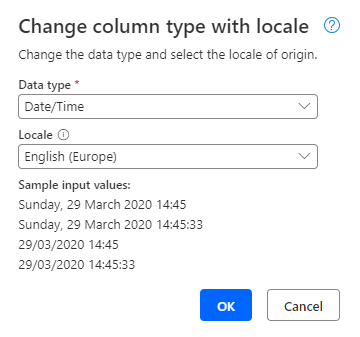
Select Using locale.

Select Date/Time for the Data type, select English (Europe) for the Locale, and then select OK.
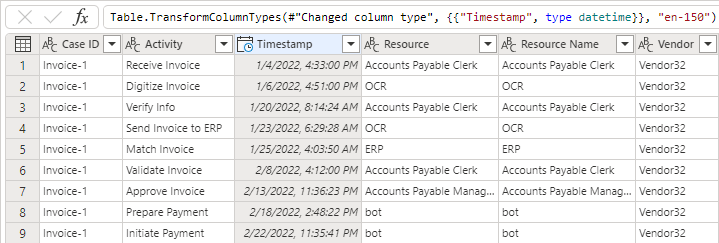
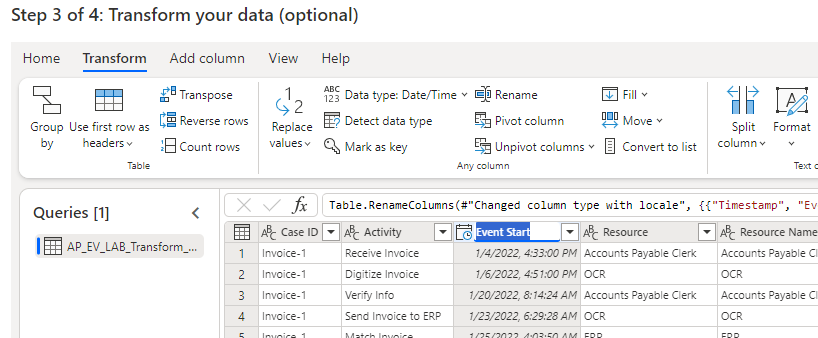
The Timestamp column should now resemble the following image.
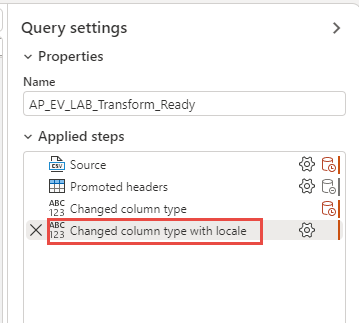
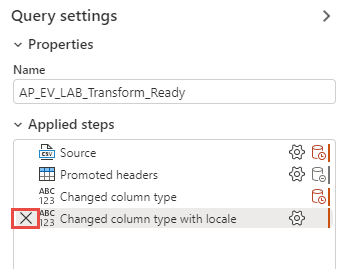
Your added step should appear on the Query settings properties. The steps include some that the system adds automatically. Double-click the Changed column type with locale step.
The Change column type with locale dialog should open. You can edit the step by changing the data type and/or locale. Select Cancel.
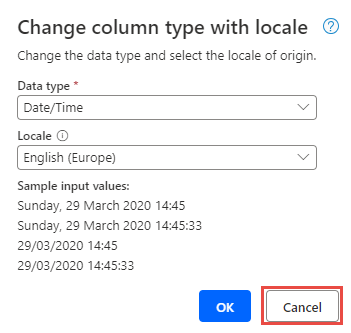
You can also delete the step by selecting the X button. Do not delete the step.
Double-click the Timestamp column header.
The column name should go into edit mode. Change the column name to Event Start.


The renamed column step should now show as added to the applied steps.

Filter row
Vendor8 is no longer on the preferred vendors list. After a review, you realize that data that relates to Vendor8 doesn't add value, so you decide to remove all activities associated with Vendor8.
High-level steps: Filter row
Try to perform the following high-level steps to complete this exercise. If you get stuck, go to the step-by-step section and follow those instructions instead.
Locate the vendor column.
Filter out all activities associated with Vendor8.
Step by step: Filter row
This section provides more in-depth guidance for the preceding high-level steps.
Task: Filter rows
To filter the rows, follow these steps:
Select the Transform tab.
Select the Vendor column and then select the dropdown menu next to the column header.
Locate and clear the Vendor8 checkbox.

Select OK.
The system should now filter out Vendor8 from the dataset. A Filtered rows step should now show in the Applied steps section.
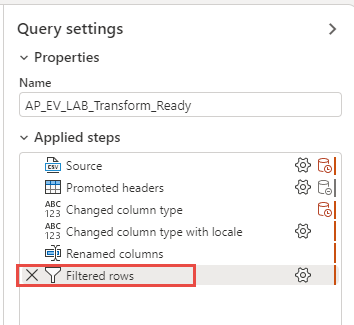


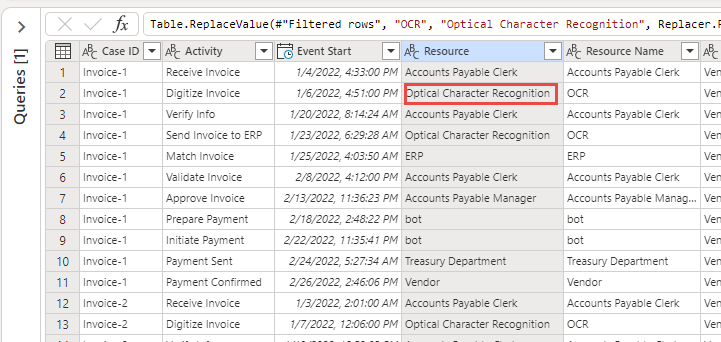
Replace values rows
While transforming the data, you find that the value OCR isn't clear enough. You decide to replace it with the more descriptive term Object Character Recognition instead.
High-level steps: Replace values rows
Try to perform the following high-level steps to complete this exercise. If you get stuck, go to the step-by-step section and follow those instructions instead.
Use the Replace values feature of Power Query to replace the OCR value of the Resource column with Object Character Recognition.
Use the Replace values feature of Power Query to replace the OCR value of the Resource Name column with Object Character Recognition.
Step by step: Replace values rows
This section provides more in-depth guidance for the preceding high-level steps.
Task: Replace value
To replace the value, follow these steps:
Select the Transform tab.
Select the Resource column. Go to the ribbon, select Replace values, and then select Replace values again.
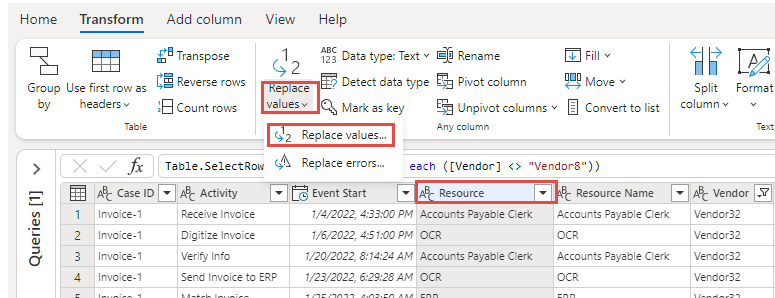
You can also right-click the Resource column header and then select Replace values.
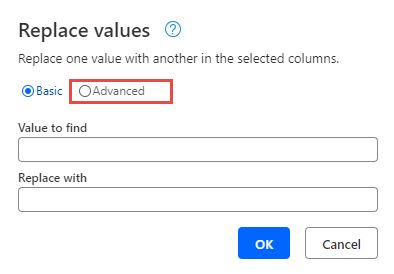
Select Advanced.
In the Value to find field, enter OCR. Enter Optical Character Recognition in the Replace with field, select the Match entire cell contents checkbox, and then select OK.
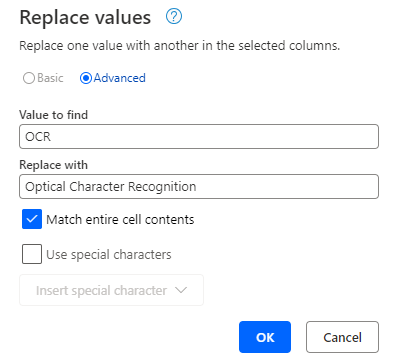
The Resource column should now show the OCR value replaced with Optical Character Recognition.
Right-click the Resource Name column header and then select Replace values.
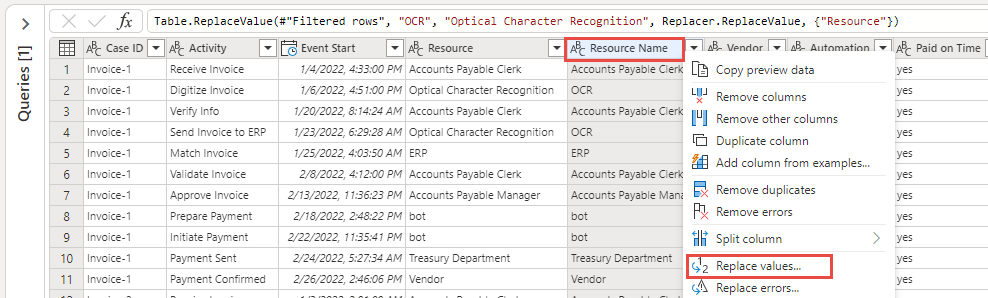
Select the Advanced option.
In the Value to find field, enter OCR. Enter Optical Character Recognition in the Replace with field, check the Match entire cell contents checkbox, and then select OK.
The Resource Name column should now show the OCR value replaced with Optical Character Recognition.
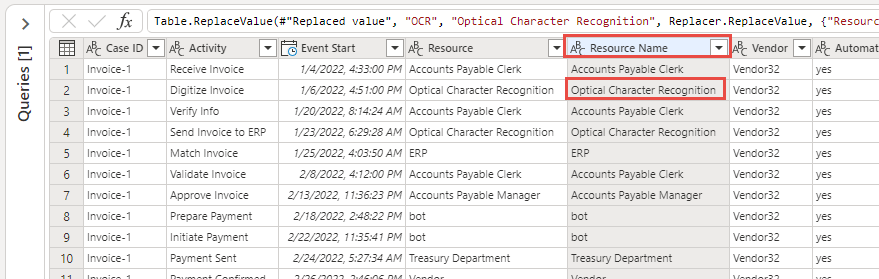


Two Replaced value steps should now show in the Applied steps section.
Rename steps
After completing your data transformation, you realize that the step names are too generic. As a result, you decide to rename them to more descriptive names.
High-level steps: Rename steps
Try to perform the following high-level steps to complete this exercise. If you get stuck, go to the step-by-step section and follow those instructions instead.
Use the Rename step feature to rename the Replaced value step to Replace OCR Resource.
Use the Rename step feature to rename the Replaced value 1 step to Replace OCR Resource Name.
Use the Rename step feature to rename the rest of the steps that you previously added.
Step by step: Rename steps
This section provides more in-depth guidance for the preceding high-level steps.
Task: Rename steps
To rename the steps, follow this procedure:
Go to the Applied steps section and right-click the Replaced value step.
Select Rename.
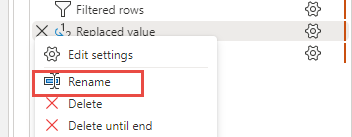
Rename the step to Replace OCR Resource.
The step name is now Replace OCR Resource. Select the Diagram view button.
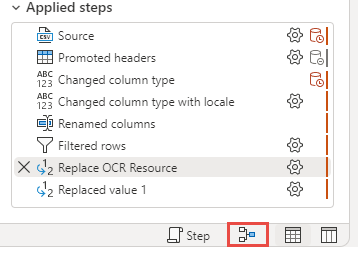
A diagram view of the applied steps should display. Right-click the Replaced value 1 step and then select Rename.
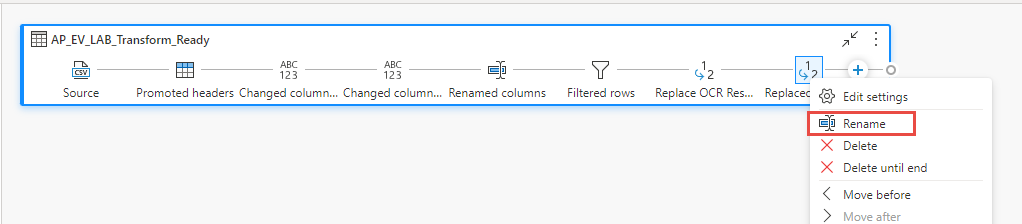
Rename the step to Replace OCR Resource Name.
To exit the diagram view, select the Diagram view button again.
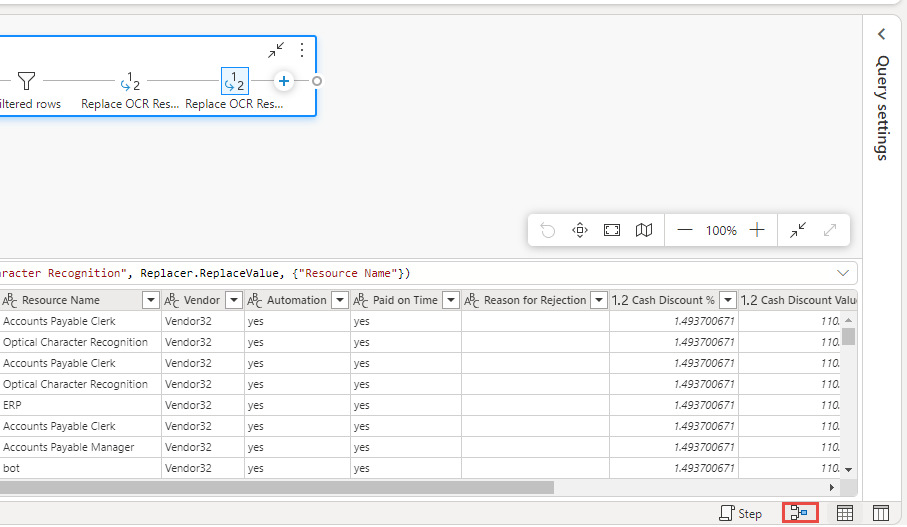
Expand the Query settings pane.
Optionally, you can rename the rest of the steps that you previously added.
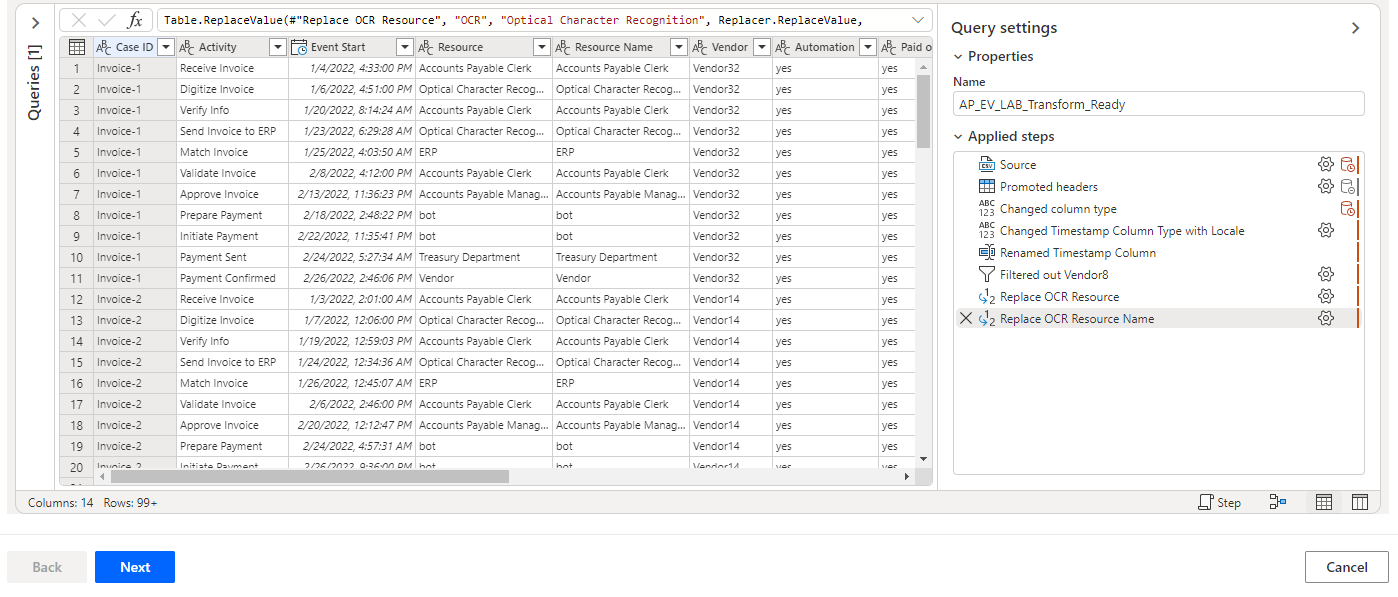
The applied steps should now resemble the following image. Select Next.


Map attributes
In this final task, you map the required attributes.
Map the required attributes as shown in the following table.
Attribute name Attribute type Case ID Case ID Activity Activity Event Start Event Start 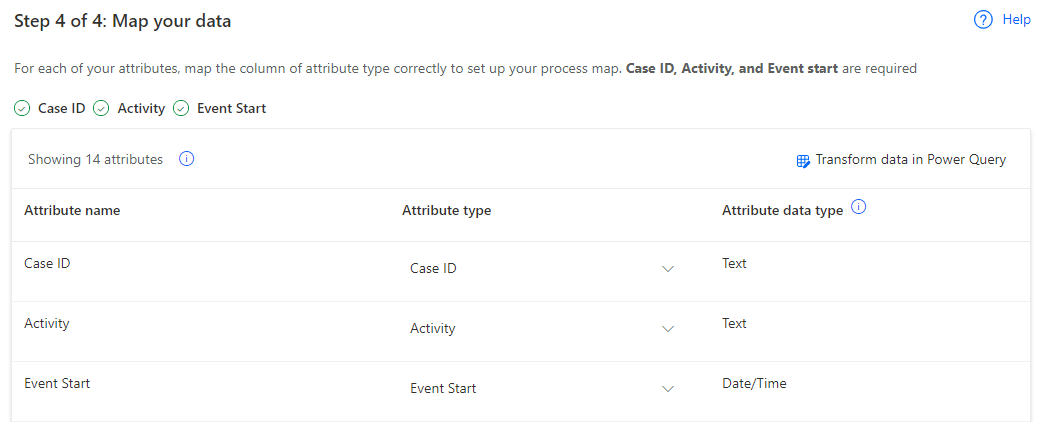
Map the rest of the attributes as shown in the following table.
Attribute name Attribute type Resource Resource Resource Name Event Level Attribute Vendor Case Level Attribute (first event) Automation Case Level Attribute (first event) Paid on Time Case Level Attribute (first event) Reason for Rejection Case Level Attribute (first event) Cash Discount % Case Level Attribute (first event) Cash Discount Value Financial per Case (first event) Invoice Value Financial per Case (first event) Business Unit Case Level Attribute (first event) Region Case Level Attribute (first event) 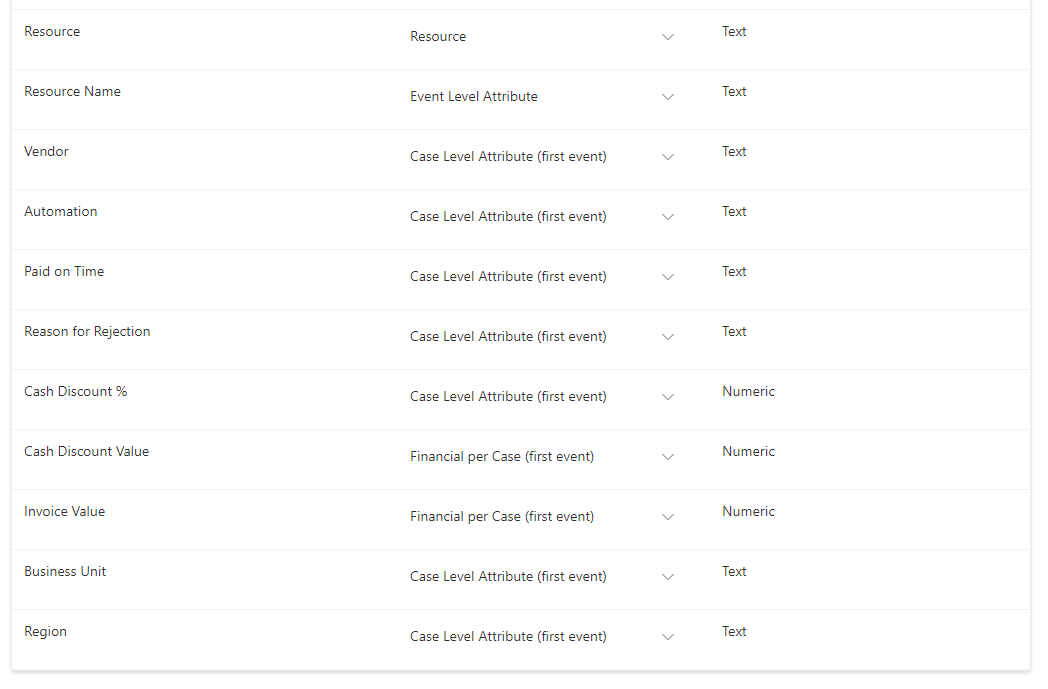
Select Save and analyze and then wait for the system to complete the mapping.


The overview of the process should resemble the following image.
