Exercise - Troubleshooting Azure NetApp Files
In this exercise, you perform actions to troubleshoot.
Task 1: Use diagnose and solve problem tool
In this task, you use Azure diagnose and solve problems tool to troubleshoot issues of Azure NetApp Files.
From the Azure portal, select Diagnose and solve problems from the left navigation pane.
From the Diagnose and solve problems page, select the problem type.
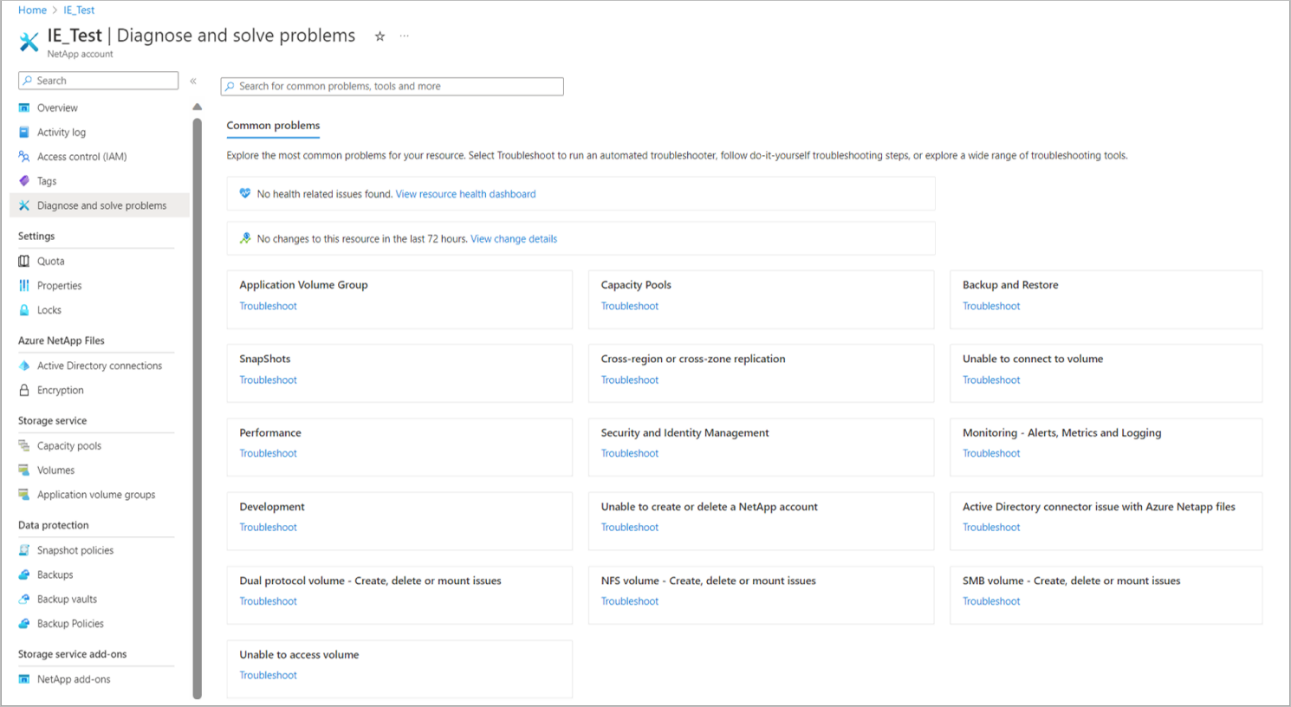
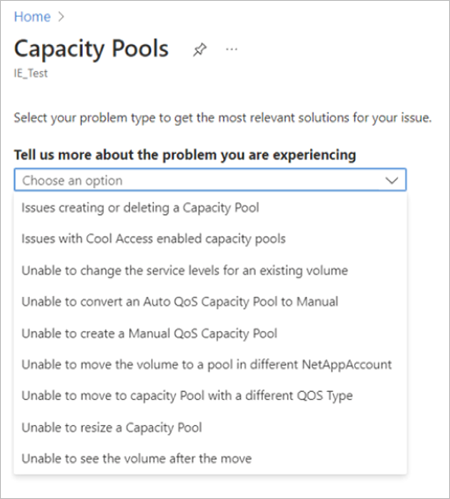
After specifying the problem type, select an option (problem subtype) from the pull-down menu to describe the specific problem you're experiencing. Then follow the on-screen directions to troubleshoot the problem.
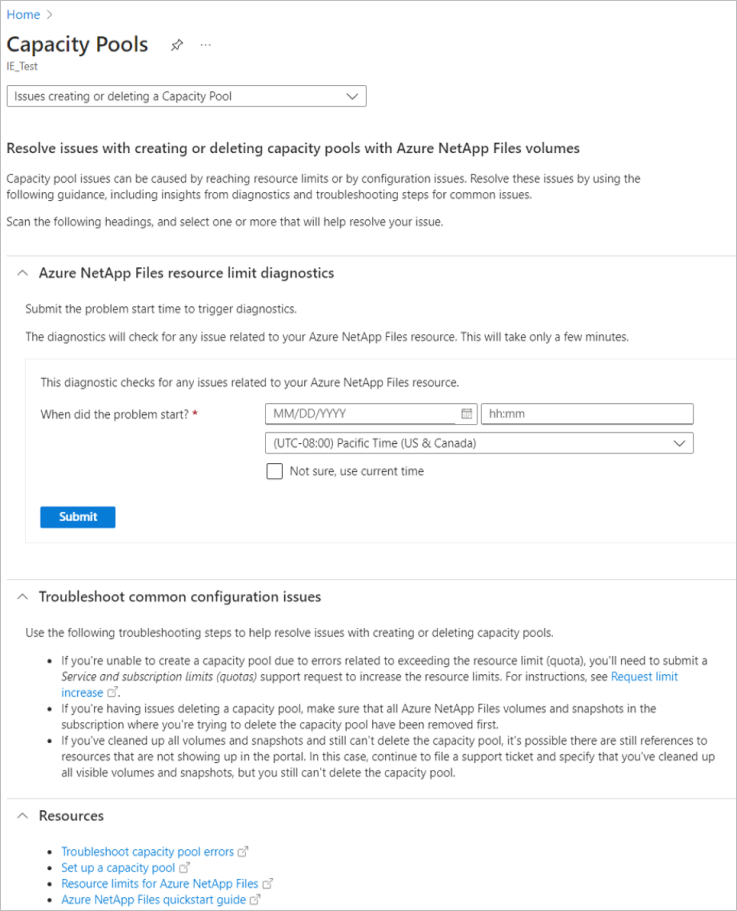
This page presents general guidelines and relevant resources for the problem subtype you select. In some situations, you might be prompted to fill out a questionnaire to trigger diagnostics. If issues are identified, the tool presents a diagnosis and possible solutions.
Task 2: Troubleshoot user access on LDAP volumes
In this task, you validate user connectivity and access to LDAP-enabled volumes based on group membership
In the volume page, select an LDAP-enabled volume, and select LDAP Group ID List under Support & Troubleshooting.
Enter the user ID and select Get group IDs.
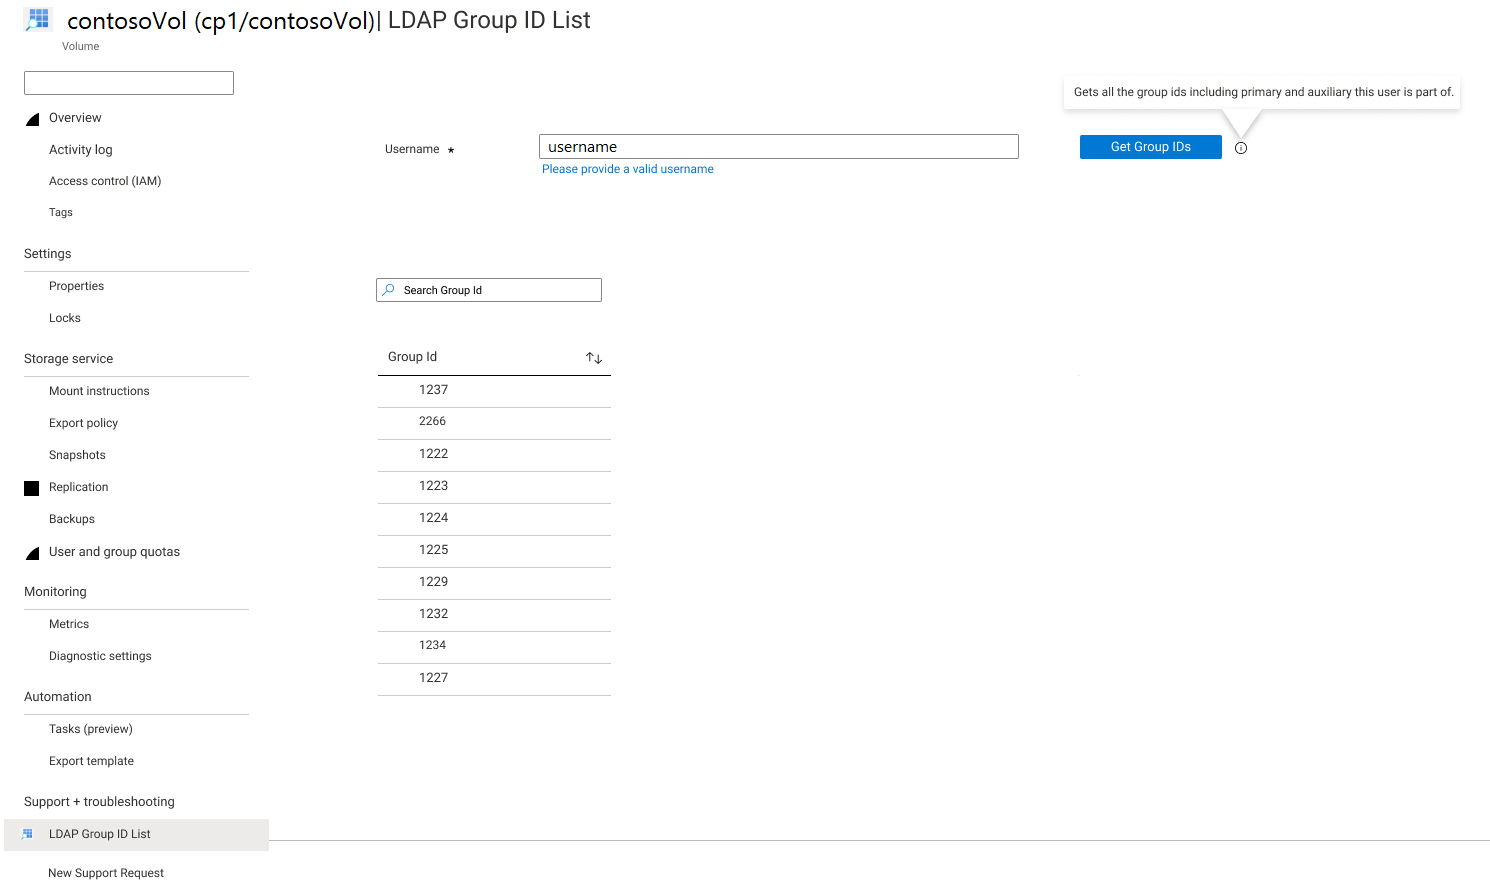
The portal displays up to 256 results even if the user is in more than 256 groups. You can search for a specific group ID in the results.
Task 3: Troubleshoot file locks on an Azure NetApp Files volume
In this task, you learn to break file locks on NFS, SMB, or dual-protocol volumes that need to be cleared, Azure NetApp Files allows you to break these locks.
You can break file locks for all files in a volume or break all file locks initiated by a specified client. Breaking file locks may be disruptive.
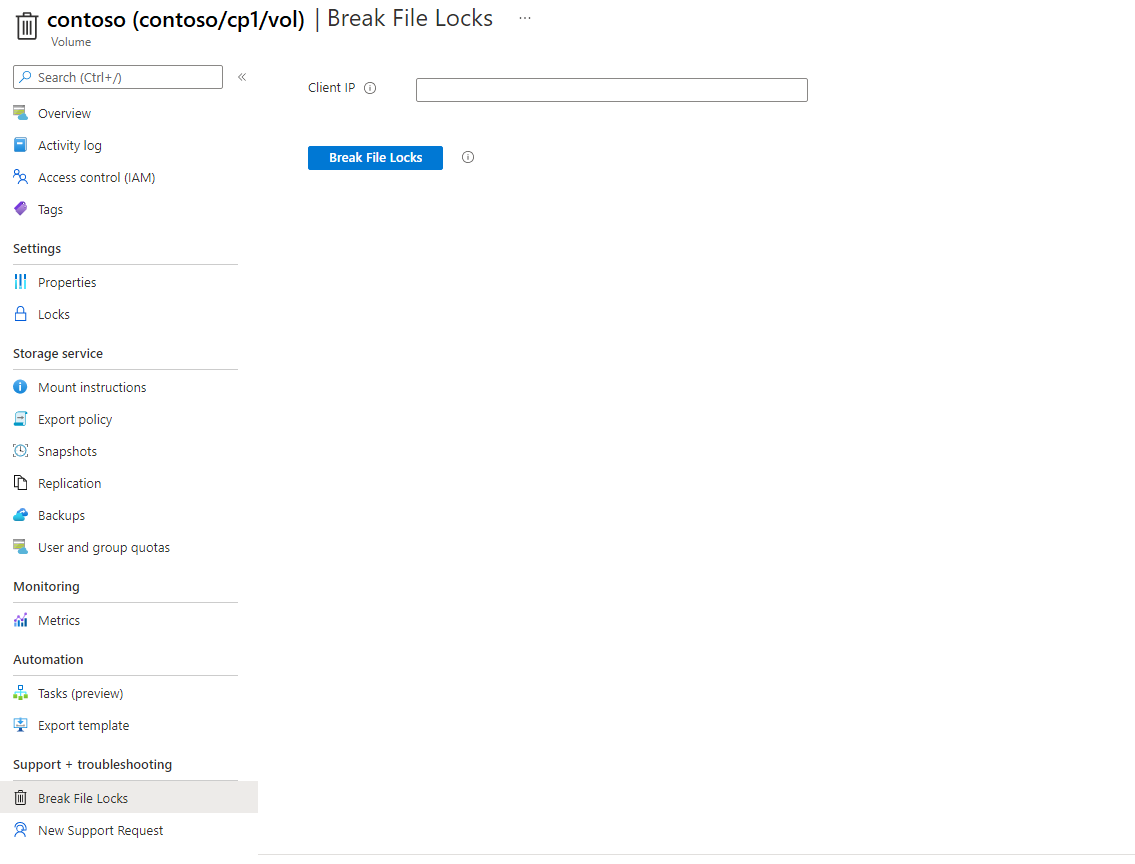
Navigate to the volume you want to break file locks on. In the Volume menu under Support & Troubleshooting, navigate to Break File Locks.
To break file locks for a specific client connected to a volume, enter an IP address in the Client IP field. To break file locks for all clients connected to a volume, leave the Client IP field empty.
Select Break File Locks.
Confirm you understand that breaking file locks may be disruptive.
