Exercise - Connect Azure Storage Explorer to Azure Data Lake Storage
Azure Storage Explorer isn't just about storage accounts. You can also use it to investigate and download data from Azure Data Lake Storage.
You've learned how simple creating and managing blob and queue resources in your Azure Storage account is. Now you want to push your understanding further and learn how the storage account connects to your developers' data lake, which they use to store infrastructure data for the CRM system.
Azure Data Lake Storage Gen2 isn't a dedicated service or account type. It's a set of capabilities that you unlock by enabling the hierarchical namespace feature of an Azure Storage account.
Here, you'll learn how to use Storage Explorer to connect to Azure Data Lake Storage Gen2, create a container, and upload data into it.
Create a storage account with Azure Data Lake Storage Gen2 capabilities
Let's look at connecting to a Data Lake Storage Gen2-enabled account. Before you can use Storage Explorer to manage your Data Lake Storage Gen2-enabled account, you need to create the storage account in Azure.
To create the storage account, use the az storage account create command:
az storage account create \
    --name dlstoragetest$RANDOM \
    --resource-group "<rgn>[sandbox resource group name]</rgn>" \
    --location westus2 \
    --sku Standard_LRS \
    --kind StorageV2 \
    --hns
Note
Please give the storage account several minutes to complete.
Connect to your Data Lake Gen2 enabled storage account
Now that you've created a Gen2-enabled storage account, Storage Explorer should automatically connect to it.
In Storage Explorer, in the EXPLORER pane, locate Concierge Subscription and expand it to show all the storage accounts.
Note
It might take several minutes for the storage account to display in Storage Explorer. If you don't see the storage account, wait a few moments and select Refresh all.
You'll see the dlstoragetest001 (ADLS Gen2) storage account displayed under the storage accounts. Your account will have a different number suffix.

Create a container
All containers in a Data Lake Gen2-enabled storage account are blobs. To create a new container:
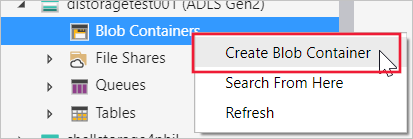
Expand the dlstoragetest001 storage account, right-click Blob Containers, and select Create Blob Container from the shortcut menu.
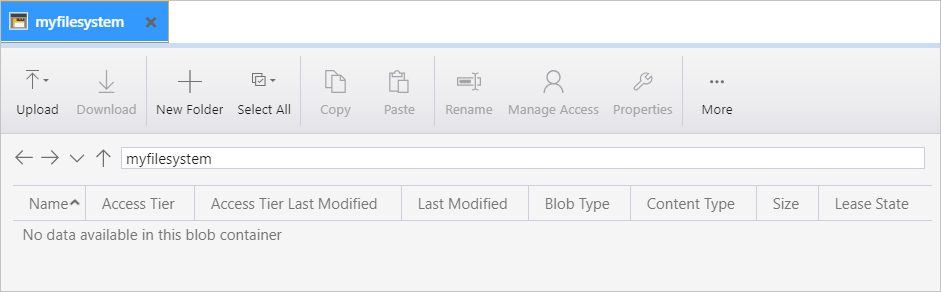
Name the new container myfilesystem.
When the container is created, the pane for the container appears. There, you can manage the container contents.
Upload and view blob data
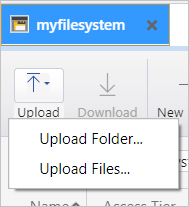
With the new myfilesystem container created, you can now upload files or folders to it.
To upload a file, select the Upload option, then select Upload Files.
In the dialog box, use the ellipsis (...) to select the file that you want to upload.
Select the file you want to upload, then select Open.
Select the Upload button.
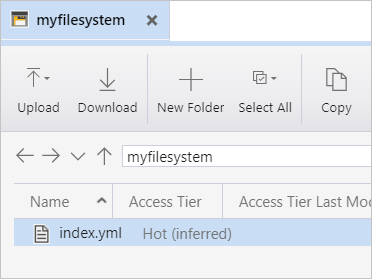
The file is available to the myfilesystem container.
You can upload as many files as you want to this folder. Also, you can create an unlimited number of folders. You can then organize and manage the content in your folders as you do with your file system.