Create an Azure DevOps organization
Before you can start working with Azure DevOps, you first need to create an organization in Azure DevOps. Therefore, you need to have an account. You currently can create a new account for free. You can use an existing Microsoft account (such as a live.com or outlook.com address), an organizational account that you already use for Microsoft 365 services, or a GitHub account.
Open a web browser and navigate to Azure DevOps.
Click the blue Start free button to create your new account or select Sign in to Azure DevOps if you already have an account.
With an organizational account your Azure DevOps organization is automatically linked to a Microsoft Entra ID. This can be used to easily manage users in your organization. If a user leaves the company, you can disable (or remove) the user directly in Microsoft Entra ID and their access will be blocked on all Azure services. Therefore, an Azure account should be created by an administrator and not by a normal user.
After creating your account, you need to provide a name for your
Azure DevOps organization, and the location where your projects
will be hosted. The Azure network has data centers all over the
world, so select the location nearest to your location. Once your
account and organization are created, you can sign in at any time
using https://dev.azure.com/{yourorganization}.
Organizations
Once signed in to Azure DevOps you get an overview of all the organizations you have access to with your account. You can create a new organization using the left menu. In the center of the screen you can find a list of projects that are created within the organizations, with the most recent projects you worked on top of the list.
An organization is the top-level entity that has separate security, licensing, projects, and so on. It all depends on your specific needs to create multiple organizations or just create multiple projects within the same organization. If your customer wants to manage its own DevOps environment, then it would be better to create a separate organization and assign your account to that organization.
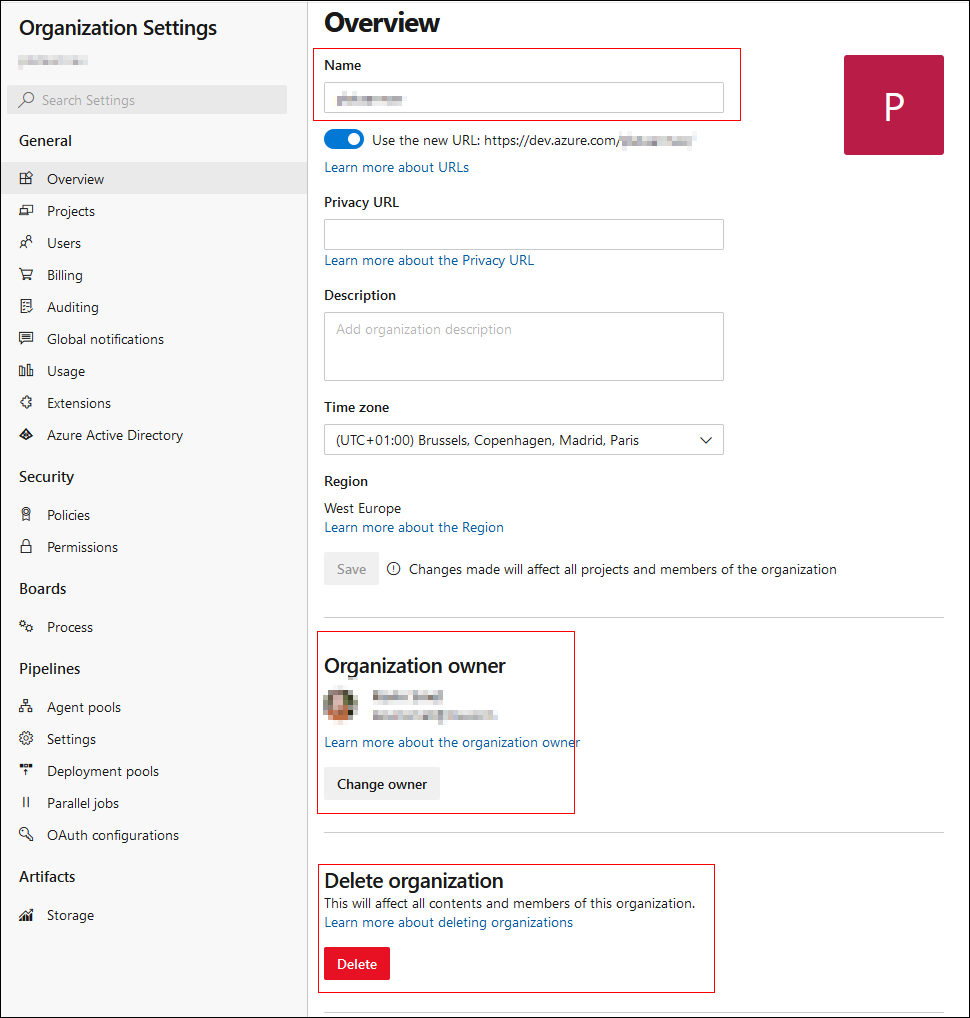
You can configure the organization by clicking the Organization settings link in the left corner. In these settings you can change the name, the time zone, the owner, the users, security, agent pools, and so on.
Let's have a look at some important settings. In the Overview section. You can change the name of the organization as well as the organization owner. If you ever need to delete your organization, you can do that in this overview section.
In the Projects section you can add, edit, or remove projects from your organization. But another important section is the Users section. Here you can add or remove users that have access to your organization within Azure DevOps.
You can add users by clicking the blue Add Users button. For each user you need to set the Access level. You can choose between Basic, Stakeholder and Visual Studio Subscriber. Each organization comes with five free basic users and unlimited stakeholders. These basic users can contribute code to different projects, configure pipelines, and execute tasks from the task board. Stakeholders can't contribute to code or add tasks to the Kanban boards, but they can access and follow the status of the project, start, build, and release pipelines.
If you need more than five users in your organization, you will need to pay a monthly fee per extra user, using the Azure platform. If a user is already a Visual Studio Subscriber using an MSDN subscription, you need to select Visual Studio Subscriber. These users already have a separate license for Azure DevOps. They will be added on top of the other users, and you don't need to pay extra for them. The first time the user signs into the Azure DevOps platform, their subscription will be validated. If the user isn't a valid subscriber, they will be considered a Basic user. Next you can select the projects your user will have access to.
If your organization is not linked to a Microsoft Entra ID, then you can still link it in the organization settings. By connecting Microsoft Entra ID to your DevOps organization, you can map existing users to their corresponding identity in Microsoft Entra ID.


