Set up the Unity project
A sample project is available, which includes a pre-configured application. You are tasked to create the button prefabs that will be instantiated when the app starts. Before you can begin creating the prefab, you'll need to clone the project on GitHub and configure Unity for Windows Mixed Reality development.
Download the starter project
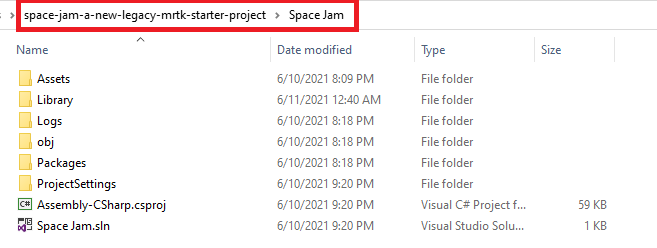
Download the Mixed Reality starter project from Azure. You will find a zip folder called space-jam-a-new-legacy-mrtk-starter-project. Extract the contents of this zip file, and save to your computer:

Open the project in Unity
In the Unity Hub, add the sample project, which is the space-jam-a-new-legacy-mrtk-starter-project/SpaceJam/ folder.

If necessary, allow Unity to upgrade the project to your installed version.

Next, open the project in Unity.
In the Project panel, open the Scenes folder. Then, select and open the PlayerRoster scene.

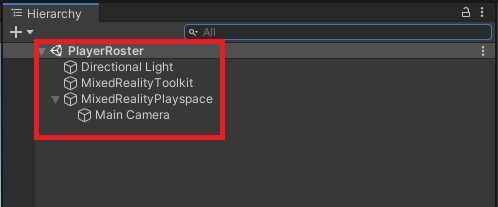
In the Hierarchy panel, you should now see the PlayerRoster scene. The scene includes the lighting, MixedRealityToolkit, and MixedRealityPlayspace, which contains the camera.

© 2021 Warner Bros. Ent. All Rights Reserved.