Document management
Often, organizations use Microsoft SharePoint to create websites where you can more securely store, organize, share, and access information from any device. A key benefit of SharePoint is its document management capabilities. It provides users with a single space to collaborate on documents and includes features such as change tracking and versioning. Because important documents are often related to customers, such as proposals, PowerPoint presentations, and configuration files, organizations frequently use SharePoint as the tool for these files.
Document management with SharePoint allows users to manage common document types, such as Microsoft Word, Excel, PowerPoint, and OneNote. You can create folders to save and manage those documents in customer engagement apps from Microsoft Dynamics 365 Sales, Dynamics 365 Customer Service, Dynamics 365 Field Service, Dynamics 365 Customer Insights - Journeys, and Dynamics 365 Project Operations, as well as in Power Apps model-driven apps. The documents are seamlessly stored in SharePoint.
While the documents are stored in SharePoint, you can access them directly from the SharePoint site and from Dataverse rows, as shown in the following image.
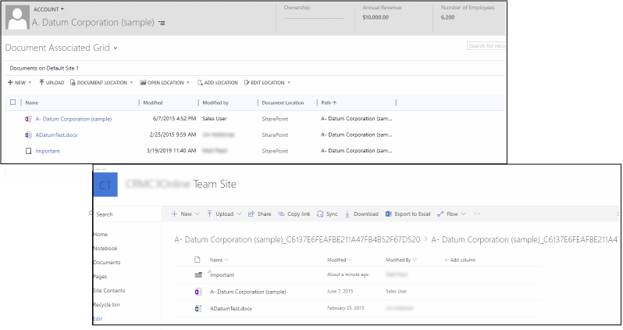
Document management functionality uses server-based SharePoint integration on a site collection in SharePoint. Server-based SharePoint provides the following benefits:
Users only sign in once. Therefore, they don't need to sign in to customer engagement apps and SharePoint.
No other software is required to install on SharePoint.
SharePoint documents display in lists.
Users perform SharePoint actions from the command bar.
When you use SharePoint Online with customer engagement apps, you can:
Create, upload, view, and delete documents that are stored in SharePoint from within customer engagement apps.
Use the SharePoint document management abilities within customer engagement apps, such as checking in or checking out the document and changing document properties.
Enable noncustomer engagement apps users, such as customers who want to review a bid, to directly access the SharePoint documents (if they have the appropriate permissions).
Get started
Before you get started learning how to set up the functionality, you need to understand how the integration works. The documents are stored and accessed through SharePoint, and they're not accessed directly from model-driven apps. When in Dynamics 365 customer engagement apps or Power Apps model-driven apps, you're essentially looking at an IFrame that's connected to your SharePoint site and is formatted to look like model-driven apps. For this reason, anyone who accesses the documents in SharePoint, whether directly from the SharePoint site or from within a model-driven app, needs to assign specific permission levels to individual users or groups from within SharePoint.
To share items, go to the Microsoft 365 admin center and sign in by using Microsoft 365 Global administrator credentials.
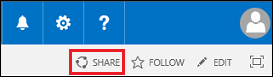
Open the Microsoft 365 app launcher and then select SharePoint. On the left menu, typically located at the bottom of the screen, select Team Site. On the Home page, select SHARE (upper-right corner).
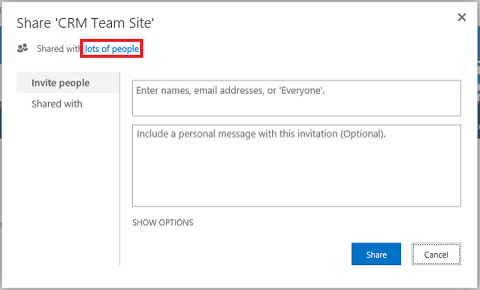
You can view the default permissions for your team site by selecting lots of people. By default, all users in your Microsoft 365 organization can add and edit documents on the team SharePoint site. To invite others, select Invite people and then add people who are external to your organization to share documents with them.
For more information about SharePoint permissions, see Introduction: Control user access with permissions.
Set up a new organization
By default, document management isn't set up in new environments. If your organization hasn't deployed document management, when a system administrator signs in, an alert message is displayed to enable server-based SharePoint integration. If you want to enable server-based SharePoint integration, you can select Enable Now. After you've set up server-based integration, the alert will no longer appear.

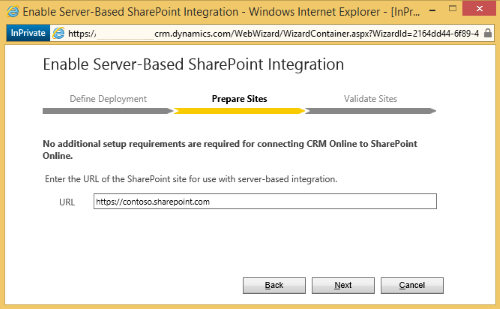
If the message doesn't appear, you can still set up the functionality through the Power Platform admin center. In the Power Platform admin center, select an environment that you want to set up, go to Settings > Integration > Document management settings, and then select Enable Server-Based SharePoint Integration. This action directs you to a configuration wizard that assists you in setting up server-based SharePoint integration.
You need to define whether you're connecting to an Online or an
On-Premises SharePoint site. Based on the option that you select, you need to supply extra information. For example, if you're
connecting to an Online SharePoint site, you need to provide the URL
of the SharePoint site that you want to connect to, such as https://contoso.sharepoint.com.
Define tables to use with document management
After you've enabled server-based SharePoint integration, you'll need to set up the tables that you want available for document management integration. For example, if you want to store documents in SharePoint for specific accounts or contacts, you need to make sure that you enable those respective tables for document management.
After you've completed the initial setup, you might be asked if you want to go directly to the document management settings. If not, you can access the settings from the Microsoft Power Platform admin center. After selecting an environment that you want to work with, select Settings > Integration > Document management settings > Document Management Settings.
You need to select which tables you want to use to manage SharePoint documents. If a URL isn't already specified, you need to enter the URL of the SharePoint site where the document locations and folders for storing documents is created.
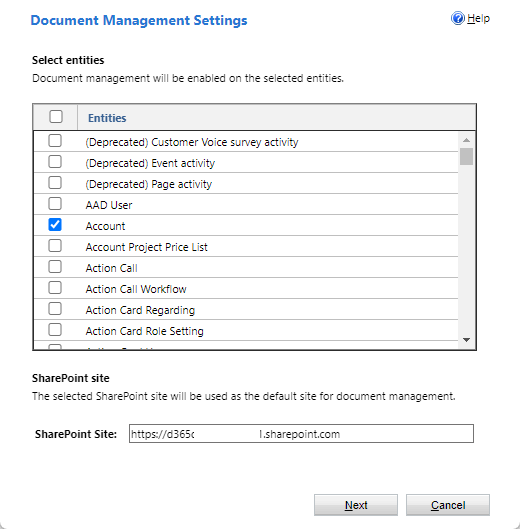
As you go through the document management configuration wizard, you can define the folder structure that you want to use. If you don't select anything at this point, when someone first uses the integration for a Dataverse row, they're prompted to create the folder to store the data. If you select the Based on entity option, document libraries and folders that are based on the Account or Contact entity are automatically created on the SharePoint site. Users aren't prompted to create them.
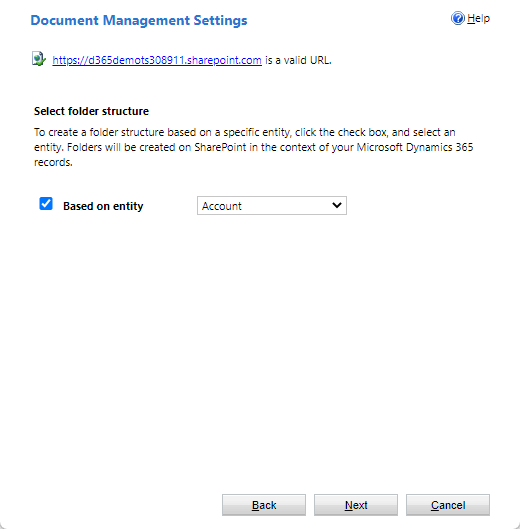
For more information, see Enable document management on entities.
After you've enabled server-based SharePoint integration, you can further enhance the integration by enabling OneNote and OneDrive.
OneNote - When this feature is enabled, you have the benefit of using OneNote to take or review customer notes directly from customer rows. For more information, see Set up OneNote integration.
OneDrive - When this feature is enabled, users can create and manage private documents by using OneDrive. For more information, see Enable OneDrive (online).
Use document management
After you've set up SharePoint integration, you can start adding documents to rows. When you open a document management-enabled row, such as an account, a Documents option displays when you select the Related tab.
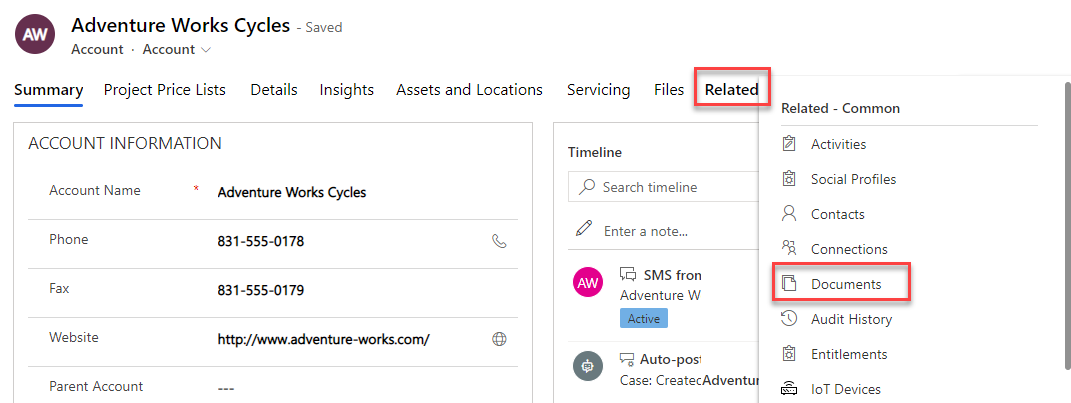
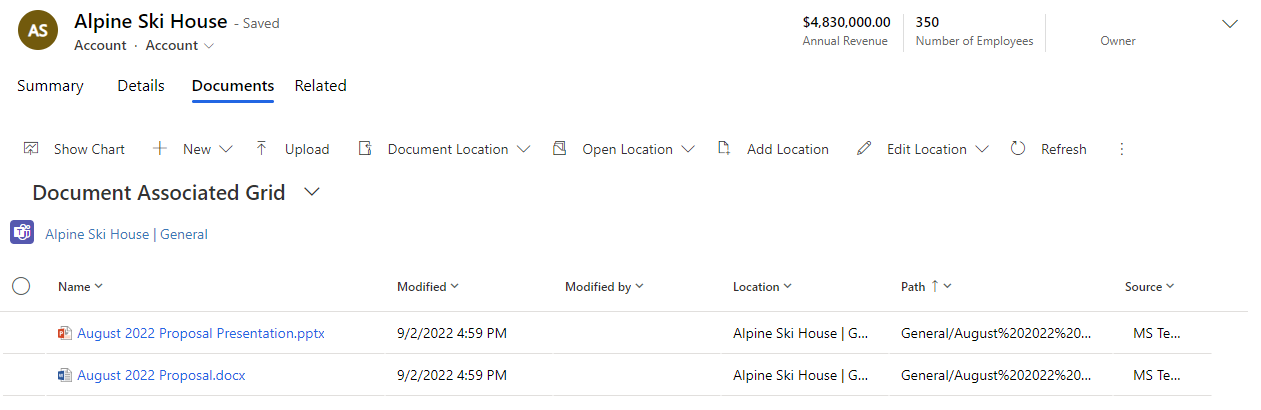
When the Documents tab opens, the Document Associated Grid displays, which provides you with the following options:
New - Allows you to create a new document directly from within the window. You can create a Word document, Excel spreadsheet, OneNote notebook, or PowerPoint presentation. You can also create a new folder to store documents.
Upload - Allows you to upload an existing document directly to the SharePoint site.
Document Location - Allows you to specify which document location that you want to view documents from. You might have multiple locations set up for different types of documents.
Open Location - Lets you open the SharePoint document location directly from the subgrid so that you can take advantage of all available options.
Add Location - Allows you to add an extra document location for storing documents.
Edit Location - Lets you make changes to the existing document location that you're working with.
Refresh - Refreshes the document location.
For more information, see Using Document Management.