Exercise - Add columns to a view
In this exercise, you'll add columns to an existing view.
Scenario
You work at a bicycle store and are responsible for your organization's Dataverse environment.
The purchase department employees are using a Power Apps app that you built to help them manage providers and orders. After they use the app for a few weeks, the employees request some modifications.
For the list of accounts that's presented to them, the employees want to:
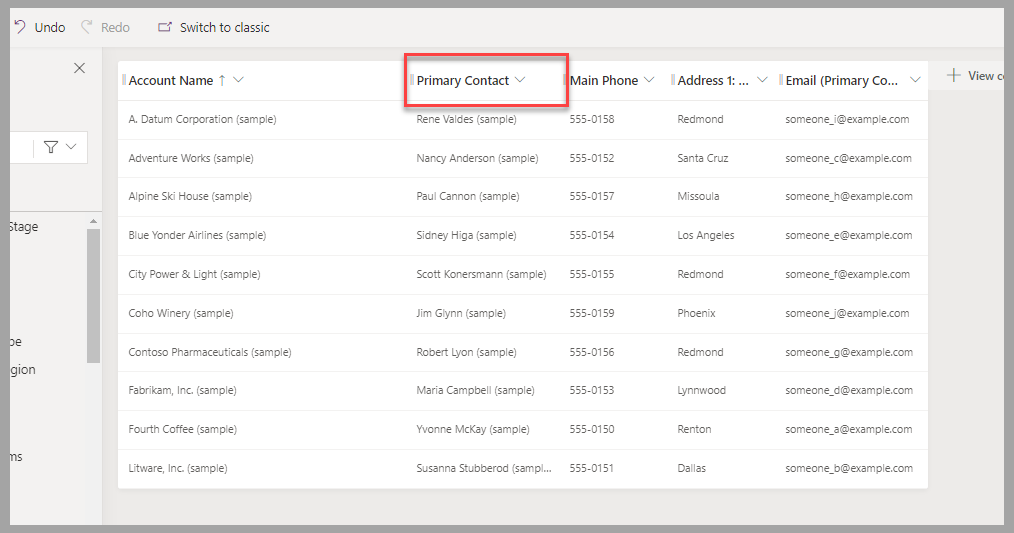
Move the Primary Contact column next to the Account Name column.
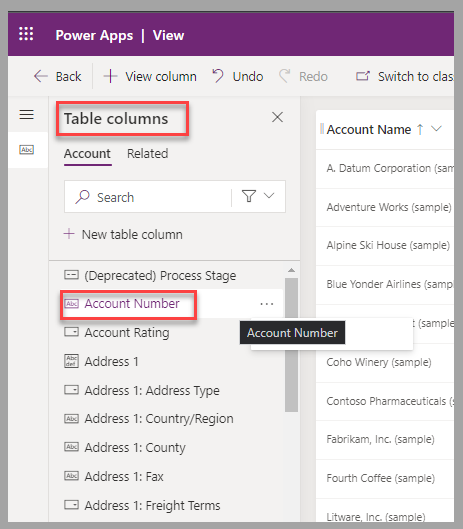
Add Account Number and Credit Limit as the last columns.
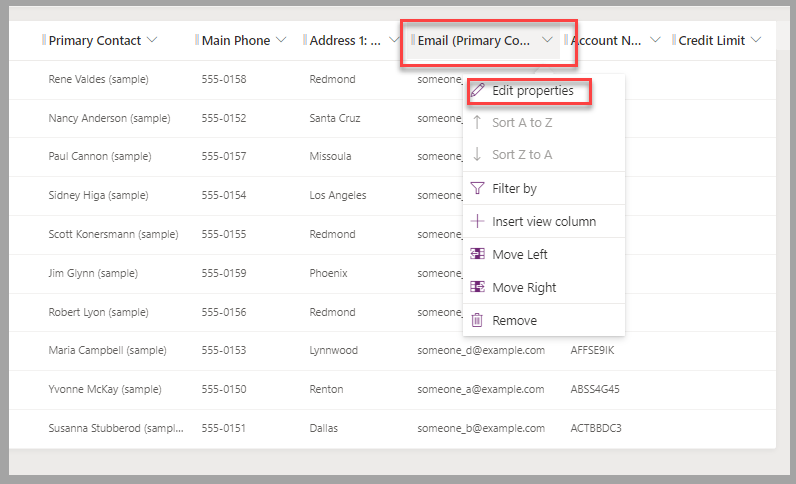
Resize the Email (Primary Contact) column to be wider (about 150 percent of current size).
Remove the City column.
Exercise
Go to a Dataverse environment where you can modify the tables, such as a dedicated training or development environment. Then, follow these steps:
Sign in to Power Apps portals.
In the left pane, select Tables.
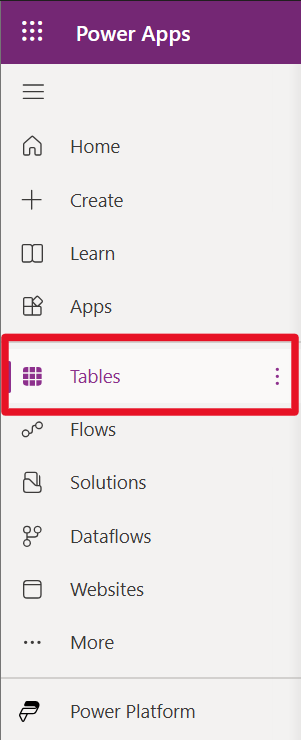
In the list of tables, select Account.

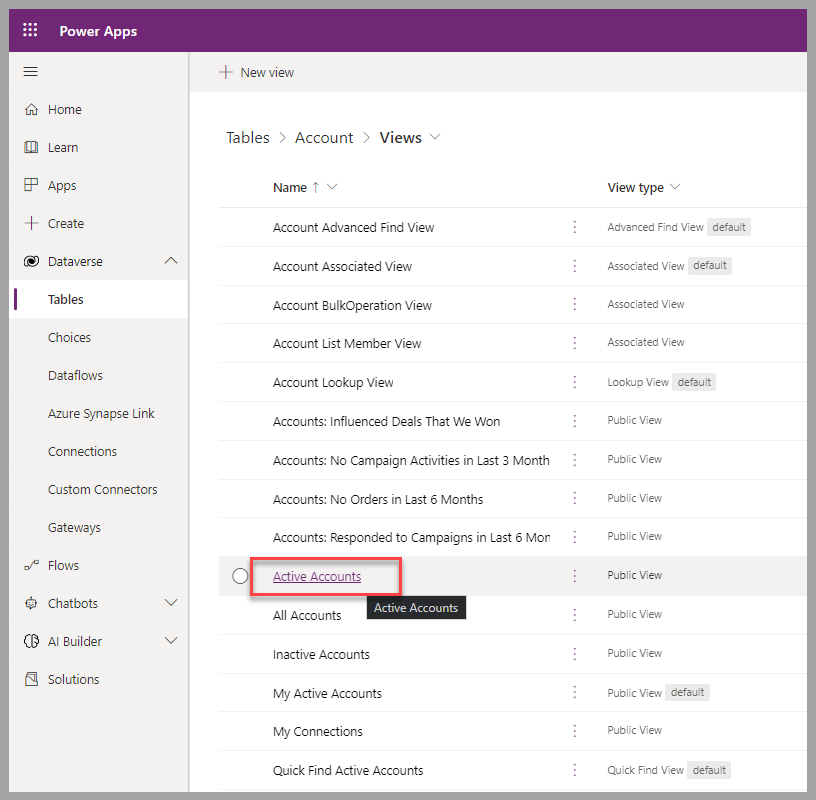
In the Account table, select Views.

Select the Active Accounts view.
To move the contact name to the requested location, first select the Primary Contact column header.
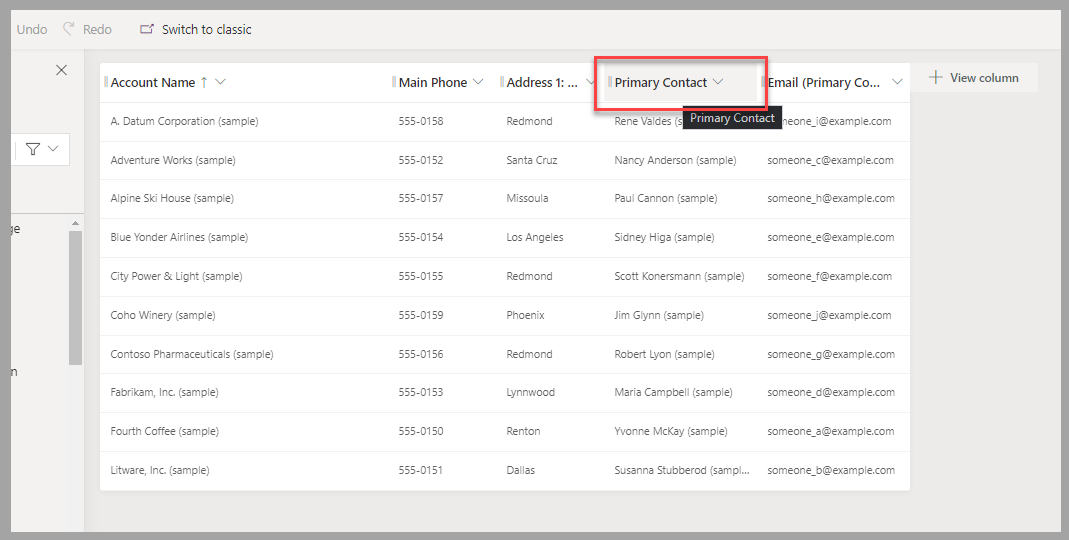
Then drag the column heading to the left toward the Account Name column.
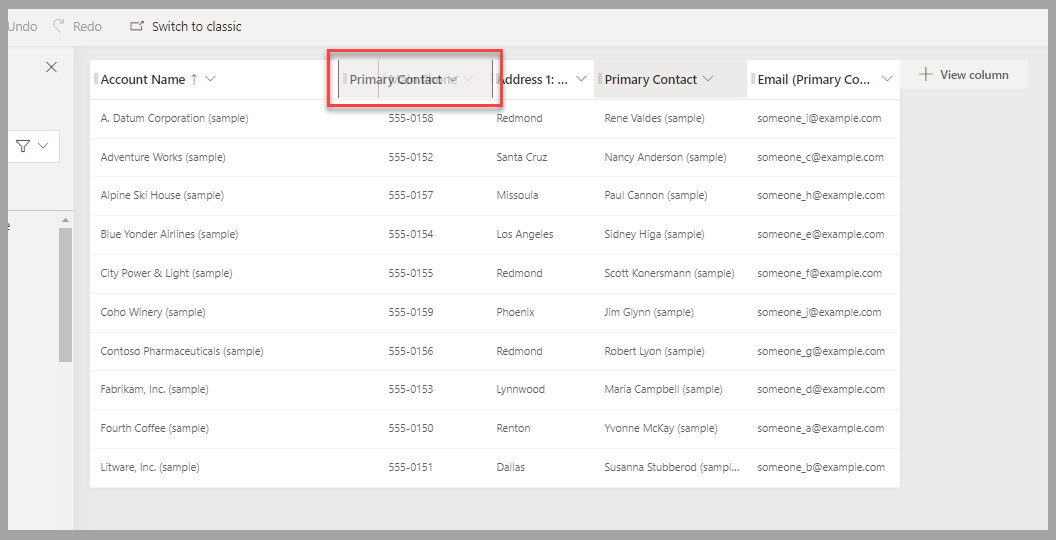
Drop the column heading next to the Account Name column.
Add the Account Number column by selecting it in the list of columns in the left pane.


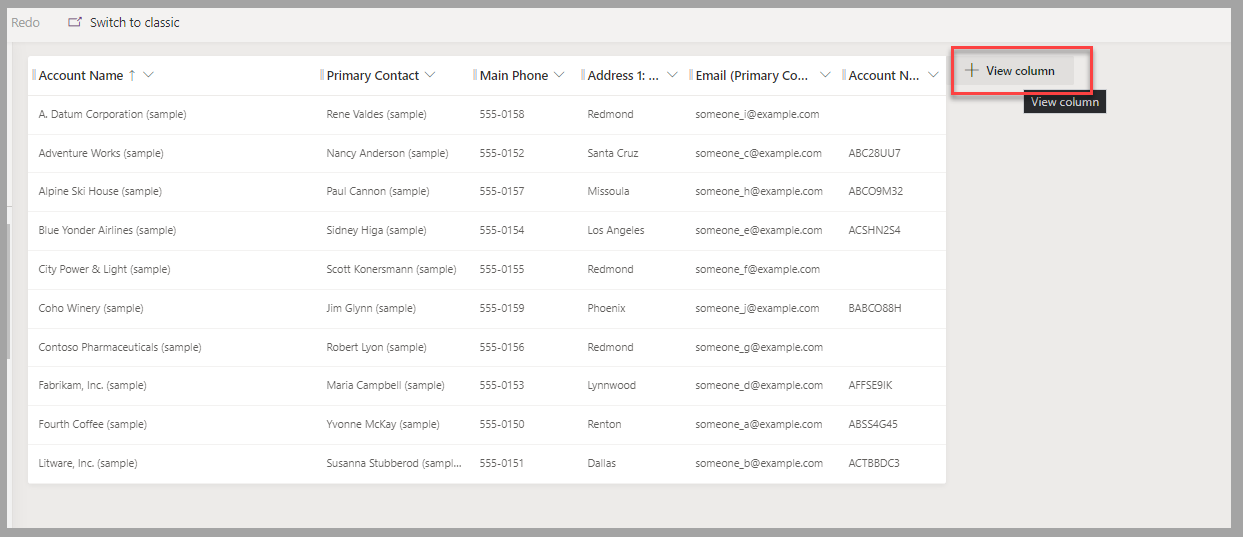
Now, try a different method to add columns.
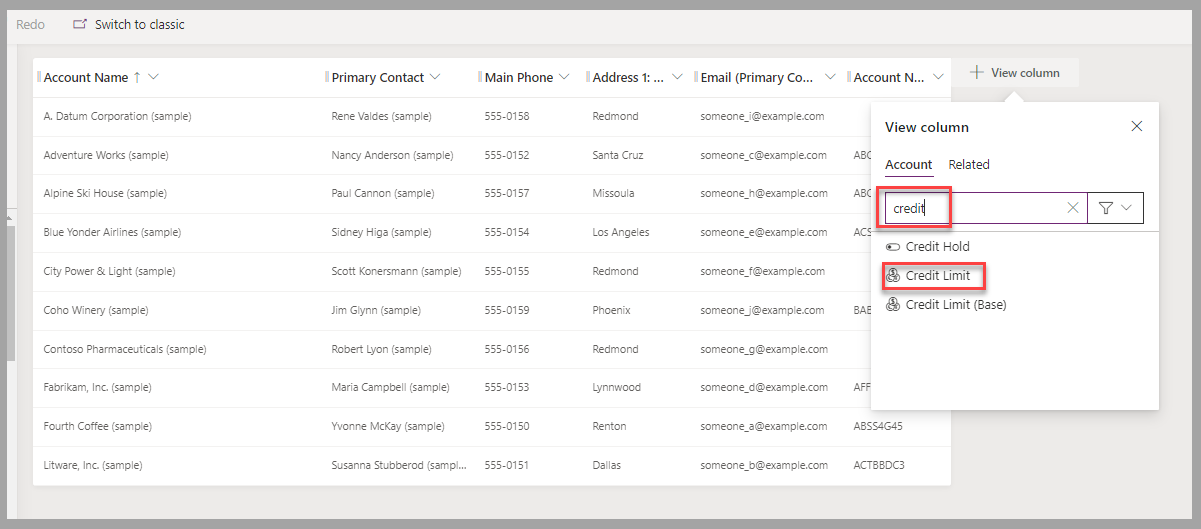
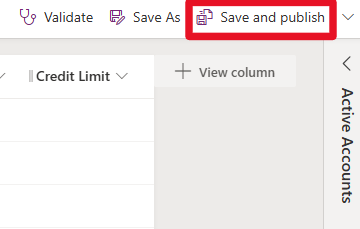
Add the Credit Limit column by selecting + View column.
Enter credit in the search field and then select Credit Limit.
To change the size of a displayed column, you can drag the column separators or proceed through the following steps:
a. Select the drop-down in the Email (Primary Contact) column header, and then select Edit properties.
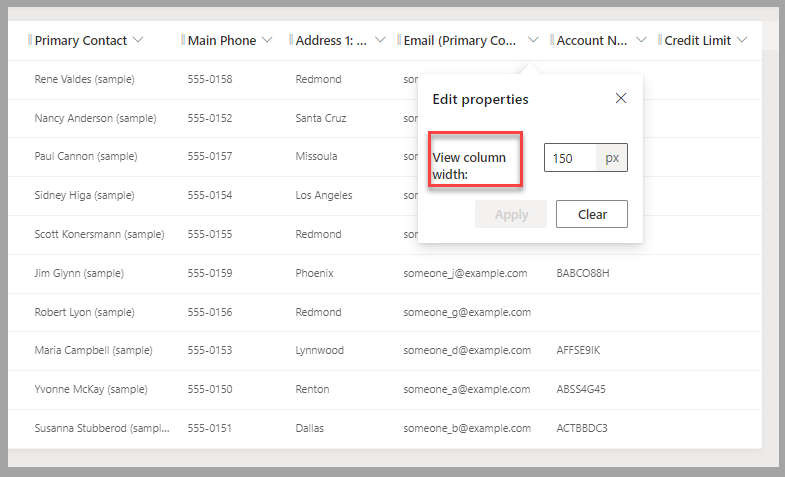
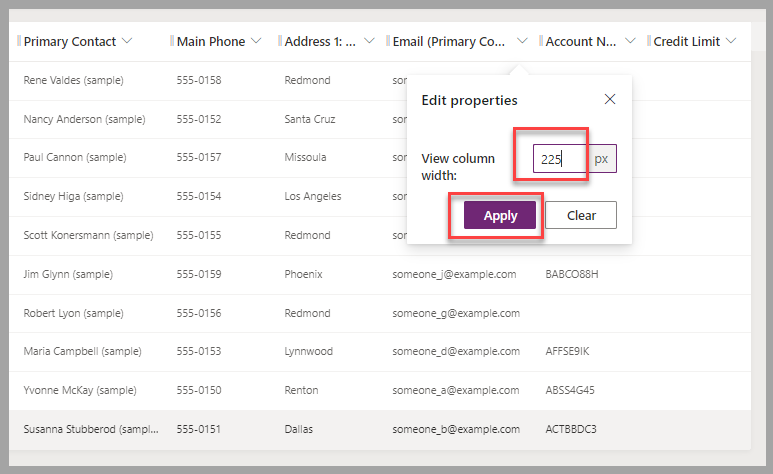
b. Modify the View column width property. (In this case, the request is to increase by 150 percent, so you modify the value to 225 pixels.)
c. Select Apply to complete the modification.
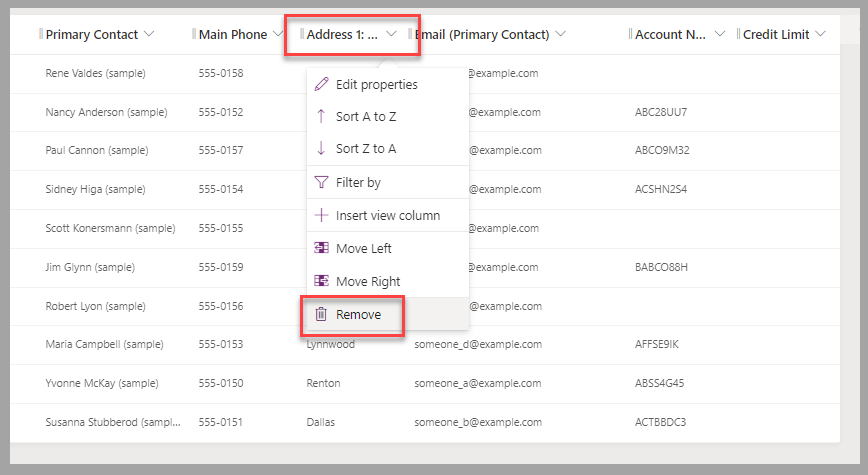
To remove a column, select the Address 1: City column heading and then select Remove.
To apply changes and make them available to all Power Apps users, select Save and Publish.


Exercise steps (video)
Watch the following video for a demonstration of the steps that you completed in this exercise.
Next steps
You've learned how to add, modify, and remove columns in a Dataverse table view. Next, you learn how to apply filter criteria to limit the displayed records and how to sort data in Dataverse views.