Filter and sort data for Dataverse views
You've learned how to create and modify views and how to add or remove columns in views. In this unit, you'll learn how to include or exclude records in a view and how to define the order in which records are shown.
Filter data
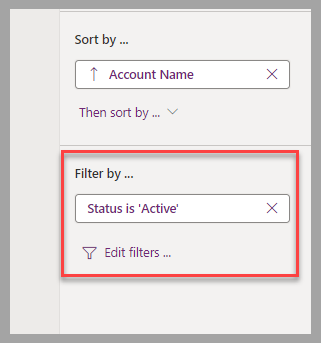
To determine which records will be shown in a view, set up the Filter by property of that view.
A filter consists of one or more criteria applied to each record to determine whether it should be displayed. A record is displayed if it meets the criteria and hidden if doesn't. You can group different rules using Or clause which displays the record if any rule is valid, or an And clause, which displays the record only if all rules are valid.

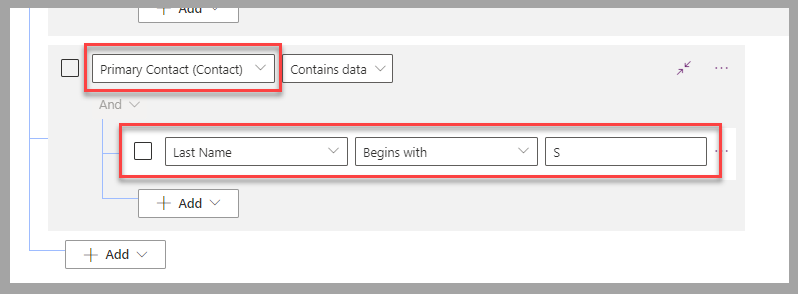
You can set the filtering criteria for columns of the table with the view you're looking at or for columns of related tables. For example, an Account has a Primary Contact that can be assigned. When using a filter criterion, you can filter records where the primary contact's last name begins with the letter S.
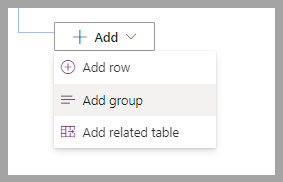
When you select Add to add filter criteria, three options are available:
Add row - Add a single row.
Add group - Group multiple criteria with and or operators.
Add related table - Add rules against tables that are related to the current table.
Whether a single criterion or a complex set of criteria, you can set a filter using these logical operations to determine whether a record should be displayed.
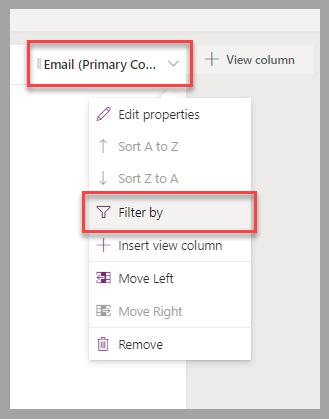
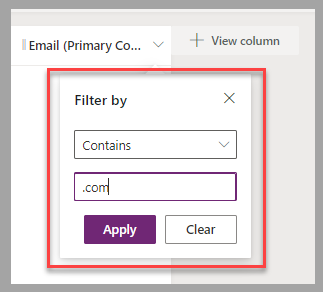
The filter isn't limited to the visible columns in a view. However, for visible columns, there's a shortcut to add a filter. Select the column heading and then select Filter by in the menu to define the filter.
Sort data
The order in which records are displayed in a view is determined by the Sort by settings. Using the view property pane on the right hand side of the screen, you can choose to sort by any of the view's visible columns. In this pane, you can sort by multiple columns, and the first selected column's sort will be applied, followed by the second's, and so on.

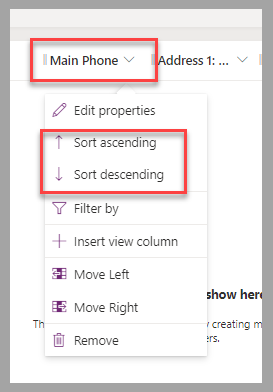
You can also sort by a single column by selecting the column and then choosing ascending or descending order.
Modify filters and sort criteria in Power Apps
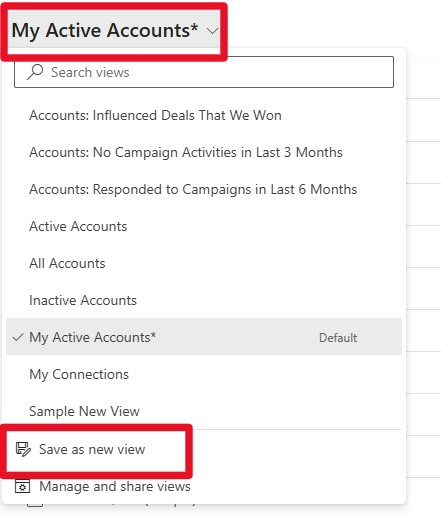
Model-driven app users can modify filters and sort criteria in the app. They can select Edit filters to apply filter and sort criteria temporarily to the current view. An asterisk is appended to the view name to indicate that a temporary view change has been applied.

To save this temporary view as a new personal view, the users can select the drop-down next to the name of the current view and then select Save as new view.
Next steps
You've learned how to modify records displayed in a view by creating or editing the view's filter criteria. You've also learned to change the order of the records using the sort feature. Next, you apply what you've learned in an exercise with the Account table.