Use a remote Git repository
So far, we only looked at the usage of a local Git repository. After you developed new features, solved some bugs, and committed all those changes to the local repository, it's time to share your modifications with your team. You need to upload your changes to a remote repository.
Before you can upload, you first need to check if other team members also made some modifications. Maybe these modifications have an impact on your changes and could lead to conflicts with your code, so you need to merge your code with the incoming code changes. Conflicts are then called merge conflicts. Resolve these conflicts within your local repository before you upload your modifications to the remote repository.
We started creating our local repository with the init command. This also means that there's no remote repository connected yet. You have to use the remote command to link a remote repository.
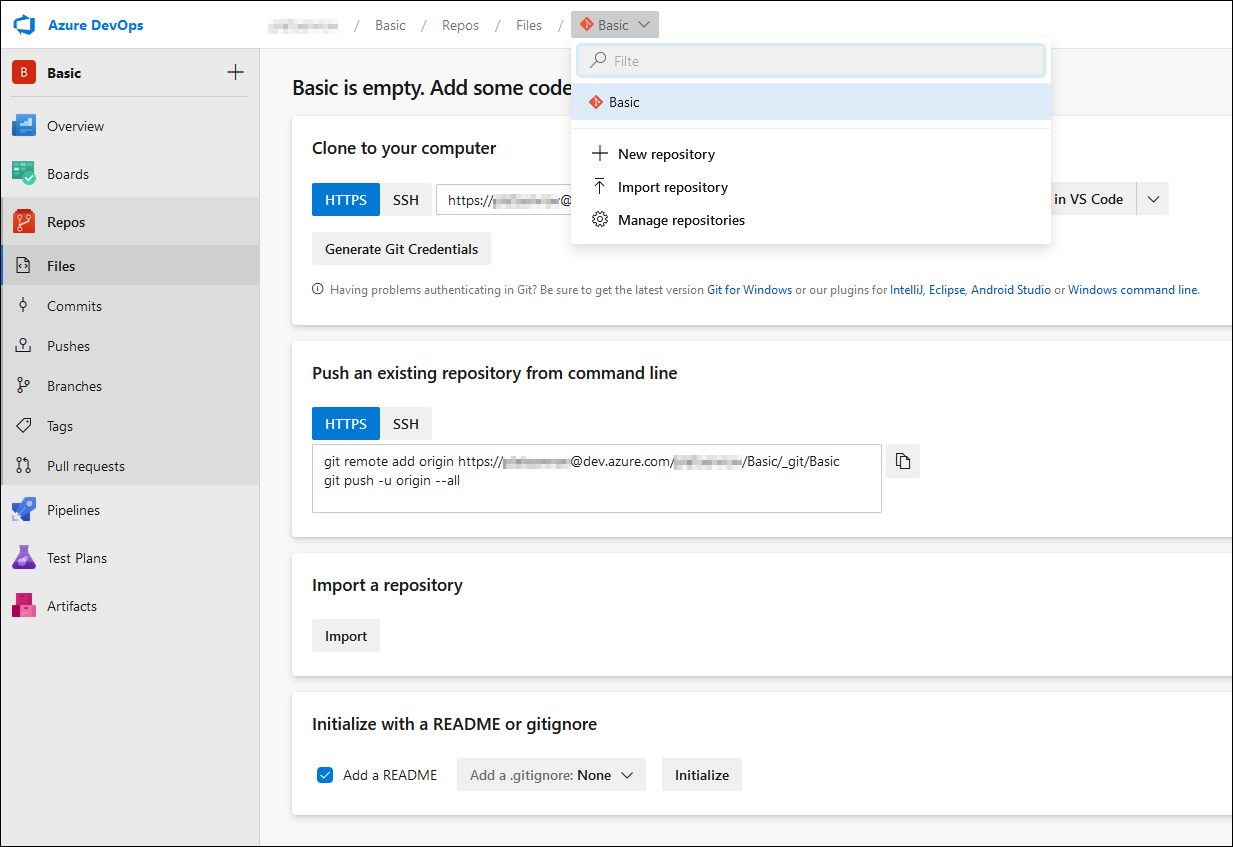
This repository can be hosted within Azure Repos, GitHub, or other platforms. When you create a new project within Azure DevOps, a repo is automatically created for you. The repository gets the same name as your project within Azure DevOps.
A project can contain multiple repositories, so you can always create a new one by clicking on the repository name at the top and select + new repository.
Azure DevOps automatically generates a link that you can use to sync your local repository with this remote repository. There are two ways you can link.
You first can create a local repository and then we can use the Push an existing repository from command line section to link the local repo with the remote repo. You'll use the remote add command. This command has two parameters. The first one is the name that identifies your remote repository. By default, the name origin is used for that command. But you can change the parameter to devops if it makes more sense. The second parameter is the link to the remote repository.
git remote add <shortname> <url>
git push -u origin --all
The Git push command is discussed in another unit of this module, but in this case, it uploads all the existing data in the remote repository and does this for all branches. If you have an empty remote repository, this command creates a main branch and the other branches if there are. This links your local main branch with the remote main branch.
To get a list of all the remote repositories linked to your local repo, you can use the -v option.
git remote -v
To remove the link with a remote repository, you use remote rm.
git remote rm <shortname>
Within Visual Studio Code, there is also an option to link the remote repository. Use View, Command Palette (Ctrl+Shift+P), and search for Git: Add Remote
You first need to provide a name, for example, origin, and then specify the remote git URL. Once a remote repository is linked, you can see an icon indicating that the local repository is linked. The icon can also be a sync icon that you can click to synchronize the two repositories.
In this example, it is a cloud icon, indicating that you still need to perform a push command to create a branch on the remote repository and upload your files. You can click this icon to publish your changes.
Another way to link a remote repository to your local repository, is first creating a remote repository and use the clone function to create a local repository. With this approach, you don't need to initialize a local repository first. We'll discuss the clone command in the next unit.


