Set the layout used by a report
A report in Business Central consists of a report object that defines the dataset of the report (what data is available) and several report layouts (how data is presented).
Maybe you want to modify existing report layouts provided in Business Central? Depending on the technology used for the layout, this is something you might be able to do yourself (Excel and maybe also Word layouts), or maybe you need a developer to do it (pixel perfect RDLC layouts).
A report layout determines the look of a report. It controls which data fields of a report dataset appear, how they're arranged, styled, and more. A report may have more than one layout, which you can then switch among as needed.
A report layout controls content and format of the report, including which data fields of a report dataset appear on the report and how they're arranged, text style, images, and more. From Business Central, you can change which layout is used on a report, create new layout, or modify the existing layouts.
When there are multiple companies in the application, the layouts are set on a per-company basis. So, the same report in one company can have a different layout in another company.
You can also use report layouts to add content to email messages. For example, report layouts can save time and help ensure consistency by reusing the same content when you communicate with your customers. To use custom report layouts with email, the file type for the layout must be Word. You can't use the RDLC file type.
There are four types of layouts that you can use on reports:
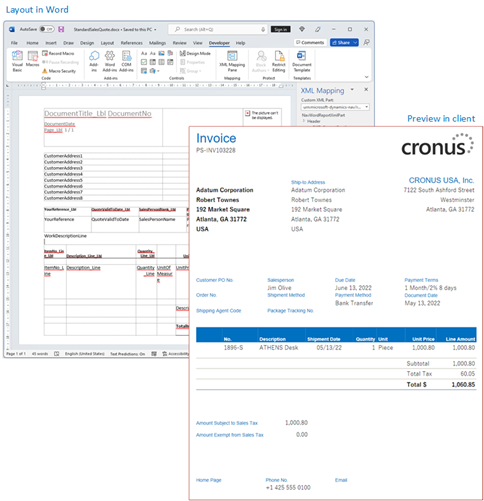
Word - Word layouts are based on Word documents (.docx file type). Word layouts enable you to design report layouts by using Microsoft Word. A Word layout determines the report's content - controlling how that content elements are arranged and how they look. A Word layout document will typically use tables to arrange content, where the cells can contain data fields, text, or pictures.
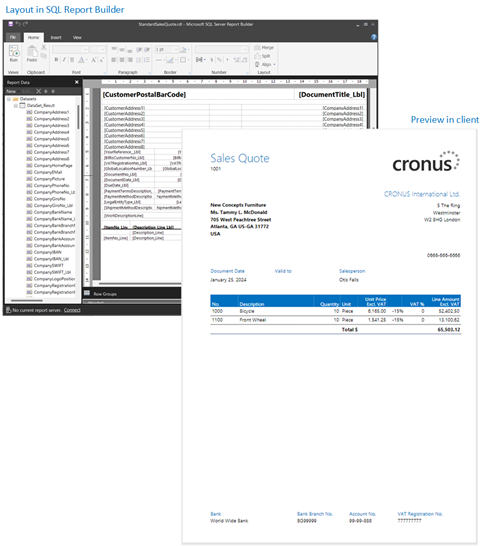
RDLC - RDLC layouts are based on client report definition layout files (.rdl or .rdlc file types). These layouts are created and modified by using SQL Server Report Builder or Microsoft RDLC Report Designer. The design concept for RDLC layouts is similar to Word layouts, where the layout determines what fields to show and how they're arranged. However, designing RDLC layouts is more advanced than Word layouts.
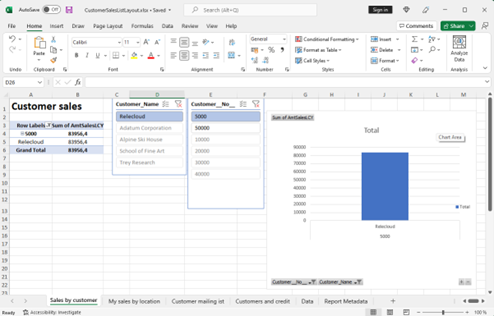
Excel - Excel layouts are based on Microsoft Excel workbooks (.xlsx file type). They let you create reports by using familiar Excel features for summarizing, analyzing, and presenting data with tools like formulas, PivotTables, PivotCharts, and more.
External - An external layout type refers to an advanced type that's specially designed for specific reports. The reports and the layouts themselves are typically provided by partners, not by Microsoft. The actual file type of the layout will vary depending on the provider.


In addition to the type, layouts are further divided into three categories, based on their source or origin.
Extension layouts - Extension layouts are layouts that are part of an extension that's been installed on the environment. These layouts are typically standard layouts provided by Microsoft, for example, in the base application. Or they could be layouts that are included in extensions from other software providers. You can recognize extension layouts on the Report Layouts page because the extension name and publisher are shown in the Extension column.
User-defined layouts - The other source of layouts is the end-user. From inside Business Central, a user with proper permissions can add new layouts in various ways. For example, you could start from an existing extension layout or another user-defined layout. On the Report Layouts, user-defined layout will have an empty Extension column.
Custom layouts - Custom layouts are also layouts that are created by users. The difference is that these layouts are created from the legacy Custom Report Layouts page, and they can only be Word and RDLC type. Although you can still create custom layouts, they're being phased out in favor of user-defined layouts.
One important thing to remember is that you can't modify extension layouts from the Business Central client. For example, you aren't allowed to change the layout name or type, or upload and replace it with another version. If you try, you'll get an error message. You'll have to create a user-defined or custom layout based on the extension layout instead.
The first thing when creating a layout is to decide which layout type you want. You can choose either Word, Excel, or RDLC. The layout type will depend on how you want the generated report to look. Plus, it depends on your knowledge of application software for creating the layouts, like Word, Excel, and SQL Server Report Builder.
Excel layouts are generally the easiest to create and modify because the features for summarizing data, adding graphics, and styling, are common Excel features.
Not all reports and document have a dataset that is optimized for use with an Excel layout. For example, aggregations and complex calculations work best with RDLC or Word layouts. The same is true for documents.
If you're only making style changes like font type, size and colors, a Word layout are also a good choice.
Adding data fields or rearranging data fields in Word or RDLC is more advanced than with Excel.
Word and RDLC layouts are good to use for reports that will eventually be printed.
The general design concepts for Word and RDLC layouts are similar. However, each type has certain design features that affect how the generated report appears in Business Central. The same report might look different when using the Word layout compared to the RDLC layout.
Set the default layout
There are a few ways to set which layout a report uses. Each way has advantages, depending on what you're looking to do:
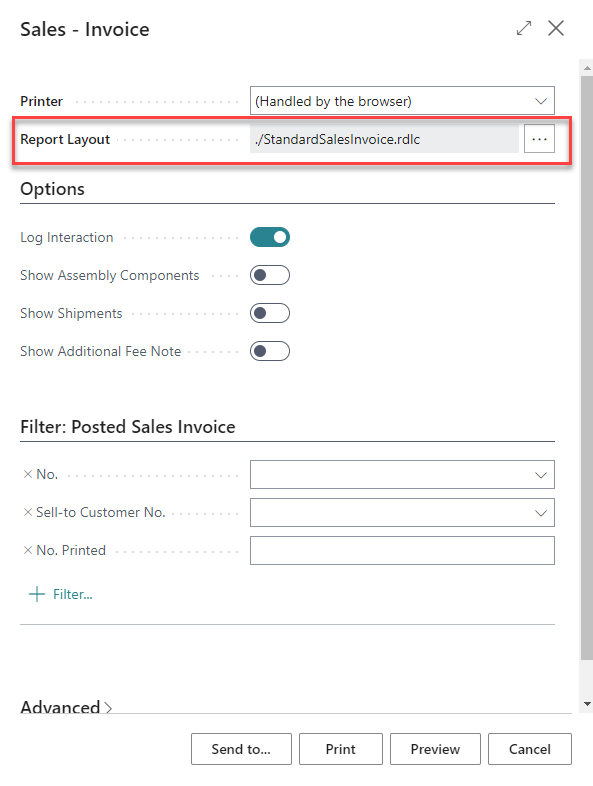
From the report request page - When setting up a report to run, the report request page includes the Reports Layout field that shows the current default layout used by the report. You can use this field to temporarily switch to another available layout the report you're running. After you run the report, the layout will revert to the default layout again.
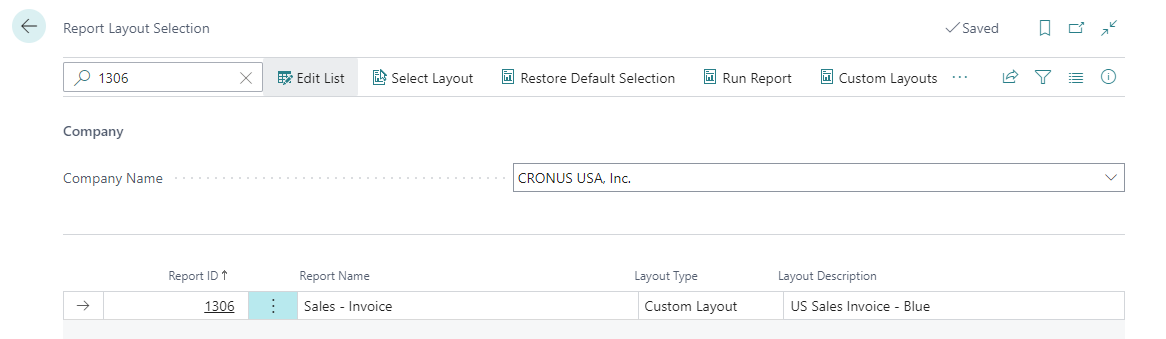
From the Report Layout Selection page - The Report Layout Selection page displays a list of all reports. This page indicates what the current default layout for a report is. It lets you set layouts in different companies, without having to switch the company you're working with.
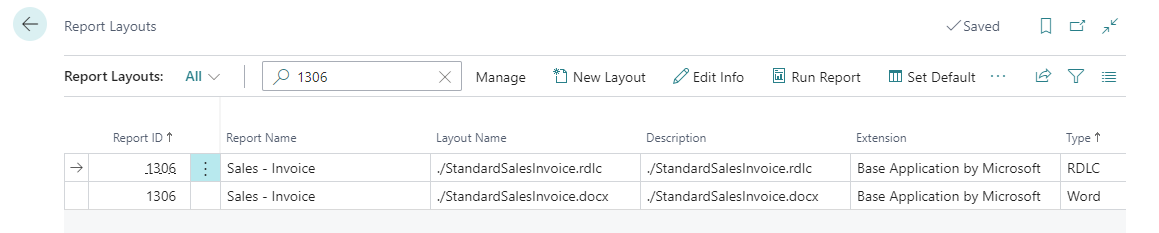
From the Report Layouts page - The Report Layouts page displays all available layouts for each report in the current company. It's also used to specify the default layout for reports. It's easy to find a specific layout by sorting or filtering the list. Once you find the layout, you can set it for a report with a single selection.


You can't use the Report Layouts page for Word and RDLC layouts that were created by using the legacy Custom Layouts feature. In fact, you won't even see these custom layouts listed on the Report Layouts page. For these layouts, you can only set them by using Report Layout Selection page.
To set the layout from the Report Layouts page, follow these steps:
Select the lightbulb icon that opens the Tell Me feature, enter Report Layouts, and then select the related link.
The Report Layouts page appears and lists all the layouts currently available for all reports.
Find the layout in the list, select it, then select the Set Default action at the top of the page.
To set the layout from Report Layout Selection page, follow these steps:
Select the lightbulb icon that opens the Tell Me feature, enter Report Layout Selection, and then select the related link.
The page lists all the reports that are available for the company that's specified in the Company field at the top of the page. The Layout Description field specifies the layout that the report currently uses.
Set the Company field at the top to the company that includes the report.
Find and select the report in the list, then do one of the following steps:
If the layout that you want to switch to is a different type than the current layout, select the Layout Type field, then choose the type of the layout you want to set on the report.
If the layout that you want to switch to the same type as the current layout, select the Select Layout action at the top of the page.
In the Report Layouts page, select the layout, then select OK.
Reports are designed to use a layout by default. You can switch back to the original default layout from the Report Layout Selection page. Just select the report, then select the Restore Default Selection action at the top of the page.
Create a new layout
There are two ways to create a new layout from an existing layout. One way is by saving the existing layout to a copy. The other way is to export the existing layout.
Copying is a quick way to create a new layout that's the same as an existing layout. Once you have the copy, you'll make modifications by exporting the layout. To copy a layout and edit it, follow these steps:
Select the lightbulb icon that opens the Tell Me feature, enter Report Layouts, and then select the related link.
The Report Layouts page appears and lists all the layouts currently available for all reports.
Select the layout that you want a copy of for your new layout, then choose the Edit Info action.
If you selected an extension layout, you're prompted whether you want to edit a copy. To continue, select Yes.
To help you find the layout, you can use the Search box, Filter pane, and columns sorting.
Change the Layout Name.
Turn the Save Changes to Copy switch to On, then select OK.
The new layout shows in the Report Layouts page.
Exporting and Importing is another way to create a new layout. Follow these steps:
Select the lightbulb icon that opens the Tell Me feature, enter Report Layouts, and then select the related link.
The Report Layouts page appears and lists all the layouts currently available for all reports.
Select the layout that you want a copy of for your new layout, then select the Export Layout action. The layout file is downloaded to your device.
To help you find the layout, use the Search box, Filter pane, and columns sorting.
Open the layout file in the appropriate application, like Word (for a .docx file) or Excel (for an .xlsx file).
Make necessary changes to the file and save it.
Back on Report Layouts, select the New Layout action.
Fill in the following fields:
Report ID: Set this field to the ID assigned to the report.
Layout Name: Type a brief description name for the layout to help you easily identify it.
Description: Type more detailed information the layout.
Format Options: Set this field to match the type of the layout, like Word, Excel, or RDLC.
Select OK and open file explorer on your device.
Find and select the Excel file, then select Open.
The selected file is uploaded to the layout, and you return to the Report Layouts page.
If you want to see how the report looks with the new layout, select the layout in the list, then select Run Report.
Modify a layout
Follow these steps to modify an existing user-defined layout:
Select the lightbulb icon that opens the Tell Me feature, enter Report Layouts, and then choose the related link.
The Report Layouts page appears and lists all the layouts currently available for all reports.
Select the layout that you want to modify, then choose the Export Layout action. The layout file is downloaded to your device.
To help you find the layout, use the Search box, Filter pane, and columns sorting.
Open the layout file in the appropriate application, like Word (for a .docx file) or Excel (for an .xlsx file).
Make neccessary changes to the file and save it.
Back on the Report Layouts page, select the existing layout, then select the Replace Layout action.
Select OK and select to open file explorer on your device.
Find and select the Excel file, then select Open.
The selected file is uploaded to the layout, and you return to the Report Layouts page.
If you want to see how the report looks with the new layout, select the layout in the list, then select Run Report.
Replace a layout
Follow these steps to replace the existing user-defined layout file with a new file.
Select the lightbulb icon that opens the Tell Me feature, enter Report Layouts, and then select the related link.
The Report Layouts page appears and lists all the layouts currently available for all reports.
Select the existing layout, then select the Replace Layout action.
Select OK and select to open file explorer on your device.
Find and select the Excel file, then select Open.
The selected file is uploaded to the layout, and you return to the Report Layouts page.
If you want to see how the report looks with the new layout, select the layout in the list, then select Run Report.
Rename a layout
Follow these steps if you want to change the name and description of a user-defined layout.
Select the lightbulb icon that opens the Tell Me feature, enter Report Layouts, and then select the related link.
The Report Layouts page appears and lists all the layouts currently available for all reports.
Select the layout that you want to rename, then choose the Edit Info action.
To help you find the layout, use the Search box, Filter pane, and columns sorting.
Change the Layout Name, then select OK.
Available fonts
The online version of Business Central contains pre-installed fonts on the servers that can be used when generating reports. For security and legal reasons, you can't upload custom fonts to the Business Central environment. Refer to Available Fonts for a list of fonts available for use in Business Central.
Magnetic Ink Character Recognition (MICR) fonts are installed and available to use.
Both the E-13B and the CMC-7 standards are supported.
In addition to MICR fonts, special security fonts are available to generate text, names, amounts, and the currency symbols Dollar, Euro, Pound, and Yen, which are hard to tamper with once a check has been printed.
Fonts to generate barcodes are installed and available to use in both Word and RDLC report layouts.
The following one-dimensional barcode symbologies are supported:
Code 3 of 9 (Code 39)
Code 128
Code 93
Codabar
MSI
Interleaved 2 of 5
The following two-dimensional barcode symbologies are supported:
Aztec
Data Matrix
Maxicode
PDF417
QR