Note
Access to this page requires authorization. You can try signing in or changing directories.
Access to this page requires authorization. You can try changing directories.
This article provides detailed steps to troubleshoot issues when the Azure Monitor Agent (AMA) installation fails on Azure Windows virtual machines (VMs).
Note
To complete the troubleshooting process, ensure that you know the resource ID of the VM and have administrative access to its operating system.
Step 1: Start the VM if it's not running
Sign in to the Azure portal.
Select the VM where the AMA agent is installed.
On the VM's Overview page, check if the VM Status is Running.

If the VM is running, move to Step 2: Verify if the VM has a managed identity.
If the VM isn't running, start it and wait for it to fully boot and become operational.

Step 2: Verify if the VM has a managed identity
Sign in to the Azure portal.
Select the VM where the AMA agent is installed.
Under the Security blade, select Identity
Check if the "SystemAssigned" or "UserAssigned" identity exists.
If one or both identities exist, move to Step 3: Verify if the extension exists in the VM configuration.
If neither is displayed, enable a system-assigned managed identity or assign a user-assigned managed identity.
To determine which identity is appropriate for your environment, see What are managed identities for Azure resources?
Enable a system-assigned managed identity on an existing VM
To enable a system-assigned managed identity on a VM that was originally provisioned without it, your account needs the Virtual Machine Contributor role assignment. No other Microsoft Entra directory role assignments are required.
Sign in to the Azure portal using an account associated with the Azure subscription that contains the VM.
Navigate to the desired VM and select Identity.
Under System assigned > Status, select On, and then select Save:


Assign a user-assigned managed identity to an existing VM
To assign a user-assigned managed identity to a VM, your account needs the Virtual Machine Contributor and Managed Identity Operator role assignments. No other Microsoft Entra directory role assignments are required.
Sign in to the Azure portal using an account associated with the Azure subscription that contains the VM.
Navigate to the desired VM and select Identity > User assigned > +Add.
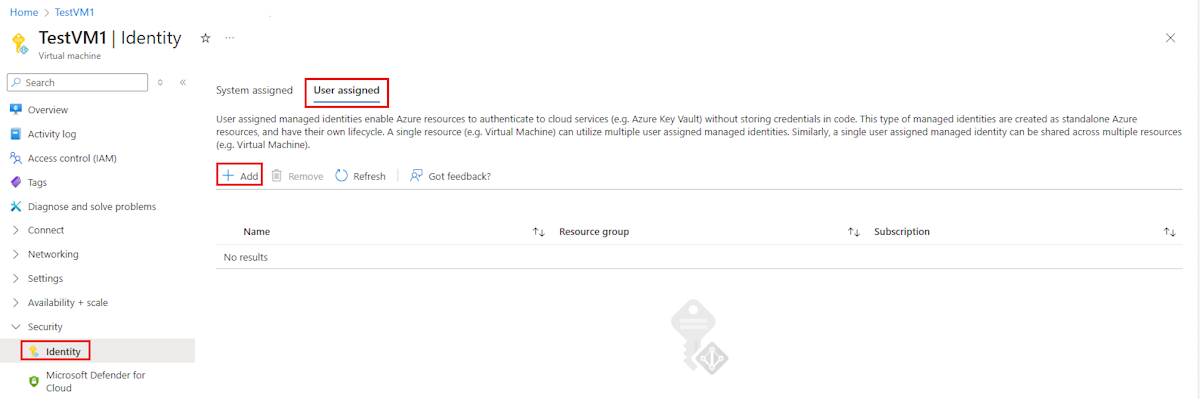
Select the user-assigned identity you want to add to the VM and then select Add.


Step 3: Verify if the extension exists in the VM configuration
Navigate to the Azure portal.
Locate your VM:
- In the left-hand menu, select Virtual Machines.
- Find and select the VM you want to check from the list.
Check the VM's extensions:
In the VM's left-hand menu, select Extensions + applications under the Settings section.
Look for the extension with the type
Microsoft.Azure.Monitor.AzureMonitorWindowsAgent.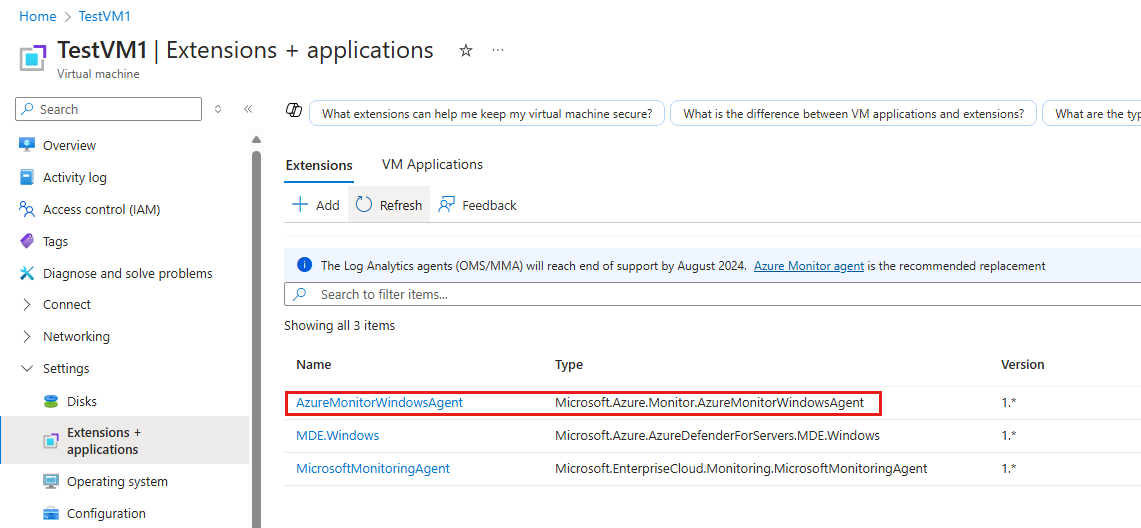
If the extension exists, go to step 4.
If the extension doesn't exist, go to step 5.
Verify the extension status:
Check the Status column for the
Microsoft.Azure.Monitor.AzureMonitorWindowsAgentextension.If the status is "Provisioning Succeeded," skip steps 5 and 6 and move to Step 4: Verify if the VM Guest Agent is running.

If the status isn't "Provisioning Succeeded," proceed to steps 5 and 6.
Install the extension:
- Select the Add button.
- Search for and select
AzureMonitorWindowsAgent. - Follow the prompts to install the extension on the VM.
Check the extension and its status again.


After the extension is installed, repeat steps 3 and 4 to ensure the extension is now present and the status is "Provisioning Succeeded."
Step 4: Verify if the VM Guest Agent is running
Check the status of the VM Guest Agent by using one of the following methods:
Use the Azure portal.
- Navigate to the Azure portal.
- Locate your VM:
- In the left-hand menu, select Virtual Machines.
- Find and select the VM you want to check from the list.
- Check the VM's extension:
- In the VM's left-hand menu, select Extensions + applications under the Settings section.
- Look for the extension with the type
Microsoft.Azure.Monitor.VirtualMachines.GuestHealth.GuestHealthWindowsAgent.
- Verify that the status is "Provisioning Succeeded."
Run the
Get-Service WindowsAzureGuestAgentPowerShell cmdlet and check theStatuscolumn in the command output: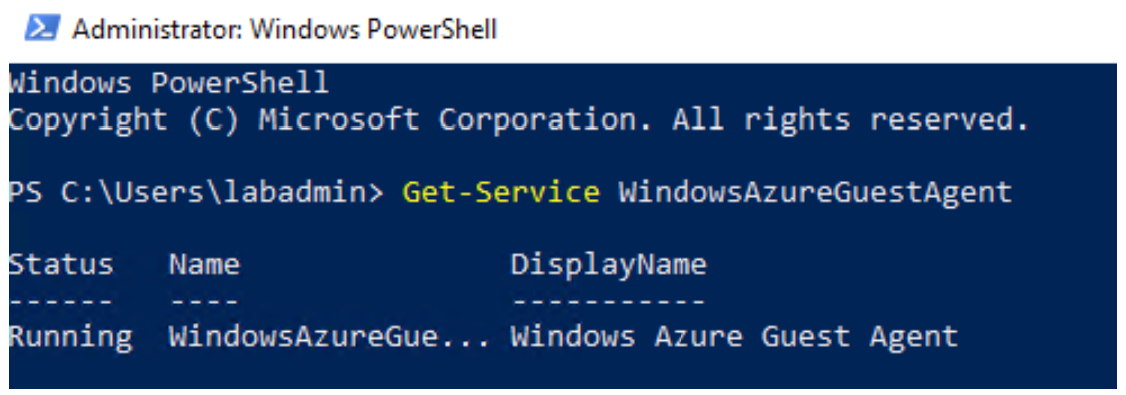
If the VM Guest Agent is running, move to Step 5: Verify if the VM Guest Agent downloads the extension binaries.
Step 5: Verify if the VM Guest Agent downloads the AMA extension binaries
Navigate to the Azure portal:
Locate your VM:
- In the left-hand menu, select Virtual Machines.
- Find and select the VM you want to check from the list.
Check the VM's extensions:
- In the VM's left-hand menu, select Extensions + applications under the Settings section.
- Look for the extension with the type
Microsoft.Azure.Monitor.AzureMonitorWindowsAgent.
Check the VM Guest Agent logs:
- Under Support + troubleshooting, open the Boot Diagnostics tab.
- Select Serial log to view the VM boot and extension logs.
- Look for logs related to the
Microsoft.Azure.Monitor.AzureMonitorWindowsAgentextension.
Verify the extension binaries.
If the logs indicate that the binaries are downloaded and extracted, move to Step 6: Verify if the VM Guest Agent installs and enables the extension.
If the binaries are missing, the VM Guest Agent doesn't successfully download the extension binary files. In this case, go to step 6.
Restart the VM Guest Agent.
Connect to the VM using Remote Desktop Protocol (RDP).
Open a Command Prompt or PowerShell window.
Run the following commands:
net stop WindowsAzureGuestAgent
net start WindowsAzureGuestAgent
Verify the extension binaries again.
Repeat the preceding step 5 to verify if the binaries have been successfully downloaded and extracted after the restart.
Step 6: Verify if the VM Guest Agent has the AMA extension installed and enabled
To ensure that the Azure VM Guest Agent has installed and enabled the extension correctly, follow these steps:
Navigate to the Azure portal.
Locate your VM:
- In the left-hand menu, select Virtual Machines.
- Find and select the VM you want to check from the list.
Connect to your VM:
- Use RDP to connect to your VM.
- Enter your VM's IP address, username, and password to sign in.
Open File Explorer and navigate to the
C:\WindowsAzure\Logs\directory.Check the VM Guest Agent logs:
- Open the WaAppAgent.log file to view the VM Guest Agent logs.
- Look for logs related to the extension
Microsoft.Azure.Monitor.AzureMonitorWindowsAgent.
Verify the plugin environment setup:
Check for a log entry indicating the plugin environment is set up:
[00000010] YYYY-MM-DDTHH:MM:SS.SSSZ [WARN] Setting up plugin environment (name: Microsoft.Azure.Monitor.AzureMonitorWindowsAgent, version: X.Y.Z.Z)., Code: 0Verify the plugin installation:
Look for a log entry indicating the plugin installer is run:
[00000010] YYYY-MM-DDTHH:MM:SS.SSSZ [WARN] Installing plugin (name: Microsoft.Azure.Monitor.AzureMonitorWindowsAgent, version: X.Y.Z.Z), Code: 0
[00000010] YYYY-MM-DDTHH:MM:SS.SSSZ [WARN] Started a process with the launch command C:\Packages\Plugins\Microsoft.Azure.Monitor.AzureMonitorWindowsAgent\X.Y.Z.Z\AzureMonitorAgentExtension.exe, params: install.
Verify the plugin installation results:
Check for a log entry indicating the installation results:
[00000010] YYYY-MM-DDTHH:MM:SS.SSSZ [WARN] Installed plugin (name: Microsoft.Azure.Monitor.AzureMonitorWindowsAgent, version: X.Y.Z.Z), Code: 0Check the command execution logs:
- Navigate to the directory
C:\WindowsAzure\Logs\Plugins\Microsoft.Azure.Monitor.AzureMonitorWindowsAgent\{version}\. - Open the files named
CommandExecution*.logand check for any stdout or stderr messages during the installation and enablement process.
- Navigate to the directory
Verify that the plugin is enabled:
Look for log entries indicating the plugin is enabled:
[00000010] YYYY-MM-DDTHH:MM:SS.SSSZ [WARN] Enabling plugin (handler name: Microsoft.Azure.Monitor.AzureMonitorWindowsAgent, extension name: , version: X.Y.Z.Z)., Code: 0
[00000010] YYYY-MM-DDTHH:MM:SS.SSSZ [INFO] Command C:\Packages\Plugins\Microsoft.Azure.Monitor.AzureMonitorWindowsAgent\X.Y.Z.Z\AzureMonitorAgentExtension.exe of Microsoft.Azure.Monitor.AzureMonitorWindowsAgent has exited with Exit code: 0
[00000010] YYYY-MM-DDTHH:MM:SS.SSSZ [WARN] Setting the install state of the handler Microsoft.Azure.Monitor.AzureMonitorWindowsAgent_X.Y.Z.Z to Enabled
Check the extension status:
- Navigate to the directory
C:\Packages\Plugins\Microsoft.Azure.Monitor.AzureMonitorWindowsAgent\*\Status\. - Open the files named
*.statusand verify that the extension status is sent to Azure.
- Navigate to the directory
Identify and resolve issues (if you encounter them):
Identify and resolve issues based on the VM Guest Agent logs, and then move to Step 7: Verify if the AMA processes have started.
Tip
When you try to resolve the issues, you can refer to the Azure official documentation for further assistance.
If you can't identify or resolve the issues, search for the issues or ask for assistance in the Microsoft Q&A forum. Before seeking further help, ensure that you have collected the necessary logs.
Step 7: Verify if the AMA processes have started
Navigate to the Azure portal.
Locate your VM:
- In the left-hand menu, select Virtual Machines.
- Select the VM you want to check from the list.
Connect to your VM:
- Use RDP to connect to your VM.
- Enter your VM's IP address, username, and password to sign in.
Open Task Manager.
Once signed in, right-click the taskbar and select Task Manager. You can also select Ctrl+Shift+Esc to open Task Manager directly.
Check the AMA processes:
- In Task Manager, select the Processes tab.
- Look for the following processes:
AMAExtHealthMonitorMonAgentHostMonAgentLauncherMonAgentManager
Note
The
MonAgentCoreprocess isn't included in this list. It's part of the agent configuration, so the installation might succeed without starting this process.Verify if all the AMA processes are running.
If all four processes (
AMAExtHealthMonitor,MonAgentHost,MonAgentLauncher, andMonAgentManager) are listed and running, the agent processes have successfully started.
Next steps
Contact us for help
If you have questions or need help, create a support request, or ask Azure community support. You can also submit product feedback to Azure feedback community.