Note
Access to this page requires authorization. You can try signing in or changing directories.
Access to this page requires authorization. You can try changing directories.
This article provides guidance on how to use the Azure Resource Manager (ARM) template to create or update the Azure Cloud Services (extended support) deployment.
Background
Azure Cloud Services (extended support) is a new ARM-based deployment model for Azure Cloud Services. Cloud Services (extended support) has the primary benefit of providing regional resiliency along with feature parity with Azure Cloud Services deployed using Azure Service Manager. It also offers some ARM capabilities such as role-based access and control (RBAC), tags, policies, and supports deployment templates.
For classic Cloud Services, the Azure DevOps built-in pipeline task AzureCloudPowerShellDeployment@1 can help manage the CI/CD progress easily. But the task for Cloud Services (extended support) isn't ready yet.
Main points for publishing Cloud Services (extended support)
- Define some variables for the storage account to prepare for the ARM template deployment.
- Use the VSBuild@1 - Visual Studio build v1 task to build the cloud service project and output the cloud service package file or configuration file.
- Use the built-in AzureFileCopy@5 - Azure file copy v5 task to upload a build directory to the blob storage.
- Use the storage reference including the access key to generate a SAS token by AzurePowerShell@5 - Azure PowerShell v5 task, and output the token to a variable that will be used in the next task.
- Use the output of the previous task and the value for the AzureResourceManagerTemplateDeployment@3 - ARM template deployment v3 task.
Steps to publish Cloud Services (extended support)
Create a starter pipeline and prepare to upload to the storage account. These variables can help with the following further operations.
- stg_account <the name of storage account>
- stg_key <access key of storage account>
- stg_container <container name of storage account>
- stg_prefix $[format('{0:yyyyMMddHHmm}', pipeline.startTime)]
- stg_url
https://$(stg_account).blob.core.windows.net/$(stg_container) - cscfg_name <the name of the configuration file>
- cspkg_name <the name of the package file>
- url_cscfg $(stg_url)/$(stg_prefix)/$(cscfg_name)
- url_cspkg $(stg_url)/$(stg_prefix)/$(cspkg_name)
Use the Visual Studio build task to build your task based on your cloud service project solution file and output it to a local path on the agent. For more information, see MSBuild.

Here's the YAML file to build a project:
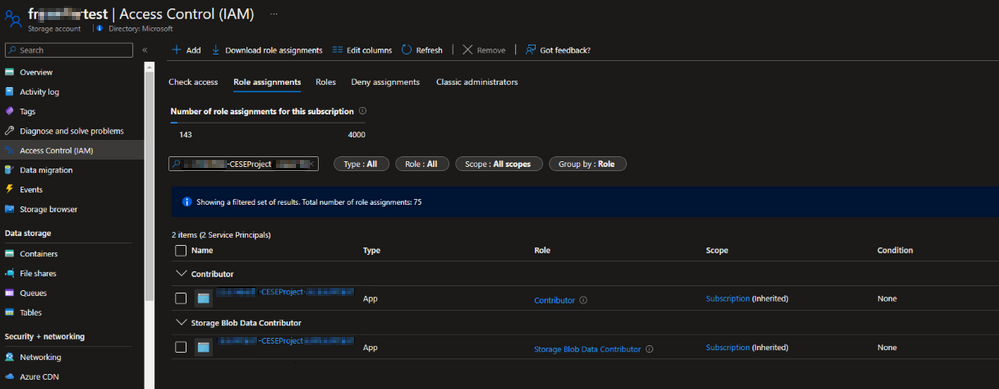
# Build your project under your repository.
# 1. Restore the NuGet dependency.

- task: NuGetCommand@2
  inputs:
    command: 'restore'
    restoreSolution: '**/*.sln'
    feedsToUse: 'select'
    vstsFeed: xxx

# 2. Use MS build to output the cloud service project configuration and package to the temporary location of the local agent.

- task: VSBuild@1
  inputs:
    solution: '**\*.sln'
    msbuildArgs: '/t:Publish /p:DeployOnBuild=true /p:AutomatedBuild=True /p:configuration=release /p:TargetProfile=Cloud /p:PublishDir=%SYSTEM_DEFAULTWORKINGDIRECTORY%/Debug/publish'

# 3. Copy the configuration and package files to the local path on the agent where any artifacts locate.

- task: CopyFiles@2
  inputs:
    SourceFolder: 'Debug/publish'
    Contents: '**'
    TargetFolder: '$(Build.ArtifactStagingDirectory)'

# 4. Copy the definition file to the local path on the agent where any artifacts locate.

- task: CopyFiles@2
  inputs:
    SourceFolder: 'Project'
    Contents: '*.csdef'
    TargetFolder: '$(Build.ArtifactStagingDirectory)'
Use the pipeline task AzureFileCopy@4 - Azure file copy v4 task to upload the configuration, definition, and package files of the cloud service. The task supports authentication based on Microsoft Entra ID. Authentication can be done using a service principal and managed identity. You can assign the permission Contributor and Storage Blob Data Contributor to allow the access of service connections.
Find the service principle in the project settings:

The YAML version of File Copy:
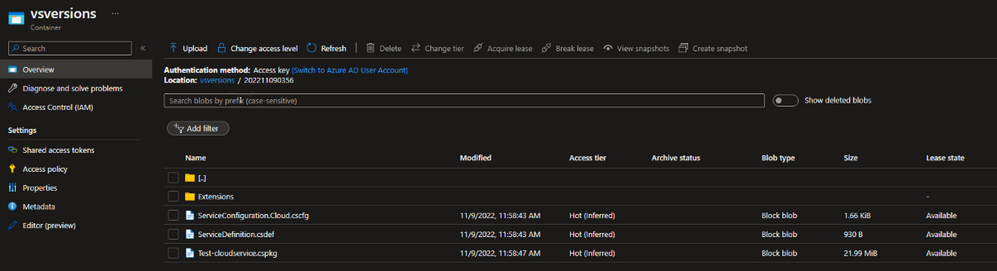
# Upload the cloud service via Azure File Copy
- task: AzureFileCopy@5
  inputs:
    SourcePath: '$(Build.ArtifactsStagingDirectory) /*'        # you can set $(Build.ArtifactsStagingDirectory) as Build part for output of the MSBuild.
    azureSubscription: xxx                                     # the name of service connector
    Destination: 'AzureBlob'
    storage: $(stg_account)                                    # variable stg_account
    ContainerName: $(stg_container)                            # variable stg_container
    BlobPrefix: $(stg_prefix)                                  # variable stg prefix is $[format('{0:yyyyMMddHHmm}', pipeline.startTime)]
    AdditionalArgumentsForBlobCopy: '--recursive'              # recursively copy the files in this directory
After copying the file, you'll see the copied cloud service package in the storage.
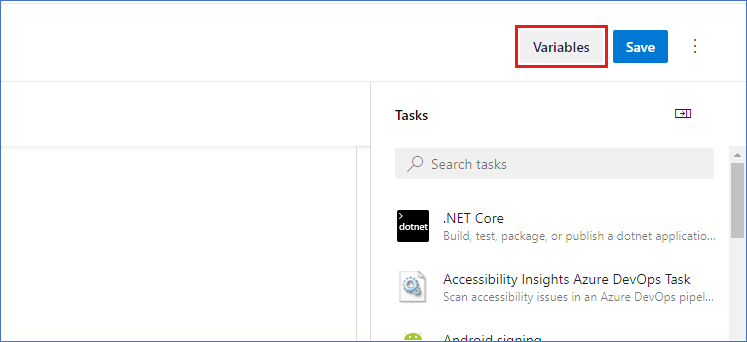
Use the Azure PowerShell pipeline task to generate a temporary SAS token for five minutes.
# Generate temp SAS token for 5 mins
- task: AzurePowerShell@5                                                     # please make sure the Azure PowerShell contains the module of Az and AzureRm.
  name: GenerateSasToken
  inputs:
    azureSubscription: xxx                                                    # the name of service connector
    ScriptType: 'InlineScript'
    Inline: |
      $account_name = ${env:STG_ACCOUNT}
      $account_key = ${env:STG_KEY}
      $context = New-AzStorageContext -StorageAccountName $account_name -StorageAccountKey $account_key
      $sas = New-AzStorageAccountSASToken -Service Blob -ResourceType Service,Container,Object -Permission "rl" -ExpiryTime (Get-Date).AddMinutes(5) -Context $context
      $cspkg = ${env:URL_CSPKG} + $sas
      $cscfg = ${env:URL_CSCFG} + $sas
      Write-Host ("##vso[task.setvariable variable=cspkg]$cspkg")             # output $cspkg in PowerShell to global variable cspkg
      Write-Host ("##vso[task.setvariable variable=cscfg]$cscfg")             # output $cscfg in PowerShell to global variable cscfg
    azurePowerShellVersion: 'LatestVersion'
Use the ARM template pipeline task to deploy the Cloud Services (extended support) deployment. To get the sample template, see 101-cses-multirole-rdp.
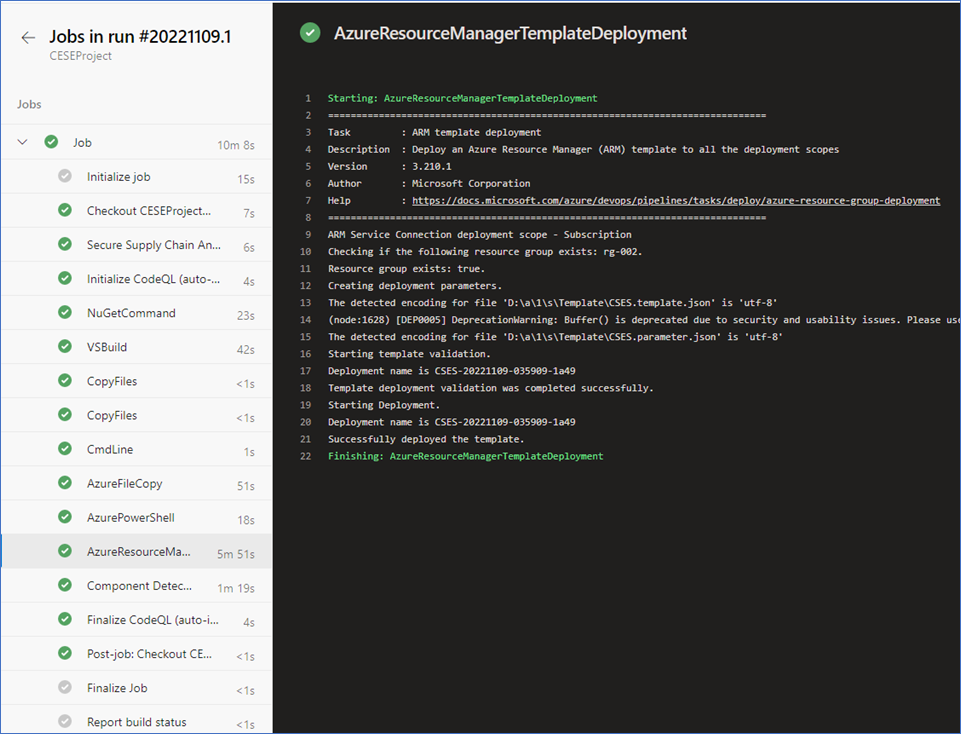
#Azure Resource Manager template deployment
- task: AzureResourceManagerTemplateDeployment@3
  inputs:
    deploymentScope: 'Resource Group'                                           # resource group level deployment
    azureResourceManagerConnection: xxx                                         # the name of service connector
    subscriptionId: xxx                                                         # subscription id of the service connector
    action: 'Create Or Update Resource Group'
    resourceGroupName: 'rg-002'
    location: 'Australia Central'
    templateLocation: 'Linked artifact'
    csmFile: 'Template/CSES.template.json'
    csmParametersFile: 'Template/CSES.parameter.json'
    overrideParameters: '-packageSasUri $(cspkg) -configurationSasUri $(cscfg) -cloudServiceName cses4test002 -deploymentLabel deploy$(stg_prefix)' # overwrite some parameters of template.
    deploymentMode: 'Incremental'
After the deployment is complete, you should see the following task results and the cloud service with the tag. You can change the code and configuration to update the current deployment.


In the Azure portal, you can find the deployment results in the cloud service resource group.

The deployment label should be the same as the timestamp you defined.

Contact us for help
If you have questions or need help, create a support request, or ask Azure community support. You can also submit product feedback to Azure feedback community.