Note
Access to this page requires authorization. You can try signing in or changing directories.
Access to this page requires authorization. You can try changing directories.
Applies to: ✔️ Windows VMs
You can reset the local Windows password of a VM in Azure using the Azure portal or Azure PowerShell provided the Azure guest agent is installed. This method is the primary way to reset a password for an Azure VM. If you encounter issues with the Azure guest agent not responding, or failing to install after uploading a custom image, you can manually reset a Windows password. This article details how to reset a local account password by attaching the source OS virtual disk to another VM. The steps described in this article do not apply to Windows domain controllers.
Warning
Only use this process as a last resort. Always try to reset a password using the Azure portal or Azure PowerShell first.
Overview of the process
The core steps for performing a local password reset for a Windows VM in Azure when there is no access to the Azure guest agent is as follows:
- Stop the affected VM.
- Create a snapshot for the OS disk of the VM.
- Create a copy of the OS disk from the snapshot.
- Attach and mount the copied OS disk to another Windows VM, then create some config files on the disk. The files will help you to reset the password.
- Unmount and detach the copied OS disk from the troubleshooting VM.
- Swap the OS disk for the affected VM.
Detailed steps for the VM with Resource Manager deployment
Note
The steps do not apply to Windows domain controllers. It only works on standalone server or a server that is a member of a domain.
Always try to reset a password using the Azure portal or Azure PowerShell before trying the following steps. Make sure you have a backup of your VM before you start.
Take a snapshot for the OS disk of the affected VM, create a disk from the snapshot, and then attach the disk to a troubleshoot VM. For more information, see Troubleshoot a Windows VM by attaching the OS disk to a recovery VM using the Azure portal.
Connect to the troubleshooting VM using Remote Desktop.
Create
gpt.iniin\Windows\System32\GroupPolicyon the source VM's drive (if gpt.ini exists, rename to gpt.ini.bak):Warning
Make sure that you do not accidentally create the following files in C:\Windows, the OS drive for the troubleshooting VM. Create the following files in the OS drive for your source VM that is attached as a data disk.
Add the following lines into the
gpt.inifile you created:[General] gPCFunctionalityVersion=2 gPCMachineExtensionNames=[{42B5FAAE-6536-11D2-AE5A-0000F87571E3}{40B6664F-4972-11D1-A7CA-0000F87571E3}] Version=1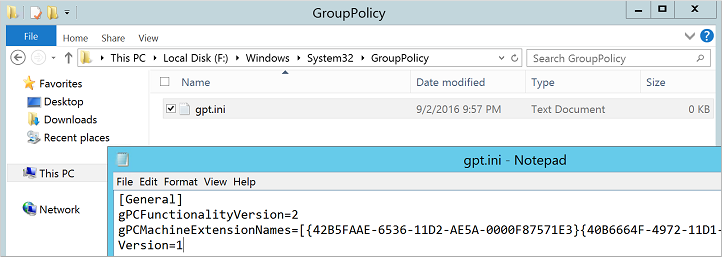
Create
scripts.iniin\Windows\System32\GroupPolicy\Machine\Scripts\. Make sure hidden folders and file name extensions are shown. If needed, create theMachineorScriptsfolders.Add the following lines the
scripts.inifile you created:[Startup] 0CmdLine=FixAzureVM.cmd 0Parameters=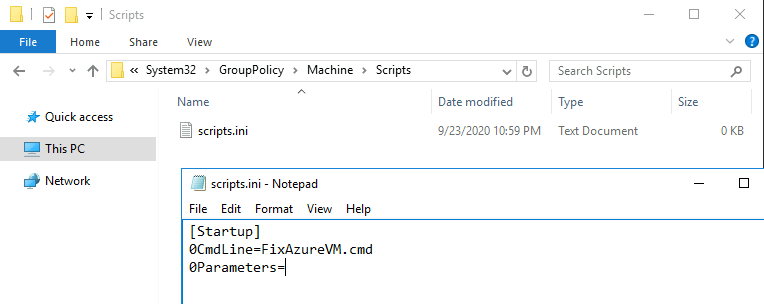
Create
FixAzureVM.cmdin\Windows\System32\GroupPolicy\Machine\Scripts\Startup\with the following contents, replacing<username>and<newpassword>with your own values:net user <username> <newpassword> /add /Y net localgroup administrators <username> /add net localgroup "remote desktop users" <username> /add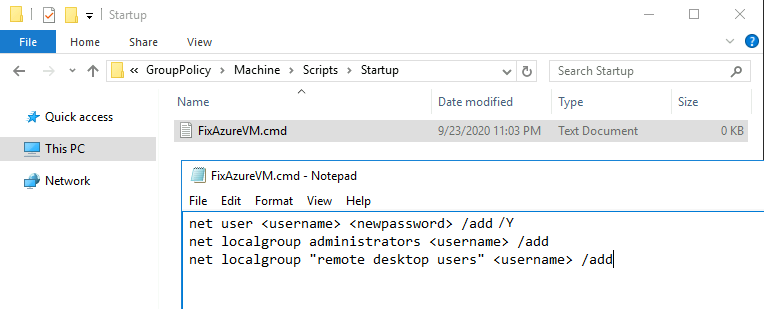
You must meet the configured password complexity requirements for your VM when defining the new password.
In Azure portal, detach the disk from the troubleshooting VM.
After the new VM is running, connect to the VM using Remote Desktop with the new password you specified in the
FixAzureVM.cmdscript.From your remote session to the new VM, remove the following files to clean up the environment:
- From %windir%\System32\GroupPolicy\Machine\Scripts\Startup
- remove FixAzureVM.cmd
- From %windir%\System32\GroupPolicy\Machine\Scripts
- remove scripts.ini
- From %windir%\System32\GroupPolicy
- remove gpt.ini (if gpt.ini existed before, and you renamed it to gpt.ini.bak, rename the .bak file back to gpt.ini)
- From %windir%\System32\GroupPolicy\Machine\Scripts\Startup
Next steps
If you still cannot connect using Remote Desktop, see the RDP troubleshooting guide. The detailed RDP troubleshooting guide looks at troubleshooting methods rather than specific steps. You can also open an Azure support request for hands-on assistance.
Contact us for help
If you have questions or need help, create a support request, or ask Azure community support. You can also submit product feedback to Azure feedback community.