Note
Access to this page requires authorization. You can try signing in or changing directories.
Access to this page requires authorization. You can try changing directories.
This article helps you resolve the warnings that occur for an untrusted certificate after you install Microsoft Visual Studio 2015 Update 3.
Original product version: Visual Studio 2015
Original KB number: 3180222
Symptoms
You have developed web applications through Hypertext Transfer Protocol Secure (HTTPS) by using the release version of Visual Studio 2015, Update 1 or Update 2. However, after you install Visual Studio 2015 Update 3, you start receiving warnings about an untrusted certificate.
Cause
During the initial installation of Visual Studio, Internet Information Services (IIS) Express installs a self-signed certificate into the Certificates (Local Computer)\Personal\Certificates folder if a certificate doesn't already exist. The first time that you debug a web application that uses Secure Sockets Layer (SSL), you are prompted to install this certificate into the Certificates - Current User\Trusted Root Certification Authorities\Certificates folder.
During the upgrade to Visual Studio 2015 Update 3, IIS Express installs a new SHA256 self-signed certificate into the Certificates (Local Computer)\Personal\Certificates folder. However, because there is already a certificate installed in the Certificates - Current User\Trusted Root Certification Authorities\Certificates folder, Visual Studio fails to prompt you to install the new SHA256 certificate into the Certificates - Current User\Trusted Root Certification Authorities\Certificates folder.
Method 1: Use a PowerShell script
Note
This is the preferred method.
Run the following script in the Windows PowerShell Integrated Scripting Environment (ISE):
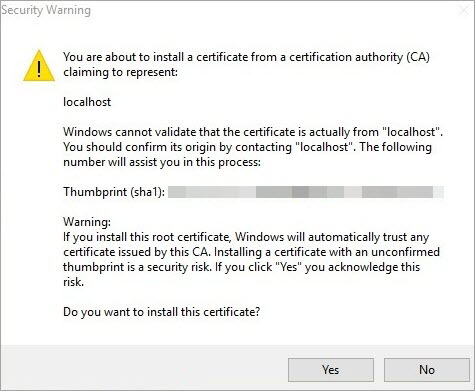
ipmo PKI
$name = [GUID]::NewGuid()
$cerFile = "$env:TEMP\$name.cer"
$certs = Get-ChildItem Cert:\LocalMachine\My -DnsName localhost -SSLServerAuthentication |
? {($_.FriendlyName -eq 'IIS Express Development Certificate') -and
($_.SignatureAlgorithm.FriendlyName -ieq 'sha256RSA') -and
($_.EnhancedKeyUsageList.Count -eq 1)}
if ($certs.Count -eq 0)
{
    Write-Error 'Cannot find any SHA256 certificate generated by IIS Express.
    Please make sure that the latest version of IIS Express is installed.'
}
else
{
    foreach ($cert in $certs)
    {
        Export-Certificate -Cert $cert.PSPath -FilePath $cerFile -Type CERT | Out-Null
        Import-Certificate -FilePath $cerFile -CertStoreLocation Cert:\CurrentUser\Root | Out-Null
        Remove-Item $cerFile -Force
    }
    Write-Host 'Successfully installed the certificate to
    Trusted Root Certification Authorities of the current user.'
}
Click Yes when you receive the following warning:
After the script finishes running, you should see the following message in the PowerShell ISE command window:
Successfully installed the certificate to Trusted Root Certification Authorities of the current user.
Method 2: Configure computers to trust the IIS Express certificate
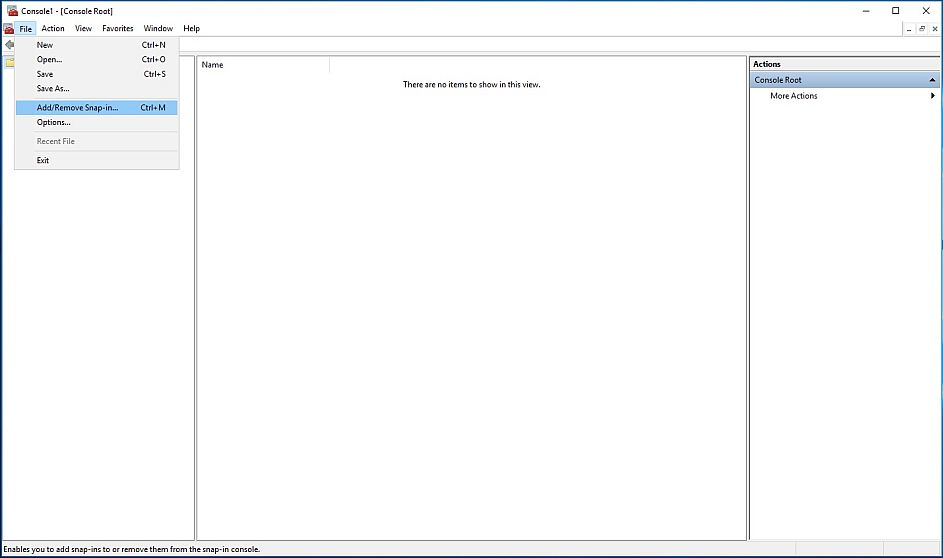
Open the Microsoft Management Console by clicking Start, typing Run, and then pressing Enter. In the Run dialog box, type mmc, and then click OK.

Add a snap-in to manage certificates for the local computer. To do this, follow these steps:
On the File menu, click Add/Remove Snap-in.
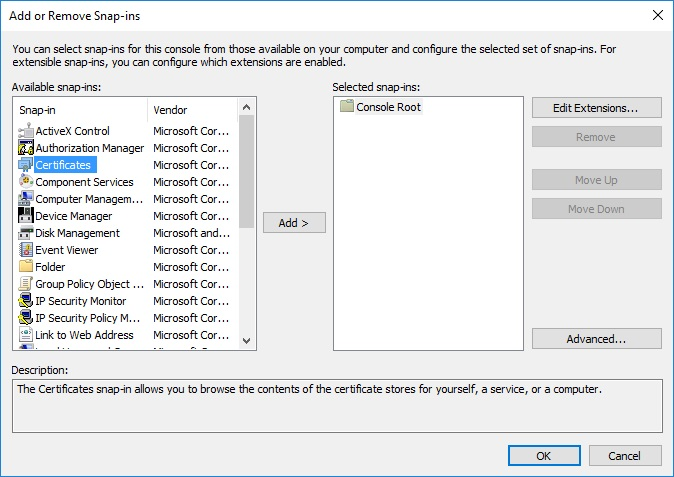
In the Add or Remove Snap-ins dialog box, select Certificates, and then click Add.
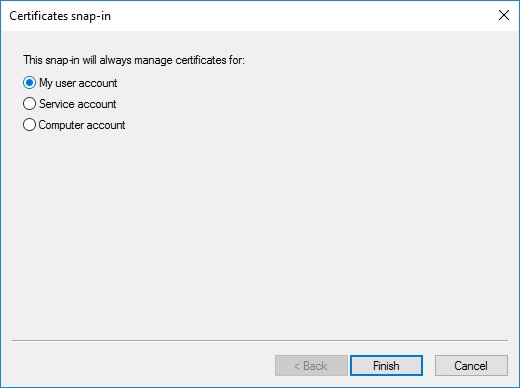
In the Certificates snap-in dialog box, select Computer account, and then click Next.

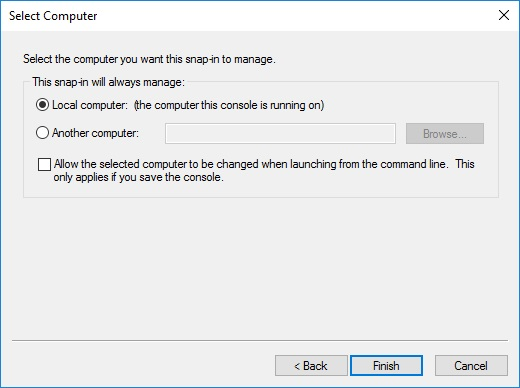
In the Select Computer dialog box, select Local Computer, and then click Finish.
In the Add or Remove Snap-ins dialog box, select Certificates again, and this time select My user account in the Certificates snap-in dialog box.
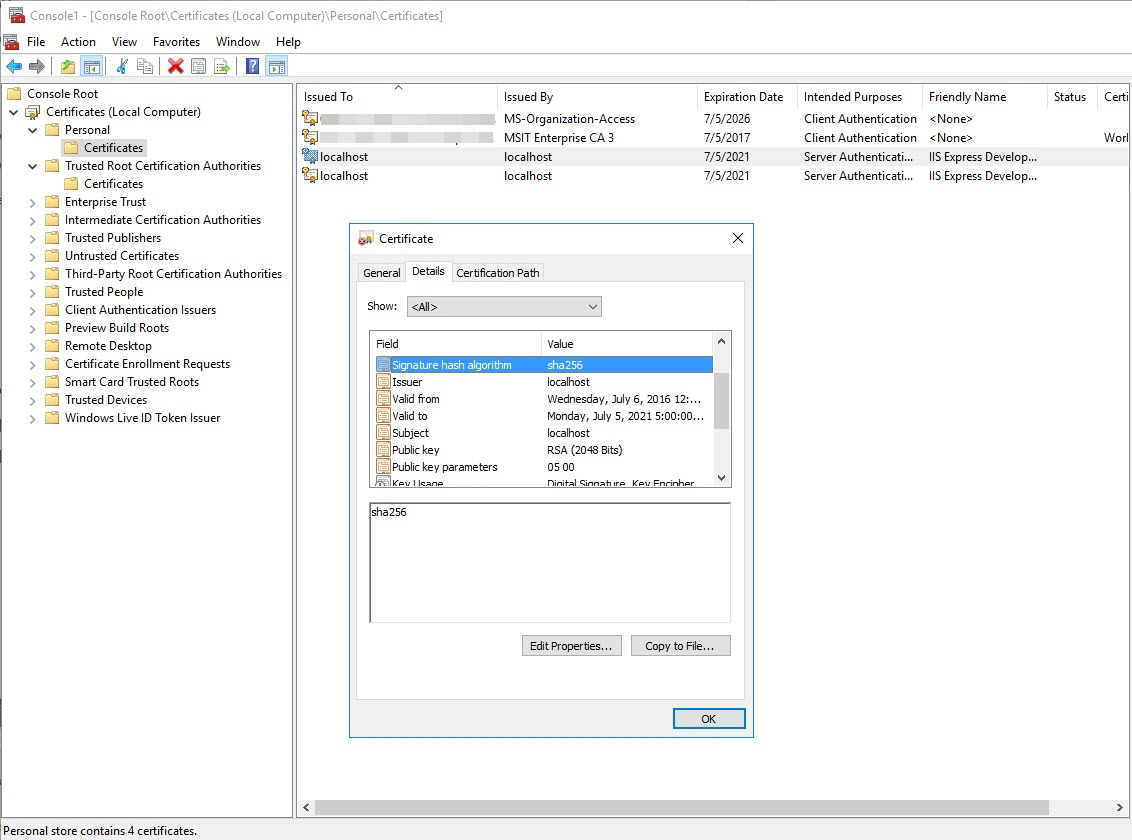
Export the SHA256 IIS Express certificate from
Certificates (Local Computer)\Personal\Certificates, as follows:Open the IIS Express Development Certificate, verify that you have selected the SHA256 certificate. and then click Copy to File.
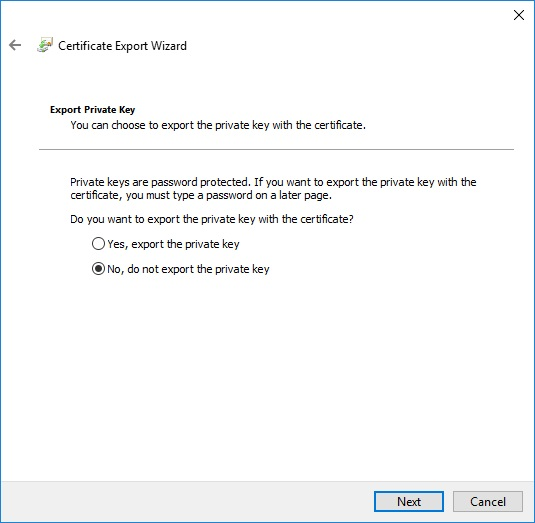
In the Certificate Export Wizard, select No, do not export the private key, and then click Next.
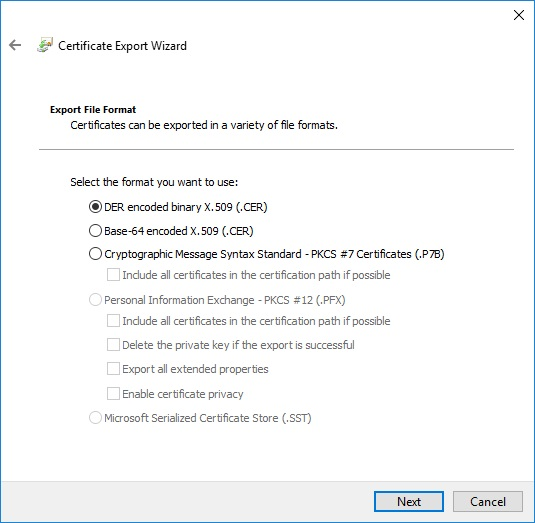
On the next page of the wizard, select DER encoded binary X.509 (.CER), and then click Next.
On the next page of the wizard, select a location on disk, and follow the remaining steps until you have successfully exported the certificate.
Import the exported certificate to the following location:
Certificates - Current User\Trusted Root Certification Authorities\CertificatesTo do this, follow these steps:
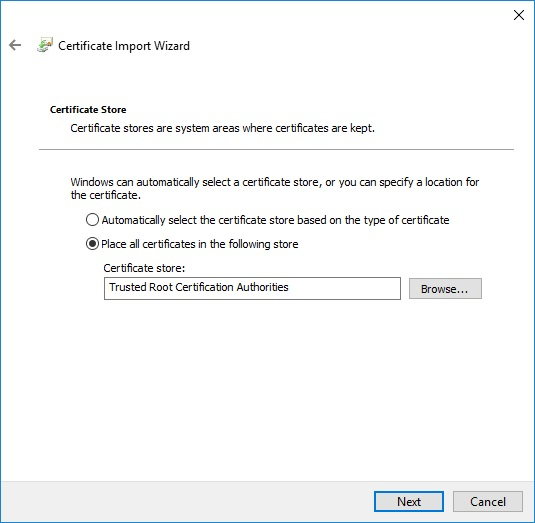
Navigate to the
Certificates - Current User\Trusted Root Certification Authorities\Certificatesfolder, and then click Action, point to All Tasks, and then click Import.In the Certificate Import Wizard, browse to the certificate that you exported (Trusted Root Certification Authorities), and then select Place all certificates in the following store.
Click Next, verify that you selected the correct certificate, and then click Finish.
After you have successfully imported the self-signed IIS certificate, you will no longer receive warnings about an untrusted certificate during development.