Note
Access to this page requires authorization. You can try signing in or changing directories.
Access to this page requires authorization. You can try changing directories.
Applies to: .NET Core 2.1, .NET Core 3.1, .NET 5
This article introduces how to install Nginx and configure it as a reverse proxy server.
Prerequisites
To follow the exercises in this part, you must have one ASP.NET Core web application created and deployed to the /var folder.
Goal of this part
In the previous part, you created an ASP.NET Core web application by using the .NET CLI tool, and the application is deployed to the /var folder. The application was also configured to listen on port 5000 for HTTP requests, and HTTPS redirection was removed.
At this point, the clients should provide the port number when you connect to the application (for example, http://localhost:5000). However, this isn't the desired behavior.
Our goals in this part are as follows:
- Clients should be able to navigate without having to provide a port number. For example, clients should connect by using
http://localhost. - The web application should start automatically if it stops for some reason or after the computer restarts.
In the next section, you'll use Nginx as a proxy server to route the HTTP requests that are made to port 80 to our .NET application instead. You'll also configure your application to start automatically.
What is Nginx?
Nginx is a popular, lightweight, and fast web server. It can run on both Linux and Windows, and it can be configured as a reverse proxy server.
What is a daemon?
Nginx runs as a daemon. A daemon is an alternative term for a service that runs in the background. Just like the services that run on Windows, daemons can be configured to auto-start during startup. You'll configure your ASP.NET Core application to run as a daemon.
Install Nginx by using APT
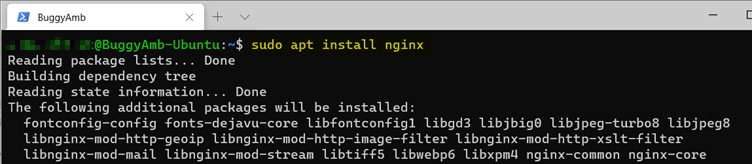
Installing Nginx is straightforward. Run the sudo apt install nginx command to install the program on the Ubuntu virtual machine.
After the installation finishes, run whereis nginx to discover where the program is installed. You can see where the Nginx configuration files are located by inspecting the output. The following screenshot shows that the configuration files are located in the /etc/nginx folder.

Note
If you run a distribution other than Ubuntu or Debian, you can find the equivalent package manager installation command or instructions from the official Nginx installation documentation.
Manage services by using systemctl
If you don't see that Nginx is running, you can start it explicitly by running sudo systemctl start nginx. Although this exercise will demonstrate the systemctl commands for Nginx, these commands are used to configure the web application to start automatically as a daemon.
After the installation finishes, Nginx is already configured to start automatically. Nginx runs as a daemon. You can check the status of the daemon by using systemctl.
The systemctl command is used to manage "services" for such tasks as showing the status of the service, or starting and stopping it. Some available parameters are start, stop, restart, enable, disable, and status. To check the status of Nginx, run systemctl status nginx.
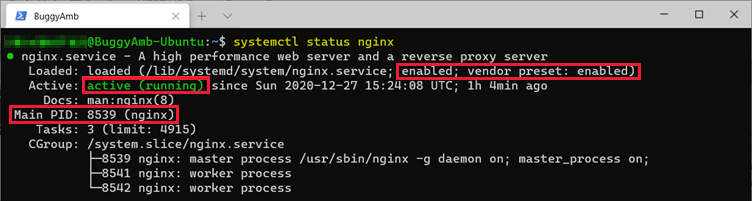
This command generates some useful information. As this screenshot shows, Nginx is in active (running) status, and the process ID of the Nginx instance is 8539. Also notice the enabled and vendor preset: enabled statements. Enabled means that this daemon will start when the machine is restarted, and vendor preset: enabled means that Nginx is enabled by default when it's installed. Therefore, Nginx will start automatically when the server is started.
Test the Nginx installation
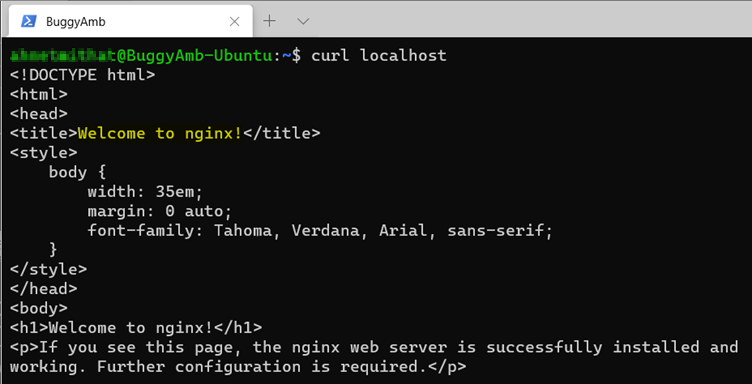
By default, Nginx listens on port 80. Because it's running, you should be able to access the main page of Nginx when you browse localhost. Use curl to test Nginx by running curl localhost. The yellow highlighted text in the following screenshot shows the Nginx default web page. Therefore, Nginx is running:
systemctl command options
Services, or daemons, can be managed by using the systemctl command. Starting, stopping, or making changes require superuser access. Therefore, you must add the sudo prefix to these commands.
Restart daemons
You might have to restart the daemons from time to time. To restart a daemon, run sudo systemctl restart <daemon_name>. To restart Nginx, run sudo systemctl restart nginx. Make sure that you check the status of Nginx before and after you run this command to monitor changes to the process ID.
Stop daemons
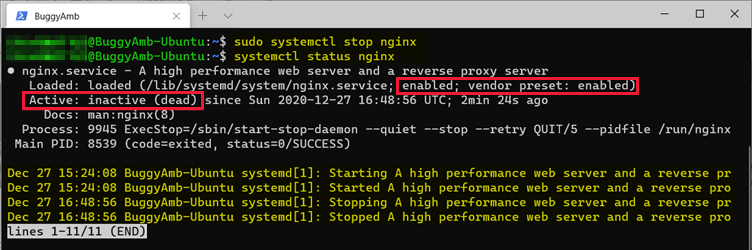
To stop a daemon, run sudo systemctl stop <daemon_name>. To stop Nginx, run sudo systemctl stop nginx, and then check the status of Nginx by running systemctl status nginx again. This time, the service is shown as inactive (dead) but still enabled. This means that although the service isn't running, it will start automatically after the server is restarted.
Note
The systemctl status command also displays several lines of previous log entries for the daemon.
After you stop Nginx, run curl localhost again.
Note
The connection is refused because nothing is listening for incoming traffic on port 80.

Disable daemons
Disabling a daemon is different from stopping a daemon. A disabled daemon could be running, but it won't start automatically after the server is restarted. To disable the Nginx daemon, run sudo systemctl disable nginx, and then check the status of Nginx.
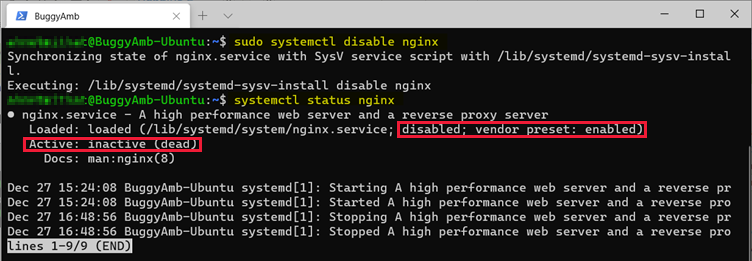
This screenshot shows that Nginx isn't running, and it's disabled. This means that Nginx won't start automatically after a restart.
Start daemons
To start a daemon, run sudo systemctl start <daemon_name>. To start Nginx, run the sudo systemctl start nginx, and then check the status of the service again.
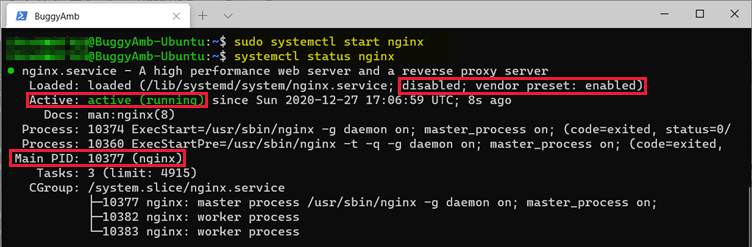
This screenshot shows that Nginx is started but is still disabled. Although the service is running, Nginx won't start automatically after a restart because it's a disabled service.
Enable daemons
Enabling a service means that it will start automatically after a restart. To enable Nginx, run sudo systemctl enable nginx, and then check the status of Nginx again.

This screenshot shows that Nginx is running, and it will be started after the server is restarted.
Configure Nginx as reverse proxy to route the requests to your ASP.NET Core application
Now that you've learned how to start, stop, and restart the Nginx service, you'll next configure Nginx as a reverse proxy to route the requests that are made on port 80 to your ASP.NET Core application that's listening on port 5000.
Here's the required configuration. Some of the key parts are highlighted.
http {
  map $http_connection $connection_upgrade {
    "~*Upgrade" $http_connection;
    default keep-alive;
  }

  server {
    listen        80;
    server_name _;
    location / {
        proxy_pass         http://localhost:5000;
        proxy_http_version 1.1;
        proxy_set_header   Upgrade $http_upgrade;
        proxy_set_header   Connection $connection_upgrade;
        proxy_set_header   Host $host;
        proxy_cache_bypass $http_upgrade;
        proxy_set_header   X-Forwarded-For $proxy_add_x_forwarded_for;
        proxy_set_header   X-Forwarded-Proto $scheme;
    }
  }
}
This configuration indicates the following:
- Nginx will listen on port 80 for all the requests (directive:
listen 80). - Nginx will route the requests to
http://localhost:5000(directive:proxy_pass http://localhost:5000)
Note
The server_name _ line in the code. This is used as a catch-all directive. If you want to learn more about server_name, refer to the official documentation.
The configuration changes appear straightforward. We will use this code to replace the server directive section in the configuration file. But where is the configuration file?
Find the correct Nginx configuration file
The primary Nginx configuration file is /etc/nginx/nginx.conf. To inspect the configuration, use the cat /etc/nginx/nginx.conf command, and search for the server directive.
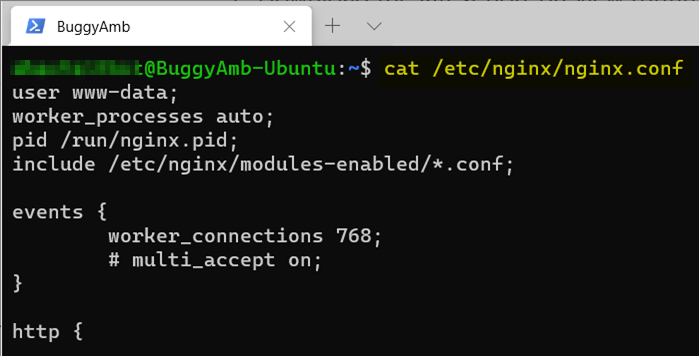
Scroll through the configuration to locate the server directive. You should expect not to find it. We can put the desired configuration changes somewhere inside the configuration file. However, ideally, you wouldn't want to replace the original configuration file. This is to prevent introducing configuration errors that might prevent the server from starting correctly. The server section isn't in the main configuration file. If you keep scrolling through the configuration file, you'll discover that there are some include directives.
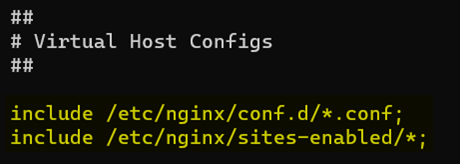
Include directives make it easier to manage the configuration by splitting it into chunks to be included in the main configuration file. The main configuration file can be kept simple, and some specific configuration parts can be moved to other files. The highlighted lines in this screenshot indicate the following:
- Nginx will load configuration from each .conf file that's located in the /etc/nginx/conf.d directory.
- Nginx will load the configurations from each file that's located in the /etc/nginx/sites-enabled directory.
If you inspect these directories, you won't find any configuration files in /etc/nginx/conf.d. However, there is one file in /etc/nginx/sites-enabled.

The default configuration file looks like a prime candidate to host the configuration that we're looking for. If you inspect the /etc/nginx/sites-enabled/default file by using cat /etc/nginx/sites-enabled/default, you would see that the default server directive is put within the following code.
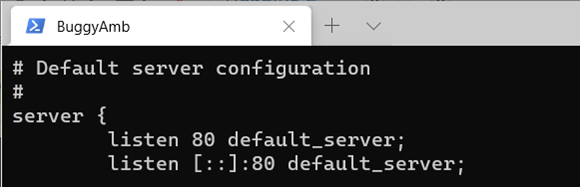
Therefore, the /etc/nginx/sites-enabled/default file will have to be edited to change the configuration.
Edit the configuration file by using vi
You learned how to edit files when you edited the Startup.cs file to remove HTTPS redirection from the ASP.NET pipeline. Now, you'll use vi again to change the nginx configuration file.
Tip
Always back up the files that you're changing. If something were to go wrong after editing, you can use that copy to restore the file to its previous state. In this case, run cp /etc/nginx/sites-enabled/default ~/nginx-default-backup to copy the configuration file to your home directory. The backup file name will be nginx-default-backup. Notice that the backup wasn't made in the same directory as the original file. This is because Nginx loads all the configuration files from that directory, and you don't want to break the configuration by loading two different versions of server directive.
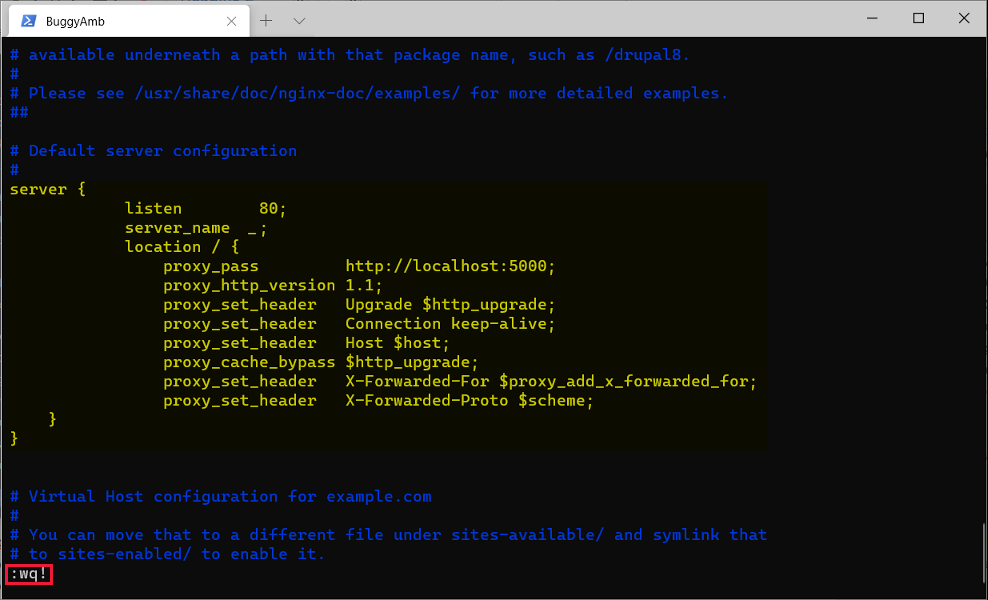
Run sudo vi /etc/nginx/sites-enabled/default to edit the configuration file and replace the server directive, as shown in the following screenshot.
Here are some tips and tricks for editing files by using vi:
- You can scroll up and down by using the arrow keys.
- To enter editing mode, press the Insert or I key. While you're in editing mode, there will be a --INSERT-- message in the bottom-left corner.
- In editing mode, you can use the keyboard to delete characters one at a time.
- In editing mode, copy and paste operations work together with most of the terminals. So, you can copy the content from this article and paste it into vi.
- To exit editing mode, press Esc.
- You can delete lines more easily in normal mode. In normal mode, go to the beginning of a line that you want to delete, and enter dd. The
ddcommand deletes the whole line. You can also type 5dd to delete five lines at one time. However this option should be used with caution to avoid deleting extra content. - How to Delete Lines in Vim / Vi article is a good one To learn how to delete multiple lines in vi.
- To exit vi and save the changes, enter :wq!, and then press Enter. Here, the colon (
:) means that you're running a command,wmeans write the changes,qmeans quit, and!means override the changes. - To exit without saving the changes, enter :q!, and then press Enter.
The changes are now saved, and you have to restart the Nginx service for these changes to take effect. Before you restart the service, you can run the sudo nginx -t command to test the configuration file. When this command runs, Nginx checks the configuration file syntax, and then it tries to open the files that are referenced in the configuration file.

As you can see here, the configuration file that was changed appears to be correct.
We have to restart Nginx so that the changes take effect:
sudo systemctl restart nginx
After the restart, you expect to see a response from the ASP.NET Core application when you make a request to http://localhost because Nginx should work as a reverse proxy for the requests that are made to port 80.
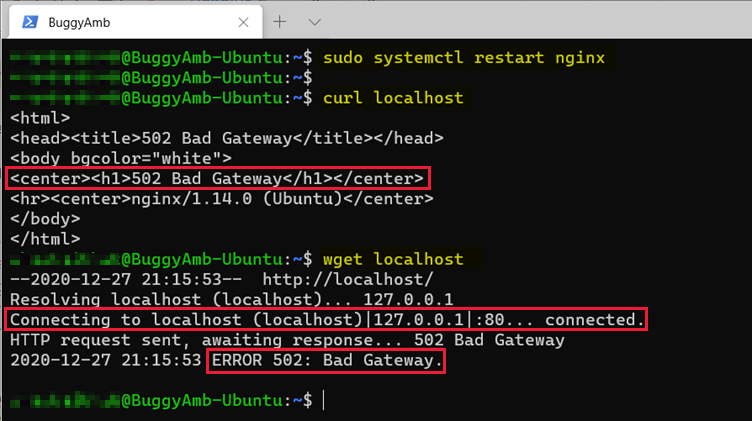
Restart the Nginx service for the changes to take effect, and then make a request to localhost by running curl localhost. However, this command will fail. The next step is to run wget localhost, and then search for some hints as to the source of the problem.
Troubleshoot the Nginx proxy problem
In the previous screenshot, you see this information:
Resolving localhost (localhost)... 127.0.0.1
Connecting to localhost (localhost)|127.0.0.1|:80... connected.
HTTP request sent, awaiting response... 502 Bad Gateway
2020-12-27 21:15:53 ERROR 502: Bad Gateway.
The first and second lines indicate that you're able to resolve localhost and connect on the 127.0.0.1:80 socket. Therefore, Nginx should be running. To verify this, you can run the systemctl status nginx command.
The third line indicates the source of the problem. You receive an HTTP 502 Bad Gateway error message. HTTP 502 Bad Gateway is related to proxies. It means that the reverse proxy could not connect to the back-end application. In this case, it's your ASP.NET Core web application that should be running and listening on port 5000 for the requests. We should check whether the web application is also running.
To start troubleshooting, run the same netstat command as before. This time, use the grep to filter your application's port 5000. Then, run netstat -tlp | grep 5000.
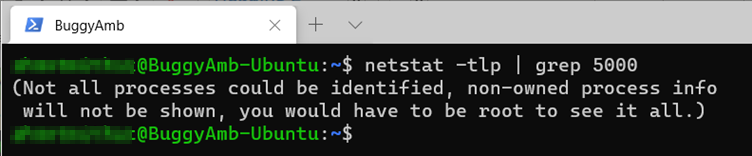
This sample output indicates that nothing is listening on port 5000. Therefore, this is the cause of the HTTP 502 response that's coming from Nginx because it can't find a process that's listening on port 5000.
The solution is to start your ASP.NET Core application. However, before going further, you can review another approach for troubleshooting this problem. Not every problem is as easy to fix as simply looking at a few lines of log content and finding the root cause. Sometimes, you have to deep-dive into other system and application logs.
Because you work closely with Nginx when you set up ASP.NET Core applications in Linux, we suggest that you learn which kind of logs Nginx and the operating system provides for troubleshooting.
Check the Nginx logs
If you run cat /etc/nginx/nginx.conf again, and then look for the logging settings, you should notice the following.
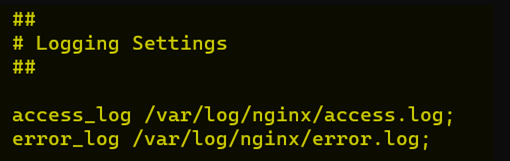
This shows that Nginx has two kinds of logs: Access logs and Error logs. These are stored in the /var/log/nginx/ directory.
Access logs are similar to IIS log files. A quick inspection of the content reveals that they resemble the following screenshot.
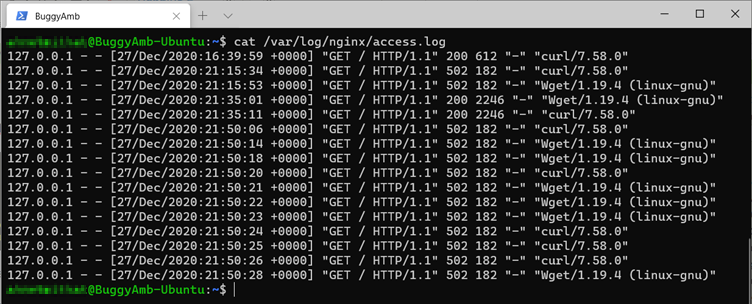
Access logs don't show new information other than the HTTP 502 response status that you already knew. You can also inspect the error logs by running cat /var/log/nginx/error.log. These reveal lots more about the cause of the problem.
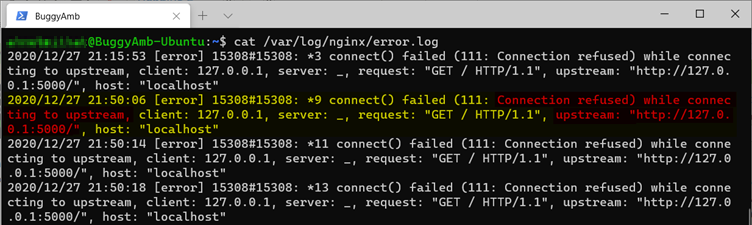
The indications are clear: Nginx can get the request from the client, but it can't connect to the upstream server at http://127.0.0.1:5000 and to the ASP.NET Core application that should have been running and listening on that port.
Workaround
To work around this problem, start your ASP.NET Core application manually. Connect to the server by using a second terminal session, and then run the ASP.NET Core application as before.
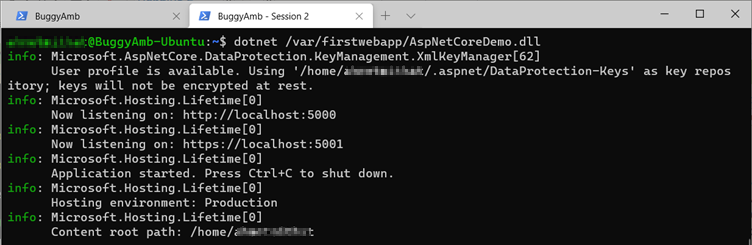
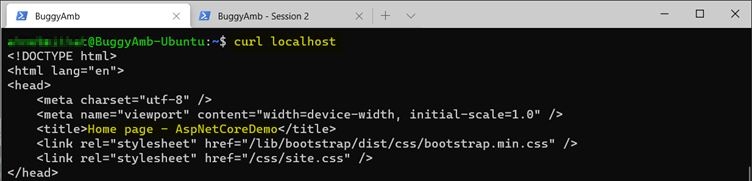
While your ASP.NET Core application is running, switch to the other terminal session, and run the same curl localhost command. Now, you can access your ASP.NET Core application that running behind Nginx. The following screenshot shows that you made a request to localhost, the request was handled by Nginx and routed to the back-end application, and you received a response from your ASP.NET Core application.
You have now configured Nginx to behave as a reverse proxy for your ASP.NET Core application that's running in Linux.
However, if the ASP.NET Core application doesn't start after a restart, what will be the result? What will occur if the web application crashes and doesn't start until you notice that it's not running? Should you start your ASP.NET Core application after every restart of process termination?
Next steps
Part 2.3 - Configure the ASP.NET Core application to start automatically
Third-party information disclaimer
The third-party products that this article discusses are manufactured by companies that are independent of Microsoft. Microsoft makes no warranty, implied or otherwise, about the performance or reliability of these products.