Note
Access to this page requires authorization. You can try signing in or changing directories.
Access to this page requires authorization. You can try changing directories.
This article shows how to add a custom field to the Internet Information Services (IIS) log file by using Advanced Logging.
Original product version: Internet Information Services
Original KB number: 4466879
Introduction
Typically, the existing Logging module in IIS is used to log items such as the original client IP address in the X-FORWARDED-FOR field in the IIS logs. However, if you use a third-party reporting tool to parse the IIS logs, the tool may not understand the X-FORWARDED-FOR field. Instead, it may use a different field, such as the Client IP Address (c-ip) field.
For example, assume that you have a load-balanced environment that consists of at least two web servers together with an F5 load balancer in front of the web servers. Typically, the original client's IP address is logged in the X-FORWARDED-FOR field in the IIS logs by the existing Logging module. To use the third-party reporting tool, you try to create a custom Client IP Address (c-ip) field. However, you receive the following conflict message:
The field "c-ip" conflicts with the name of an existing standard field.
Please choose a different field name.

This article describes how to add a custom field such as the Client IP Address (c-ip) field so that it does not conflict with any predefined fields in the IIS logs.
Solution
There are two solutions to this problem.
Solution 1
Create a custom ISAPI filter or HTTP module through which you can replace the c-ip field value with the value in theX-FORWARDED-FORrequest header that is being passed from the F5 load balancer in each client request.Solution 2
Use Advanced Logging. This is an out-of-band module for IIS. To do this, follow these steps:
Download the Advanced Logging, and install it on the server that is running IIS.
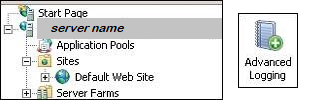
Locate the root node or server level, and then double-click the Advanced Logging module:
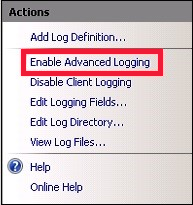
Select the Enable Advanced Logging option on the Actions pane:
Select the Edit Logging Fields option, and then select the Add Field button in the pop-up window.
Specify the following field values (for example):
- Field ID: <type any friendly name>
- Category: <Leave blank>
- Source type: Request Header
- Source name: X-FORWARDED-FOR
- Log header name: c-ip

In the Advanced Logging module, double-click the default Log definition, and then select the Select Fields button.

Select the custom field that you created in step 5, and then select OK.

Try to access the website from any client system, and then check the log that was created by the Advanced Logging module. (By default, the log file is in the
C:\inetpub\logs\AdvancedLogsfolder, but it can be configured for a different folder.)Note
The original client IP address is logged under c-ip instead of X-FORWARDED-FOR in a load-balanced environment.