Note
Access to this page requires authorization. You can try signing in or changing directories.
Access to this page requires authorization. You can try changing directories.
The Microsoft Authentication Library (MSAL) for Android Native includes a tool called Package Inspector. This tool lists the packages installed on an Android device and allows users to view, copy, and paste the signature hash used to sign an application's package. Package Inspector is invaluable for troubleshooting and verifying the signature hash of applications installed on an Android device. This article covers installation, usage, and common issues of the Package Inspector.
Scenarios for using Package Inspector
You have successfully developed an application to use MSAL, but after deploying the app to the Google Play Store, the app fails to perform authentication.
In this scenario, Package Inspector is useful to discover the new signature hash used by Google to sign the app package.
You are implementing MSAL in your Android application, but encounter the following error:
The redirect URI in the configuration file doesn't match with the one generated with the package name and signature hash. Please verify the uri in the config file and your app registration in Azure portal.
In this scenario, you can use Package Inspector to verify what the package signature hash is and configure both the Azure portal and application to use the correct signature hash.
You are implementing MSAL in your Android application, but encounter the following error:
Intent filter for: BrowserTabActivity is missing
This error occurs because the signature hash specified in the AndroidManifest.xml file doesn't match the signature hash used to sign the APK file. In this scenario, Package Inspector is useful to verify what the signature hash is.
Note
For more information about MSAL for Android Native, see Microsoft Authentication Library (MSAL) for Android.
Prerequisites
Before you start, ensure you have the following:
A recent version of Android Studio installed.
Android Studio comes with an AVD manager. For more information, see Create and manage virtual devices.
A virtual Android device with applications installed.
A physical device with developer options, USB debugging enabled, and a USB cable. For more information, see Configure on-device developer options.
An application installed to inspect.
Install Package Inspector
There are two methods to install Package Inspector:
Option 1: Clone Android MSAL repository directly into Android Studio
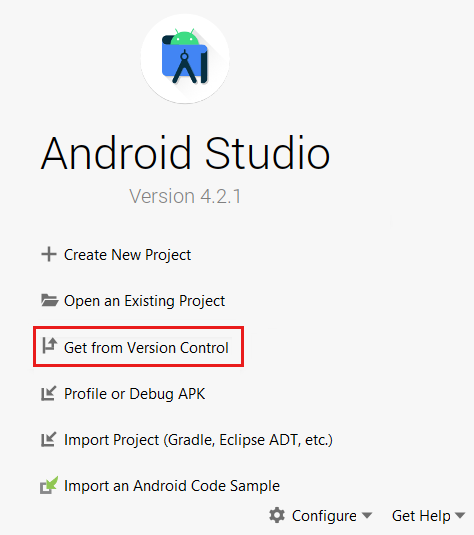
Open Android Studio and close any open projects.
Select Get From Version Control.
Ensure Git is selected at the top of the window, paste the Android MSAL repository URL
https://github.com/AzureAD/microsoft-authentication-library-for-android.git, and then select Clone.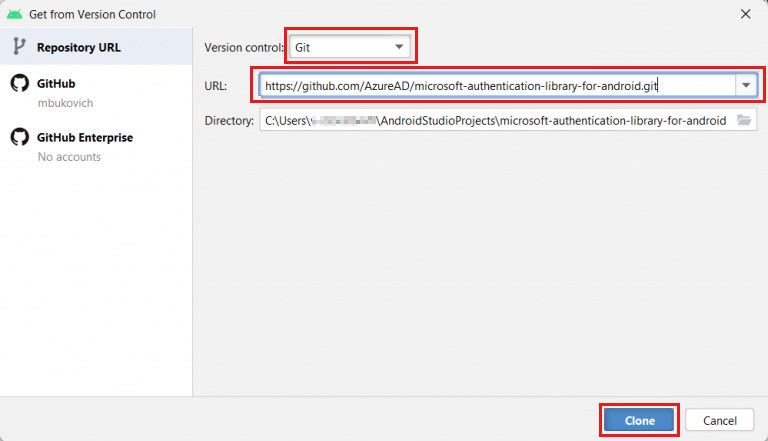
Option 2: Download Android MSAL repository and open it in Android Studio
Extract the zip file to your selected directory.
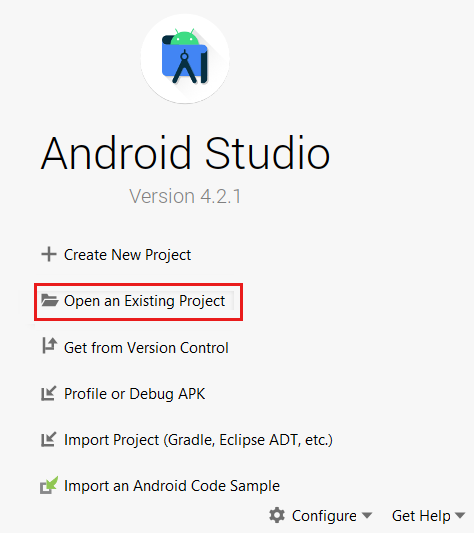
Open Android Studio and close any open projects.
Select Open an Existing Project.
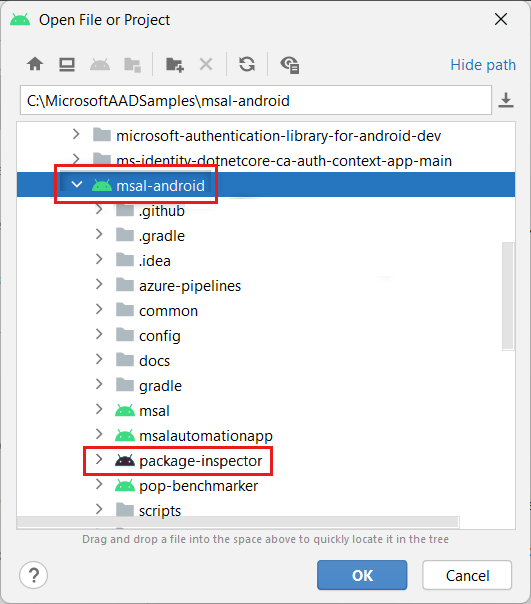
Select the root package msal-android for the Android MSAL repository. Then, select OK.
Note
- The default name of the root package is
microsoft-authentication-library-for-android-dev. In this example, it's renamedmsal-android. - Don't select the package-inspector directory.
- The default name of the root package is
Use Package Inspector
With the Android MSAL project open in Android Studio, connect the desired Android device. It can be a physical device connected to the computer's USB port or an emulator booted from Android Studio's AVD manager. Ensure your device appears in the drop-down list at the top of Android Studio and select it.
On the left of the device drop-down list, there is another drop-down list. Select package-inspector from it.

Select the play button (indicated with a green circle on the right) to build, install, and run Package Inspector on the selected device.

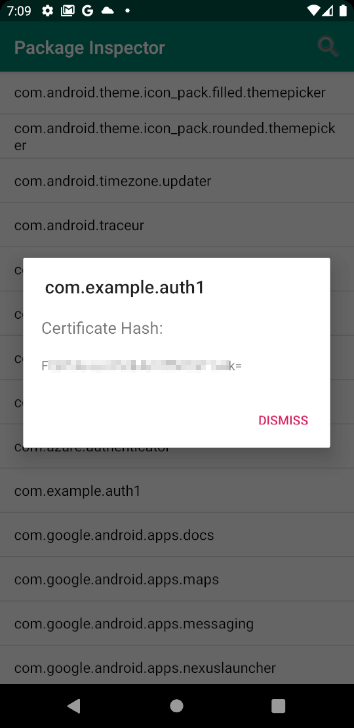
Browse the list of packages in the Package Inspector app and select a package to view its signature hash. All accessible packages appear in this list.


Common issues
Issues when loading Package Inspector into Android Studio
To resolve these issues, ensure you load the root package from the MSAL repository, not Package Inspector. Make sure that the Android MSAL project you load into Android Studio is named microsoft-authentication-library-for-android-dev or whatever you have renamed the root directory on your system instead of package-inspector. For more information, see step 5 under Option 2 in the Install Package Inspector section.
Not all packages appear in Package Inspector
You have installed and opened Package Inspector, and a list of packages appear in the app. However, you don't see packages for any apps you have installed on the device. The issue might occur due to changes in Android 11 (API 30). For more information, see Package visibility.
To resolve this issue, follow these steps:
Open the AndroidManifest.xml file within the
package-inspectordirectory on the left side of Android Studio.Add the following permission and query between the
<manifest></manifest>tags:<manifest xmlns:android="http://schemas.android.com/apk/res/android" package="com.microsoft.inspector"></manifest> ... <permission android:name="android.permission.QUERY_ALL_PACKAGES" /> <queries> <intent> <action android:name="android.intent.action.MAIN" /> </intent> </queries>Rerun the application from Android Studio to apply the changes. Then, you can see the packages you have installed.
Contact us for help
If you have questions or need help, create a support request, or ask Azure community support. You can also submit product feedback to Azure feedback community.