Note
Access to this page requires authorization. You can try signing in or changing directories.
Access to this page requires authorization. You can try changing directories.
This article introduces how to use a Transact-SQL script and Windows Task Scheduler to automate backups of SQL Server Express databases on a scheduled basis.
Original product version: SQL Server
Original KB number: 2019698
Summary
SQL Server Express editions don't offer a way to schedule either jobs or maintenance plans because the SQL Server Agent component isn't included in these editions. Therefore, you have to take a different approach to back up your databases when you use these editions.
Currently SQL Server Express users can back up their databases by using one of the following methods:
For more information on how to use these tools to back up a database, review the following links:
Use a Transact-SQL script that uses the BACKUP DATABASE family of commands. For more information, see BACKUP (Transact-SQL).
This article describes how to use a Transact-SQL script together with Task Scheduler to automate backups of SQL Server Express databases on a scheduled basis.
Note
This applies to only SQL Server express editions and not to SQL Server Express LocalDB.
How to create a scheduled backup in SQL Express
You have to follow these four steps to back up your SQL Server databases by using Windows Task Scheduler:
Step 1: Create a stored procedure to back up your databases
Connect to your SQL express instance and create sp_BackupDatabases stored procedure in your master database using the script at the following location:
Step 2: Download the SQLCMD client utility
The sqlcmd utility lets you enter Transact-SQL statements, system procedures, and script files. In SQL Server 2014 and lower versions, the utility is shipped as part of the product. Starting with SQL Server 2016, sqlcmd utility is offered as a separate download. For more information, review sqlcmd Utility.
Step 3: Create a batch file using a text editor
In a text editor, create a batch file that is named Sqlbackup.bat, and then copy the text from one of the following examples into that file, depending on your scenario:
All the scenarios below use
D:\SQLBackupsas a place holder. The script needs to be adjusted to the right drive and Backup folder location in your environment.If you are using SQL authentication, ensure that access to the folder is restricted to authorized users as the passwords are stored in clear text.
Note
The folder for the SQLCMD executable is generally in the Path variables for the server after SQL Server is installed or after you install it as stand-alone tool. But if the Path variable doesn't list this folder, you can either add its location to the Path variable or specify the complete path to the utility.
Example 1: Full backups of all databases in the local named instance of SQLEXPRESS by using Windows Authentication
 // Sqlbackup.bat
 sqlcmd -S .\SQLEXPRESS -E -Q "EXEC sp_BackupDatabases @backupLocation='D:\SQLBackups\', @backupType='F'"
Example 2: Differential backups of all databases in the local named instance of SQLEXPRESS by using a SQLLogin and its password
 // Sqlbackup.bat
sqlcmd -U <YourSQLLogin> -P <StrongPassword> -S .\SQLEXPRESS -Q "EXEC sp_BackupDatabases @backupLocation ='D:\SQLBackups', @BackupType='D'"
Note
The SQLLogin should have at least the Backup Operator role in SQL Server.
Example 3: Log backups of all databases in the local named instance of SQLEXPRESS by using Windows Authentication
 // Sqlbackup.bat
 sqlcmd -S .\SQLEXPRESS -E -Q "EXEC sp_BackupDatabases @backupLocation='D:\SQLBackups\',@backupType='L'"
Example 4: Full backups of the database USERDB in the local named instance of SQLEXPRESS by using Windows Authentication
 // Sqlbackup.bat
 sqlcmd -S .\SQLEXPRESS -E -Q "EXEC sp_BackupDatabases @backupLocation='D:\SQLBackups\', @databaseName='USERDB', @backupType='F'"
Similarly, you can make a differential Backup of USERDB by pasting in 'D' for the @backupType parameter and a log Backup of USERDB by pasting in 'L' for the @backupType parameter.
Step 4: Schedule a job by using Windows Task Scheduler to execute the batch file that you created in step 2
Follow these steps:
On the computer that is running SQL Server Express, select Start and type Task Scheduler in the text box.
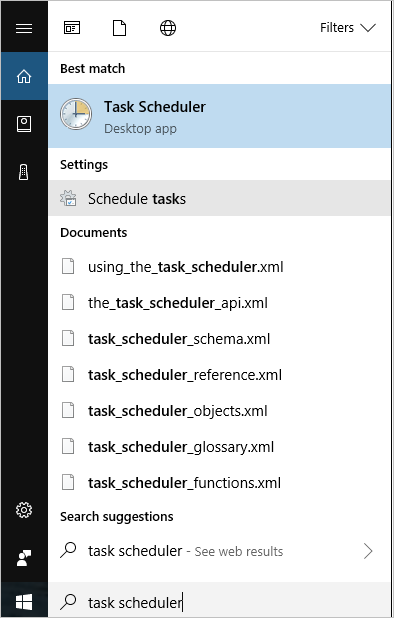
Under Best match, select Task Scheduler to launch it.
In Task Scheduler, right-click Task Scheduler (Local) and select Create Basic task.
Enter the name for the new task (for example, SQLBackup) and select Next.
Select Daily for the Task Trigger and select Next.
Set the recurrence to one day and select Next.
Select Start a program as the action and select Next.
Select Browse, select the batch file that you created in Step 3, and then select Open.
Select the Open the Properties dialog for this task when I click Finish checkbox.
In the General tab:
Review the Security options and ensure the following for the user account running the task (listed under When running the task, user the following user account:)
The account should have at least Read and Execute permissions to launch the
sqlcmdutility. Additionally,If using Windows Authentication in the batch file, ensure the task owner has permission to do SQL backups.
If using SQL Authentication in the batch file, the SQL user should have the necessary permissions to do SQL backups.
Adjust other settings according to your requirements.
Tip
As a test, run the batch file from Step 3 from a command prompt that is started with the same user account that owns the task.
Requirements
Be aware of the following requirements when you use the procedure that is documented in this article:
The Task Scheduler service must be running at the time that the job is scheduled to run. We recommend that you set the startup type for this service as Automatic. This makes sure that the service will be running even on a restart.
You must create sufficient space on the drive where the backups are written. We recommend that you clean old files in the Backup folder regularly to make sure that you don't run out of disk space. The script doesn't contain the logic to clean up old files.