Note
Access to this page requires authorization. You can try signing in or changing directories.
Access to this page requires authorization. You can try changing directories.
This article provides guidance on Windows Error Reporting (WER) and diagnostic data. WER is an event-based feedback infrastructure designed to collect information on issues that Windows can detect, report the information to Microsoft, and provide users with any available solutions.
Enable Windows Error Reporting (WER)
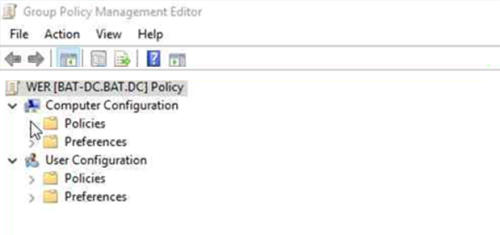
Expand Policies under Computer Configuration in Group Policy Management Editor (gpmc.msc).
Tip
Admins creating Group Policy Objects (GPOs) should be part of the Group Policy Creator Owners group in Active Directory (AD) or Domain/Enterprise Administrators.
Go to Computer Configuration > Administrative Template > System > Internet Communication Management > Internet Communication Settings.
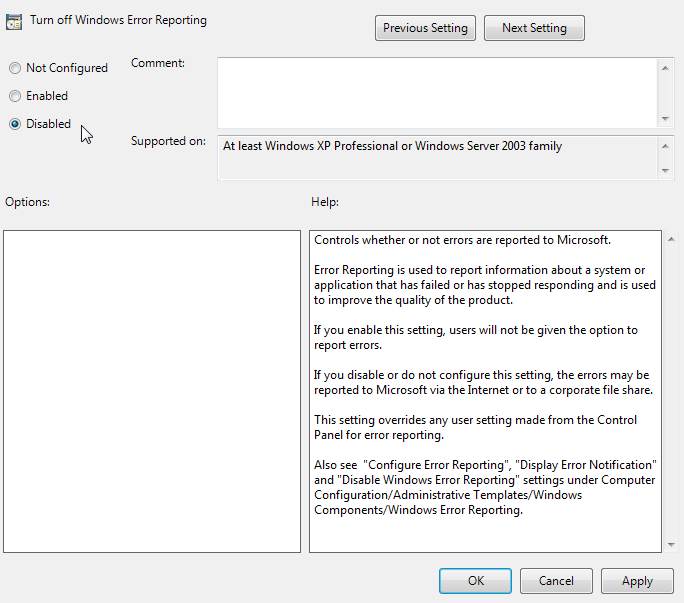
Double-click the Turn off Windows Error Reporting policy.
Select Disabled > Apply > OK.
Go to Computer Configuration > Administrative Template > Windows Components > Windows Error Reporting.
Double-click the Disable Windows Error Reporting policy.
Select Disabled > Apply > OK.
Configure Windows diagnostic data
Expand Policies under Computer Configuration in Group Policy Management Editor (gpmc.msc).
Perform the following steps depending on the OS version:
For Windows 11
Go to Computer Configuration > Administrative Templates > Windows Components > Data Collection and Preview Builds.
Double-click the Allow Diagnostic Data policy.
Select Enabled, and then select the Send optional diagnostic data option from the Options drop-down list.
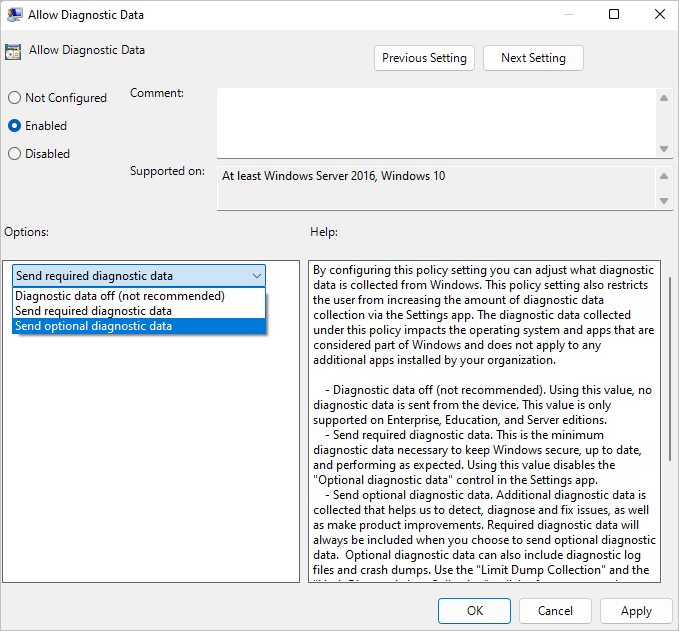
For more information about the level of data sent, see Diagnostics, feedback, and privacy in Windows.
Select Apply > OK.
Double-click the Configure diagnostic data opt-in settings user interface policy.
Select Enabled, and then select the Disable diagnostic data opt-in settings option from the Options drop-down list.
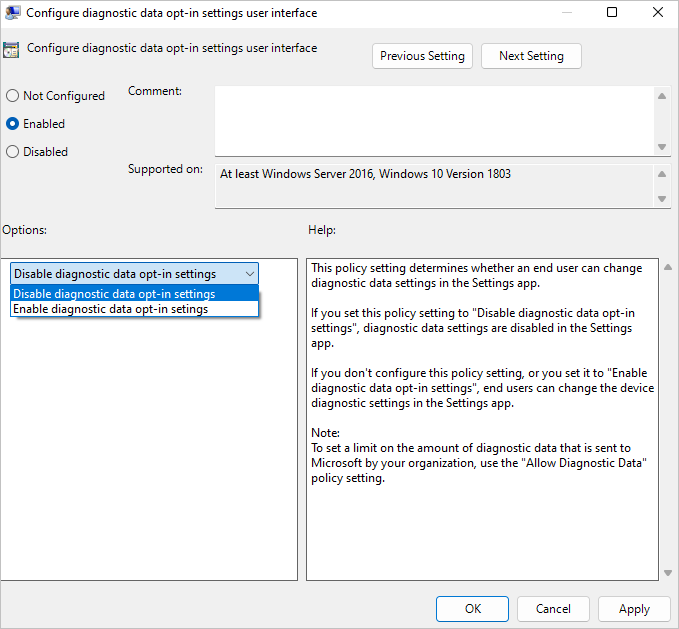
Select Apply > OK.
For Windows 10
Go to Computer Configuration > Administrative Templates > Windows Components > Data Collection and Preview Builds.
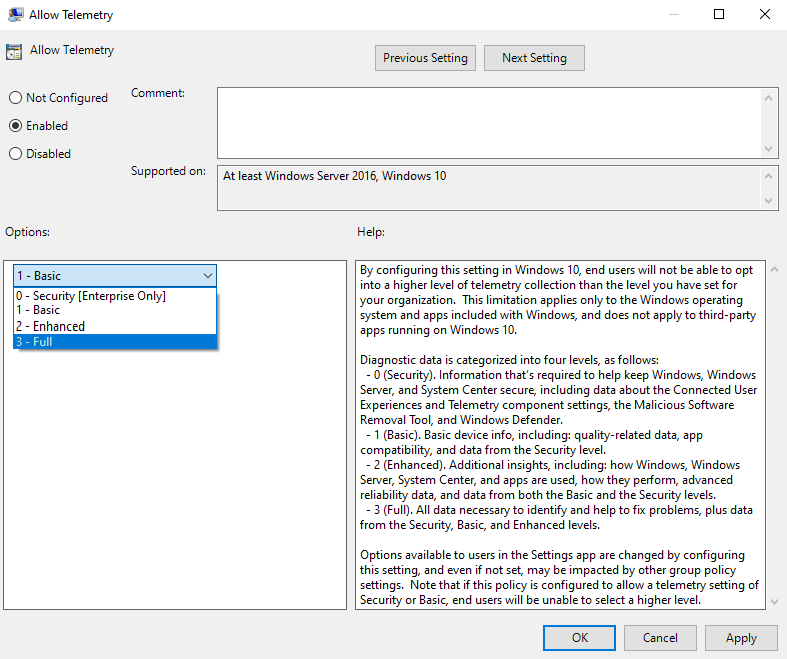
Double-click the Allow Telemetry policy.
Select Enabled.
From the Options drop-down list, select:
- Optional for Windows 10, version 1903 or later
- Full for Windows 10, version 1809 or earlier
Windows 10, version 1903 or later Windows 10, version 1809 or earlier 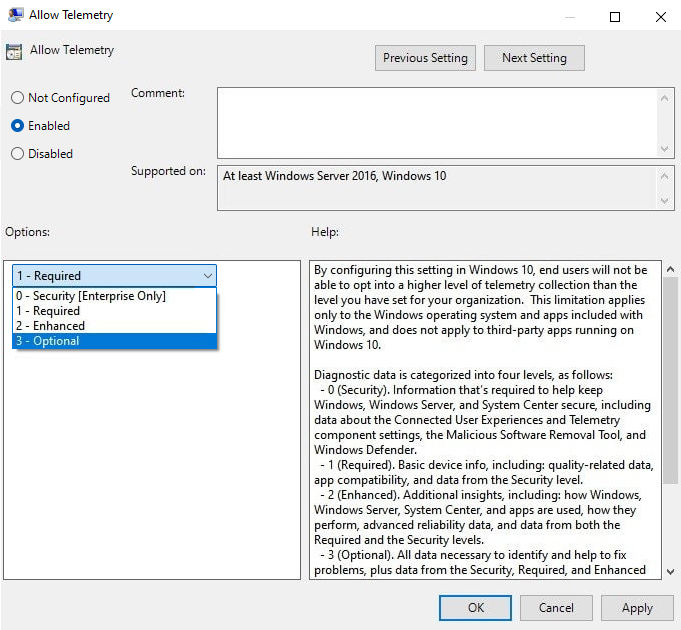
Note
Select at least the Enhanced option so that we can have enough actionable insights for Windows 10, version 1903 or later. For more information about the level of data collected, see Diagnostic data settings.
Select Apply > OK.
The following steps require at least Windows 10, version 1803.
Double-click the Configure telemetry opt-in setting user interface policy.
Select Enabled, and then select the Disable telemetry opt-in Settings option from the Options drop-down list.

Select Apply > OK.


Configure network endpoints to be allowed
The following table lists the network endpoints related to how you can manage the collection and control of diagnostic data.
- Port used: 443
- Protocol used: HTTPS with SSL/TLS using certificate pinning
| Windows versions | Endpoint |
|---|---|
| All Windows versions | watson.microsoft.com |
| Windows 10, version 1803 or later | watson.telemetry.microsoft.com |
| Windows 10, version 1809 or later | umwatsonc.events.data.microsoft.com |
| Windows 10, version 1809 or later | ceuswatcab01.blob.core.windows.net |
| Windows 10, version 1809 or later | ceuswatcab02.blob.core.windows.net |
| Windows 10, version 1809 or later | eaus2watcab01.blob.core.windows.net |
| Windows 10, version 1809 or later | eaus2watcab02.blob.core.windows.net |
| Windows 10, version 1809 or later | weus2watcab01.blob.core.windows.net |
| Windows 10, version 1809 or later | weus2watcab02.blob.core.windows.net |
For more information, see Configure Windows diagnostic data.
Limit additional data from being sent to Microsoft (Optional)
If the policies described in the article are enabled, Windows Error Reporting will send only kernel mini dumps and user mode triage dumps.
If you enable Optional data through Telemetry and want to control the type of dump information shared with Microsoft, you can use the following policies. These policies allow you to limit the types of crash dumps.
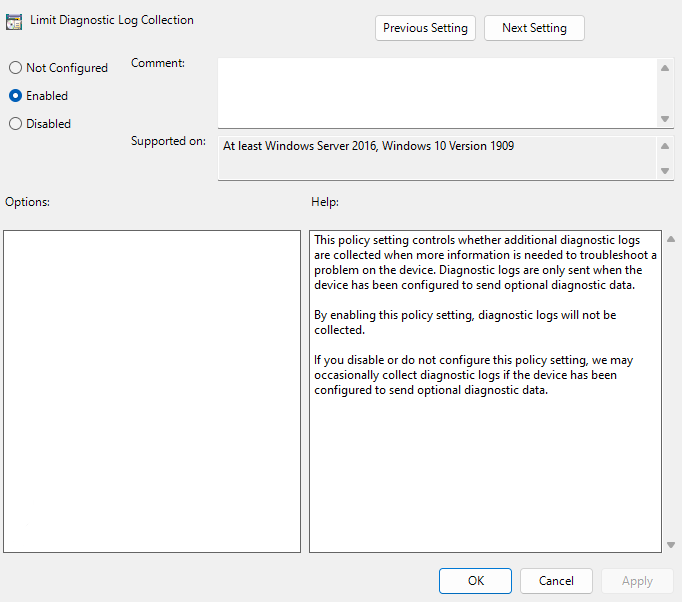
For Windows 11 and Windows 10 (version 1909 and later):
Go to Computer Configuration > Administrative Templates > Windows Components > Data Collection and Preview Builds.
Double-click the Limit Dump Collection policy.
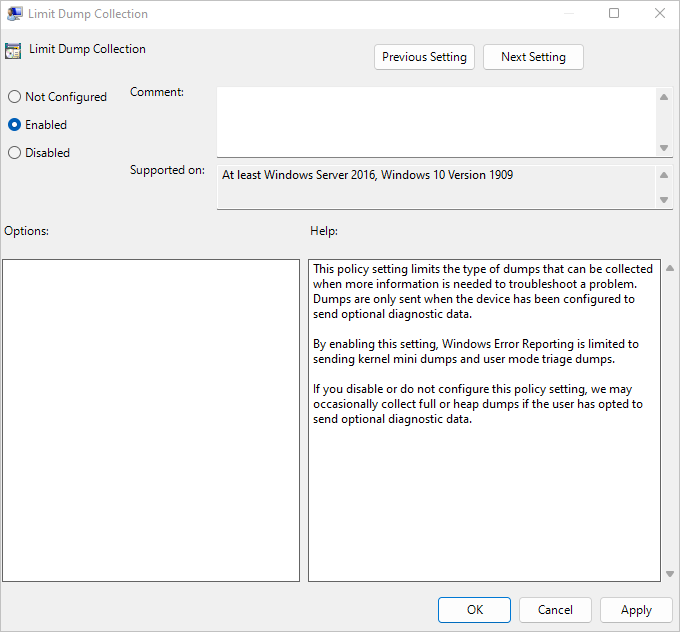
Select Enabled > Apply >OK.
Double-click the Limit Diagnostic Log Collection policy.
Select Enabled > Apply > OK.
For more information, see Configure types of dump to be collected.
Validate the correct data setting checklist
Your group policy object will have the following settings configured:
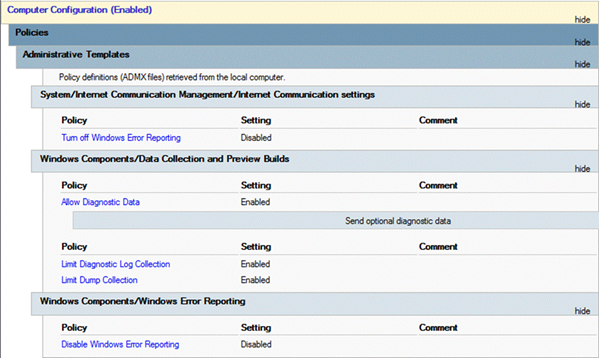
After you've applied the above-mentioned settings to the Organizational Unit, check the following items by using Registry Editor (Regedit.exe), and ensure the settings are configured and applied as desired on one of the machines:
HKEY_LOCAL_MACHINE\SOFTWARE\Policies\Microsoft\Windows\DataCollectionRegistry Key Name Data AllowTelemetry0x00000003 DisableTelemetryOptInSettingsUx0x00000001 LimitDiagnosticLogCollection0x00000001 LimitDumpCollection0x00000001 HKEY_LOCAL_MACHINE\SOFTWARE\Policies\Microsoft\PCHealth\ErrorReporting- Registry Key Name:
DoReport - Data: 0x00000001
- Registry Key Name:
HKEY_LOCAL_MACHINE\SOFTWARE\Policies\Microsoft\Windows\Windows Error ReportingRegistry Key Name Data Disabled0x00000000 DontSendAdditionalData0x00000001 HKEY_LOCAL_MACHINE\SOFTWARE\Microsoft\Windows\Windows Error Reporting\Consent- Registry Key Name:
DefaultConsent - Data: 0x00000004
- Registry Key Name:
Gather key information before contacting Microsoft support
Download TSS on all nodes and unzip it in the C:\tss folder.
Open the C:\tss folder from an elevated PowerShell command prompt.
Start the following traces on the problem computer by using the following cmdlets:
TSS.ps1 -SDP PERF,SETUPTSS.ps1 -Scenario NET_WFPRespond to the EULA prompt.
Wait until the automated scripts finish collecting the required data.
The traces will be stored in a zip file in the C:\MS_DATA\SDP_PERFSETUP\ folder, which can be uploaded to the Microsoft workspace for analysis.