Note
Access to this page requires authorization. You can try signing in or changing directories.
Access to this page requires authorization. You can try changing directories.
Multi-tenant management for Microsoft Defender XDR and Microsoft Sentinel in the Defender portal enables security operation center (SOC) analysts to access and analyze data from multiple tenants and workspaces in one place, allowing them to quickly identify and respond to threats. Triage incidents and alerts across security information and event management (SIEM) and extended detection and response (XDR) data for tenants that onboarded a Microsoft Sentinel workspace to the Defender platform.
Manage incidents & alerts originating from multiple tenants and workspaces under Incidents & alerts.
View and investigate incidents
To view or investigate an incident:
Go to the Incidents page in Microsoft Defender multitenant management. The Tenant name and Workspaces columns show which tenant the incident originates from:
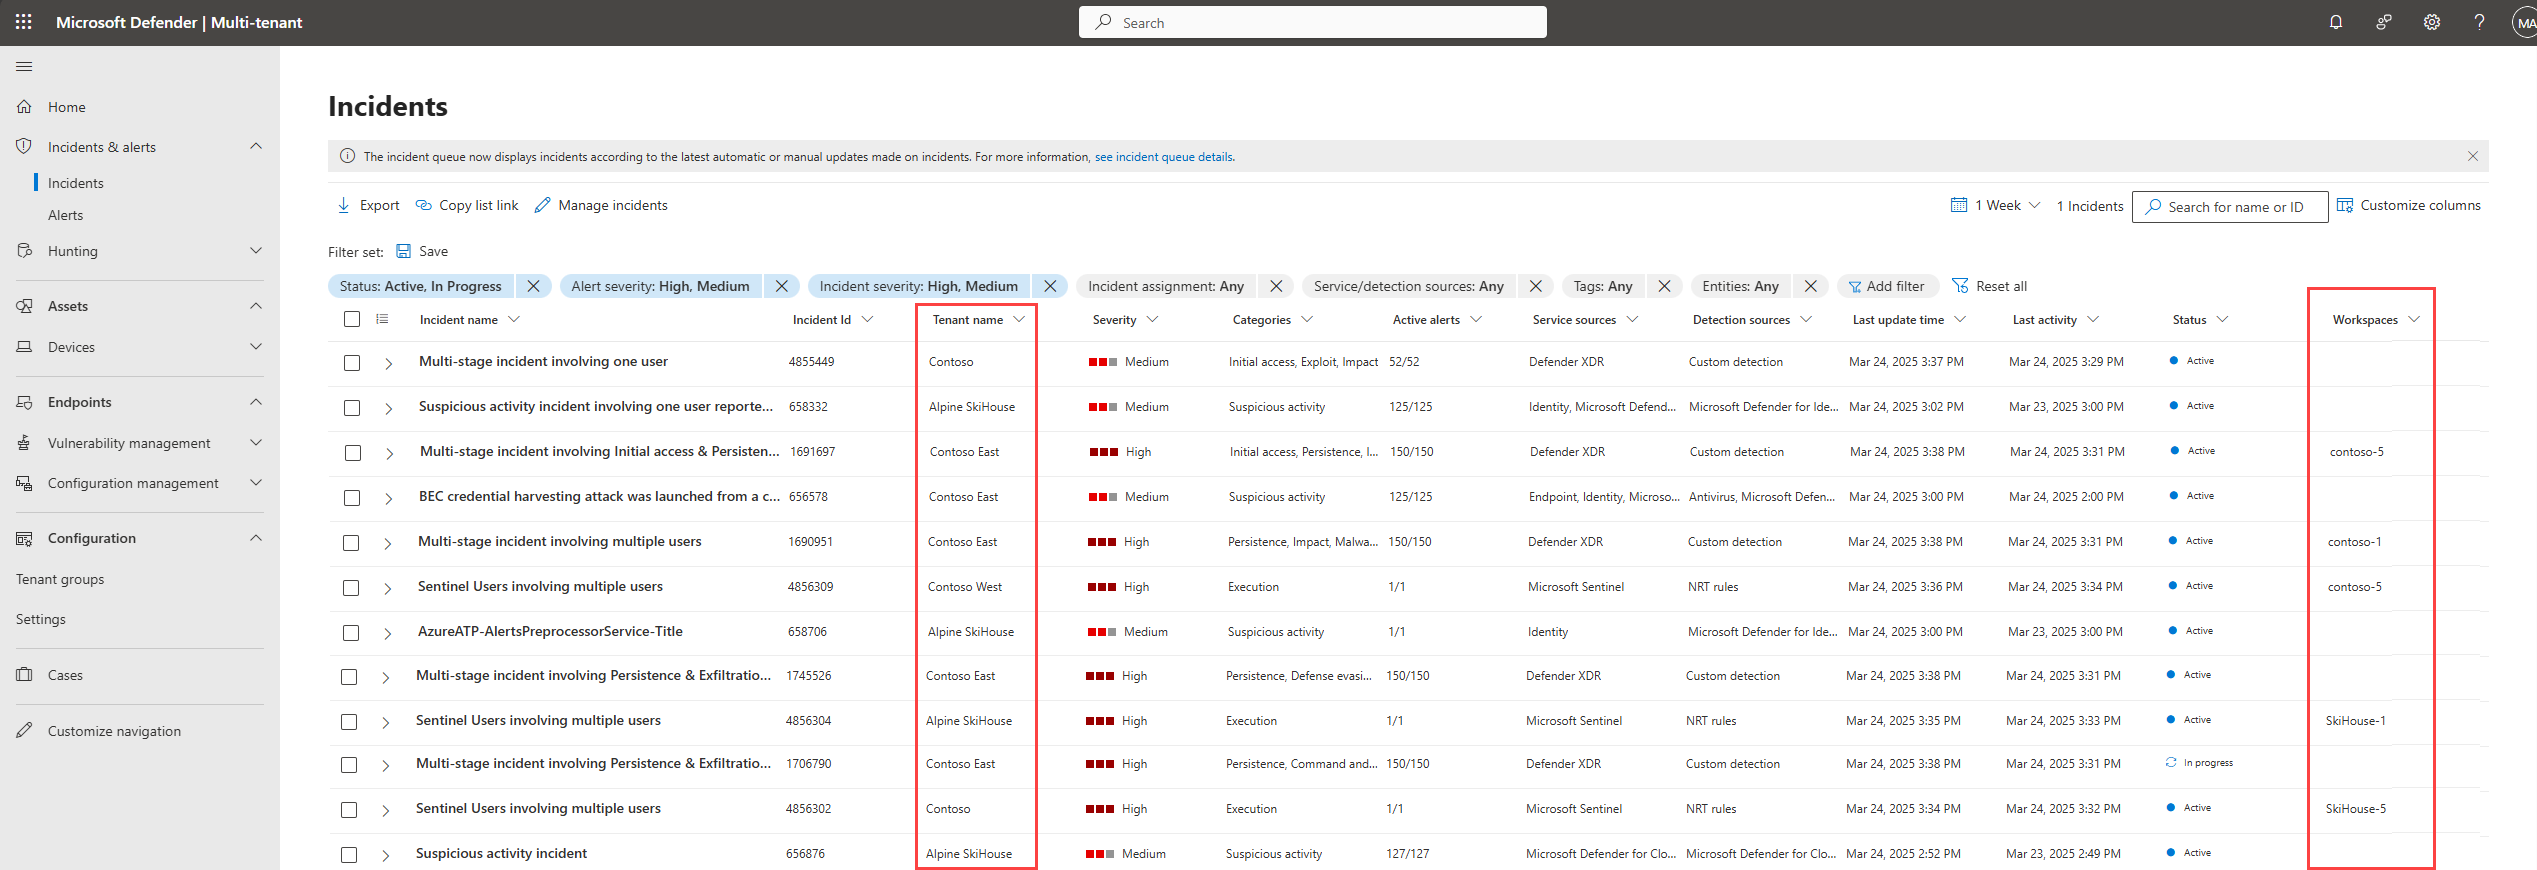
Select the incident you want to view. A flyout opens with the incident details pane, where you can:
- Select Open incident page to view this incident in a new tab for the specific tenant in the Microsoft Defender portal.
- Select Manage incident to assign the incident, set incident tags, set the incident status, and classify the incident.

To learn more, see Investigate incidents.
Manage multiple incidents
To manage incidents across multiple tenants and workspaces:
Go to the Incidents page in Microsoft Defender multitenant management.
Choose the incidents you want to manage from the incidents list and select Manage incidents.
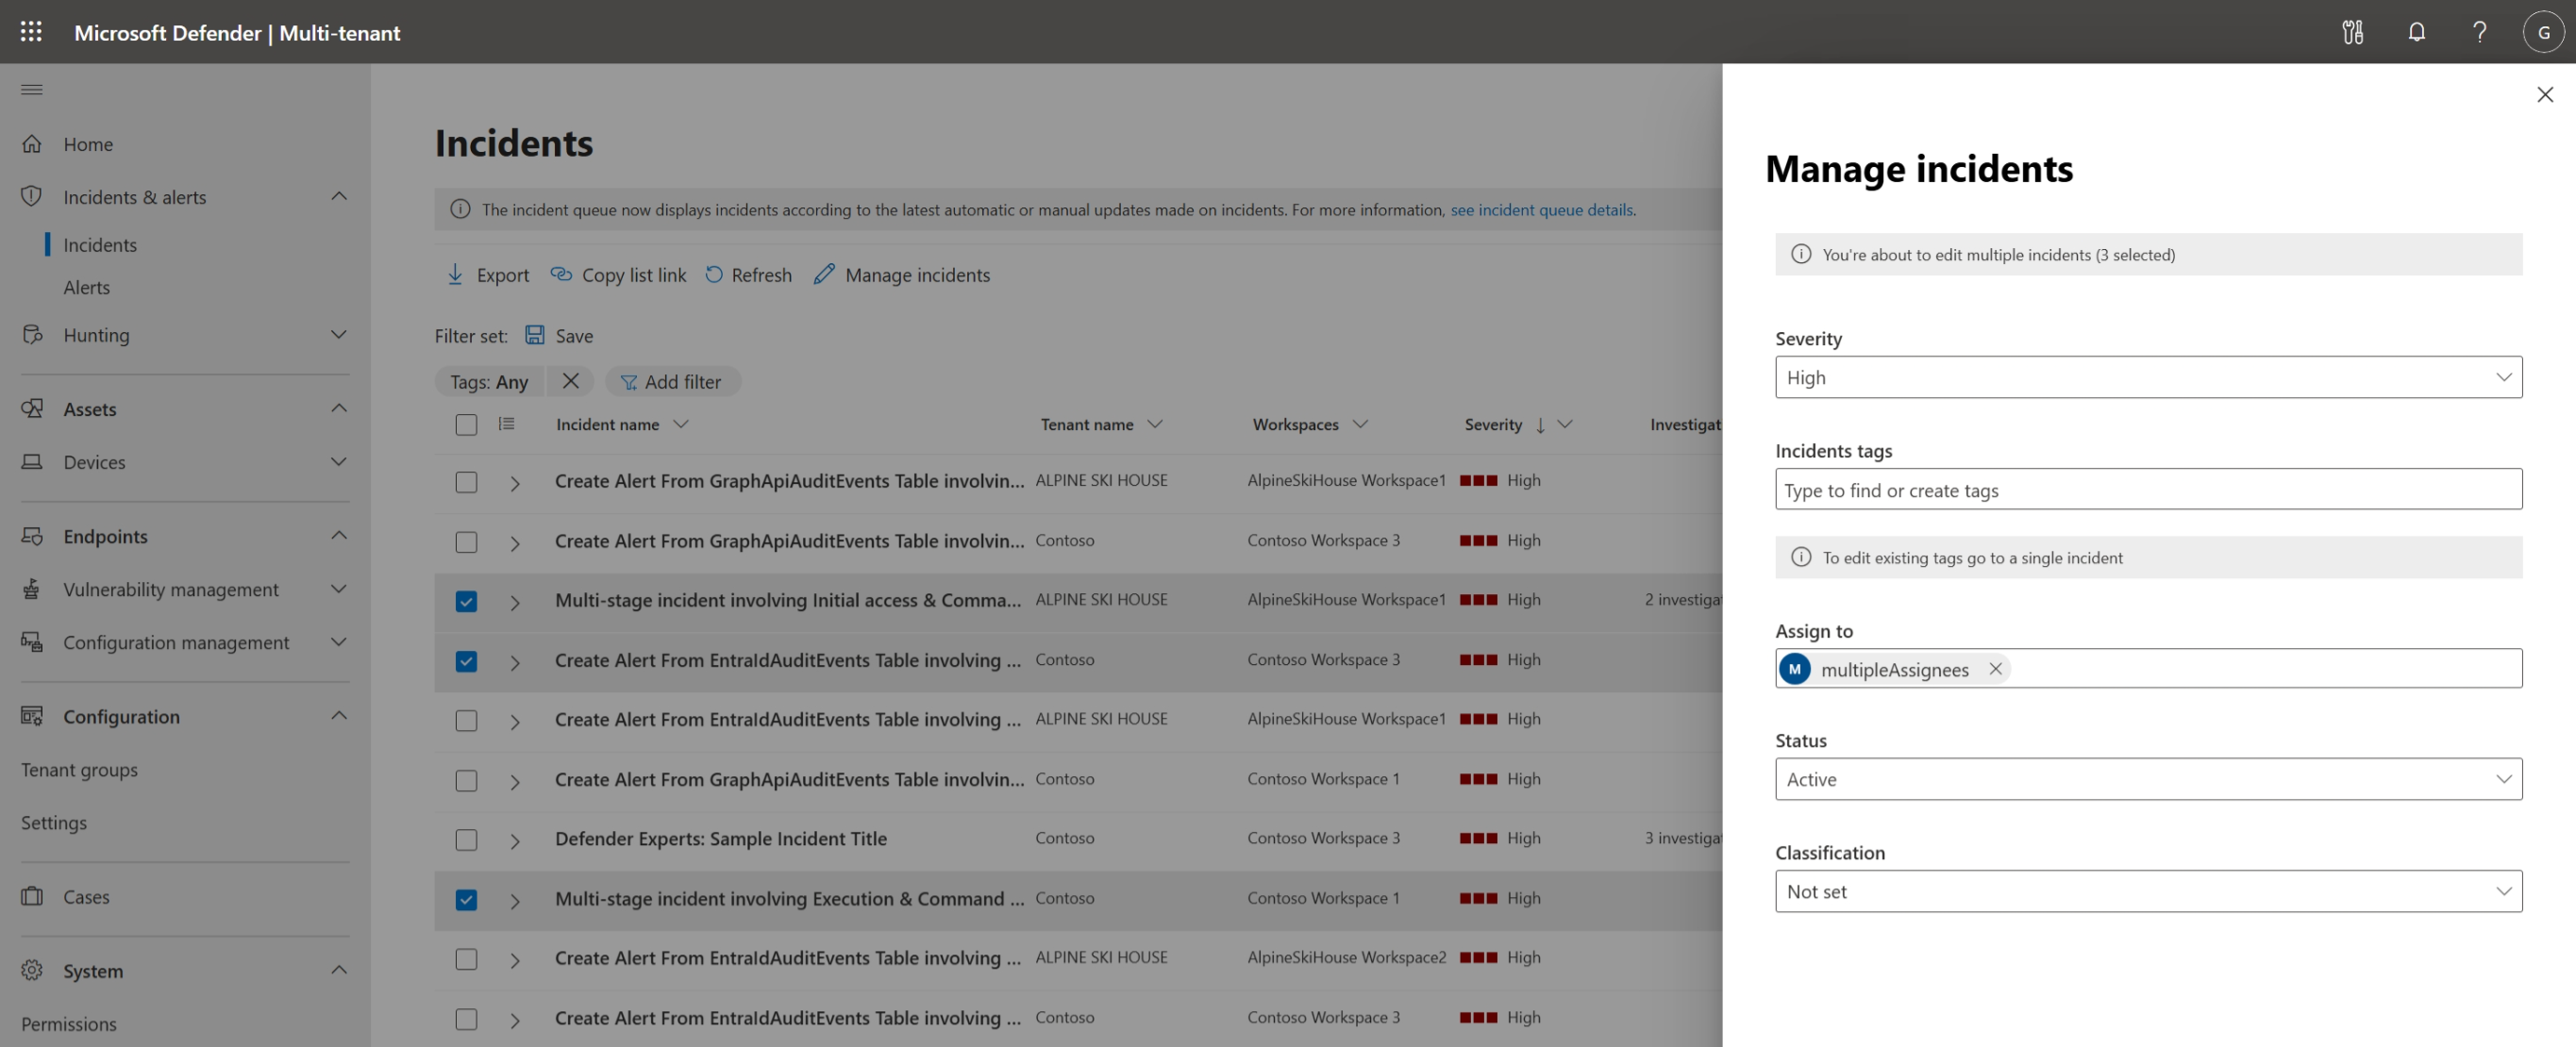

On the incidents flyout pane you can assign incidents, assign incidents tags, set the incident status, and classify multiple incidents for multiple tenants simultaneously.
Note
Currently, you can only assign multiple incidents from same tenant.
To learn more about incidents in the Microsoft Defender portal, see Manage incidents.
View and investigate alerts
To view or investigate an alert:
Go to the Alerts page in multitenant management and select the alert you want to view. A flyout panel opens with the alert details page:
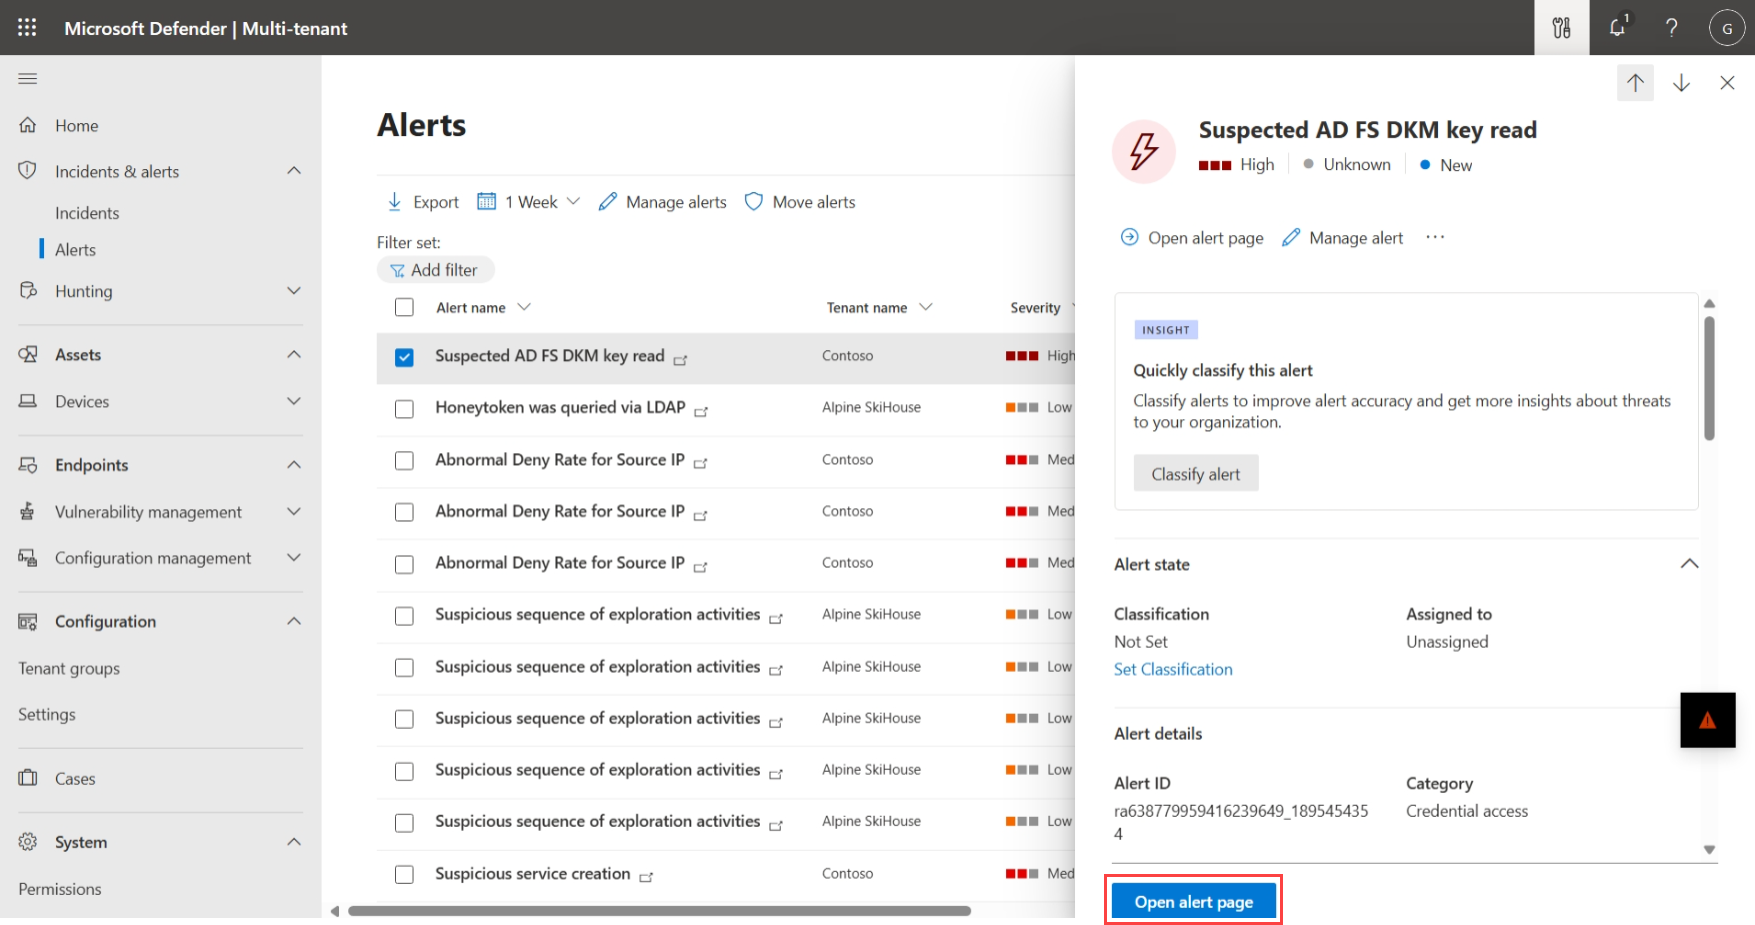
From the alert details pane you can:
- Select actions such as Open alerts page, Move alert to another incident, and Tune alert to view this alert in a new tab for the specific tenant in the Microsoft Defender portal.
- Select Manage alert to assign the alert, set the alert status, and classify the alert.

To learn more, see Investigate alerts.
Manage multiple alerts
To manage alerts across multiple tenants and workspaces:
Go to the Alerts page in Microsoft Defender multitenant management.
Choose the alerts you want to manage from the alerts list and select Manage alerts.


Use the Manage alerts pane to set alert status, assign alerts, set classifications, and add comments for multiple alerts simultaneously. While alert status, classifications, and comments can be added across tenants, assigning alerts can only be done for alerts from the same tenant.
For more information, see Manage alerts.
Move alerts
Move an alert to a different incident to help you better organize and correlate related security events. For example, you might find that multiple alerts are part of the same security breach, and want to include them all in the same incident. This ensures that all relevant information is grouped together, enabling more efficient investigation and response.
To move one or more alerts:
- On the Alerts page, select one or more alerts and then select Move alerts
- On an alert details pane or alert details page, select Move alert to another incident
In the Move alert to another incident pane, define whether you want to create a new incident, or use an existing incident. If you choose to use an existing incident, search for the incident by name or ID and add a reason for the change. In all cases, add a comment describing your change before you select Save.