Note
Access to this page requires authorization. You can try signing in or changing directories.
Access to this page requires authorization. You can try changing directories.
With Visual Studio, you can connect different types of services and applications to Application Insights by using the Connected Services feature. The functionality adds all the required references and connection code to your project, and modifies your configuration files appropriately. You can choose to connect to the live Application Insights service running in Azure or use a local emulator.
This article describes how to connect Application Insights to your application by using Connected Services.
Prerequisites
To complete the procedures in this article, the following prerequisites must be satisfied:
Visual Studio with the Azure workload installed. Download Visual Studio now.
A project that implements a supported connection type to Application Insights, for example:
- .NET Framework console app
- ASP.NET Model-View-Controller (MVC) (.NET Framework)
- ASP.NET Core
- .NET Core (including console app, WPF, Windows Forms, class library)
- Azure Functions
- Universal Windows Platform App
-
An Azure account. If you don't have an Azure account, activate your Azure benefits for Visual Studio subscribers or sign up for a free trial.
Connect to Application Insights with Connected Services
Add Application Insights as a connected service to your application by following these steps:
Open a project in Visual Studio that supports a connection with Application Insights. For project examples, see the Prerequisites.
Add the Application Insights connected service. There are several ways you can start the process, for example:
Select Project > Manage Connected Services > Add a service dependency > Azure Application Insights.
In Solution Explorer, right-click the Connected Services node for the project, and select Add > Azure Application Insights.
In the Connected Services > Service Dependencies section, select Add (plus symbol):
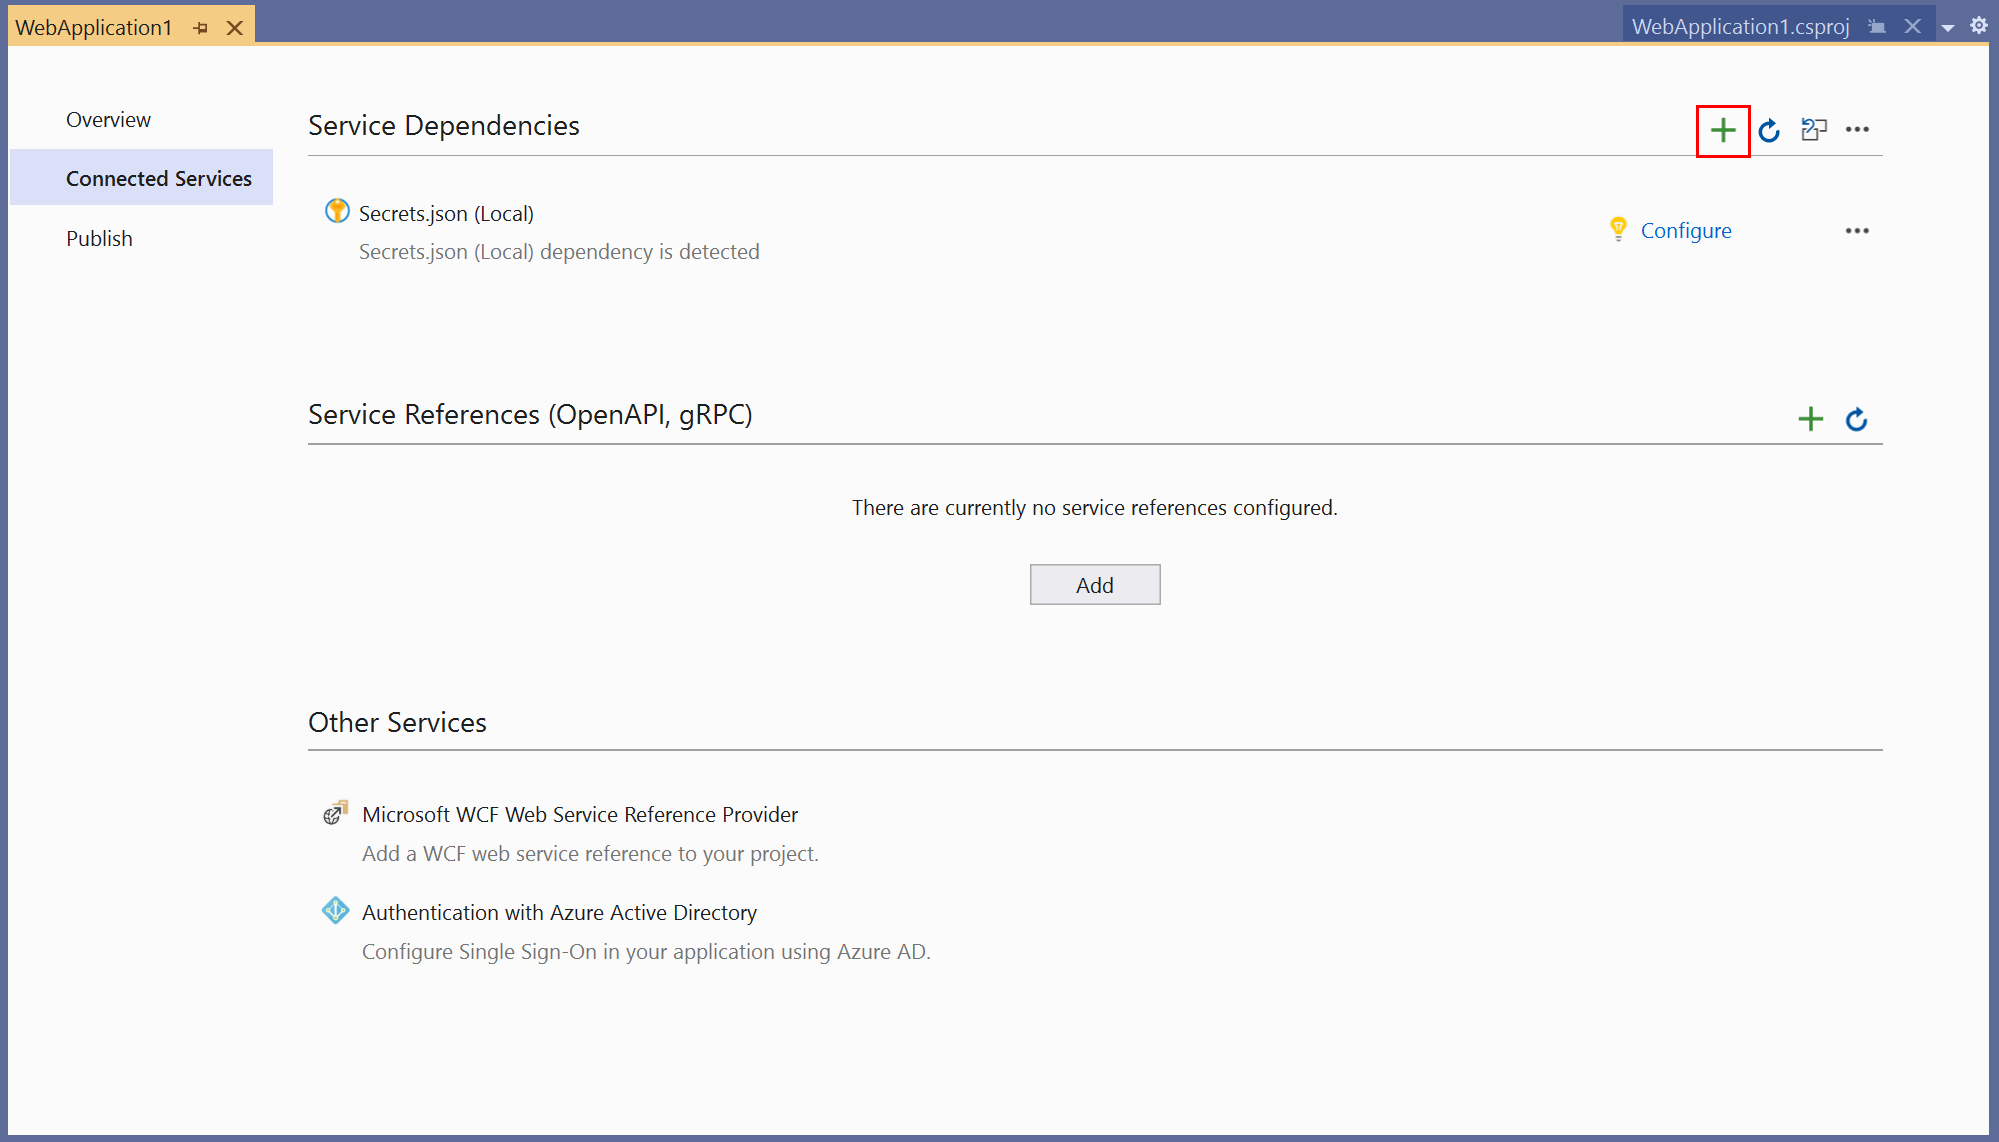
The Add dependency screen opens. You have two options for the connection: use a local emulator or access the live service in Azure. To reduce cost and simplify early development, you can start with the local emulator. Later, you can migrate to the live service by repeating the steps in this procedure.
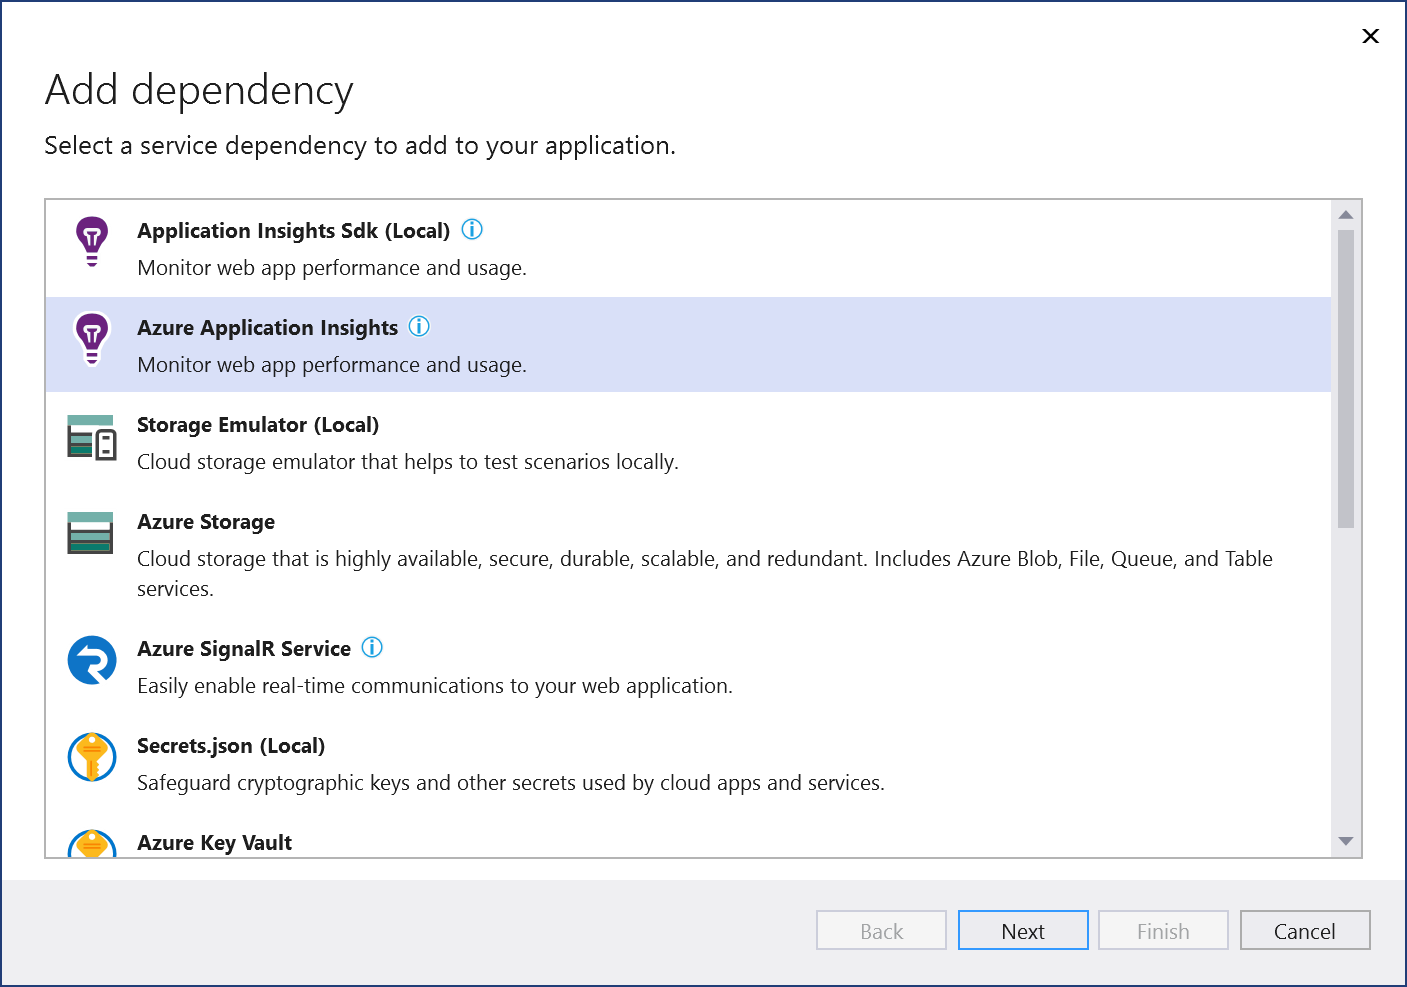
For this exercise, select Azure Application Insights to access the live service in Azure.
As needed, sign in to your Azure account. If you don't have an Azure account, you can sign up for a free trial.
In the Configure Azure Application Insights - Select a service dependency screen, choose whether to use an existing or new component for the connection:

Existing component: To use an existing Application Insights component, select the component in the list, and select Next. Continue to Step 6 and configure the connection settings.
New component: To create a new component for the connection:
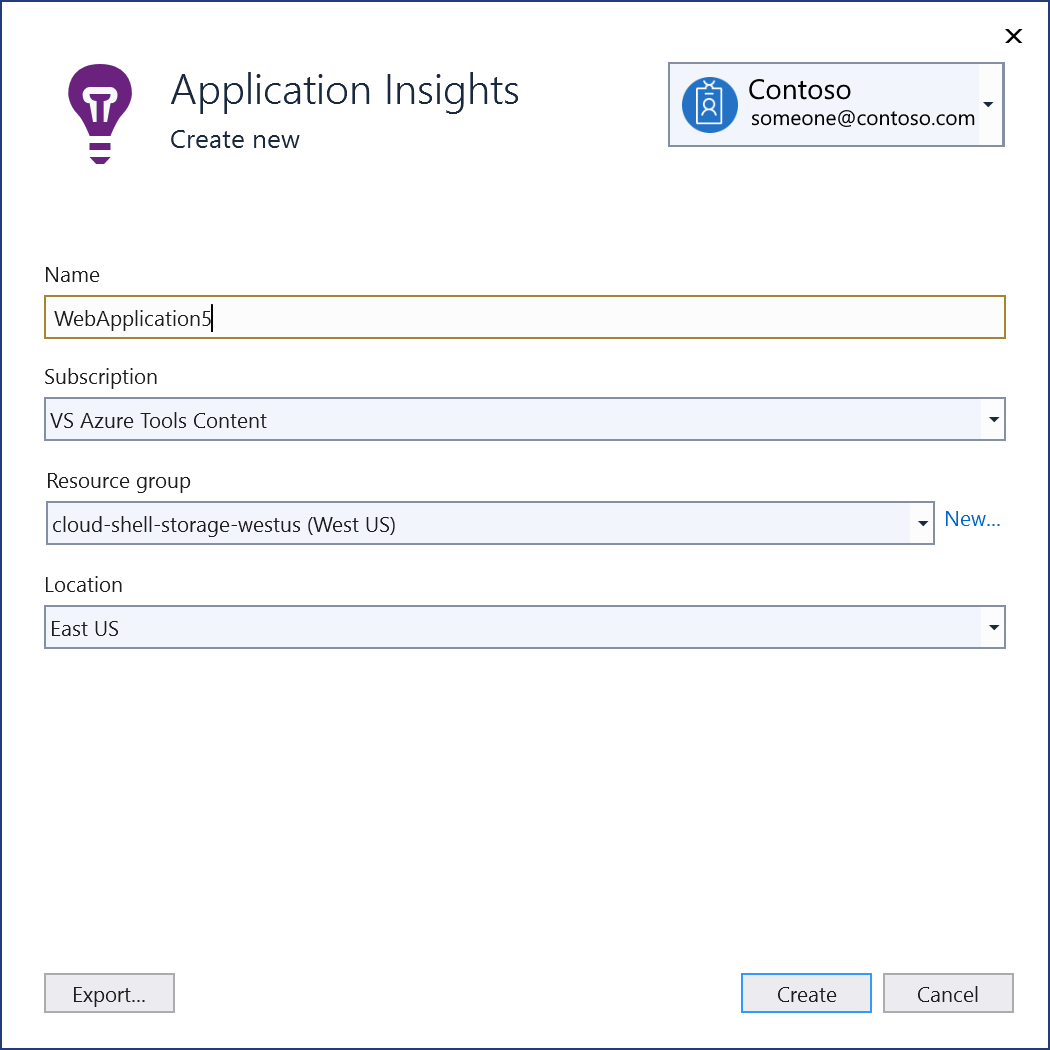
Select Create a new Application Insights component.
In the Application Insights - Create new screen, confirm the field values, adjust as needed, then select Create.
The Configure Azure Application Insights - Select a service dependency screen refreshes and the new component appears in the list. Select the new component, and select Next.
In the Configure Azure Application Insights - Provide connection string name screen, check the connection settings:

Accept the default connection values, or enter your preferred Connection string and Instrumentation key name.
Choose whether you want to store the connection string in a local secrets file, and select Next.
Caution
For improved security, in Visual Studio 2022 17.12 and later, Visual Studio creates only a name for the connection setting. In earlier versions, Visual Studio creates the connection string. Connection strings stored in the local filesystem can lead to a security risk, if they're inadvertently exposed.
The Summary of changes screen shows the planned modifications for your project. The changes include updates to the project code and properties, NuGet package references, application secrets, and the appsettings.json file.
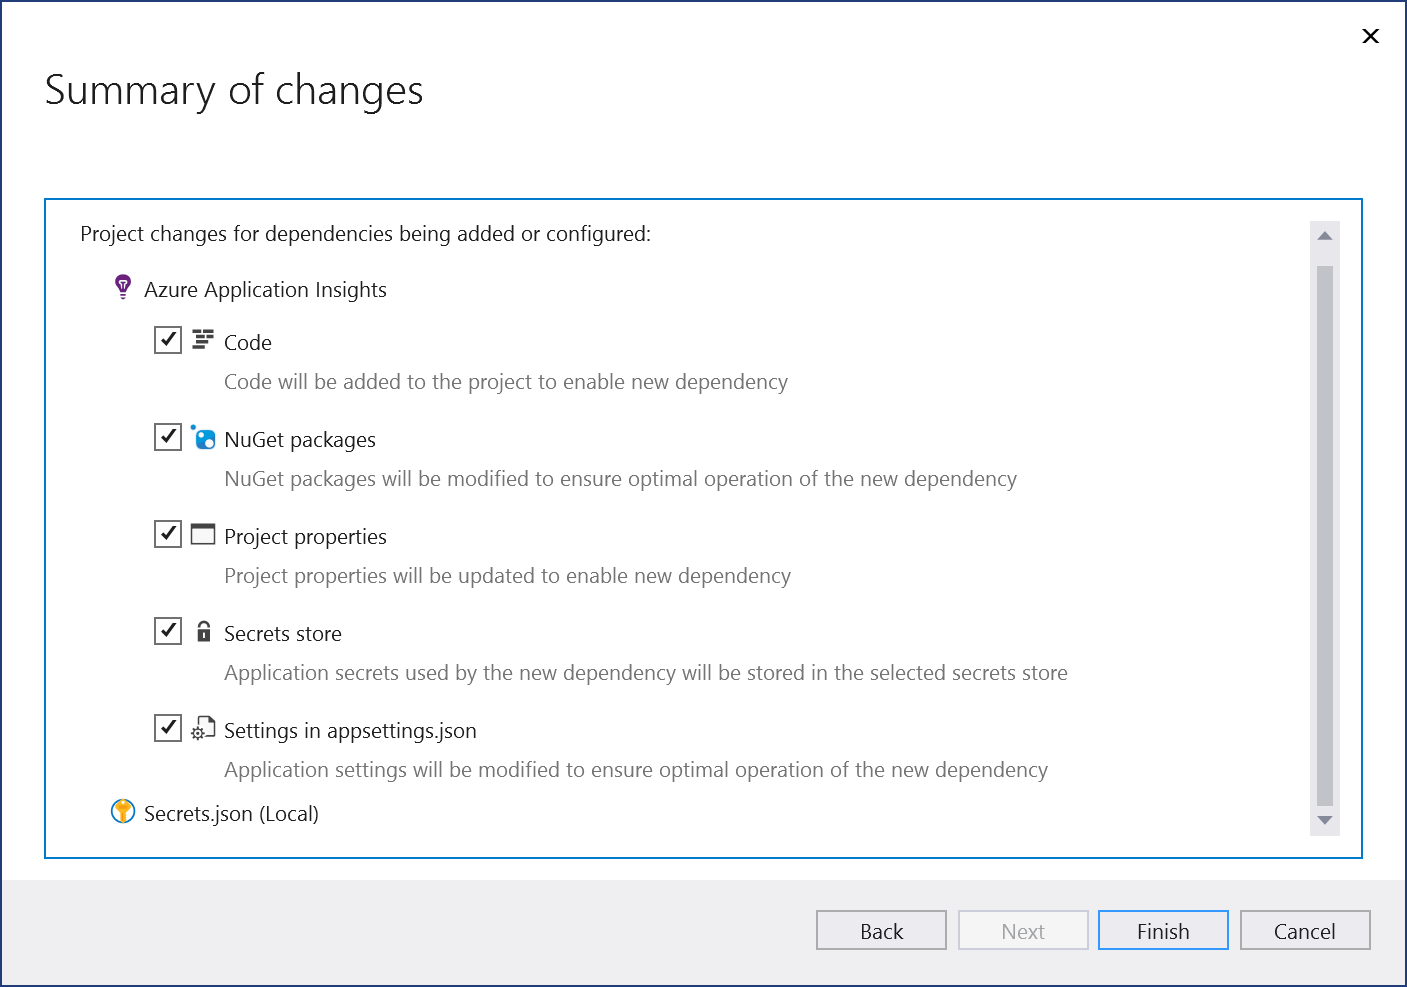
Verify the project changes, and select Finish to complete the process.
A message displays indicating a successful connection. Select Close to close the window.
In Solution Explorer, double-click the Connected Services node for the project to open the Connected Services tab. The new connection appears under the Service Dependencies section:

Connect to Application Insights with Connected Services
Add Application Insights as a connected service to your application by following these steps:
Open a project in Visual Studio that supports a connection with Application Insights. For project examples, see the Prerequisites.
Note
For .NET Framework projects, the Connected Services UI in Visual Studio is different across versions. To see the differences, compare your current view of this page to the Visual Studio 2019 version of the same page.
Add the Application Insights connected service. There are several ways you can start the process, for example:
Select Project > Connected Services > Add > Azure Application Insights.
Select Project > Application Insights > Configure Application Insights.
In Solution Explorer, right-click the Connected Services node for the project, and select Add > Azure Application Insights.
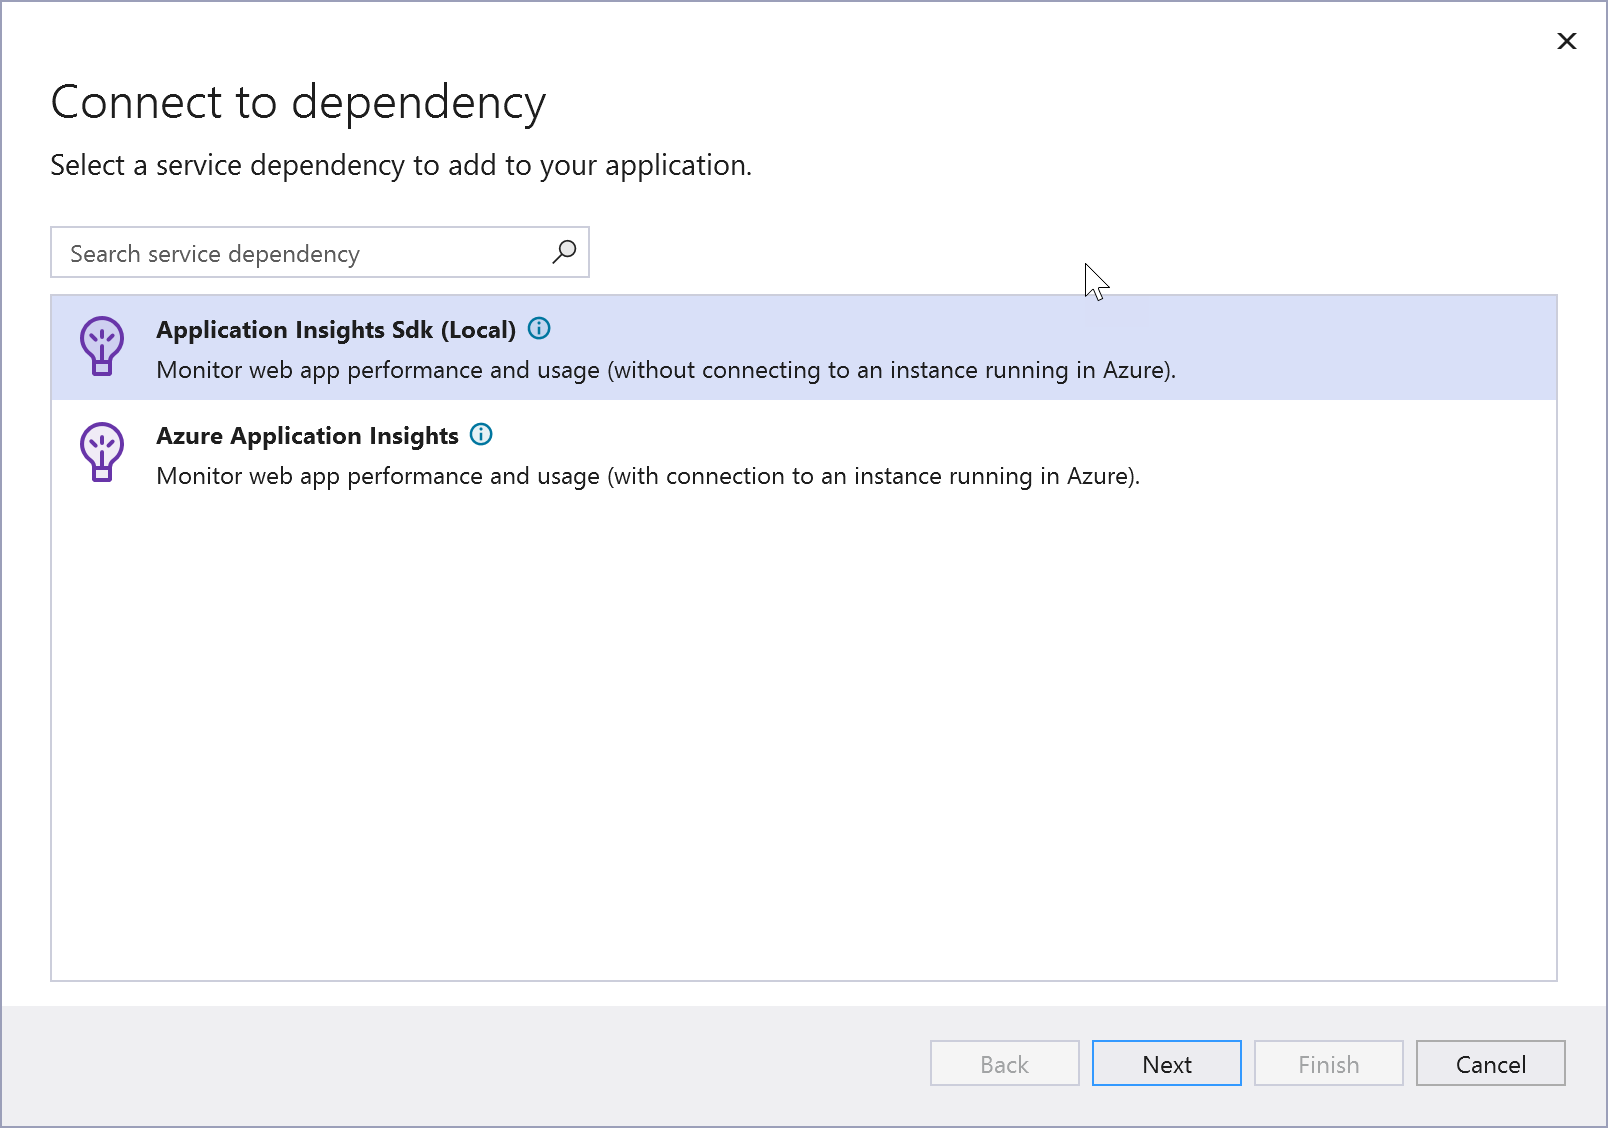
The Connect to dependency screen opens. You have two options for the connection: use a local emulator or access the live service in Azure. To reduce cost and simplify early development, you can start with the local emulator. Later, you can migrate to the live service by repeating the steps in this procedure. Select your connection preference and add the connection by following the listed steps.
Connection type Description Connection procedure Application Insights SDK (Local) Use a local emulator rather than connecting to an instance running in Azure. - Select the option, and then select Next.
- Continue to Step 6 and review the summary of planned changes.
Azure Application Insights Connect to the live Application Insights service running in Azure. - As needed, sign in to your Azure account. If you don't have an Azure account, you can sign up for a free trial.
- Continue to the next step in this procedure.
In the Connect to Azure Application Insights - Select a service dependency screen, choose whether to use an existing or new component for the connection:
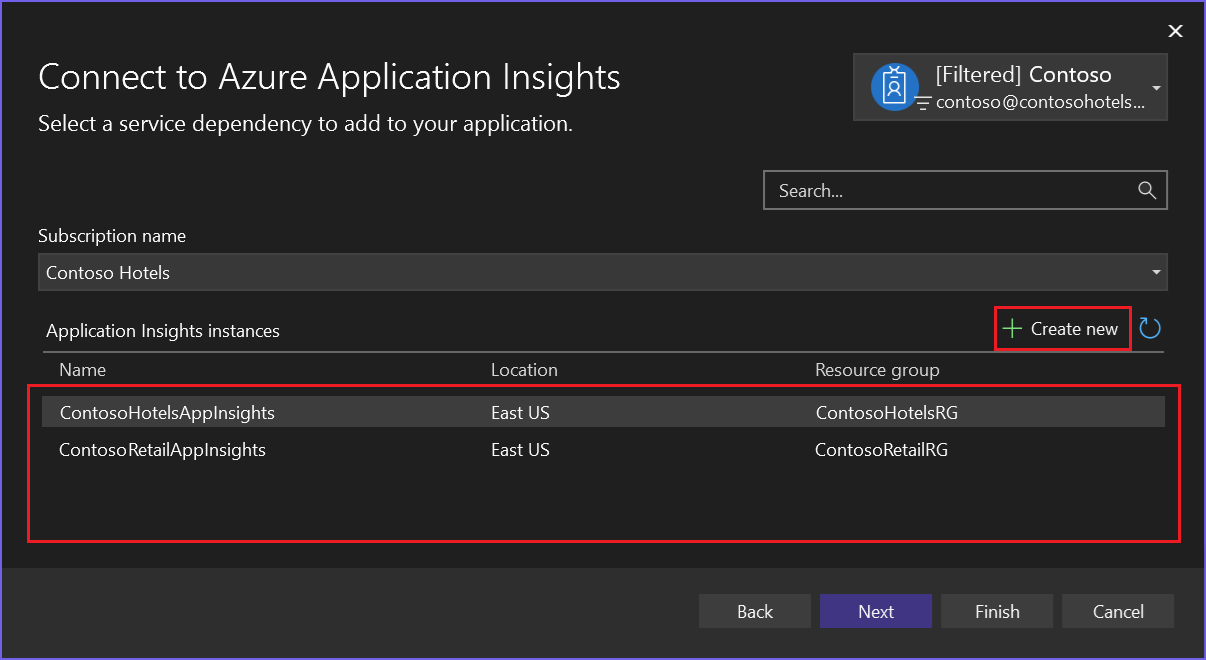
Existing component: To use an existing Application Insights component, select the component in the list, and select Next. Continue to Step 5 and configure the connection settings.
New component: To create a new component for the connection:
Select + Create new.
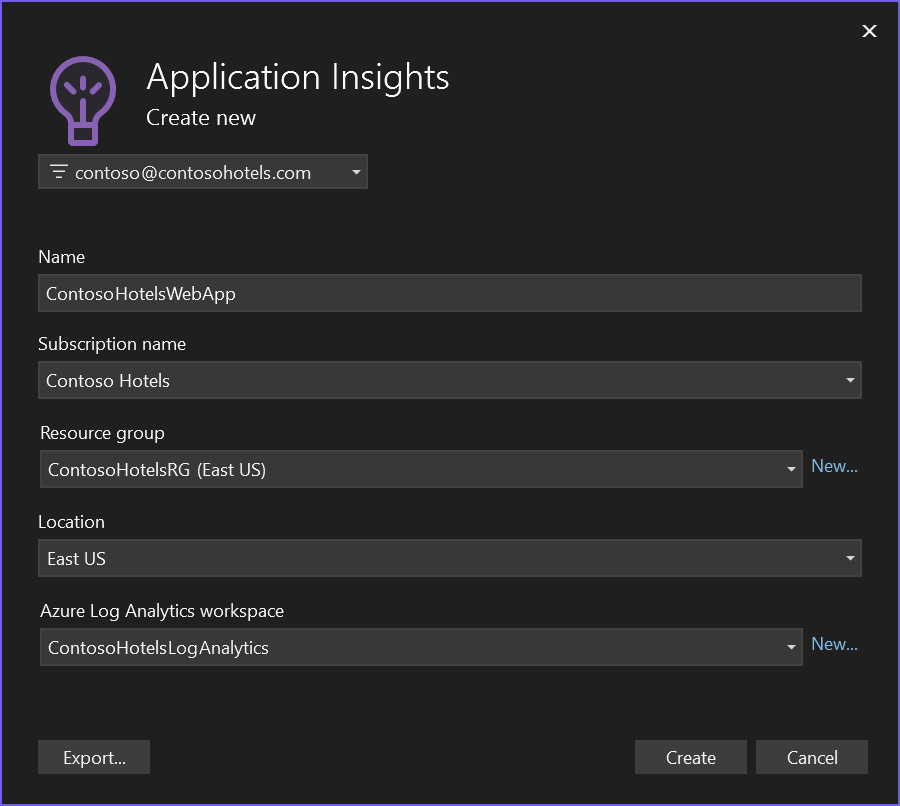
In the Application Insights - Create new screen, confirm the field values, adjust as needed, then select Create.
The Connect to Azure Application Insights - Select a service dependency screen refreshes and the new component appears in the list. Select the new component, and select Next.
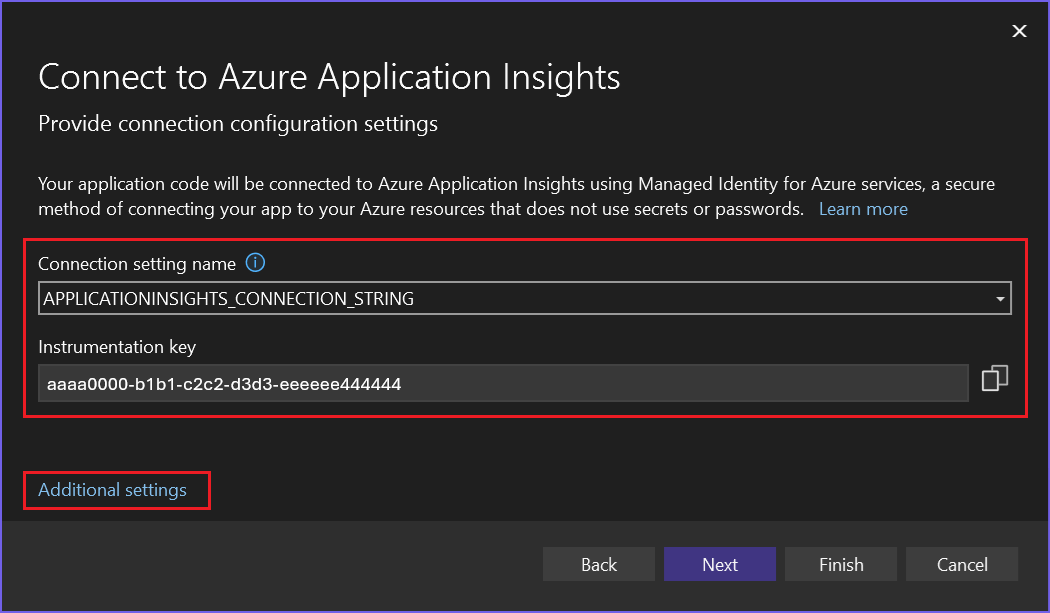
In the Connect to Azure Application Insights - Provide connection configuration settings screen, check the connection settings. Accept the default values, or enter your preferred Connection setting name and Instrumentation key.
Note
For improved security, in Visual Studio 2022 17.12 and later, Visual Studio creates only a name for the connection setting. In earlier versions, Visual Studio creates the connection string. Connection strings stored in the local filesystem can lead to a security risk, if they're inadvertently exposed.
In the Provide connection configuration settings screen, select Additional settings at the bottom left.
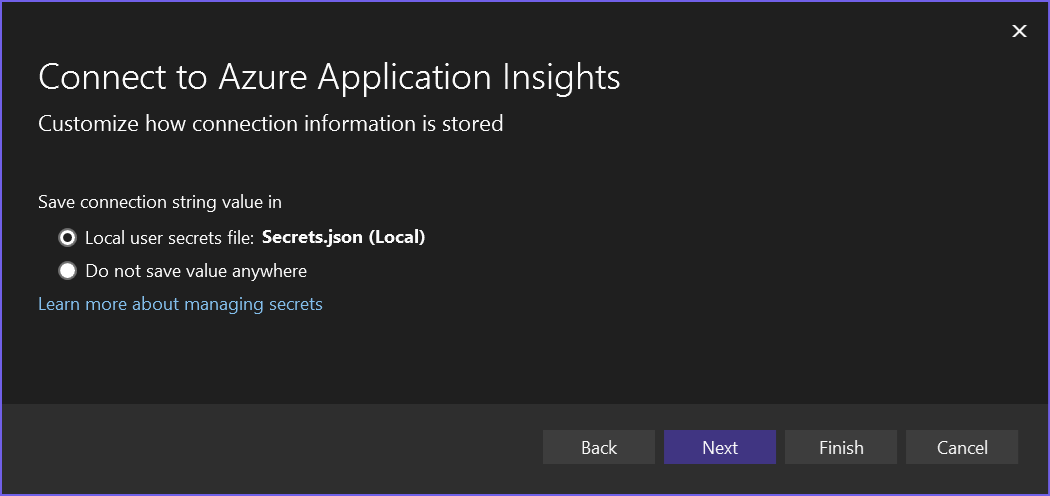
The Connect to Azure Application Insights - Customize how connection information is stored screen opens. Choose whether you want to store the connection string in a local secrets file, and select Next:
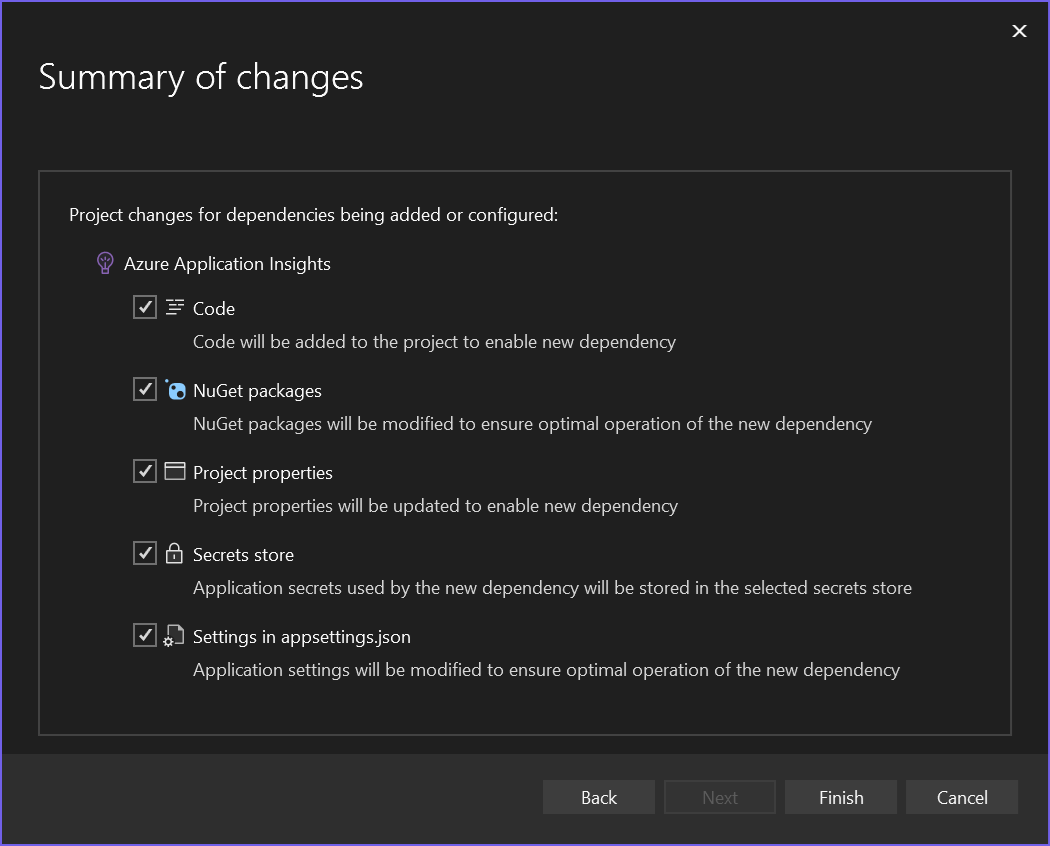
The Summary of changes screen shows the planned modifications for your project.
For an Azure Application Insights connection, the changes include updates to the project code and properties, NuGet package references, application secrets, and the appsettings.json file.
For an Application Insights SDK (Local) connection, the project changes include an added NuGet package reference and connection code for the local emulator.
Verify the project changes, and select Finish to complete the process.
A message displays indicating a successful connection. Select Close to close the window.
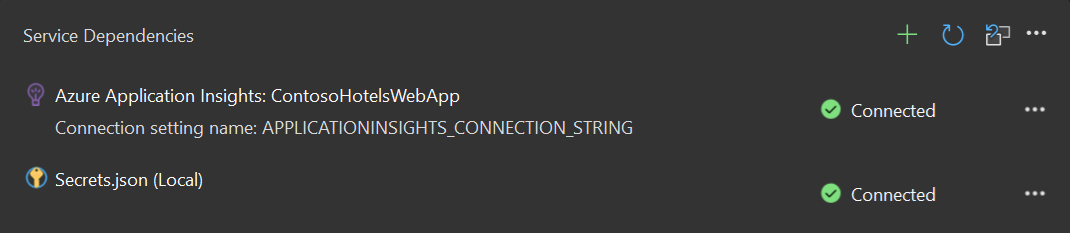
In Solution Explorer, double-click the Connected Services node for the project to open the Connected Services tab. The new connection appears under the Service Dependencies section:
To see the available actions for a dependency, select More options (...) for the item. When the dependency isn't connected, you see the Connect option. When you can select this option, the Connect to dependency screen reopens where you can change the dependency configuration and reestablish the connection.
You can also select More options (...) at the top of the Connected Services tab for options to start local dependencies, change settings, and more.
In Solution Explorer, locate and open the Program.cs file that contains the startup code for the project. Notice the following statement, which is added to support the dependency connection:
// Add services to the container
builder.Services.AddApplicationInsightsTelemetry();
Related content
- Enable monitoring for your app with Application Insights for ASP.NET Core applications
- Configure Application Insights for your ASP.NET website
- Learn more about Application Insights in Azure Monitor