Events
Sep 16, 11 PM - Oct 18, 11 PM
Join us on a learning journey combining AI, apps and cloud-scale data to build unique solutions.
Learn moreThis browser is no longer supported.
Upgrade to Microsoft Edge to take advantage of the latest features, security updates, and technical support.
With Visual Studio, you can connect any of the following to Azure Application Insights by using the Connected Services feature:
The connected service functionality adds all the needed references and connection code to your project, and modifies your configuration files appropriately.
Open your project in Visual Studio.
In Solution Explorer, right-click the Connected Services node, and, from the context menu, select Add Connected Service.
In the Connected Services tab, select the + icon for Service Dependencies.
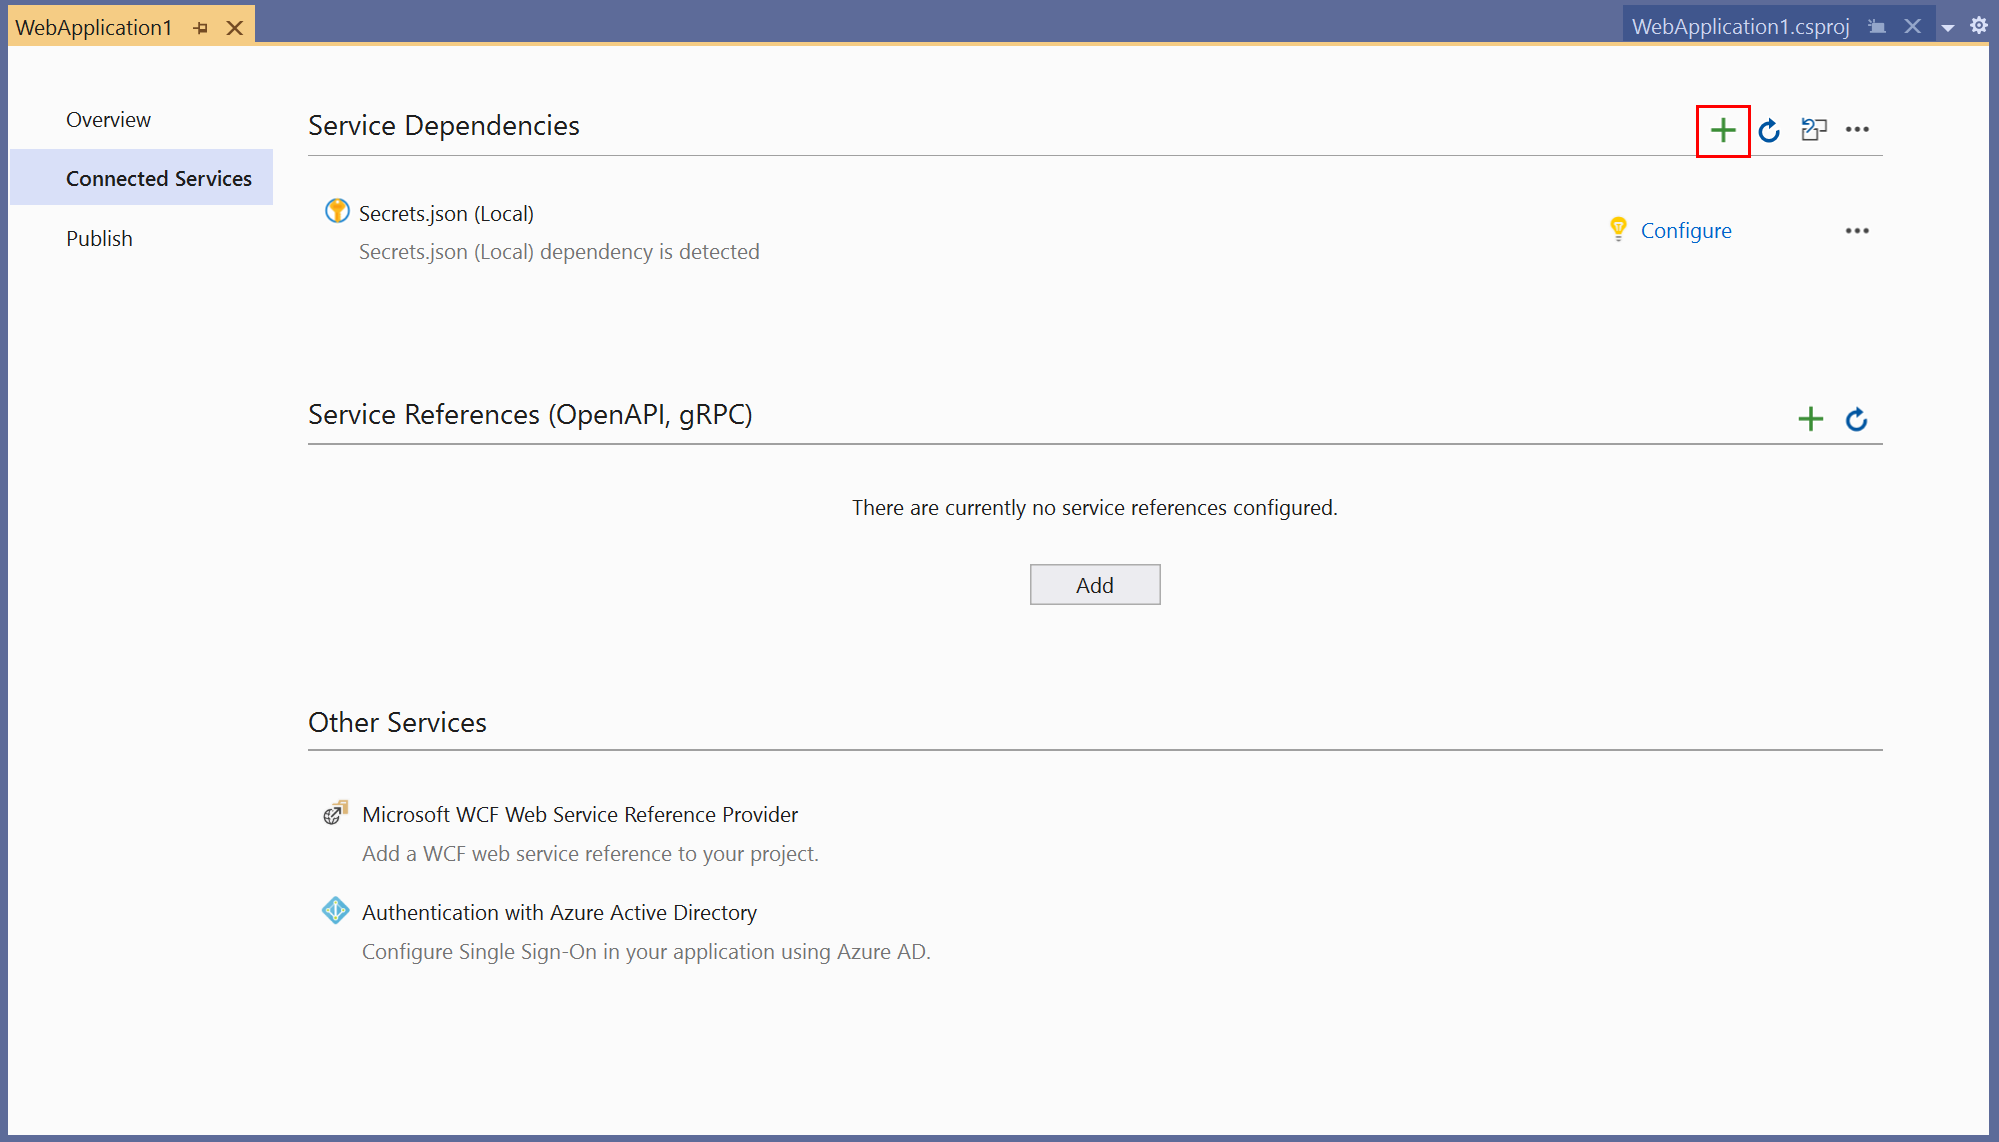
If you don't see the Connected Services node, choose Project > Connected Services > Add.
In the Add Dependency page, select Azure Application Insights.
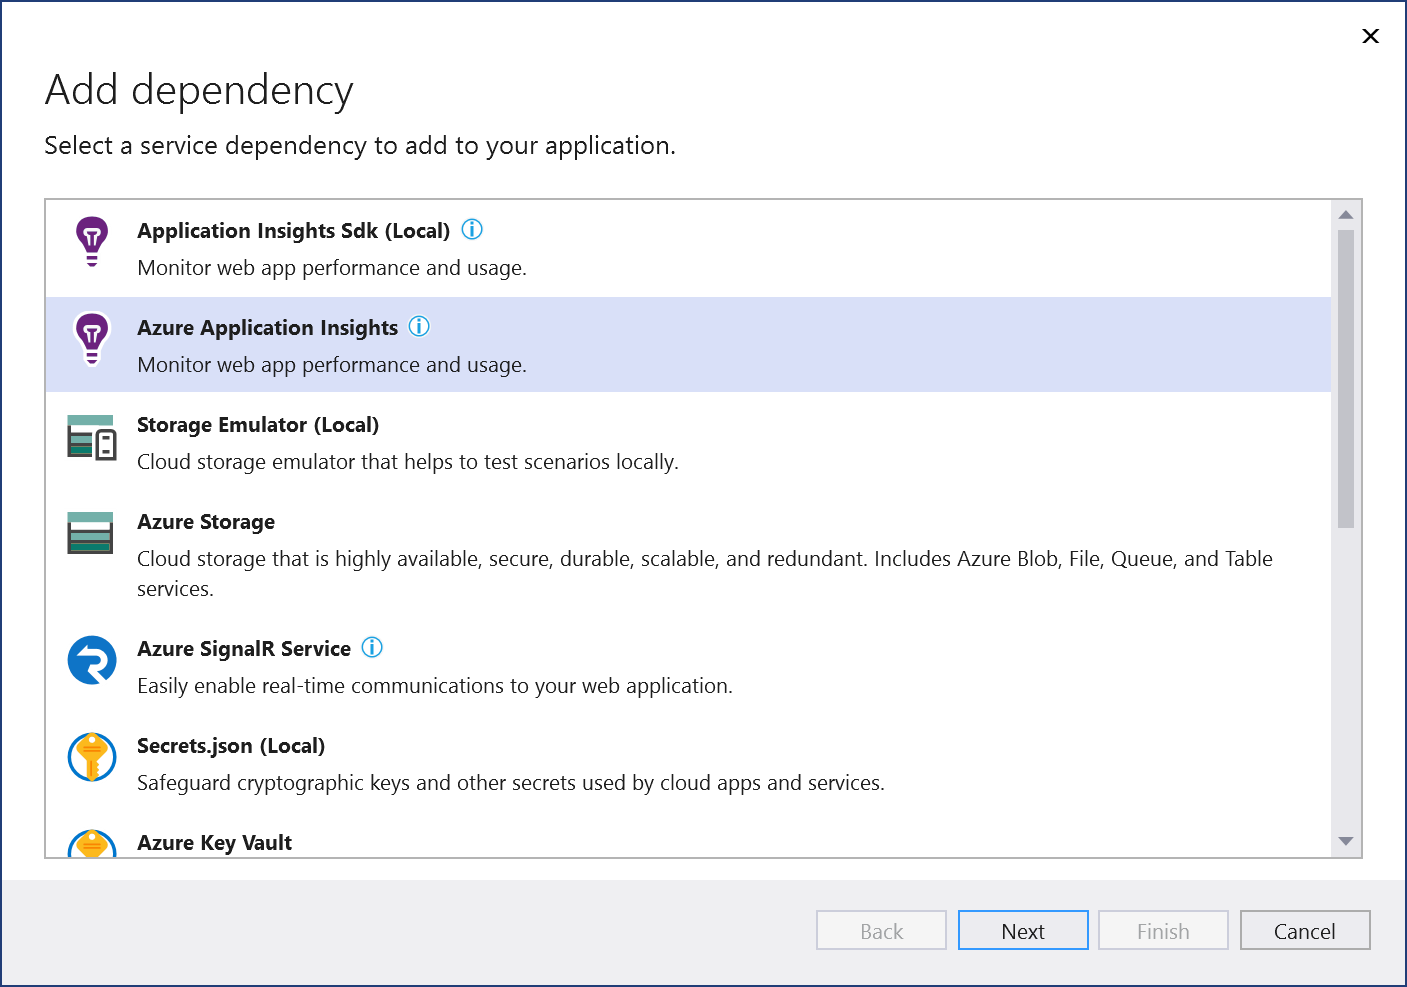
If you aren't signed in already, sign in to your Azure account. If you don't have an Azure account, you can sign up for a free trial.
In the Configure Azure Application Insights screen, select an existing Azure Application Insights component, and select Next.
If you need to create a new component, go to the next step. Otherwise, skip to step 7.

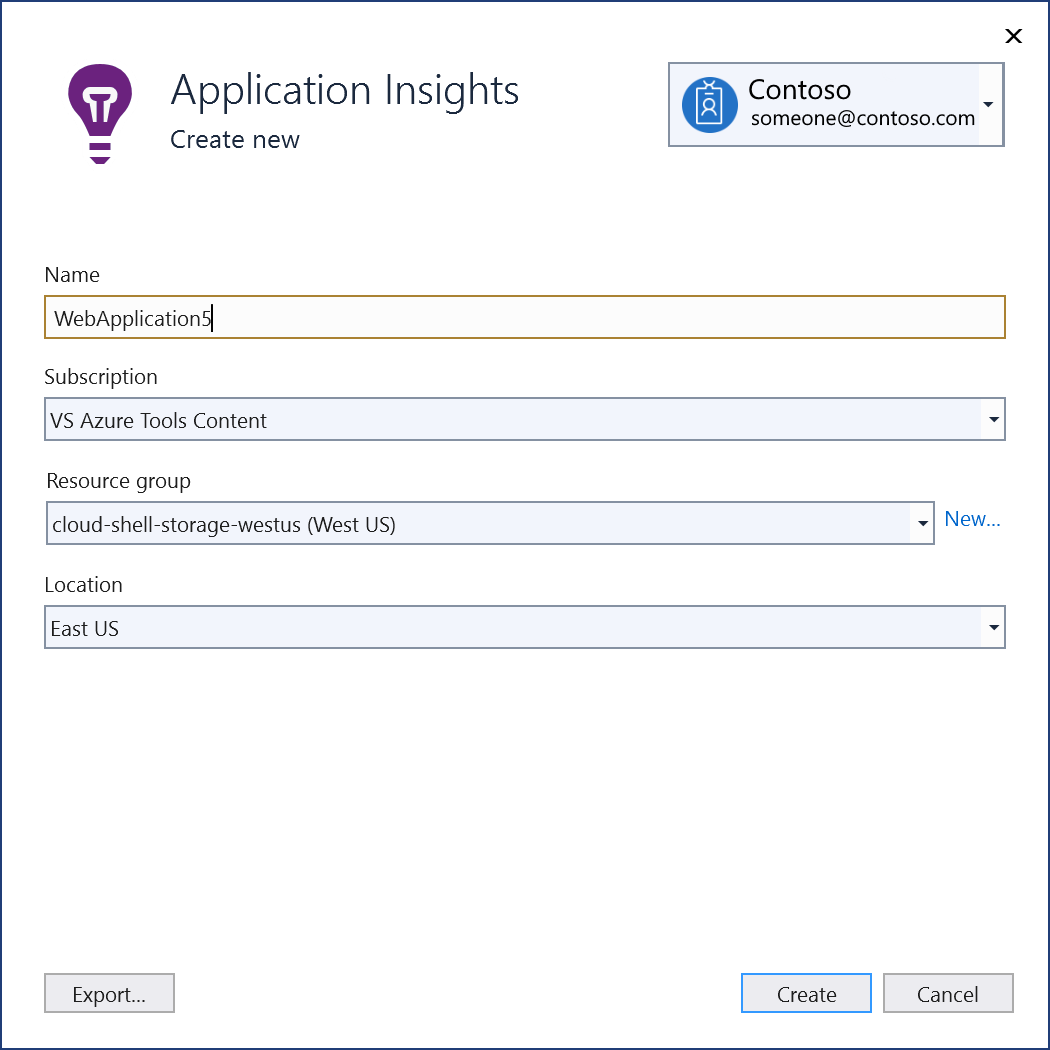
To create an Application Insights component:
Select Create a new Application Insights component at the bottom of the screen.
Fill out the Application Insights: Create new screen, and select Create.
When the Configure Azure Application Insights screen is displayed, the new component appears in the list. Select the new component in the list, and select Next.
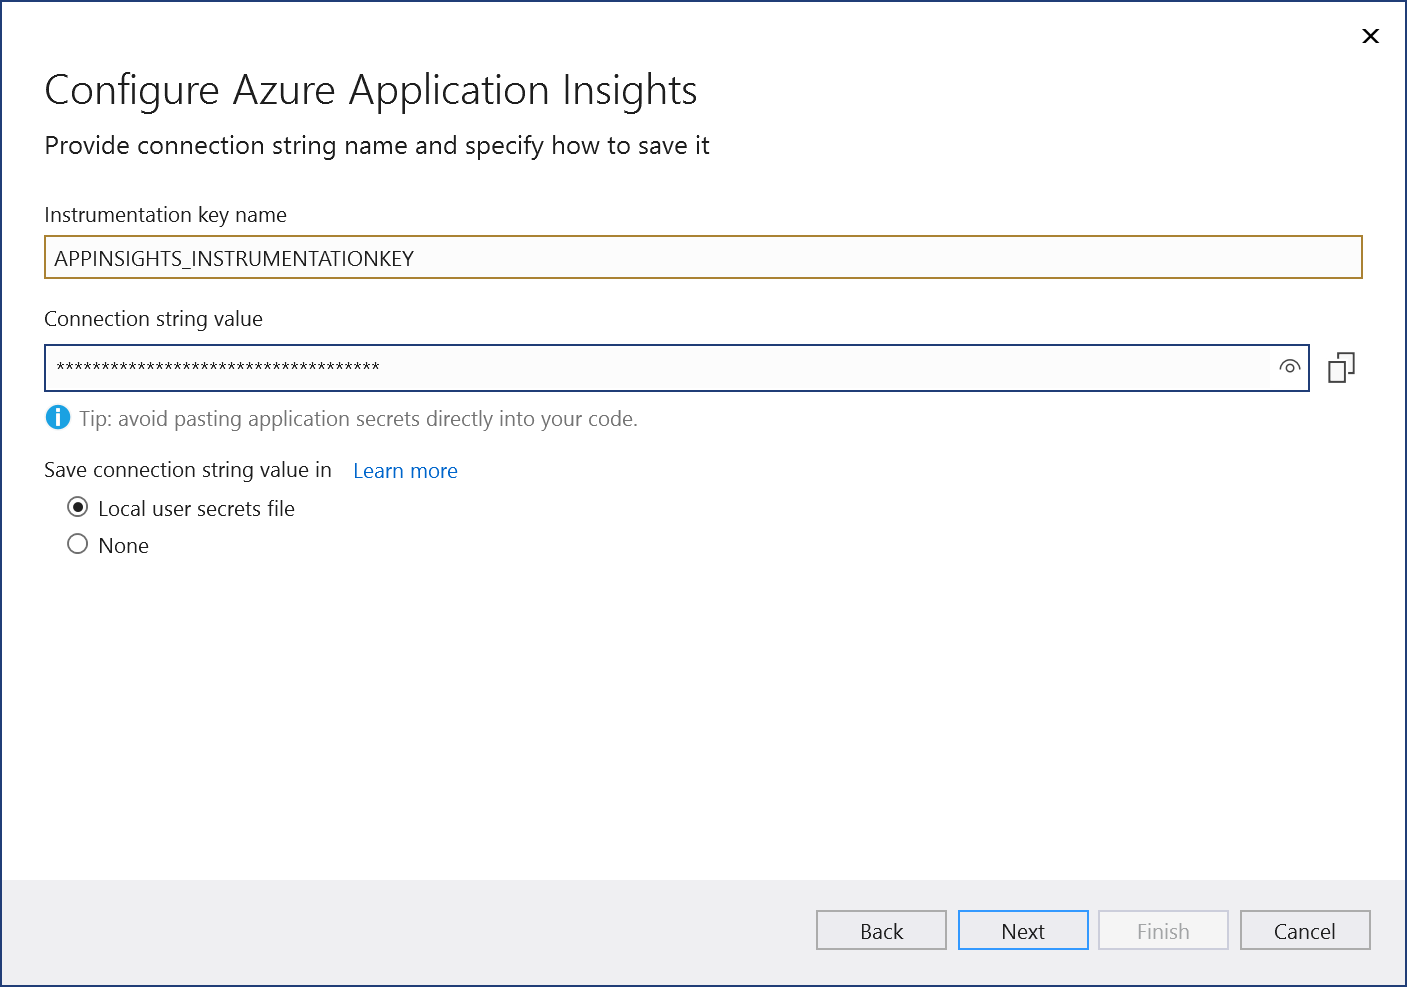
Enter an instrumentation key name, or choose the default, and choose whether you want the connection string stored in a local secrets file, or in Azure Key Vault.
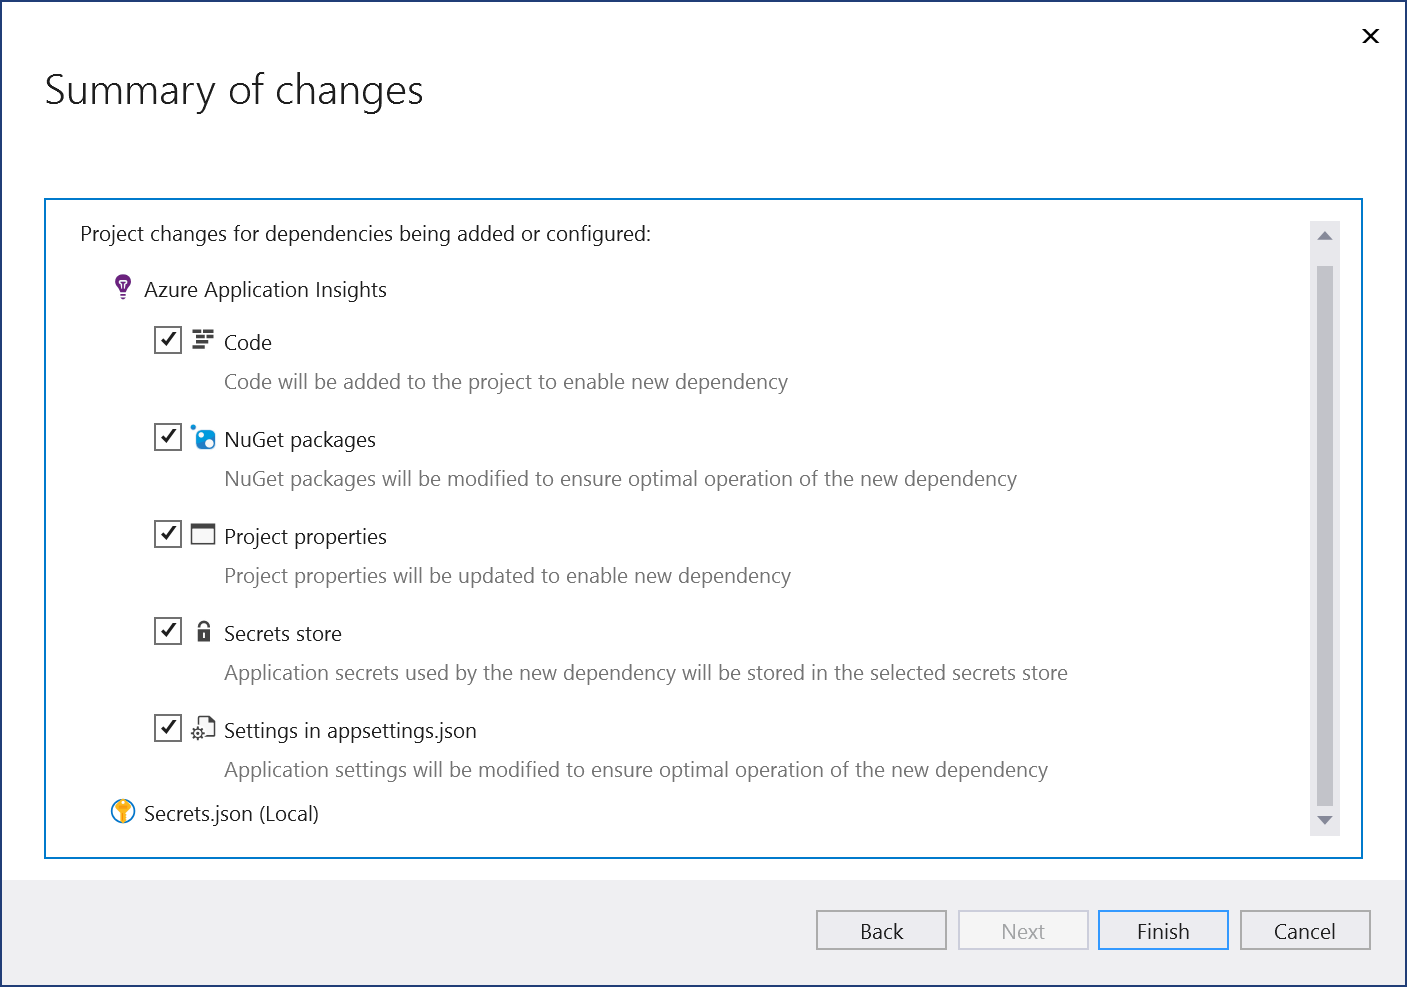
The Summary of changes screen shows all the modifications that will be made to your project if you complete the process. If the changes look OK, choose Finish.
The connection appears under the Service Dependencies section of the Connected Services tab.

Note
For .NET Framework projects, Connected Services UI is slightly different. To see the differences, compare to the Visual Studio 2019 version of this page.
Open your project in Visual Studio.
In Solution Explorer, right-click the Connected Services node, and, from the context menu, select Add to open the menu of available services.
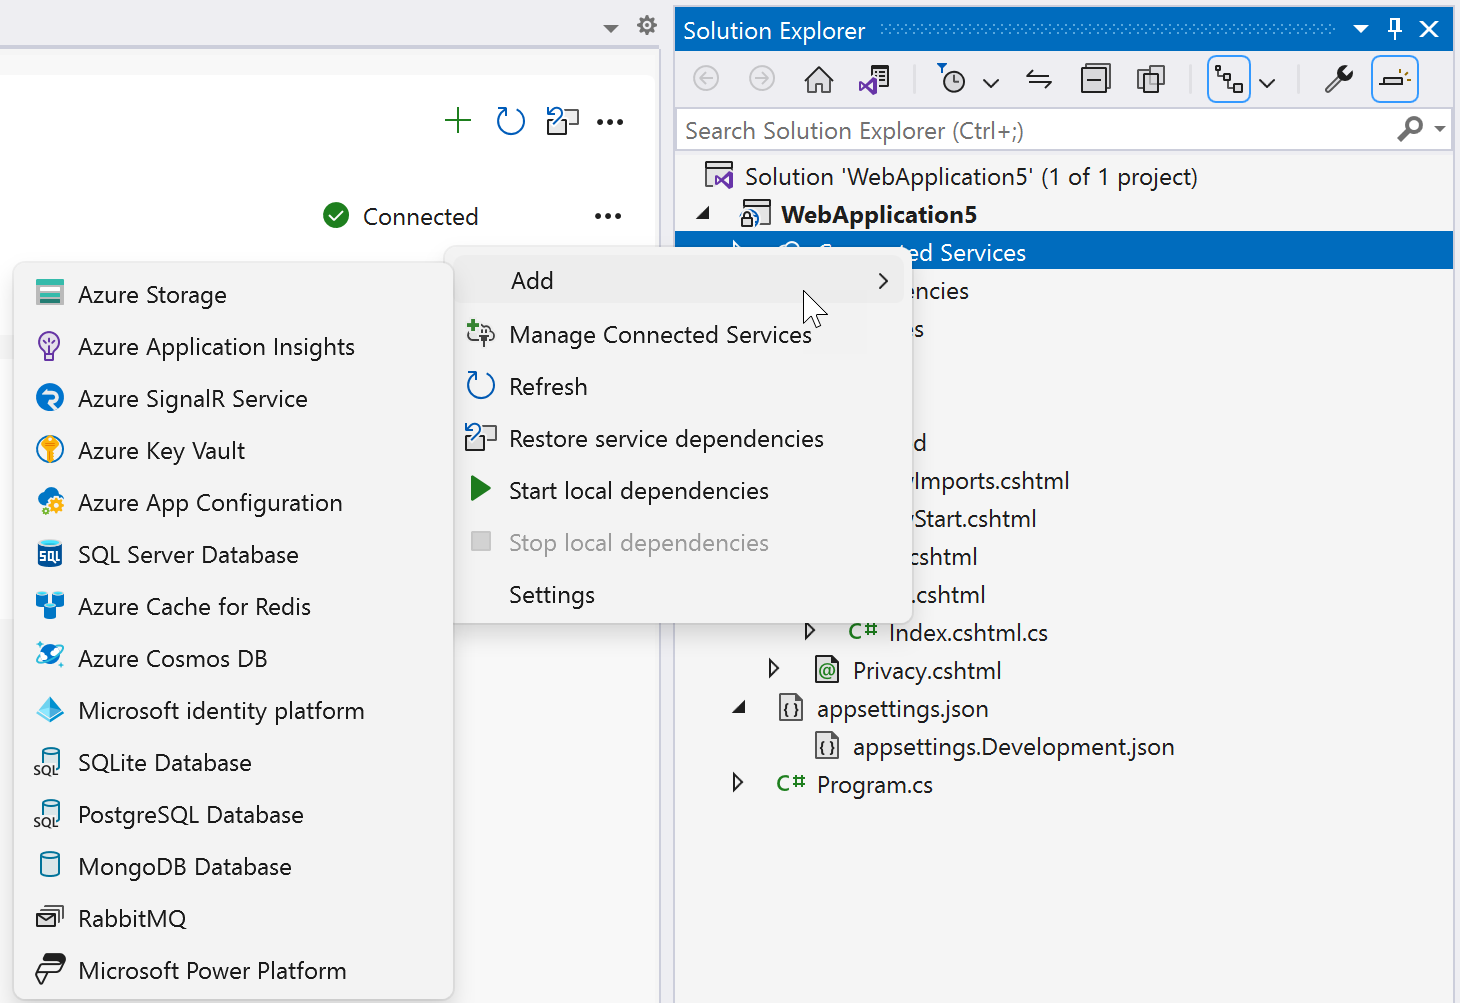
If you don't see the Connected Services node, choose Project > Connected Services > Add.
Choose Azure Application Insights. The Connect to dependency page appears. You should see two options, one for a local emulator, Application Insights Sdk (Local), and one for connecting to the live Azure Application Insights service. You can reduce cost and simplify early development by starting with the local emulator. You can migrate to the live service later by repeating these steps and choosing the other option.
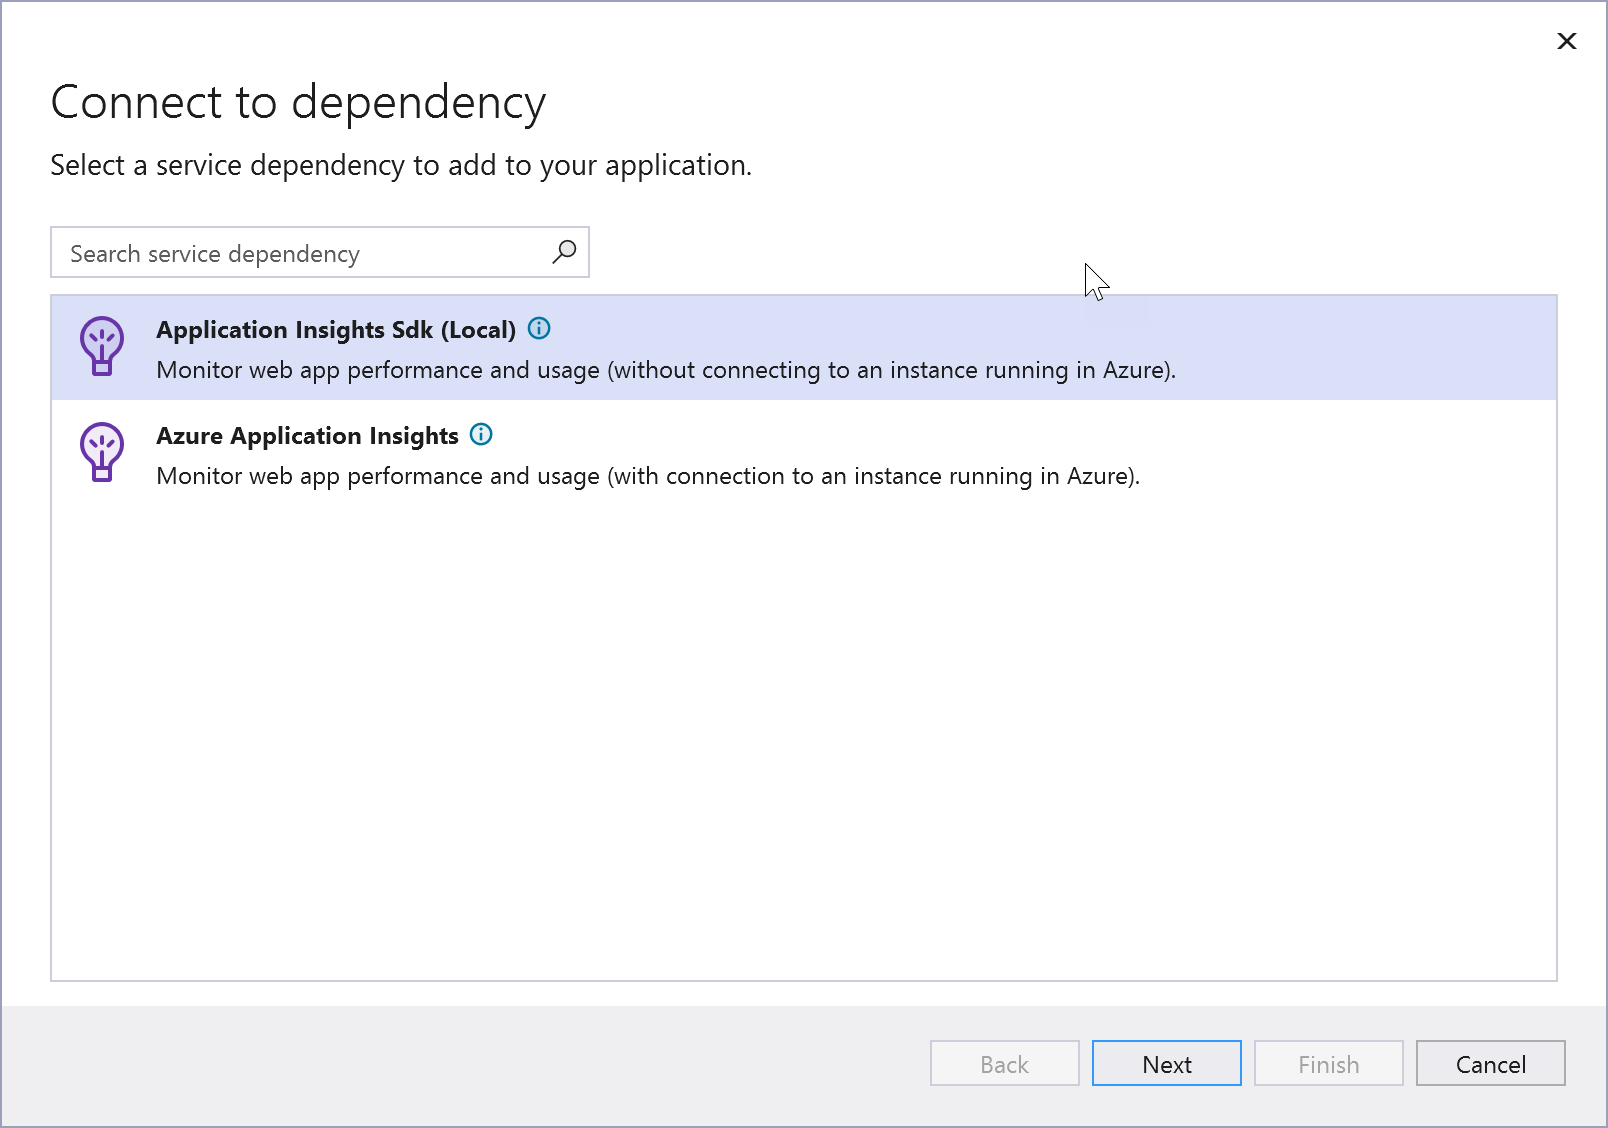
If you choose to use the Application Insights SDK locally, click Next to see the Summary of changes screen, which shows how your project is being modified. A NuGet package reference is added to your project and the connection code for the local emulator is added to your project.
If you want to connect to the Azure service, continue to the next step, or if you aren't signed in already, sign in to your Azure account before continuing. If you don't have an Azure account, you can sign up for a free trial.
In the Configure Azure Application Insights screen, select an existing Azure Application Insights component, and select Next.
If you need to create a new component, go to the next step. Otherwise, skip to step 7.
To create an Application Insights component:
Select Create a new Application Insights component at the bottom of the screen.
Fill out the Application Insights: Create new screen, and select Create.
When the Configure Azure Application Insights screen is displayed, the new component appears in the list. Select the new component in the list, and select Next.
Enter an instrumentation key name, or choose the default, and choose whether you want the connection string stored in a local secrets file, or in Azure Key Vault.
The Summary of changes screen shows all the modifications that will be made to your project if you complete the process. If the changes look OK, choose Finish.
In Solution Explorer, double-click on the Connected Services node to open the Connected Services tab. The connection appears under the Service Dependencies section:
If you click on the three dots next to the dependency you added, you can see various options such as Connect to reopen the wizard and change the connection. You can also click the three dots at the top right of the window to see options to start local dependencies, change settings, and more.
Open your startup code file (Program.cs in templates) and notice that a line has been added that resembles the following:
builder.Services.AddApplicationInsightsTelemetry(builder.Configuration["APPLICATIONINSIGHTS_CONNECTION_STRING"]);
For ASP.NET Core projects, learn how you can enable monitoring for your app at Application Insights for ASP.NET Core applications.
For ASP.NET projects, see Configure Application Insights for your ASP.NET website.
The links take you to the section of the articles after the initial setup steps, which you've already done.
Events
Sep 16, 11 PM - Oct 18, 11 PM
Join us on a learning journey combining AI, apps and cloud-scale data to build unique solutions.
Learn moreTraining
Module
Use Power Apps Instrumentation with Application Insights - Training
This module explores how to set up a Microsoft Power Apps canvas app to send telemetry to Application Insights.
Certification
Microsoft Certified: Azure Developer Associate - Certifications
Build end-to-end solutions in Microsoft Azure to create Azure Functions, implement and manage web apps, develop solutions utilizing Azure storage, and more.