Note
Access to this page requires authorization. You can try signing in or changing directories.
Access to this page requires authorization. You can try changing directories.
Note
This article applies to Azure Azure Cloud Services (extended support). This deployment model is retiring on March 31, 2027. For more information, see Azure updates.
Azure Cloud Services relies on connection strings for authentication in some cases, such as for storage accounts. Connection strings and passwords are inherently insecure due to the risk of unintended exposure or compromise. Microsoft recommends using managed identities for authentication, and services such as Service Fabric managed clusters.
After you have created your Azure Cloud Services (extended support) project, you can add new roles to it or remove existing roles from it. You can also import an existing project and convert it to a role. For example, you can import an ASP.NET web application and designate it as a web role.
Prerequisites
- Visual Studio (see [Visual Studio downloads] (https://visualstudio.microsoft.com/downloads/?cid=learn-onpage-download-cta)) with the Azure development workload installed, and the Individual Component .NET Framework project and item templates installed. See Modify Visual Studio.
- An Azure account. If you don't have an Azure account, activate your Azure benefits for Visual Studio subscribers or sign up for a free trial.
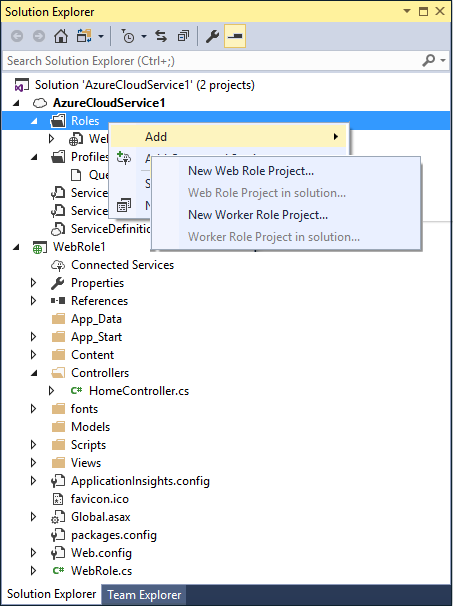
Adding a role to an Azure Cloud Services (extended support) project
The following steps guide you through adding a web or worker role to an Azure Cloud Services (extended support) project in Visual Studio.
Create or open an Azure Cloud Services (extended support) project in Visual Studio.
In Solution Explorer, expand the project node
Right-click the Roles node to display the context menu. From the context menu, select Add, then select an existing web role or worker role from the current solution, or create a web or worker role project. You can also select an appropriate project, such as an ASP.NET web application project, and associate it with a role project.
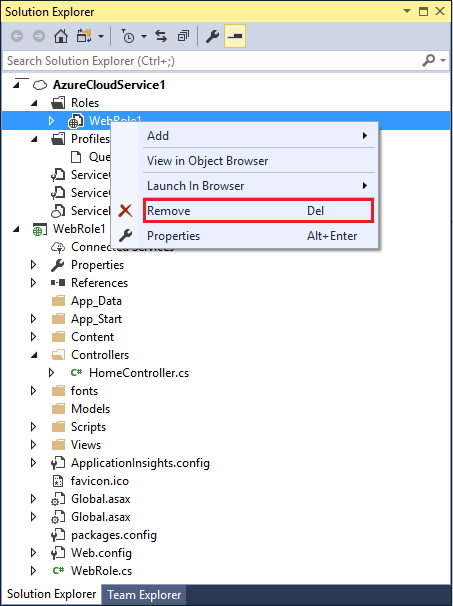
Removing a role from an Azure Cloud Services (extended support) project
The following steps guide you through removing a web or worker role from an Azure Cloud Services (extended support) project in Visual Studio.
Create or open an Azure Cloud Services (extended support) project in Visual Studio.
In Solution Explorer, expand the project node
Expand the Roles node.
Right-click the node you want to remove, and, from the context menu, select Remove.