Note
Access to this page requires authorization. You can try signing in or changing directories.
Access to this page requires authorization. You can try changing directories.
With Visual Studio, you can connect any of the following to Azure Storage by using the Connected Services feature:
- .NET Framework console app
- ASP.NET Model-View-Controller (MVC) (.NET Framework)
- ASP.NET Core
- .NET Core (including console app, WPF, Windows Forms, class library)
- .NET Core Worker Role
- Azure Functions
- Universal Windows Platform App
- Cordova
The connected service functionality adds all the needed references and connection code to your project, and modifies your configuration files appropriately.
Prerequisites
- Visual Studio (see [Visual Studio downloads] (https://visualstudio.microsoft.com/downloads/?cid=learn-onpage-download-cta)) with the Azure development workload installed.
- A project of one of the supported types
- An Azure account. If you don't have an Azure account, activate your Azure benefits for Visual Studio subscribers or sign up for a free trial.
Connect to Azure Storage using Connected Services
Open your project in Visual Studio.
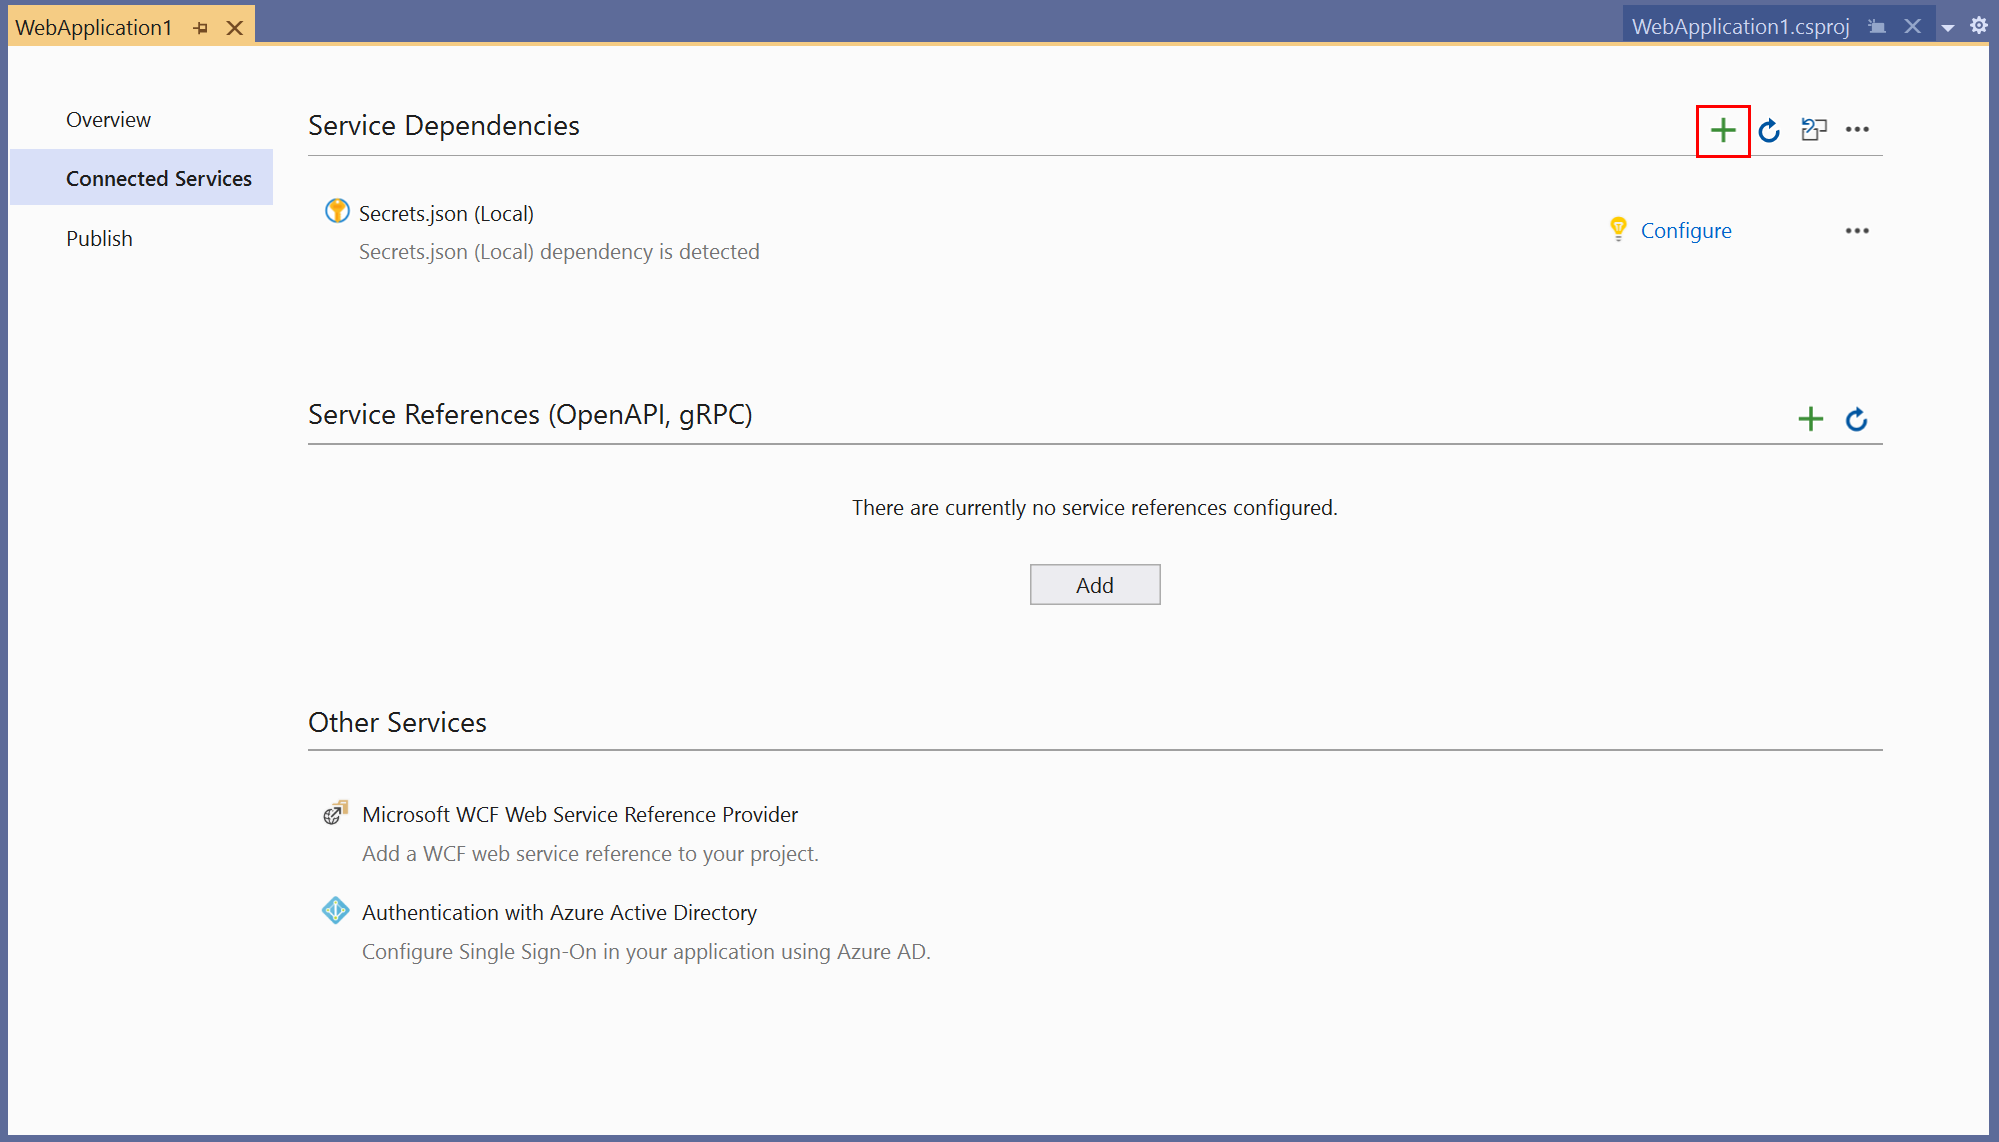
In Solution Explorer, right-click the Connected Services node, and, from the context menu, select Add Connected Service.

In the Connected Services tab, select the + icon for Service Dependencies.
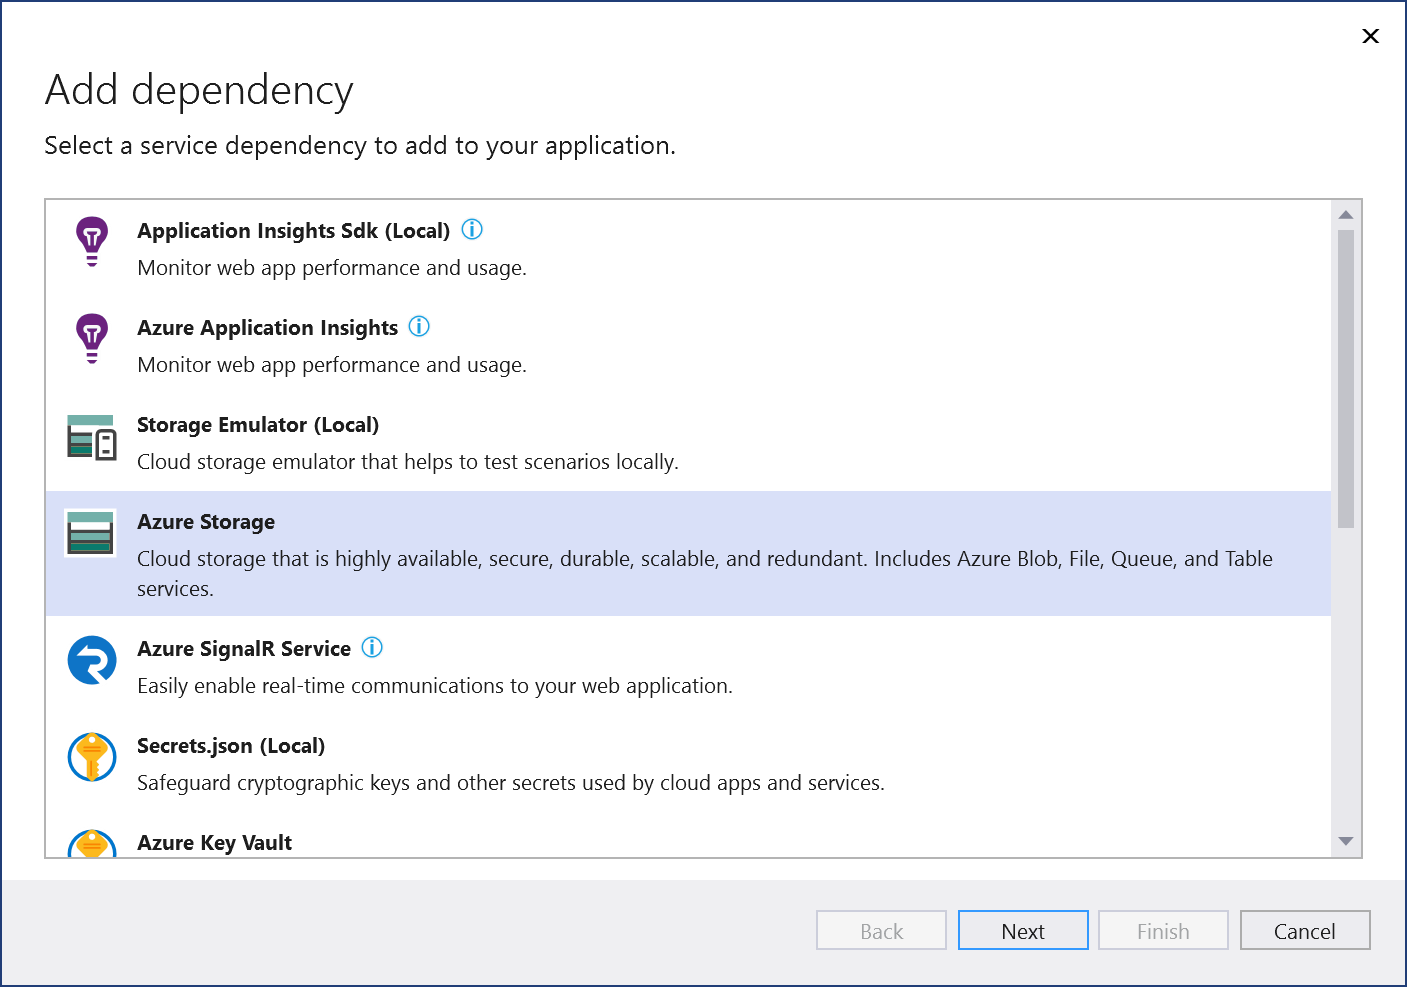
In the Add Dependency page, select Azure Storage.
If you aren't signed in already, sign in to your Azure account. If you don't have an Azure account, you can sign up for a free trial.
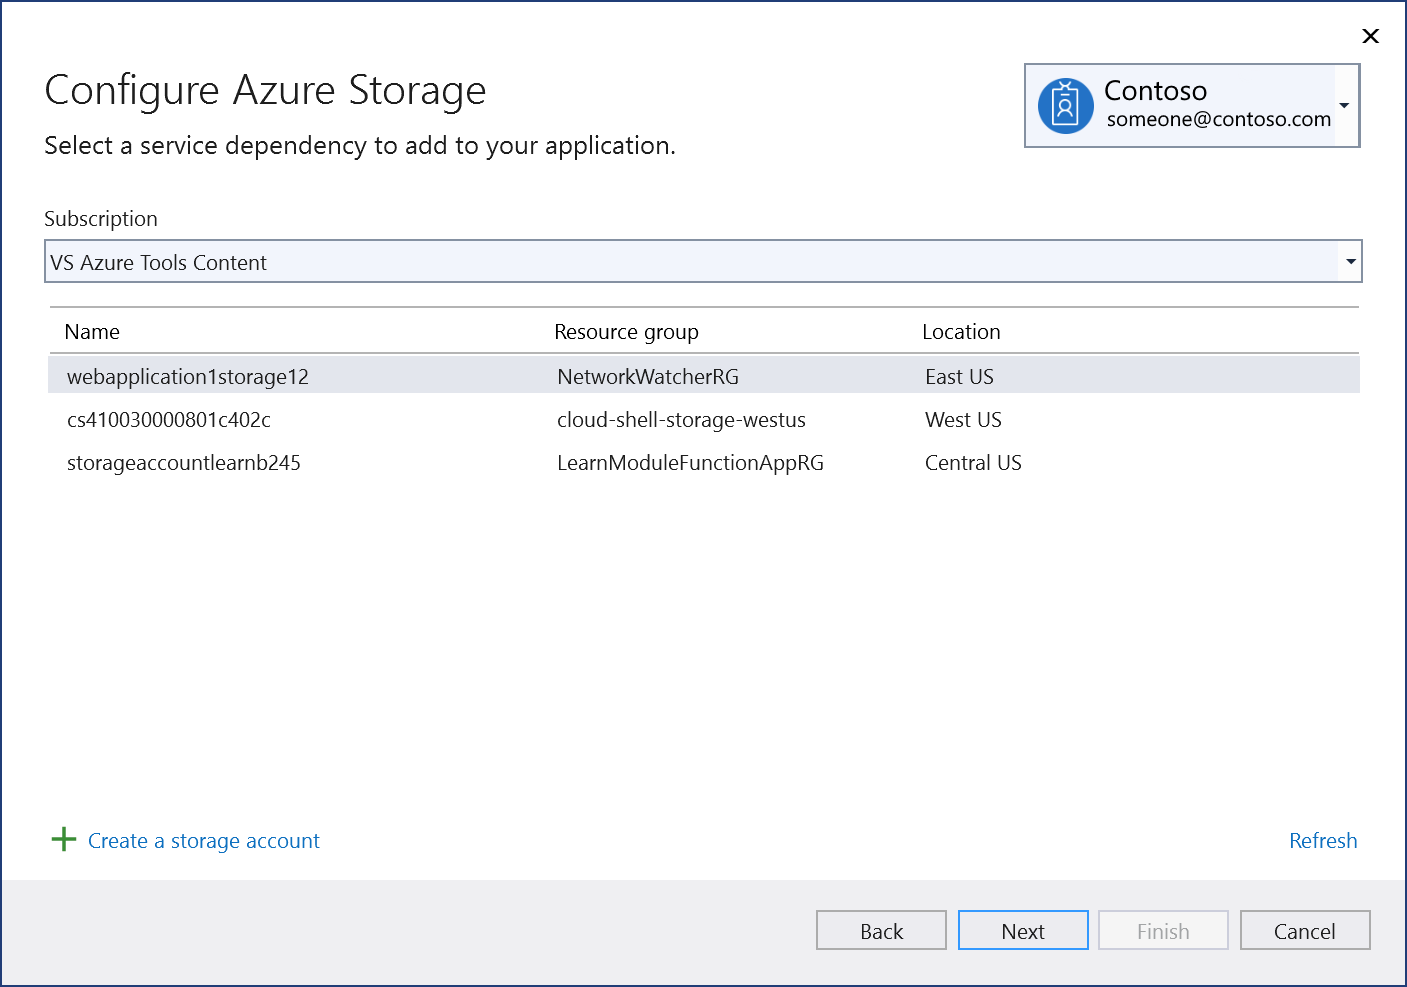
In the Configure Azure Storage screen, select an existing storage account, and select Next.
If you need to create a storage account, go to the next step. Otherwise, skip to step 6.
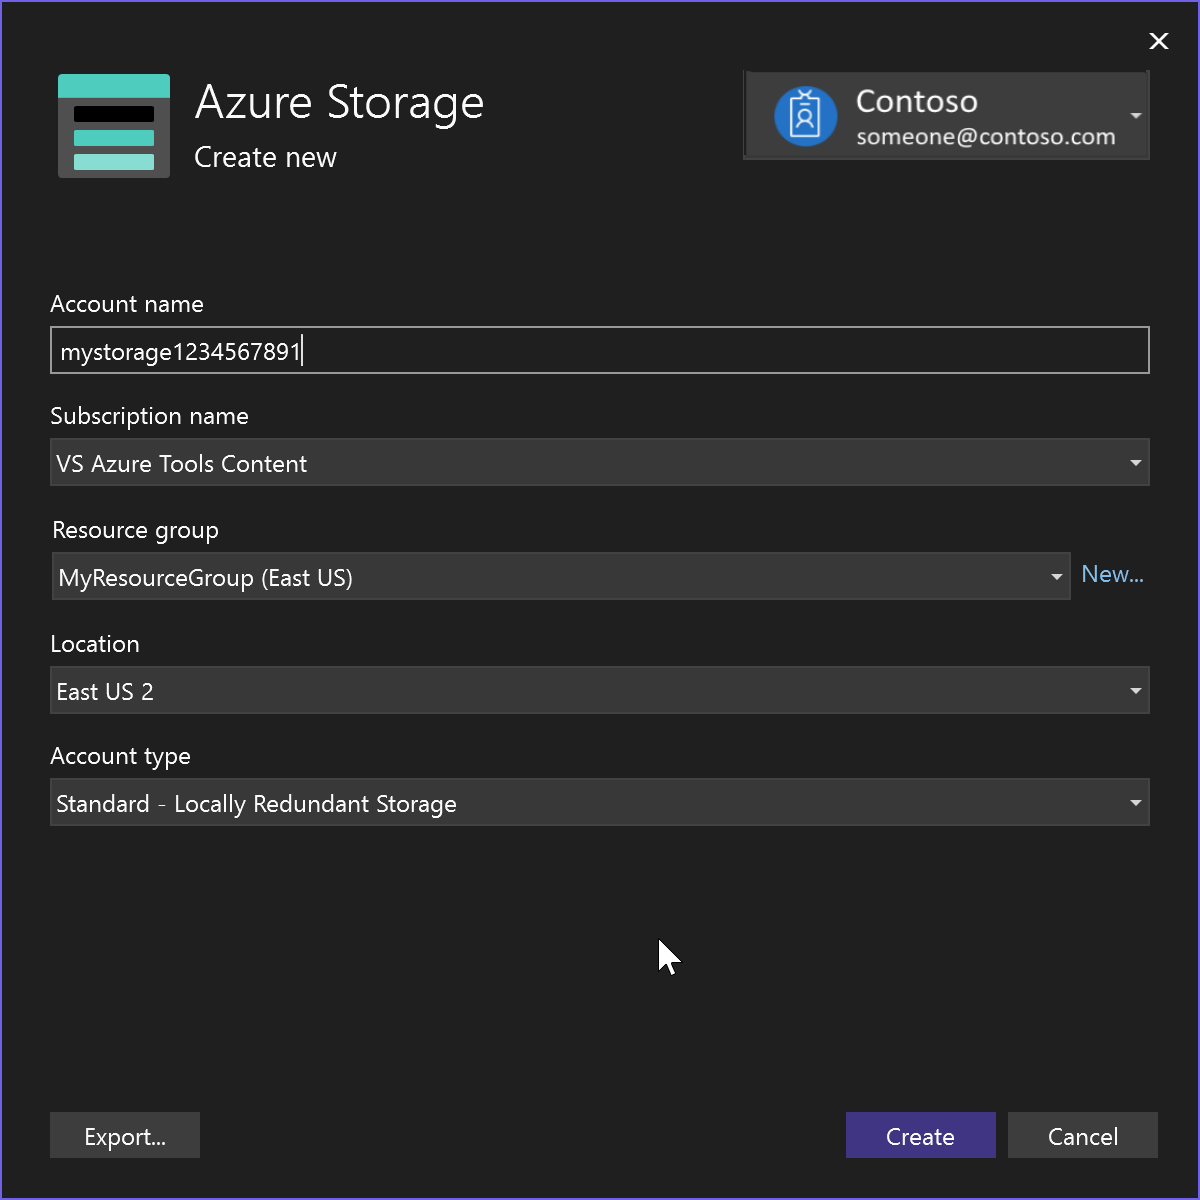
To create a storage account:
Select Create a storage account at the bottom of the dialog.
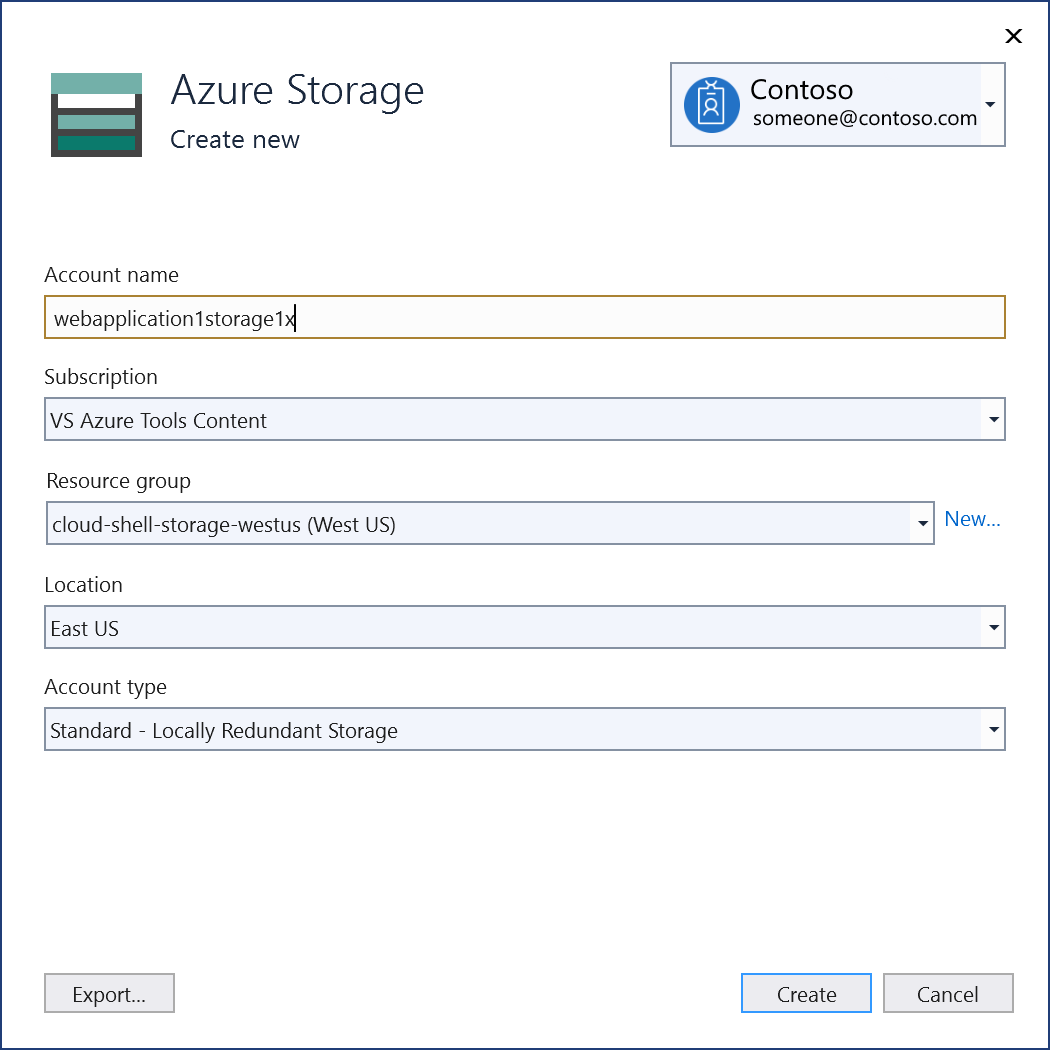
Fill out the Azure Storage: Create new dialog, and select Create.
When the Azure Storage dialog is displayed, the new storage account appears in the list. Select the new storage account in the list, and select Next.
Enter a connection string name, and choose whether you want the connection string stored in a local secrets file, or in Azure Key Vault.
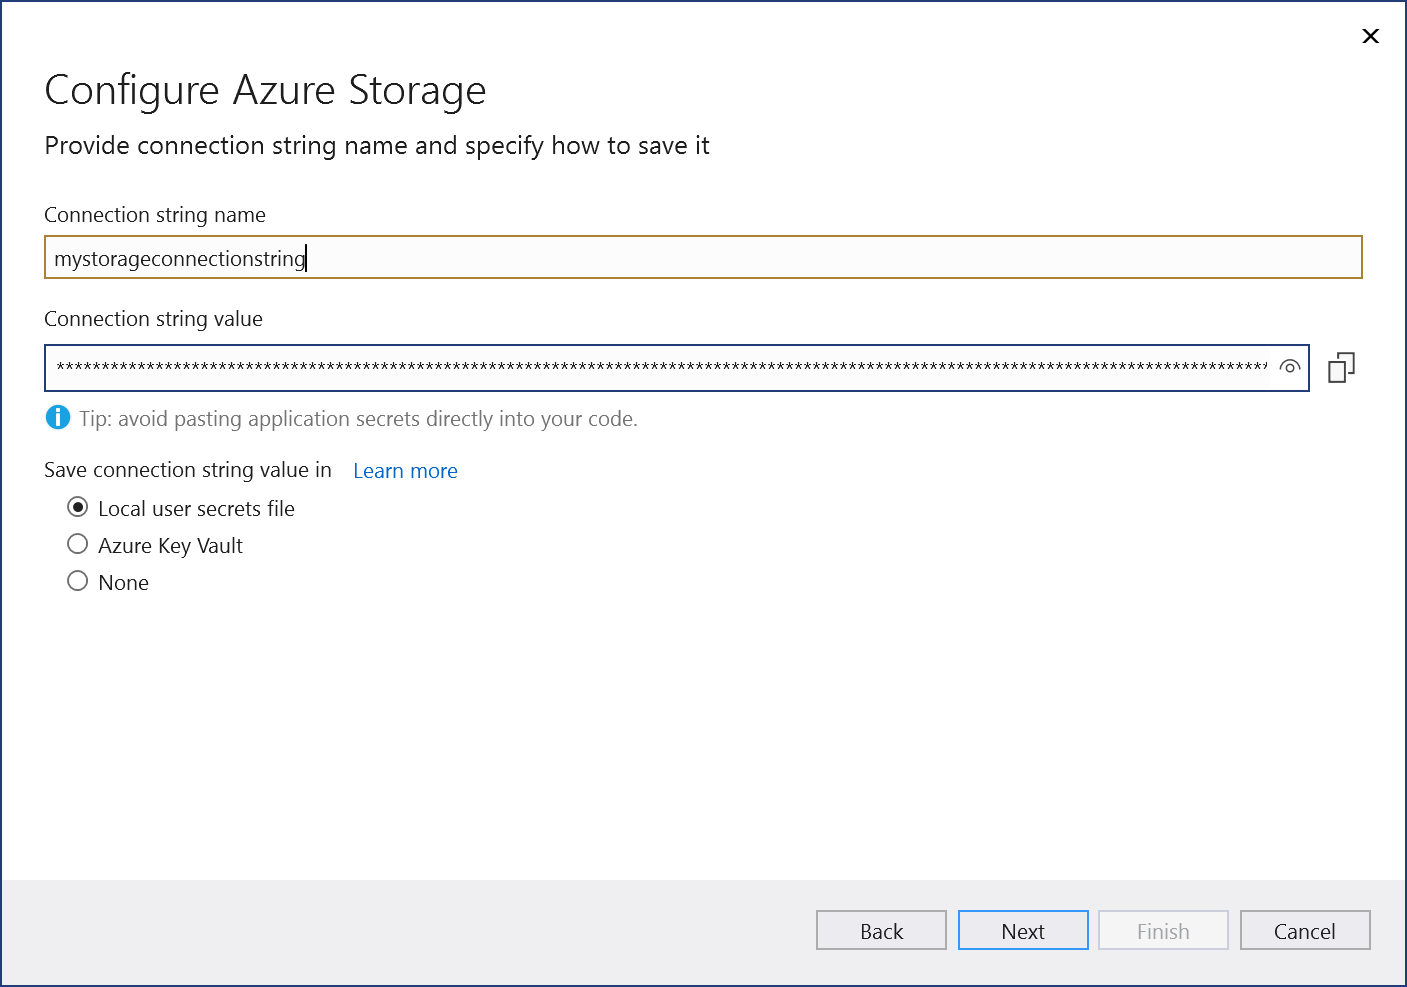
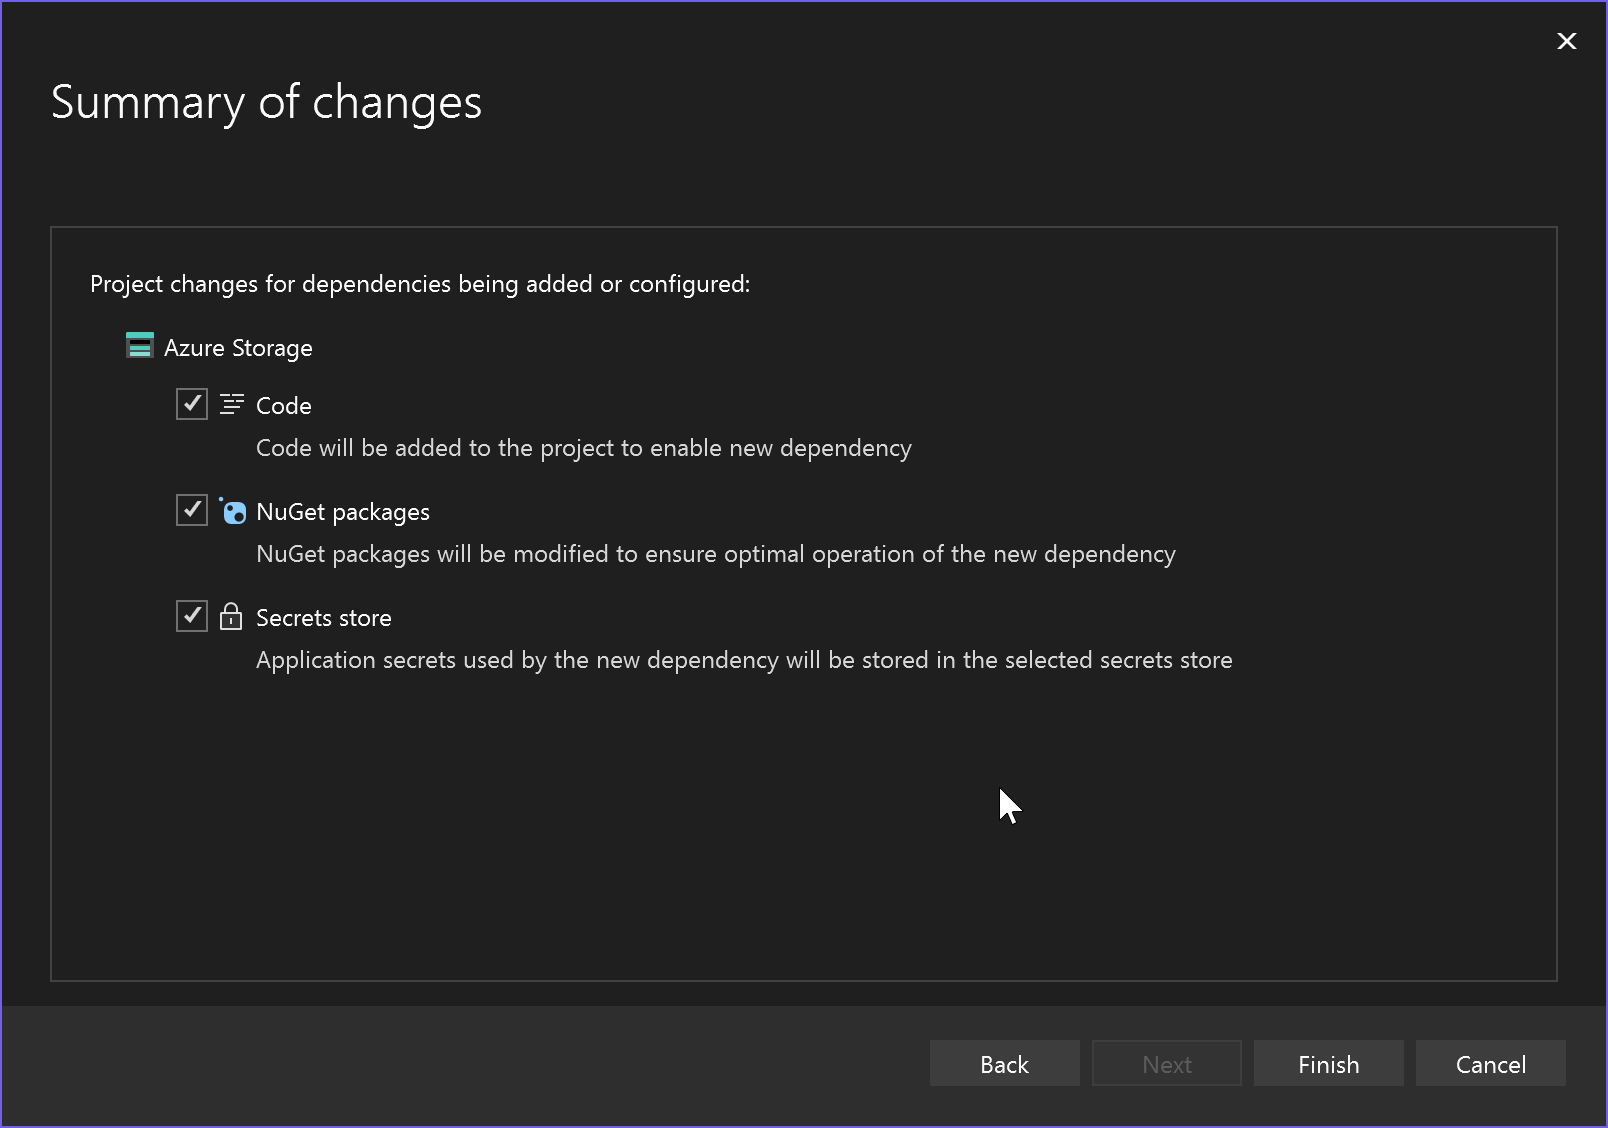
The Summary of changes screen shows all the modifications that will be made to your project if you complete the process. If the changes look OK, choose Finish.
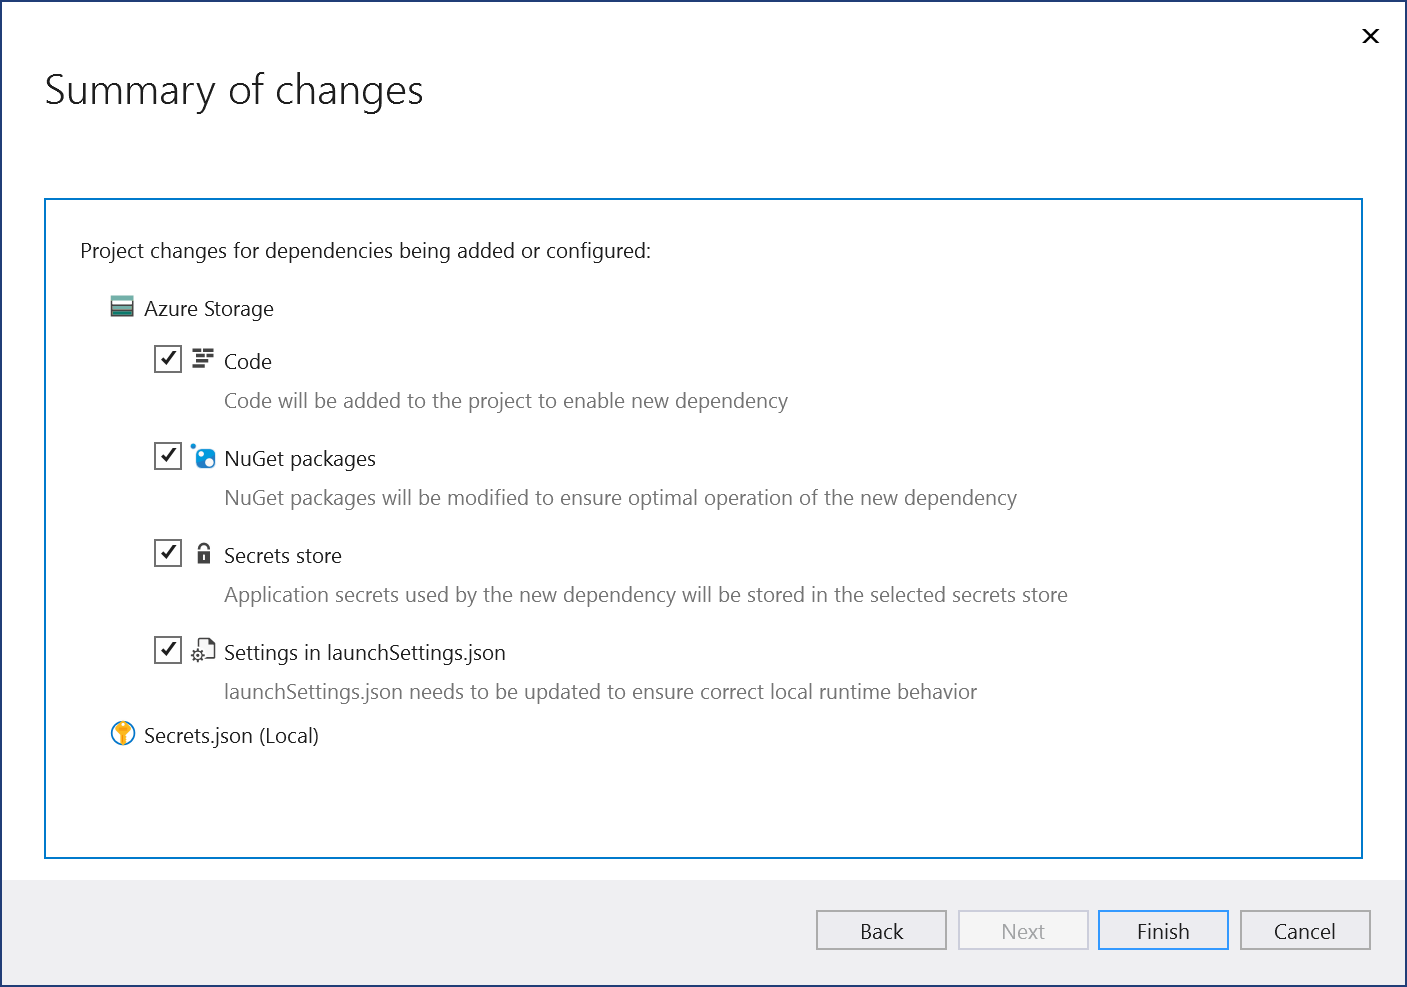
The storage connected service appears under the Connected Services node of your project.
Open your project in Visual Studio.
Press Ctrl+Q (or use the Search button in the Visual Studio IDE to the right of the main menu bar).
In Feature search, enter
Azure Storage, and choose Azure Storage - Project > Connected Services > Add > Azure Storage.
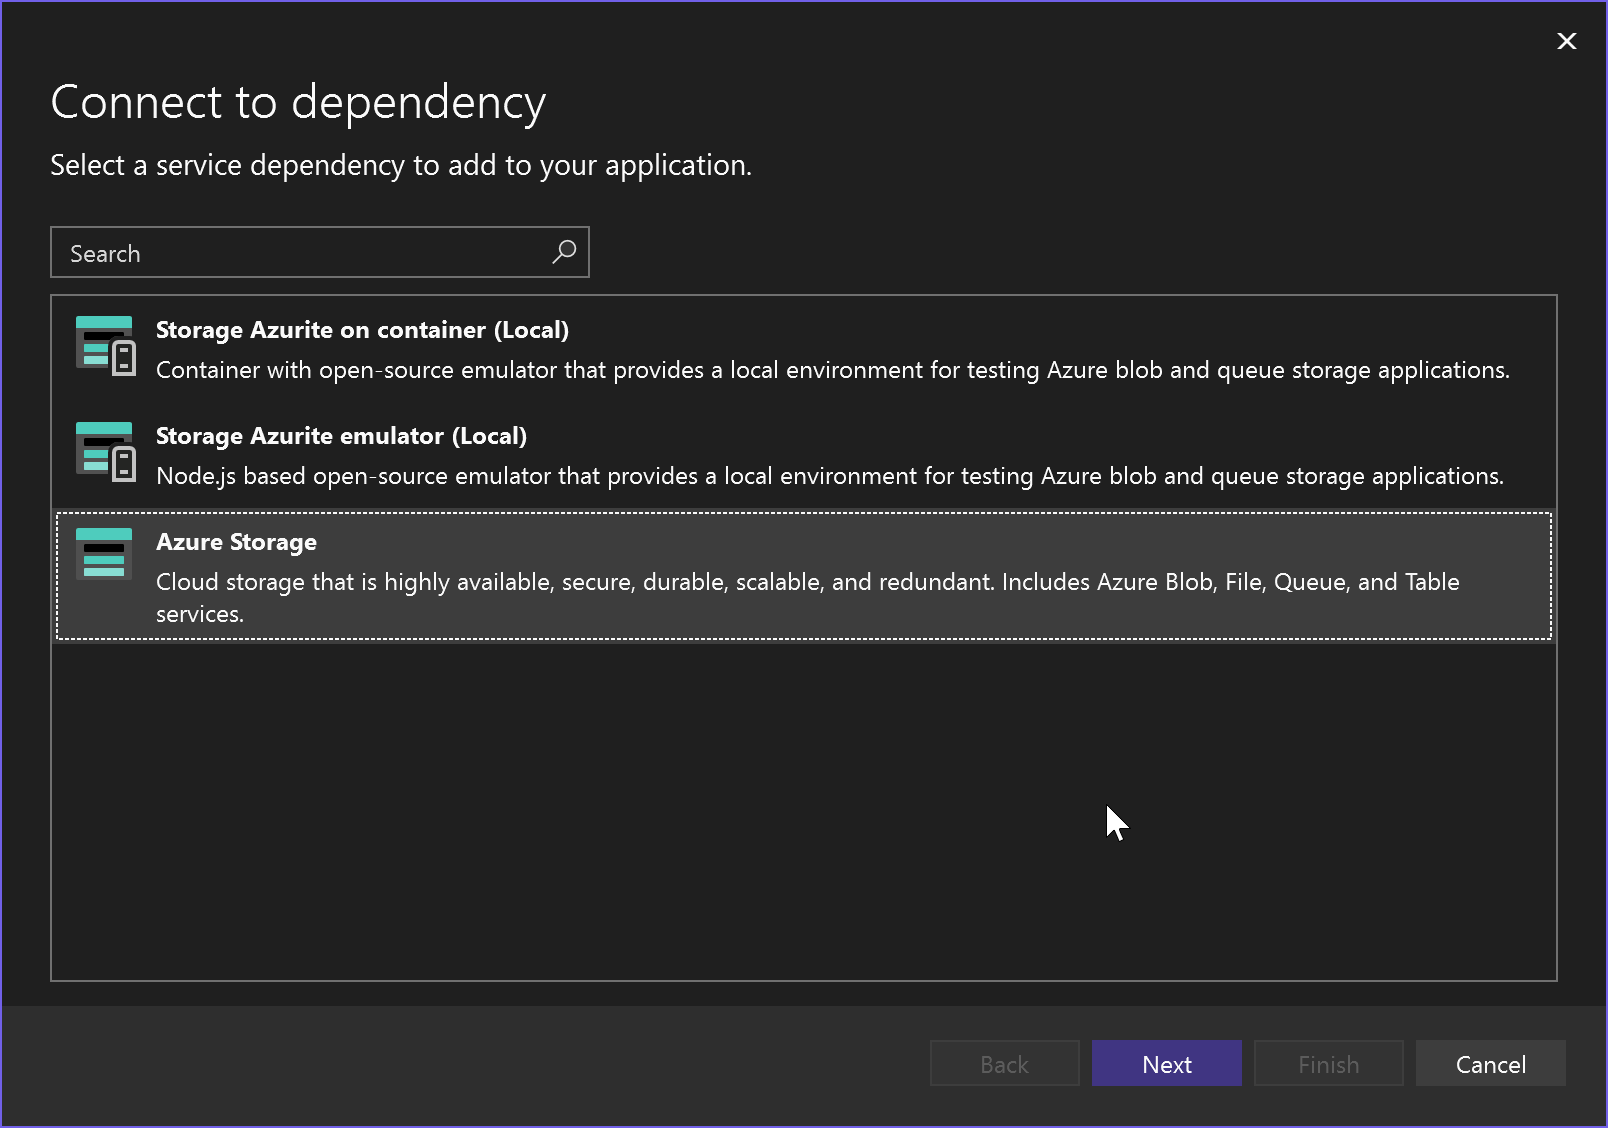
In the Connect to dependency page, select Azure Storage, and then select Next.
If you aren't signed in already, sign in to your Azure account. If you don't have an Azure account, you can sign up for a free trial.
In the Connect to Azure Storage screen, select an existing storage account, and select Next.
If you need to create a storage account, go to the next step. Otherwise, skip to the following step.
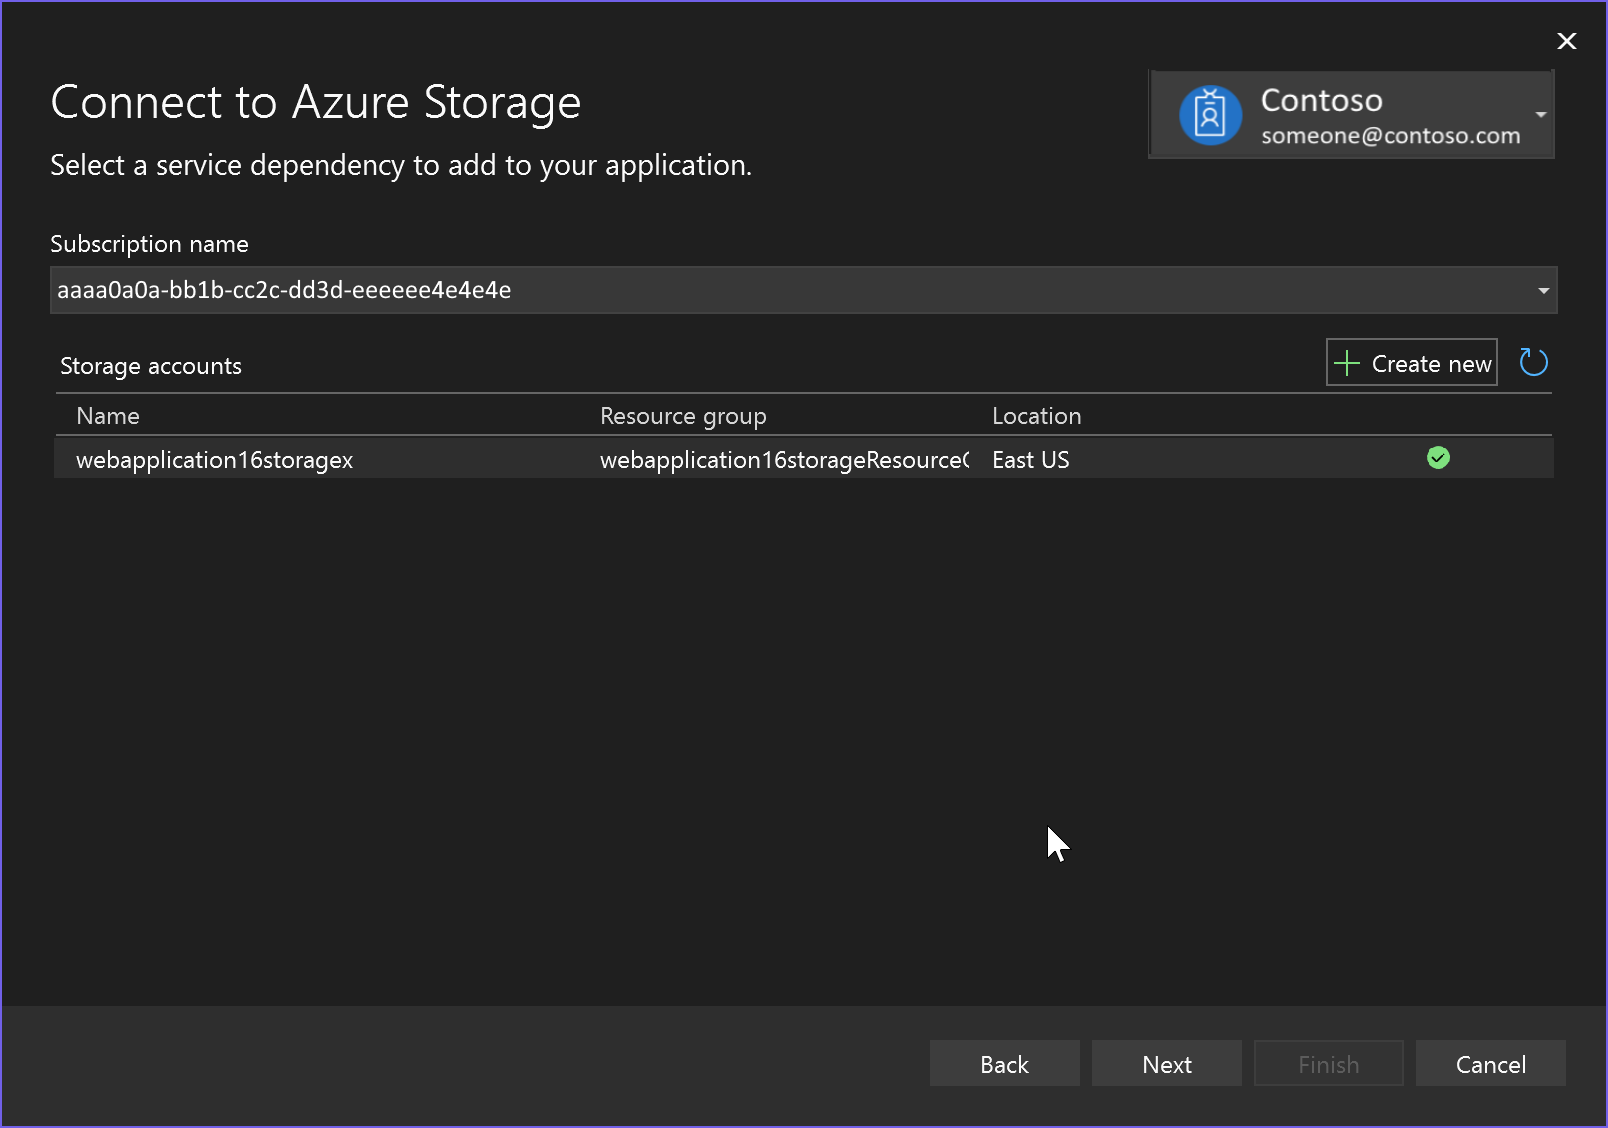
To create a storage account:
Select Create new by the green plus sign.
Fill out the Azure Storage: Create new dialog, and select Create.
When the Azure Storage dialog is displayed, the new storage account appears in the list. Select the new storage account in the list, and select Next.
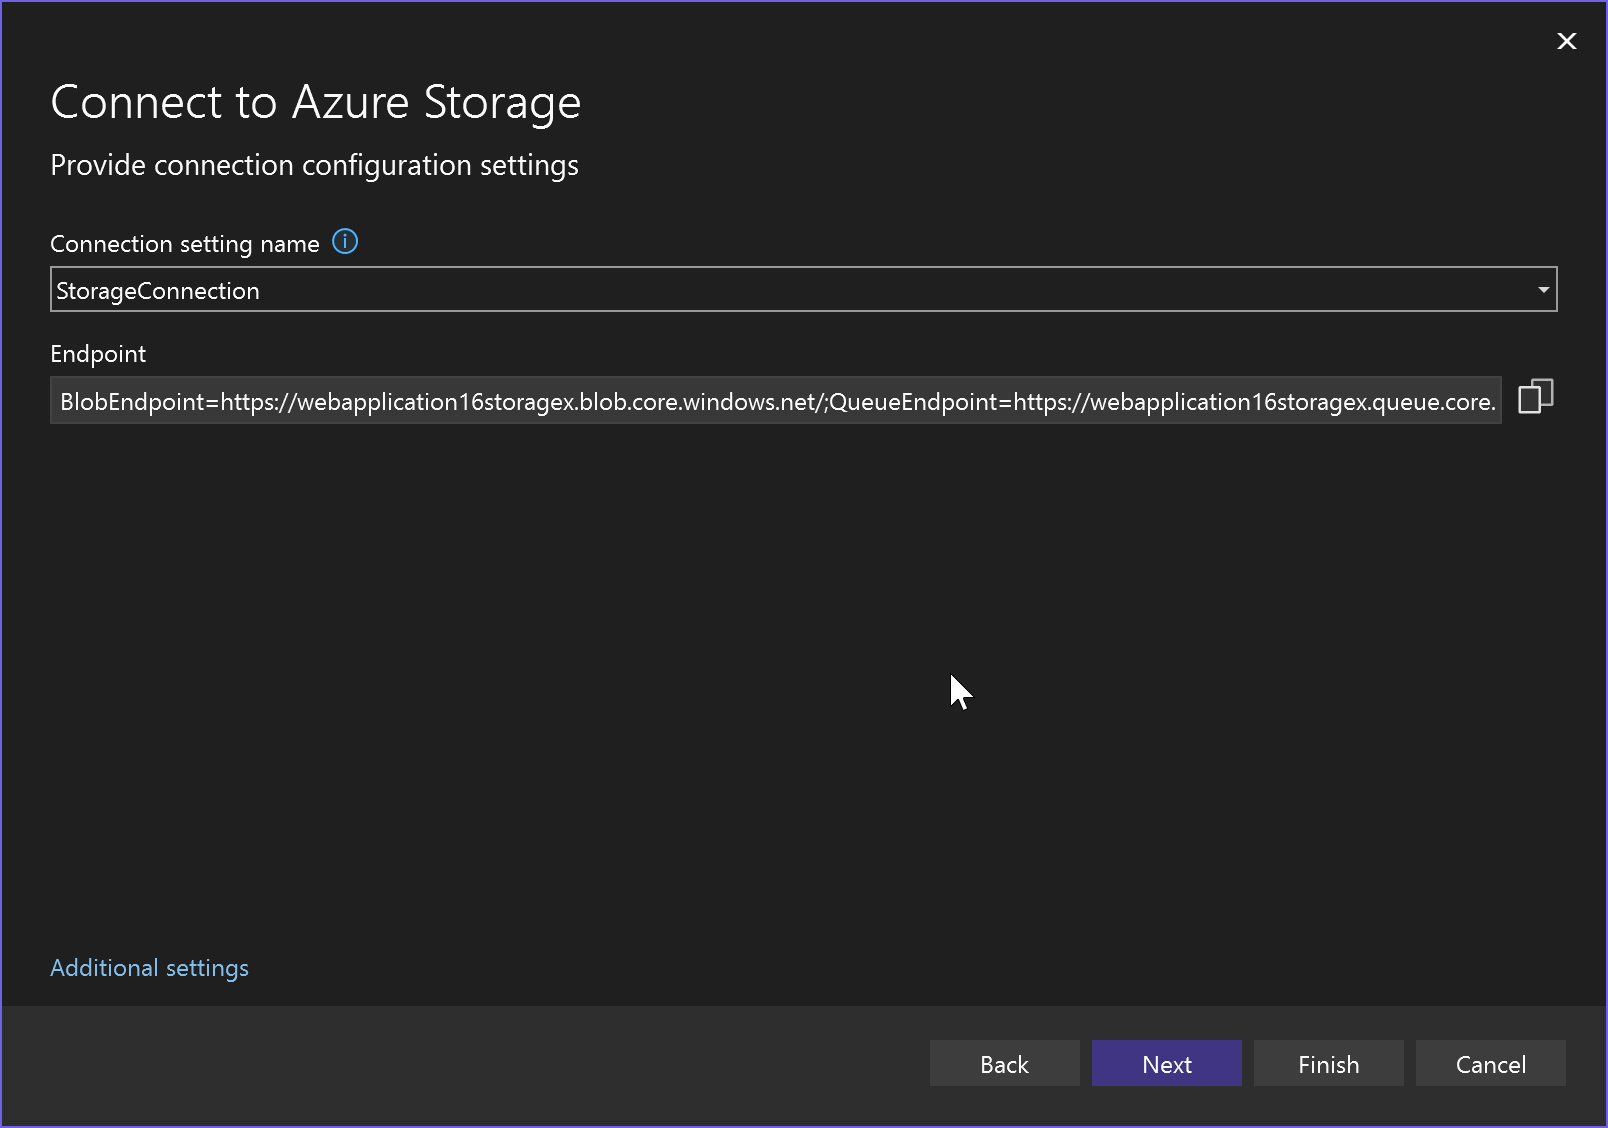
Enter a connection string setting name. The setting name references the name of the connection string setting as it appears in the secrets.json file, or in Azure Key Vault.
Choose whether you want the connection string stored in a local secrets file, in Azure Key Vault, or not stored anywhere.
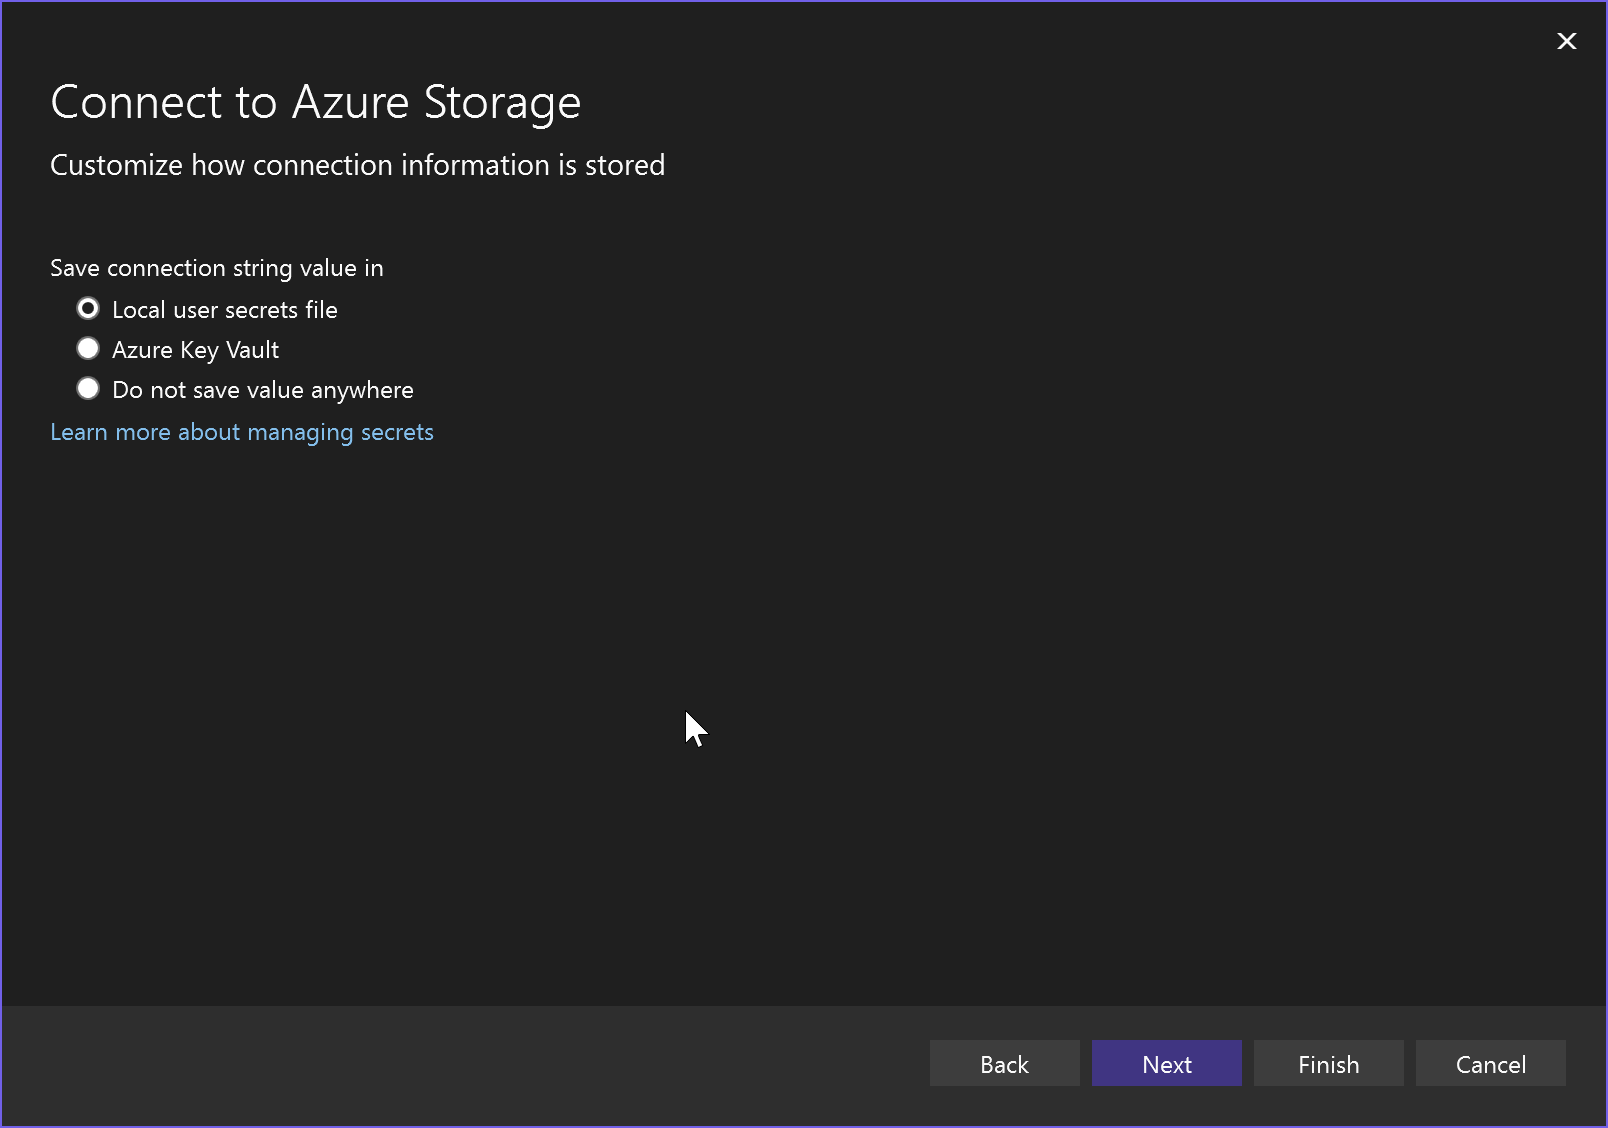
Caution
If you're using a version of Visual Studio earlier than Visual Studio 17.12, and you choose to use a secrets.json file, you must take security precautions, since the connection string in the local secrets.json file could be exposed. If you're using Visual Studio 2022 version 17.12 or later, this procedure produces more secure result, because it yields a connection setting value, instead of a connection string with authentication credentials.
The Summary of changes screen shows all the modifications that will be made to your project if you complete the process. If the changes look OK, choose Finish.
The storage connected service appears under the Connected Services node of your project.
Understand authentication
After you run the previous procedure, your app is set up to use authentication to access the storage account. The connection information for this authentication are stored locally, if you chose the secrets.json method, or in your Azure Key Vault.
If you used the secrets.json file, open the file by using the three dots next to Secrets.json on the Connected Services tab to open a menu, and choose Manage user secrets. With Visual Studio 2022 version 17.12 and later, this file contains settings that reference a URI to obtain the secure connection string, rather than the connection string itself.
{
  "StorageConnection:blobServiceUri": "https://webapplication16storagex.blob.core.windows.net/",
  "StorageConnection:queueServiceUri": "https://webapplication16storagex.queue.core.windows.net/",
  "StorageConnection:tableServiceUri": "https://webapplication16storagex.table.core.windows.net/"
}
With these settings in Visual Studio 17.12 and later, authentication is automatic and flexible. When you run or debug locally from Visual Studio, your Azure credentials saved by Visual Studio are used to access the Azure Storage account. If you launch your app from the command-line, you first need to sign in using the Azure CLI, and those credentials are automatically detected and used. But when your app is deployed to Azure and runs in Azure, it uses managed identity, without any code changes. The authentication works in all hosting environments because the Azure Identity APIs check for all chained credentials in sequence and use them when they're found. See DefaultAzureCredential.
Next steps
Azure Storage supports blobs and queues, as well as other features.
To learn about working with blobs, you can continue with the quickstart for blob storage, but instead of starting at the beginning, you can start at Azure blobs quickstart (.NET) - Code examples.
To learn about working with queues, start at Azure Queue Storage quickstart (.NET) - Code examples.