Note
Access to this page requires authorization. You can try signing in or changing directories.
Access to this page requires authorization. You can try changing directories.
This walkthrough demonstrates how to create a Windows Communication Foundation (WCF) service, test it, and then access it from a .NET Framework Windows Forms application.
Note
The instructions in this article illustrate the most recent version of the interactive development experience (IDE) available in Visual Studio. Your computer might show different names or locations for some of the user interface elements. You might be using a different version of Visual Studio or different environment settings. For more information, see Personalize the IDE.
Prerequisites
Visual Studio with the Windows Communication Foundation component installed. To install it:
- Open the Visual Studio Installer app, or select Tools > Get Tools and Features from the Visual Studio menu.
- In Visual Studio Installer, choose Modify next to the version of Visual Studio you want to modify.
- Select the Individual components tab, and then choose Windows Communication Foundation under Development activities.
- Select Modify.
For more information, see Modify Visual Studio workloads, components, and language packs.
Create a WCF service
To create a WCF service in Visual Studio, follow these steps:
In Visual Studio, select File > New > Project from the menu.
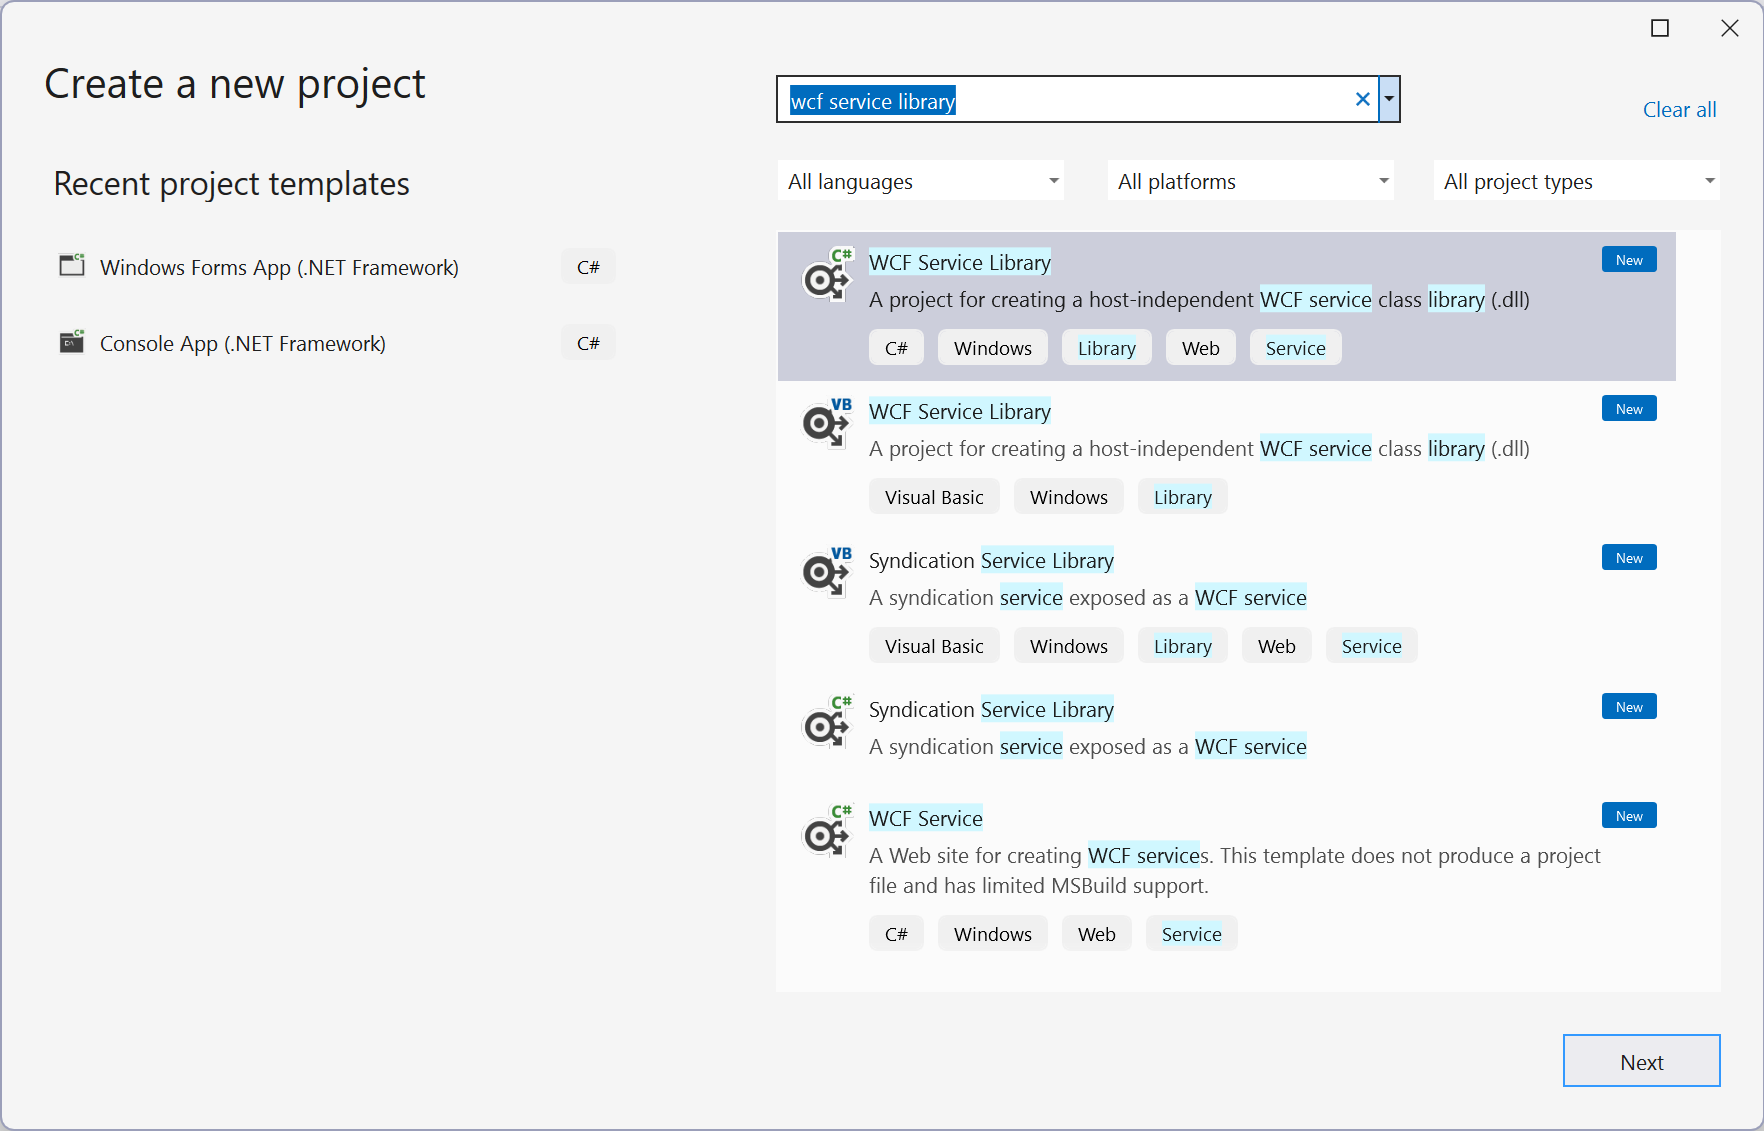
On the Create a new project page, enter wcf service library in the search box. Select either the C# or Visual Basic template for WCF Service Library, and then select Next.
Tip
If you don't see any templates, you might need to install the Windows Communication Foundation component of Visual Studio. For more information, see Prerequisites
On the Configure your new project page, verify the settings, and then select Create.
This step creates a working WCF service that you can test and access. The following steps demonstrate how to modify the default method to use a different data type. In a real application, you'd also add your own functions to the service.
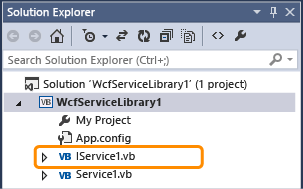
In Solution Explorer, double-click IService1.cs or IService1.vb in your WCF service library project, depending on which type of project you created.
Find the following line:
Change the type for the
valueparameter to string.In this code example, note the
OperationContractattribute. This attribute is required for any method exposed by the service.
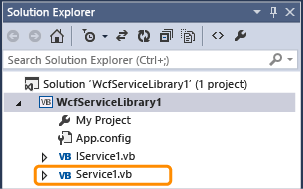
In Solution Explorer, double-click Service1.cs or Service1.vb.
In the editor, find the following line:
Change the type for the
valueparameter to string, as follows:
Test the WCF service
To test the WCF service you created, follow these steps:
Press F5 to run the service.
The WCF Test Client form appears and loads the service.
Under IService1, double-click the GetData() method.
The GetData tab appears in the WCF Test Client form.
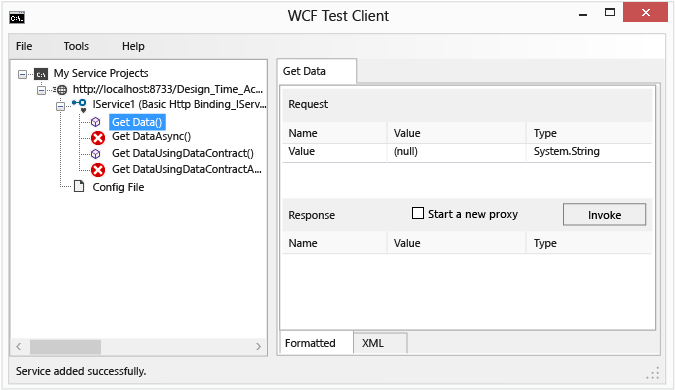
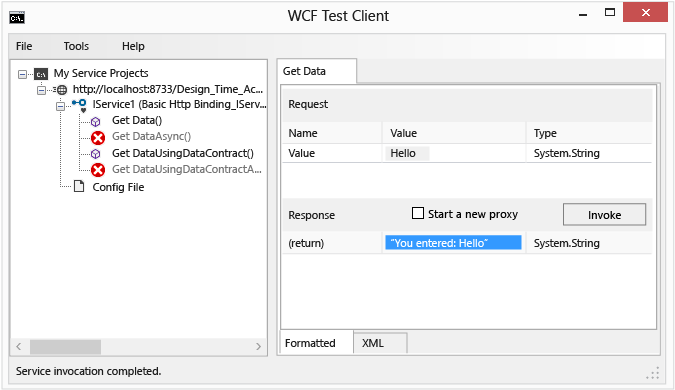
In the Request box of the GetData tab, select the Value field and enter Hello.
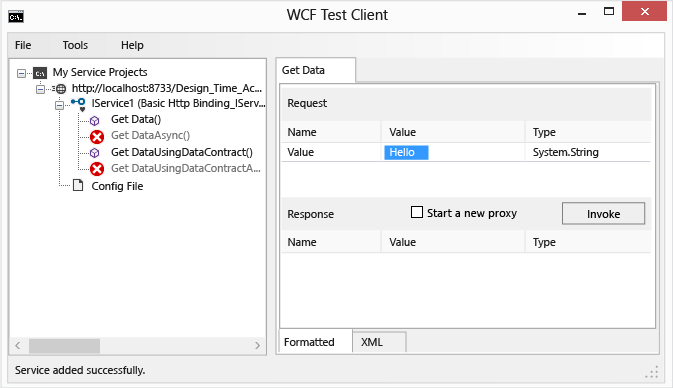
Select the Invoke button. If a Security Warning dialog box appears, select OK.
The result displays in the Response box.
On the File menu, select Exit to close the test form.
Access the WCF service
After you create and test the WCF service, you can reference it from a project and use it to build a client application.
Reference the WCF service
To reference the WCF service from a project, follow these steps:
Select File > Add > New Project.
In the Add a New Project window, choose either a C# or Visual Basic Windows Forms App (.NET Framework) project. Select Next, and then Create to create the project.
In Solution Explorer, right-click the project node of the new project, and select Add > Service Reference.
The Add Service Reference dialog box appears.
Select Discover.
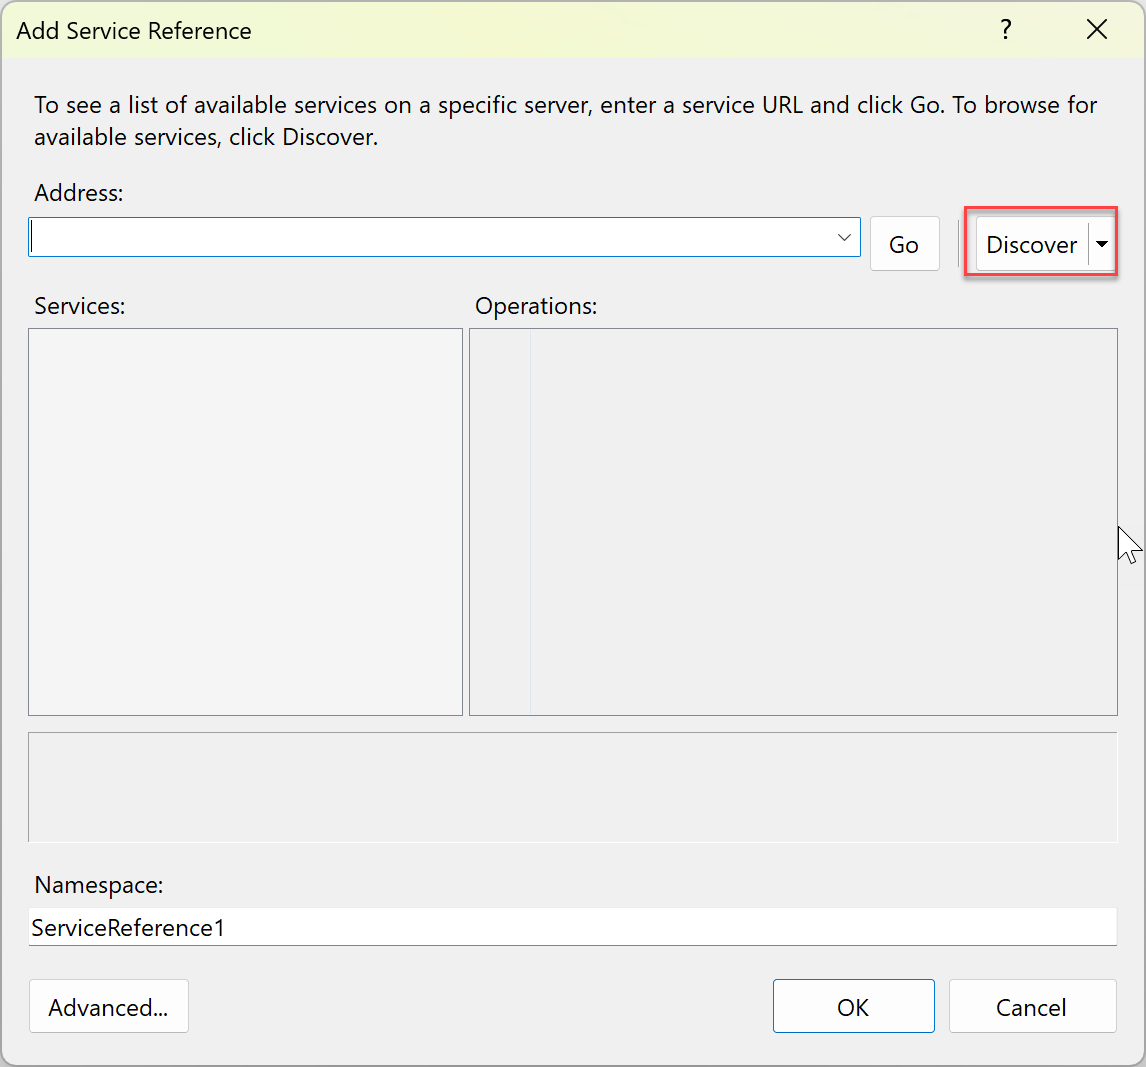
Service1 displays in the Services pane.
Select OK to add the service reference.
Build a client application
To use a WCF service reference to build a client application, follow these steps.
In Solution Explorer, double-click Form1.cs or Form1.vb in the Windows Forms app.
The form opens in Windows Forms Designer.
Open the Toolbox by selecting View > Toolbox from the menu, or press Ctrl+Alt+X from the keyboard.
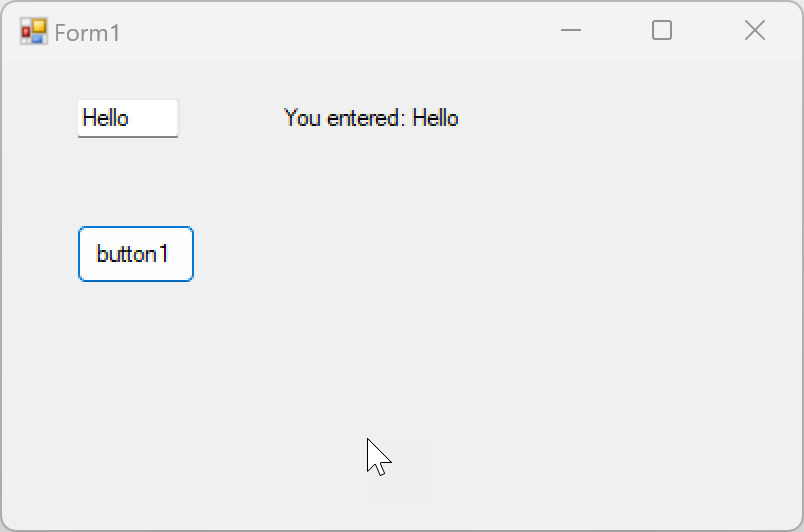
From the Toolbox, drag a TextBox control, a Label control, and a Button control onto the form.

Double-click the Button control, and add the following code in the
Clickevent handler:In Solution Explorer, right-click the project node (for example, WindowsFormsApp1), and select Set as StartUp Project.
Press F5 to run the project. Enter some text and select the button. The label displays You entered:, followed by your text.