Note
Access to this page requires authorization. You can try signing in or changing directories.
Access to this page requires authorization. You can try changing directories.
You can use the Publish tool to import publish settings and then deploy your app. In this article, we use publish settings for Azure App Service. These steps apply to ASP.NET and ASP.NET Core web apps.
Note
A publish settings file (*.publishsettings) is different than a publishing profile (*.pubxml) created in Visual Studio. A publish settings file is created by Azure App Service, and then it can be imported into Visual Studio.
Note
The technique described in this article (the use of .publishsettings files) is inherently insecure, because this technology uses Basic Authentication, which relies on passwords for authentication, rather than managed identities. For best security, we recommend using managed identities and the Azure services that support them. Visual Studio 17.12 and later are set up to deploy to Azure services that support managed identities. For web applications, use Azure App Service, and for Cloud Services (Extended Support), we recommend Service Fabric managed clusters.
Prerequisites
You must have Visual Studio installed and the ASP.NET and web development workload.
If you haven't already installed Visual Studio, go to the Visual Studio downloads page to install it for free.
Create an Azure App Service. For detailed instructions, see Deploy an ASP.NET Core web app to Azure using Visual Studio.
Create a new ASP.NET project in Visual Studio
On the computer running Visual Studio, create a new project.
Choose the correct template. In this example, choose either ASP.NET Web Application (.NET Framework) or (for C# only) ASP.NET Core Web Application, and then select OK.
If you don't see the specified project templates, go to the Open Visual Studio Installer link in the left pane of the New Project dialog box. The Visual Studio Installer launches. Install the ASP.NET and web development workload.
The project template you choose (ASP.NET or ASP.NET Core) must correspond to the version of ASP.NET installed on the web server.
Choose either MVC (.NET Framework) or Web Application (Model-View-Controller) (for .NET Core or .NET 5 and later), and make sure that No Authentication is selected, and then select OK.
Type a name like MyWebApp and select OK.
Visual Studio creates the project.
Choose Build > Build Solution to build the project.
Create the publish settings file in Azure App Service
In the Azure portal, open the Azure App Service.
Go to Download publish profile and save the profile locally.

In order to deploy with Web Deploy, you need to enable Basic authentication, which is what Web Deploy uses. In Azure App Service, go to Configuration, General settings, SCM Basic Auth Publishing Credentials, and enable Web Deploy. You can't download a publish profile if this setting is not enabled.
A file with a
.publishsettingsfile extension has been generated in the location where you saved it. The following code shows a partial example of the file (in a more readable formatting).<publishData> <publishProfile profileName="DeployASPDotNetCore - Web Deploy" publishMethod="MSDeploy" publishUrl="deployaspdotnetcore.scm.azurewebsites.net:443" msdeploySite="DeployASPDotNetCore" userName="$DeployASPDotNetCore" userPWD="abcdefghijklmnopqrstuzwxyz" destinationAppUrl="http://deployaspdotnetcore2021.azurewebsites.net" hostingProviderForumLink="" controlPanelLink="http://windows.azure.com" webSystem="WebSites"> <databases /> </publishProfile> </publishData>Typically, the preceding
.publishsettingsfile contains two publishing profiles that you can use in Visual Studio, one to deploy using Web Deploy, and one to deploy using FTP. The preceding code shows the Web Deploy profile. Both profiles will be imported later when you import the profile.
Import the publish settings in Visual Studio and deploy
On the computer where you have the ASP.NET project open in Visual Studio, right-click the project in Solution Explorer, and choose Publish.
If you have previously configured any publishing profiles, the Publish pane appears. Click New or Create new profile.
Select the option to import a profile.
In the Publish dialog box, click Import Profile.

Navigate to the location of the publish settings file that you created in the previous section.
In the Import Publish Settings File dialog, navigate to and select the profile that you created in the previous section, and click Open.
Click Finish to save the publishing profile, and then click Publish.
Visual Studio begins the deployment process, and the Output window shows progress and results.
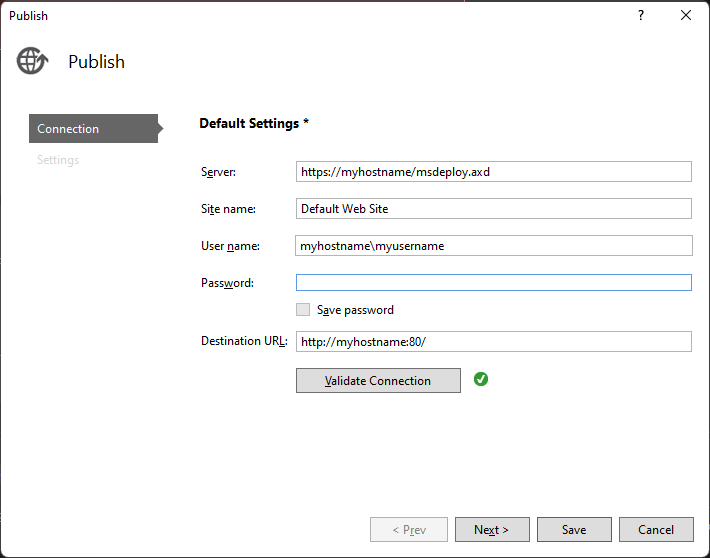
If you get an any deployment errors, click More Actions > Edit to edit settings. Modify settings and click Validate to test new settings. If the host name is not found, try the IP address instead of the host name in both the Server and Destination URL fields.
Next steps
In this tutorial, you created a publish settings file, imported it into Visual Studio, and deployed an ASP.NET app to Azure App Service. You may want an overview of publishing options in Visual Studio.