Note
Access to this page requires authorization. You can try signing in or changing directories.
Access to this page requires authorization. You can try changing directories.
In this tutorial, you create an application using Visual Basic in the Visual Studio integrated development environment (IDE). Your program will use the Windows Presentation Foundation (WPF) UI framework. Use this tutorial to become familiar with many of the tools, dialog boxes, and designers that you can use in Visual Studio.
In this tutorial, you learn how to:
- Create the project
- Configure window and add text
- Add buttons and code
- Debug and test the application
- Debug with breakpoints
- Build a release version
What is WPF?
WPF, or Windows Presentation Foundation, is a user interface (UI) framework that creates desktop client applications. The WPF development platform supports a broad set of application development features, including:
- An application model
- Resources
- Controls
- Graphics
- Layout
- Data binding
- Documents
- Security
WPF is part of .NET. If you previously created applications with .NET using ASP.NET or Windows Forms, the programming experience should be familiar. WPF uses the Extensible Application Markup Language XAML to provide a declarative model for application programming. For more information, see WPF .NET overview.
Prerequisites
You need Visual Studio to complete this tutorial. For a free version, see Visual Studio downloads.
Create the project
When you create an application in Visual Studio, you first create a project. In this tutorial, create a Windows Presentation Foundation project.
Open Visual Studio.
On the start window, choose Create a new project.

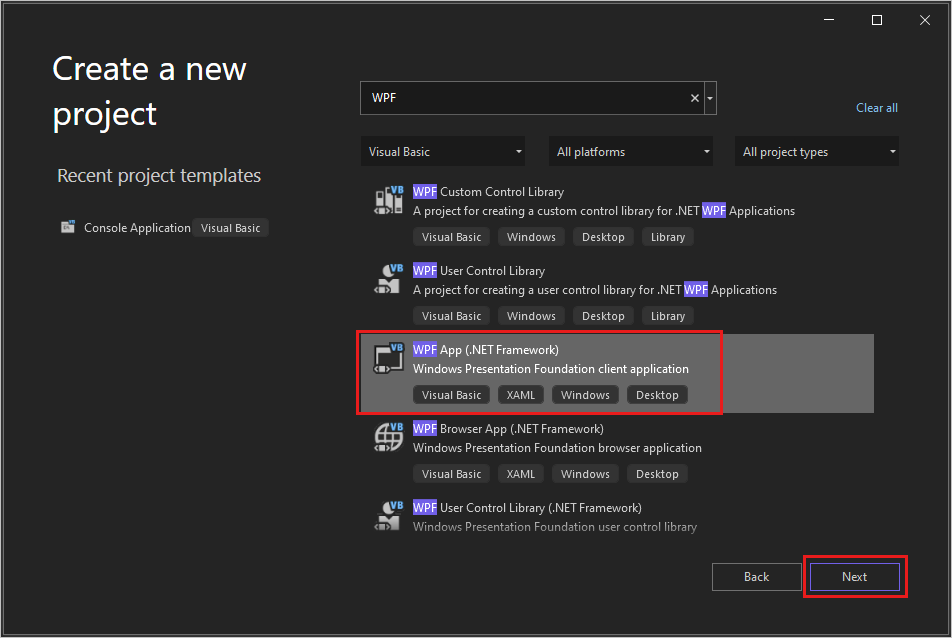
On the Create a new project window, search for WPF and select Visual Basic in the All languages list. Choose WPF App (.NET Framework), and then choose Next.

Give the project a name, HelloWPFApp, and select Create.
Visual Studio creates the HelloWPFApp project and solution. Solution Explorer shows the various files.

The WPF Designer shows a design view and a XAML view of MainWindow.xaml in a split view.
Open Visual Studio.
On the start window, choose Create a new project.

On the Create a new project window, search for WPF and select Visual Basic in the All languages list. Choose WPF App (.NET Framework), and then choose Next.
Give the project a name, HelloWPFApp, and select Create.
Visual Studio creates the HelloWPFApp project and solution. Solution Explorer shows the various files.

The WPF Designer shows a design view and a XAML view of MainWindow.xaml in a split view.
Note
For more information about Extensible Application Markup Language (XAML), see XAML overview for WPF.
Configure window and add text
Using the Properties window, you can display and change options for project items, controls, and other items.
In Solution Explorer, open the MainWindow.xaml.
In the XAML view, change the value of the Window.Title property from Title="MainWindow" to Title="Greetings".
On the left side of the Visual Studio IDE, select the Toolbox tab. If you don't see it, select View > Toolbox from the menu bar or Ctrl+Alt+X.
Either expand Common WPF Controls or enter Text in the search bar to find TextBlock.


Select the TextBlock item and drag it to the window on the design surface. You can move the TextBlock control by dragging it. Use the guidelines to place the control.
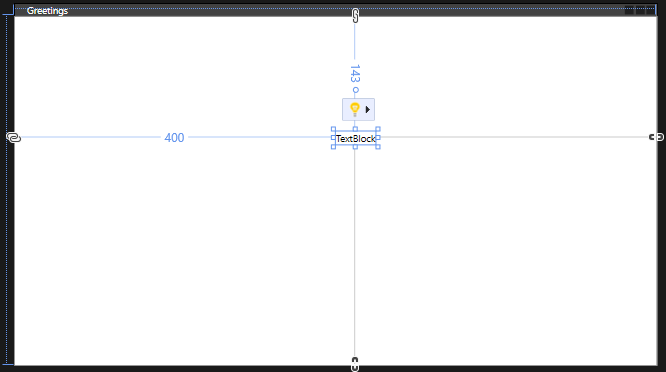
The XAML markup should look like the following example:
<TextBlock HorizontalAlignment="Left" Margin="381,100,0,0" TextWrapping="Wrap" Text="TextBlock" VerticalAlignment="Top"/>In the XAML view, locate the markup for the TextBlock and change the Text attribute:
Text="Select a message option and then choose the Display button."Center the TextBlock again if necessary.
Save your app by choosing the Save All toolbar button. Alternatively, to save your app, choose File > Save All from the menu bar, or press Ctrl+Shift+S. It's a best practice to save early and often.
Add buttons and code
Your application uses two radio buttons and a button. Use these steps to add them. You also add Visual Basic code to the button. That code refers to the radio button selection.
In the Toolbox, find RadioButton.


Add two RadioButton controls to the design surface by selecting the RadioButton item and dragging it to the design surface. Move the buttons by selecting them and using the arrow keys. Place the buttons side by side under the TextBlock control.

In the Properties window for the left RadioButton control, change the Name property at the top of the Properties window to HelloButton.


In the Properties window for the right RadioButton control, change the Name property to GoodbyeButton.
Update the Content attribute for
HelloButtonandGoodbyeButtonto"Hello"and"Goodbye"in the XAML.<Grid> <TextBlock HorizontalAlignment="Left" Margin="252,47,0,0" TextWrapping="Wrap" Text="Select a message option and then choose the Display button." VerticalAlignment="Top"/> <RadioButton x:Name="HelloButton" Content="Hello" HorizontalAlignment="Left" Margin="297,161,0,0" VerticalAlignment="Top"/> <RadioButton x:Name="GoodbyeButton" Content="Goodbye" HorizontalAlignment="Left" Margin="488,161,0,0" VerticalAlignment="Top"/> </Grid>In the XAML view, locate the markup for HelloButton and add an IsChecked attribute:
IsChecked="True"The IsChecked attribute with the value True means that HelloButton is checked by default. This setting means that the radio button is always selected, even when the program starts.
In the Toolbox, find the Button control. Then drag a button to the design surface under the RadioButton controls.
In the XAML view, change the value of Content for the Button control from
Content="Button"toContent="Display".<Button Content="Display" HorizontalAlignment="Left" VerticalAlignment="Top" Width="75" Margin="215,204,0,0"/>Your window should resemble the following image.

On the design surface, double-click the Display button.
MainWindow.xaml.vb opens, with the cursor in the
Button_Clickevent.Private Sub Button_Click(sender As Object, e As RoutedEventArgs) End SubAdd the following code:
If HelloButton.IsChecked = True Then
    MessageBox.Show("Hello.")
ElseIf GoodbyeButton.IsChecked = True Then
    MessageBox.Show("Goodbye.")
End If
Debug and test the application
Next, debug the application to look for errors and test that both message boxes appear correctly. To see how this process works, the first step deliberately introduces an error into the program.
In Solution Explorer, right-click on MainWindow.xaml and choose Rename. Rename the file to Greetings.xaml.
Start the debugger by pressing F5 or selecting Debug, then Start Debugging.
A Break Mode window appears, and the Output window indicates that an exception occurred.

Stop the debugger by choosing Debug > Stop Debugging.
You renamed MainWindow.xaml to Greetings.xaml at the start of this section. The code still refers to MainWindow.xaml as the startup URI for the application, so the project can't start.
In Solution Explorer, open the Application.xaml file.
Change
StartupUri="MainWindow.xaml"toStartupUri="Greetings.xaml".Start the debugger again (press F5). You should now see the Greetings window of your application.

Select Hello and the Display button, and then Goodbye and the Display button. Use the close icon in the upper right corner to stop debugging.
For more information, see Compile a WPF Application and Debug WPF.
Debug with breakpoints
You can test the code during debugging by adding some breakpoints.
Open Greetings.xaml.vb, and select the following line:
MessageBox.Show("Hello.")Add a breakpoint by pressing F9 or selecting Debug, then Toggle Breakpoint.
A red circle appears next to the line of code in the left margin of the editor window.
Select the following line:
MessageBox.Show("Goodbye.").Press the F9 key to add a breakpoint, and then press F5 to start debugging.
In the Greetings window, select the Hello button, and then select Display.
The line
MessageBox.Show("Hello.")is highlighted in yellow. At the bottom of the IDE, the Autos, Locals, and Watch windows are docked together on the left side. The Call Stack, Breakpoints, Exception Settings, Command, Immediate, and Output windows are docked together on the right side.

On the menu bar, choose Debug > Step Out.
The application starts again. A dialog with the word "Hello" appears.
Choose the OK button to close the dialog.
In the Greetings window, choose the Goodbye radio button, and then choose the Display button.
The line
MessageBox.Show("Goodbye.")is highlighted in yellow.Choose the F5 key to continue debugging. When the dialog appears, choose OK to close the dialog.
Close the application window to stop debugging.
On the menu bar, choose Debug > Disable All Breakpoints.


Build a release version
After you verify that everything works, you can prepare a release build of your application.
Select Build > Clean solution to delete intermediate files and output files that were created during previous builds.
Change the build configuration for HelloWPFApp from Debug to Release by using the dropdown control on the toolbar.
Select Build > Build Solution.
Congratulations on completing this tutorial! You can find the .exe you built under your solution and project directory (...\HelloWPFApp\bin\Release).
Next step
Advance to the next article to learn how to create a Windows Forms app in Visual Studio with Visual Basic.
For more information about Visual Studio, see: