Note
Access to this page requires authorization. You can try signing in or changing directories.
Access to this page requires authorization. You can try changing directories.
In this tutorial, you create a simple C# application that has a Windows-based user interface (UI). The app has a button that changes the text of a label. This simple app has all the components used for more complicated Windows Forms programs.
- Create a C# project in Visual Studio
- Create an application
- Run your application
Prerequisites
- If you don't have Visual Studio, go to Visual Studio downloads to install it for free.
- The .NET desktop development workload. To verify or install this workload in Visual Studio, select Tools > Get Tools and Features. For more information, see Change workloads or individual components.
Create a project
First, create a C# application project. The project type comes with all the template files you need to create your application.
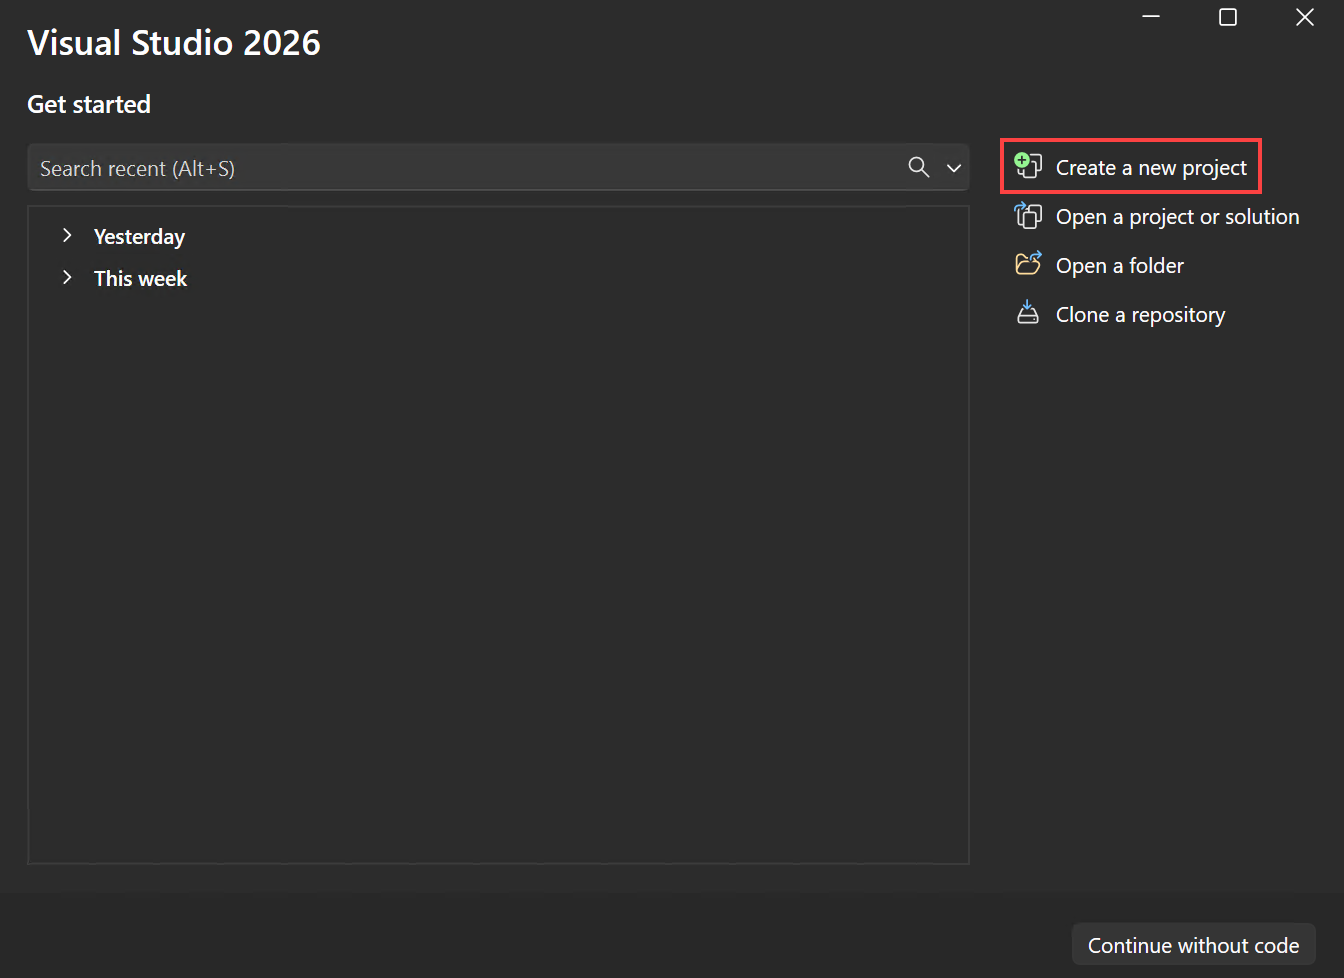
Open Visual Studio, and select Create a new project in the start window.

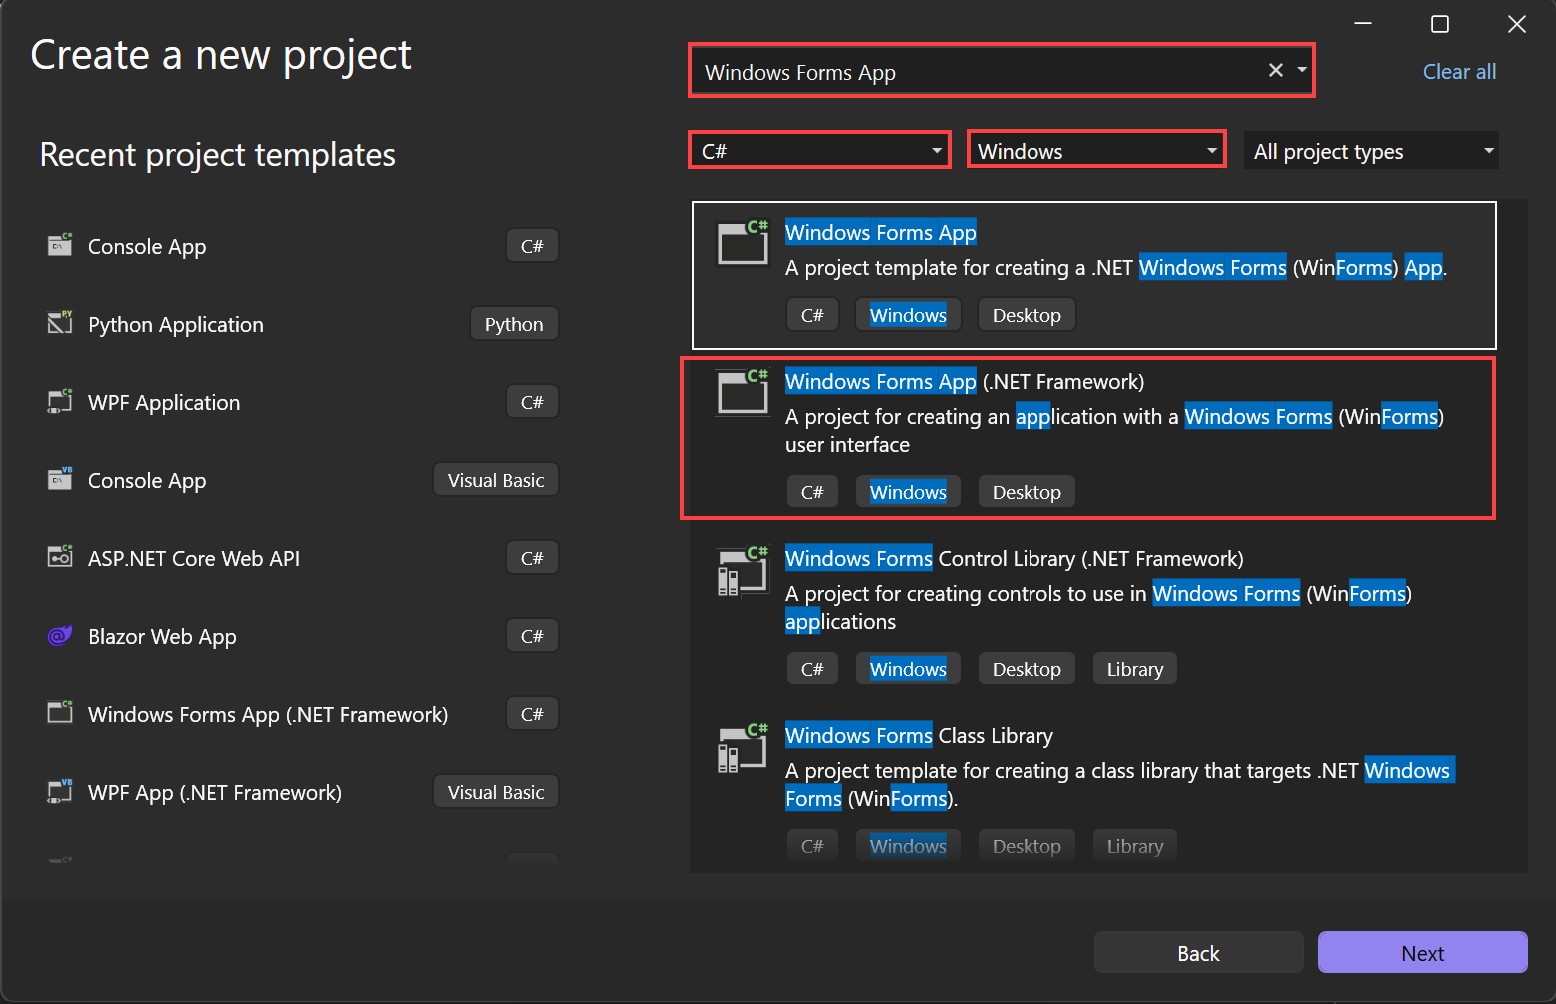
In Create a new project, select the Windows Forms App (.NET Framework) template for C#.
You can refine your search to quickly get to the template you want. For example, type Windows Forms App in the search box. Next, select C# from the language list, and then select Windows from the platform list.

In the Configure your new project window, in Project name, enter HelloWorld, and select Create.

Visual Studio opens your new project.

Open Visual Studio, and select Create a new project in the start window.
In Create a new project, select the Windows Forms App (.NET Framework) template for C#.
You can refine your search to quickly get to the template you want. For example, type Windows Forms App in the search box. Next, select C# from the language list, and then select Windows from the platform list.
In the Configure your new project window, in Project name, enter HelloWorld, and select Create.

Visual Studio opens your new project.

Create the application
After you select your C# project template and name your project, Visual Studio opens a form for you. A form is a Windows user interface. Create a Hello World application by adding controls to the form. Then run the app.
Add a button to the form
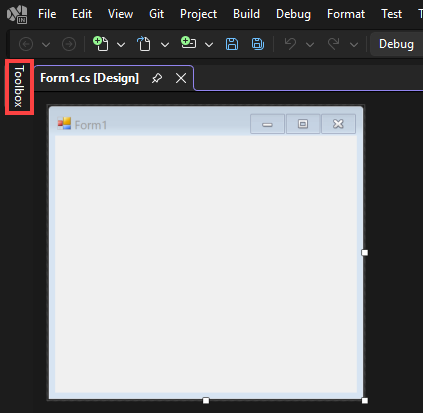
Select Toolbox to open the Toolbox flyout window.

If you don't see the Toolbox option, you can open it from the menu bar. Select View > Toolbox or Ctrl+Alt+X.
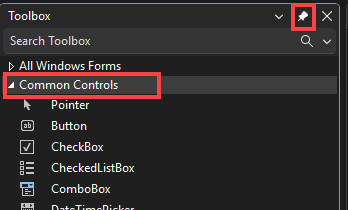
Expand Common Controls and select the Pin icon to dock the Toolbox window.

Select the Button control and then drag it onto the form.

In the Properties window, locate Text. Change the name from button1 to
Click this, and then select Enter.
If you don't see the Properties window, you can open it from the menu bar. Select View > Properties Window or F4.
In the Design section of the Properties window, change the name from button1 to
btnClickThis, and then select Enter.
If you alphabetized the list in the Properties window, Button1 appears in the (DataBindings) section, instead. You can dock or anchor the controls on your form to help with automatic placement and sizing, when the form changes size.
Add a label to the form
After you add a button control to create an action, add a label control to receive the text.
Select the Label control from the Toolbox. Then drag it onto the form and drop it beneath the Click this button.
In either the Design section or the (DataBindings) section of the Properties window, change the name of label1 to
lblHelloWorld. Then select Enter.
Add code to the form
In the Form1.cs [Design] window, double-click the Click this button to open the Form1.cs window.
Alternatively, you can expand Form1.cs in Solution Explorer, and then choose Form1.
In the Form1.cs window, after the private void line, type or enter
lblHelloWorld.Text = "Hello World!";as shown in the following screenshot.
After you select your C# project template and name your project, Visual Studio opens a form for you. A form is a Windows user interface. Create a Hello World application by adding controls to the form. Then run the app.
Add a button to the form
Select Toolbox to open the Toolbox flyout window.
If you don't see the Toolbox option, you can open it from the menu bar. Select View > Toolbox or Ctrl+Alt+X.
Expand Common Controls and select the Pin icon to dock the Toolbox window.
Select the Button control and then drag it onto the form.

In the Properties window, locate Text. Change the name from button1 to
Click this, and then select Enter.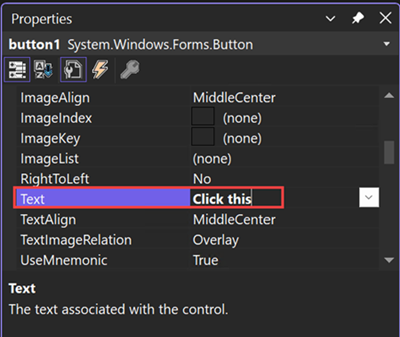
If you don't see the Properties window, you can open it from the menu bar. Select View > Properties Window or F4.
In the Design section of the Properties window, change the name from button1 to
btnClickThis, and then select Enter.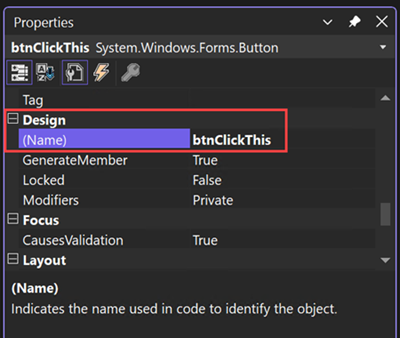
If you alphabetized the list in the Properties window, Button1 appears in the (DataBindings) section, instead. You can dock or anchor the controls on your form to help with automatic placement and sizing, when the form changes size.
Add a label to the form
After you add a button control to create an action, add a label control to receive the text.
Select the Label control from the Toolbox. Then drag it onto the form and drop it beneath the Click this button.
In either the Design section or the (DataBindings) section of the Properties window, change the name of label1 to
lblHelloWorld. Then select Enter.
Add code to the form
In the Form1.cs [Design] window, double-click the Click this button to open the Form1.cs window.
Alternatively, you can expand Form1.cs in Solution Explorer, and then choose Form1.
In the Form1.cs window, after the private void line, type or enter
lblHelloWorld.Text = "Hello World!";as shown in the following screenshot.
Run the application
Select the Start button to run the application.

Several things happen. In the Visual Studio IDE, the Diagnostics Tools window opens, and an Output window opens, too. But outside of the IDE, a Form1 dialog box appears. It includes your Click this button and text that says label1.
Select the Click this button in the Form1 dialog box. Notice that the label1 text changes to Hello World!.

Close the Form1 dialog box to stop running the app.
Related content
Congratulations on completing this tutorial. To learn more, continue with the following tutorial:
Or try these other tutorials: