Find and replace text in Visual Studio
In this article, you learn how to find and replace text in the Visual Studio editor by using the single file find-and-replace (Ctrl+F or Ctrl+H) or multi-file find-and-replace (Ctrl+Shift+F or Ctrl+Shift+H). You can also find and replace some instances of a pattern by using multi-caret selection. In addition to the editor, you can also find and replace text in certain other text-based windows such as the Find Results windows, in designer windows such as the XAML designer and Windows Forms designer, and in tool windows.
Note
If you're looking for information on Visual Studio Code, visit the VS Code find and replace docs.
Tip
If you want to rename code symbols such as variables and methods, it's better to refactor them than to use find-and-replace. Refactoring is intelligent and understands scope, whereas find-and-replace blindly replaces all instances.
You can scope searches to the current document, the current solution, or a custom set of folders. You can also specify a set of file name extensions for multi-file searches. Customize search syntax by using .NET regular expressions.
Tip
The Find/Command box is available as a toolbar control, but isn't visible by default. To display the Find/Command box, select Add or Remove Buttons on the Standard toolbar, and then select Find.
Find and Replace within a single file
- Press Ctrl+F as a shortcut to find a string in the current file.
- Press Ctrl+H as a shortcut to find and replace a string in the current file.
The Find and Replace control appears in the upper right corner of the code editor window. It immediately highlights every occurrence of the given search string in the current document. You can navigate from one occurrence to another by choosing the Find Next button or the Find Previous button on the search control.
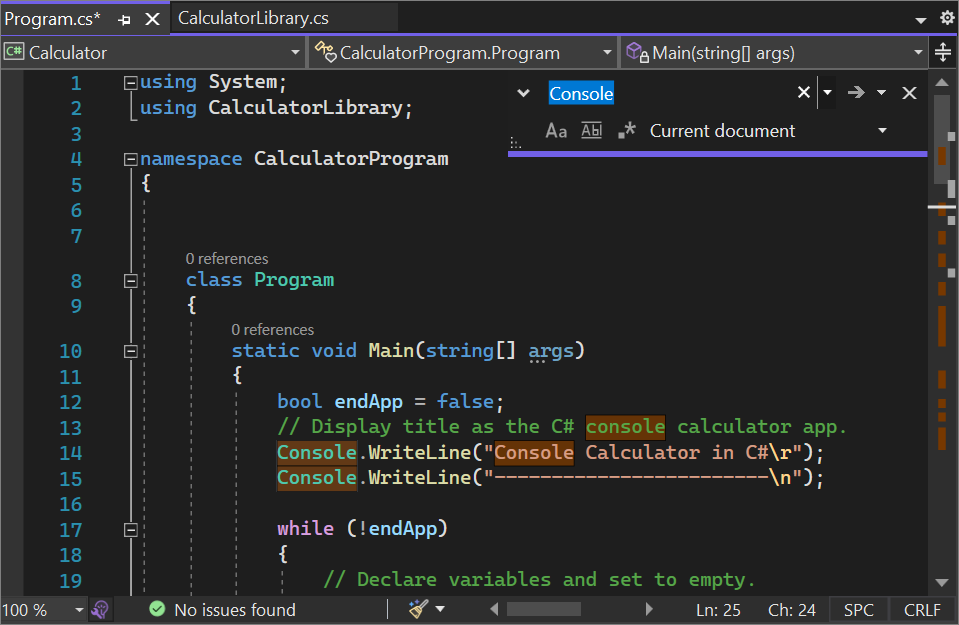
You can access replacement options by choosing the button next to the Find text box. To make one replacement at a time, choose the Replace Next button next to the Replace text box. To replace all matches, choose the Replace All button.
To change the highlight color for matches, choose the Tools menu, select Options, and then choose Environment, and select Fonts and Colors. In the Show settings for list, select Text Editor, and then in the Display items list, select Find Match Highlight.
Search tool windows
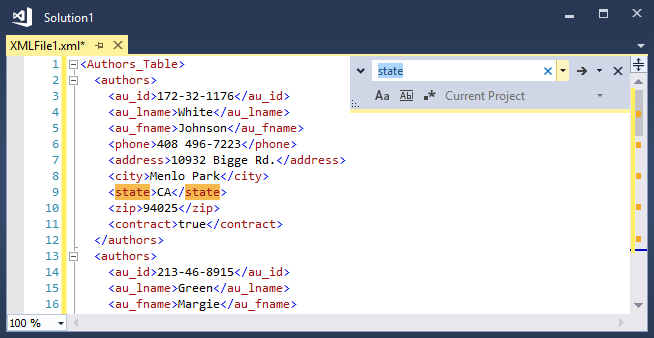
You can use the Find control in code or text windows, such as Output windows and Find Results windows, by selecting Edit > Find and Replace or pressing Ctrl+F.
A version of the Find control is also available in some tool windows. For example, you can filter the list of controls in the Toolbox window by entering text in the search box. Other tool windows that allow you to search their contents include Solution Explorer, the Properties window, and Team Explorer.
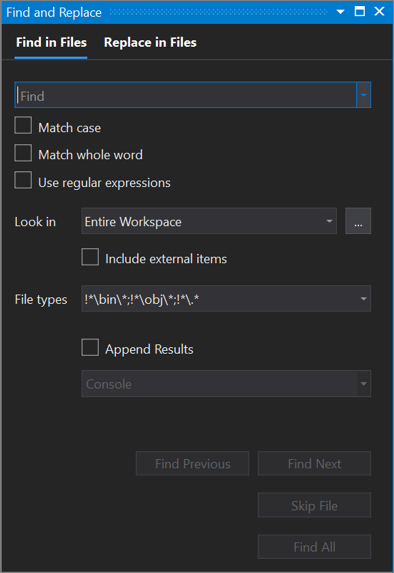
Find-and-Replace in multiple files
Find in Files allows you to search a specified set of files. The matches Visual Studio finds are listed in the Find Results window in the IDE. How the results appear depends on the options you choose in the Find and Replace dialog box.
Open the Find and Replace dialog box by pressing Ctrl+Shift+F, or:
- Press Ctrl+Q and enter "find" in the search box at the top of the screen.
- Choose Find in files from the list of results.
Important
If you are using Visual Studio 2019 version 16.6 or earlier, the Find and Replace dialog box might not look like it appears here. Switch to the Visual Studio 2017 version of this page for descriptions that'll match what you see on your screen.
- On the menu bar, select Edit > Find and Replace.
- Choose Find in Files from the fly-out menu.

To expose the Replace text box, use the down arrow to the left of the Find text.
Set the scope of your search and replace operation to:
- The currently open file
- All open documents
- The entire solution
- The current project
- Specified folder sets
- Specified file extensions
The Find and Replace tool does not search directories with the Hidden or System attribute.
To cancel a Find or Replace operation, press Ctrl+Break.
Find Results
When you choose Find All, a Find Results window opens and lists the matches for your search. Selecting a result in the list displays the associated file and highlights the match. If the file is not already open for editing, it is opened in a preview tab in the right side of the tab well. You can use the Find control to search through the Find Results list.
Create custom search folder sets
You can define a search scope by choosing the Choose Search Folders button (it looks like ...) next to the Look in box. In the Choose Search Folders dialog box, you can specify a set of folders to search, and you can save the specification so that you can reuse it later.
Tip
If you've mapped a remote machine's drive to your local machine, you can specify folders to search on the remote machine.
Create custom component sets
You can define component sets as your search scope by choosing the Edit Custom Component Set button next to the Look in box. You can specify installed .NET or COM components, Visual Studio projects that are included in your solution, or any assembly or type library (.dll, .tlb, .olb, .exe, or .ocx). To search references, select the Look in references box.
Multi-caret selection
Use multi-caret selection to make the same edit in two or more places at the same time. For example, you can insert the same text or modify existing text in multiple locations at the same time.
In Visual Studio 2022, we improved the multi-caret copy and paste experience. Previously, pasting multiple lines into multiple carets resulted in the entire clipboard being duplicated at each caret. Now, pasting multiple lines into the same number of carets will insert each line to a respective caret.
To use multi-caret, press Ctrl+Alt+mouse click or Alt+Shift+. and then use Ctrl+Shift+arrow key to expand selections. Next, press Ctrl+C to copy the text in multiple selections. Use Alt+Shift+mouse click to create multiple carets for each line to paste in where you want them. Finally, press Ctrl+V to paste each line at its own caret.
![]()
To select multiple carets:
- Use Alt+Shift+up arrow key (or down arrow key) or Alt+Shift+mouse drag to select with multiple carets. If you prefer to keep using a box selection with Alt+Shift+arrow keys and Alt+Shift+mouse drag when you expand a multi-caret selection, go to Tools > Options > Text Editor > Advanced and select Use box selection.
- Alternatively, access multi-caret selection from the menu bar by selecting Edit > Multiple Carets, and then selecting the action you want.
| Multi-caret Keyboard Shortcut | Action | Command |
|---|---|---|
| Alt+Shift+. | Use multi-caret | Edit.InsertNextMatchingCaret |
| Ctrl+Shift+arrow key | Expand selections | Edit.SizeControlUp, Edit.SizeControlDown, Edit.SizeControlRight, Edit.SizeControlLeft |
| Alt+Shift+up arrow key (or down arrow key) | Select multiple carets | Edit.LineUpExtendColumn, Edit.LineDownExtendColumn |
In the following screenshot, -0000 is selected in three locations; if the user presses Delete, all three selections are deleted:
![]()
To select multiple carets, click or make first text selection as usual, and then press Ctrl+Alt while you click or select text in each additional location. You can also automatically add matching text as additional selections, or select a box of text to edit identically on each line.
Tip
If you've selected Alt as the modifier key for mouse-click in "Go to Definition" from Tools > Options > Text Editor > General, multi-caret select is disabled. For more information, see Options dialog box: Text Editor /> General.
Commands
Use the following keys and actions for multi-caret selection behaviors:
| Shortcut | Action |
|---|---|
| Ctrl+Alt + click | Add a secondary caret |
| Ctrl+Alt + double-click | Add a secondary word selection |
| Ctrl+Alt + click + drag | Add a secondary selection |
| Shift+Alt+. | Add the next matching text as a selection |
| Shift+Alt+; | Add all matching text as selections |
| Shift+Alt+, | Remove last selected occurrence |
| Shift+Alt+/ | Skip next matching occurrence |
| Alt + click | Add a box selection |
| Esc or click | Clear all selections |
Some of the commands are also available on the Edit menu, under Multiple Carets:
![]()